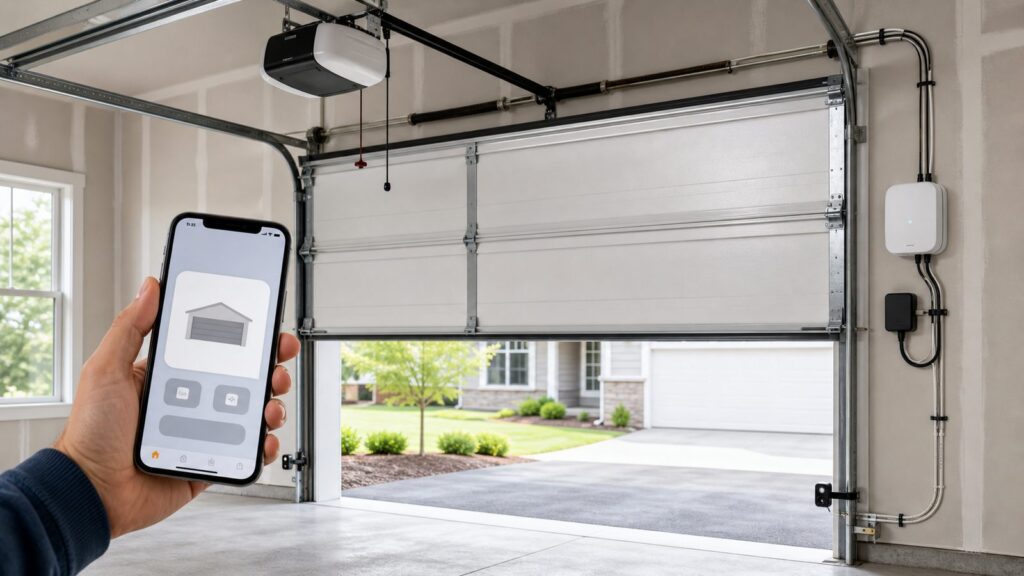
For most homeowners, making a garage door HomeKit compatible does not mean replacing the garage door. It usually means adding a HomeKit-capable smart garage door controller to the existing opener, then pairing that controller with Apple Home through the Home app.
The practical answer is this: if your opener is modern, safe, has working photo eyes, and accepts a standard wall-button input, you can often add Apple Home garage control for about $30 to $220 in hardware. A straightforward professional install commonly adds $100 to $300 in labor. If the opener is old, unsafe, incompatible, or missing modern entrapment protection, replacing the opener is the better job, usually landing around $300 to $900+ installed for many residential setups.
As an Amazon Associate I earn from qualifying purchases.
On our job sites, we treat this as a garage system upgrade, not a gadget install. The controller is only one piece. The door has to move cleanly, the opener has to reverse properly, the power has to be correct, the Wi-Fi signal has to reach the garage, and the sensor has to report door position accurately. Get those right and HomeKit control is convenient. Skip them and the homeowner ends up with false alerts, failed close commands, or a smart system attached to an unsafe door.
Recommended Free Tools
The Three Real Ways to Make a Garage Door Work With HomeKit
There are three practical routes in 2026. The right one depends on the opener brand, opener age, safety condition, and how much maintenance complexity you are willing to accept.
#1 Best Overall

- Compatibility Note: This smart garage door remote (MSG150HK) is designed specifically for the vast majority of Chamberlain, Lift-Master, and Craftsman brand openers (𝗡𝗼𝘁 𝘄𝗼𝗿𝗸𝘀 𝘄𝗶𝘁𝗵 𝗼𝘁𝗵𝗲𝗿 𝗯𝗿𝗮𝗻𝗱𝘀). Work with openers using Security+ 1.0 and Security+ 2.0 protocols (Not Security+ 3.0/Green/White learn button ). For other opener brands, please check out our universal smart garage door remote (MSG100HK) for a smooth smart upgrade.
- Remote Control: Use the Meross app to open or close your garage while cooking, at work, or on vacation. Let in family, guests, or couriers even when you're not home.Ideal for busy parents, frequent travelers, or anyone tired of hiding a spare key. No monthly fee or any other subscription fee!
- Voice Control: Open or close your garage while carrying groceries or handling kids. Just say "Hey Siri, close the garage" or "Alexa, open the garage door" — no phone needed. Compatible with Apple HomeKit, CarPlay, Alexa, Google Assistant, and SmartThings.
- Enhanced Security: Check open/close history in the app. Get alerts when the door is left open too long, left open overnight, or every time it opens or closes. You can also set the door to close automatically after a certain amount of time, or schedule a specific closing time. You’ll never have to wonder again if you forgot to close the garage door.
- Easy to Install: Installation is much easier than you may think. 𝐍𝐎 𝐧𝐞𝐞𝐝 𝐭𝐨 𝐢𝐧𝐬𝐭𝐚𝐥𝐥 𝐚𝐝𝐝𝐢𝐭𝐢𝐨𝐧𝐚𝐥 𝐚𝐝𝐚𝐩𝐭𝐞𝐫 𝐨𝐫 𝐰𝐢𝐫𝐞𝐝 𝐝𝐨𝐨𝐫 𝐬𝐞𝐧𝐬𝐨𝐫𝐬(𝐕𝐬. 𝐚𝐥𝐥 𝐩𝐞𝐞𝐫𝐬). Ideal for renters who can't modify equipment or homeowners who want a quick DIY upgrade. Note: 2.4GHz WiFi network support only
1. Add a Native HomeKit Garage Door Controller
This is the cleanest route for most Apple households. A native HomeKit controller, such as a Meross-style controller, Tailwind iQ3, or iSmartgate kit, connects to the opener, reads a door-position sensor, and appears in the Apple Home app as a garage door accessory.
Most retrofit controllers work by simulating a wall-button press. Two low-voltage wires land on the same terminals the wall control uses, and a wired or wireless sensor tells the system whether the door is open or closed. The better systems are not just remote buttons. Their value is accurate status: open, closed, moving, left open, or failed to close.
Typical hardware cost in 2026:
- Entry HomeKit controllers: about $30 to $60.
- Midrange controllers with better sensing or vehicle presence features: about $100+.
- iSmartgate Lite/Pro-style kits: commonly about $120 to $220 depending on number of doors and sensor package.
2. Use a Bridge or Local Controller
Some homes use a bridge path, such as Homebridge, Home Assistant, or a local controller designed for certain opener protocols. This can be useful when there is no simple native HomeKit accessory for the opener, or when the homeowner wants more local control and deeper automation.
Free tools Windows power users keep installed
One-click scans. No signup required.
The tradeoff is maintenance. A bridge adds another device, software updates, plug-ins, account connections, and troubleshooting. We usually reserve this for homeowners who are comfortable maintaining smart-home infrastructure or for projects where a low-voltage or AV contractor will support the system.
3. Replace the Garage Door Opener
Replacement is the right call when the existing opener is unsafe, pre-1993, unreliable, missing photo eyes, failing reversal tests, or incompatible with reasonable retrofit options. Modern residential openers are required to include entrapment protection, including inherent reversal and a secondary system such as photo eyes or edge sensors, along with a manual release.
A smart controller does not fix a bad door or an unsafe opener. If the door binds, the springs are weak, the rollers are shot, the opener gear is failing, or the photo eyes are misaligned, those issues come first.
Quick Compatibility Audit Before You Buy Anything
Before installing any smart garage controller, spend 10 minutes on a basic audit. This is the same order we use in the field because it separates easy retrofits from jobs that need repair, electrical work, network work, or opener replacement.
Do these 3 things before closing this tab:
1Fix the driver behind crashes, sound loss and screen glitches2Clear out junk files and repair common Windows errors3Scan for outdated or missing drivers - takes under a minute- Brand and model: Check the motor-head label, not just the remote.
- Manufacture date: Openers from before 1993 are poor retrofit candidates because modern entrapment protection may be missing.
- Learn-button color or protocol: This matters heavily for Chamberlain, LiftMaster, and Craftsman openers.
- Photo eyes: Confirm sensors are installed near the floor, aligned, clean, and working.
- Auto-reverse: Test that the door reverses when obstructed according to the opener manufacturer’s instructions.
- Manual release: Confirm the red emergency release is present, accessible, and operating.
- Door balance: With the opener disconnected, the door should not slam down or shoot up.
- Outlet and GFCI protection: The opener should have a proper ceiling receptacle, not an extension cord.
- Wi-Fi signal: Most controllers use 2.4 GHz Wi-Fi, which can struggle in garages with metal doors, masonry walls, foil-faced insulation, or detached structures.
If the door fails the mechanical or safety portion of this audit, do not start with HomeKit hardware. Repair the door first.
HomeKit Requirements: What Apple Home Actually Needs
To control a garage door in Apple Home, you need a compatible accessory added to the Home app. For control while you are away from home, richer automations, and more dependable shared access, the home typically needs a HomePod, HomePod mini, or Apple TV set up as a home hub.
Once installed correctly, a HomeKit garage door setup can provide:
- Open and close control from the Home app.
- Siri control from iPhone, Apple Watch, HomePod, and CarPlay where supported.
- Door status: open, closed, or sometimes opening/closing.
- Notifications when the door opens, closes, or is left open.
- Access sharing through Apple Home.
- Automations based on time, presence, sensors, or scenes.
The most useful feature is often not voice control. It is the notification that the garage door was left open at 10:30 p.m. That single alert can be worth more than every other smart-home feature combined.
Crashes, No Sound, or Screen Glitches?
Random freezes, missing sound and display glitches usually trace back to one bad driver. Find and replace yours safely.Free scan · under a minuteWindows Errors? Fix Them Before They Spread
Repair common Windows errors and clear accumulated junk for a smoother, more stable PC - no reinstall needed.Free scan · no reinstallHomeKit Garage Door Controller Options Compared
The table below shows the main upgrade paths. Exact compatibility changes by opener generation, wall control type, and accessory kit, so verify the current model before ordering.
| Option | Best For | Typical 2026 Cost | Pros | Watchouts |
|---|---|---|---|---|
| Basic native HomeKit controller | Modern openers with standard wall-button terminals | $30-$60 hardware | Low cost, direct Apple Home support, simple installation | Sensor quality and opener compatibility vary |
| Tailwind-style controller | Homeowners who want strong status sensing and vehicle-related features | About $100+ | Better feature set, useful multi-user logic, solid homeowner experience | Costs more than entry kits and still requires compatibility checks |
| iSmartgate Lite/Pro-style kit | One to three doors, homeowners wanting a more complete smart-garage package | About $120-$220 | Flexible kits, multi-door options, accessory ecosystem | Kit selection matters; sensors and adapters affect final price |
| Bridge/local-controller route | Advanced Apple Home users, Home Assistant or Homebridge homes | About $89-$250+ depending on hardware | Can solve niche compatibility problems and support local automation | More maintenance, more technical setup, not ideal for every homeowner |
| New HomeKit-friendly opener or supported smart opener setup | Old, unsafe, noisy, or incompatible openers | Often $300-$900+ installed | Solves mechanical, safety, and smart-control issues together | Highest upfront cost; may need electrical or door repair work |
The Chamberlain, LiftMaster, Craftsman, and myQ Problem
Chamberlain, LiftMaster, and Craftsman openers are common in US garages, and they are also where HomeKit compatibility gets messy. In 2026, myQ should not be assumed to provide broad native Apple HomeKit support. Newer Chamberlain/LiftMaster Security+ generations can also complicate third-party wired controller workarounds.
The detail that matters is the opener’s Security+ generation and learn-button style. Some older Security+ 2.0 openers can work with specific adapters, dry-contact interfaces, or local controllers. Newer Security+ 3.0 units with white-button-style controls are a major caveat because many third-party wall-button simulation methods may not work as expected.
Rank #2

- Works with Most Models: The smart garage door opener(MSG100HK) is work with 200 brands and over 1600 models. Compatible with openers using Security+ 1.0 and Security+ 2.0 protocols (does not support Security+ 3.0 ). If your garage door requires an extra adapter, please contact us. We'll ship the adapter to you at no additional cost.
- Voice Control: You can control your devices hands-free, just give voice commands to turn on/off the connected devices. Compatible with Apple HomeKit, Siri, Amazon Alexa, Google Assistant, and CarPlay. Please scroll down and check the "Product guides and documents - User Manual" for more product information
- Remote Control: You can turn the garage door on/off from anywhere with internet access via the Meross app. To let in your family, guests, or couriers through the garage door while you are cooking or not at home. No monthly fee or any other subscription fee! Note: 2.4GHz WiFi network support only
- More Precise and Stable: It comes with a high-sensitivity wired sensor that monitors the status of the garage door more accurately and the signal stays stable. And you can check the garage door open/ close operation records through the app. Stay alert by different notification modes such as garage door open/ close status, overtime notification, and overnight notification to remind you to close the garage door
- Easy to Install: Installation is much easier than you may think. Please refer to our installation guide and video tutorial and make sure your WiFi strength is acceptable near your garage door. If you meet any issue about meross garage opener remote, simply contact meross support team
Our rule is simple: do not promise HomeKit compatibility on a Chamberlain-family opener until the exact motor-head model and learn-button generation are confirmed. If the opener uses a proprietary wall control, the job may need a manufacturer-specific adapter, a compatible controller designed for that protocol, a bridge route, or full opener replacement.
Door-Position Sensors Matter More Than the App
A smart garage system is only as trustworthy as its position sensor. The controller needs to know whether the door is actually open or closed. Without accurate sensing, the Home app can show the wrong status or send a close command without the expected result.
There are two common sensor types:
- Wired contact sensors: Usually mounted to the door and frame or track area. They are reliable, do not need batteries, and are our preference when the wire path is clean.
- Wireless tilt sensors: Usually mounted on the top garage door panel. They are easier to install but depend on battery condition, correct orientation, and stable wireless communication.
For a sectional overhead door, a tilt sensor is commonly installed on the upper interior panel, centered or offset according to the manufacturer’s instructions. It must move predictably from vertical to horizontal as the door opens. Poor placement causes false open/closed readings.
For a wired sensor, route low-voltage wire away from the rail, chain or belt, torsion spring, rollers, hinges, and emergency release. Leave the opener cover, light lens, learn button, and service panels accessible. A clean install should not make the next service call harder.
Safety Rules You Should Not Skip
A residential garage door is the largest moving object in many homes. HomeKit does not change that. Any smart upgrade should respect UL 325, CPSC garage door operator safety rules, and the garage-door provisions adopted by the local authority having jurisdiction.
The Tool Desk
Outbyte PC Repair FREEClear out junk files and repair common Windows errorsFree Scan →Outbyte Driver Updater FREEScan for outdated or missing drivers - takes under a minuteDriver Scan →Modern automatic residential openers are expected to have inherent reversal and secondary entrapment protection, commonly photo eyes near the bottom of the door opening. The opener also needs a manual release so the door can be disconnected during a power outage or service event.
Before and after a smart-controller installation, run these checks:
- The door opens and closes smoothly from the wall control.
- The remote still works.
- The Home app command works.
- The door status updates correctly in Apple Home.
- The photo eyes reverse the door when the beam is interrupted.
- The opener reverses when it meets proper test resistance according to the manufacturer’s instructions.
- The manual release disconnects and reconnects properly.
- The system recovers after a power cycle.
- Notifications arrive for open, close, and left-open events.
If a controller offers a warning delay before unattended closing, use it. Audible and visible warnings are especially useful when the door can be closed from outside the garage.
Electrical and Wi-Fi Conditions That Make or Break the Job
Many failed smart-garage installs are not caused by the controller. They are caused by power and network conditions.
Quick wins for a faster PC:
Clear out junk files and repair common Windows errorsFree Scan →Fix the driver behind crashes, sound loss and screen glitchesFind Drivers →Repair Windows errors before they cause bigger problemsFix Now →Power
The opener should be plugged into a permanent ceiling receptacle. We do not consider an extension cord across the ceiling or wall a proper solution. Garages often have GFCI requirements under current electrical practice and local code, and detached garages can add more complexity. If the ceiling outlet is missing, damaged, loose, inaccessible, or tripping, bring in an electrician before installing smart controls.
Electrical cost varies too much by jurisdiction to quote as a universal number. Adding or correcting a GFCI-protected ceiling receptacle can add material, labor, and permit cost. If the garage is detached and needs power or network infrastructure, the project becomes broader than a smart opener upgrade.
Wi-Fi
Most retrofit garage controllers use 2.4 GHz Wi-Fi because it reaches farther than 5 GHz, but garages are difficult environments. Metal garage doors, masonry, exterior walls, steel beams, refrigerators, freezers, and detached structures can weaken the signal.
Rank #3

- Compatibility Tips: The smart garage door opener is compatible with 200 brands and over 1600 models. Compatible with openers using Security+ 1.0 and Security+ 2.0 protocols (does not support Security+ 3.0 ). Before purchasing, please check if your garage door model is on the compatibility list. If your garage door needs accessories to solve compatibility issues. please send meross support team the information about your garage opener, we can ship the proper accessory separately for you, and make it works. No additional fees.
- More Smart Remote: The external antenna can better receive wifi signals and can support up to 3 garage doors at the same time. (2 wired doors sensor is included in the package. the third door sensor need to be purchased separately)No monthly fee or any other subscription fee!
- Remote and Voice Control: You can control your devices hands free, just give voice commands to turn on/off the connected devices. Compatible with Apple HomeKit, Siri, Amazon Alexa, and Google Assistant.
- More Precise and Stable: It is equipped with a highly sensitive wired sensor which monitors the status of garage door more accurate and the signal stays stable. And you can check the garage door open/ close operation records through the APP. Stay alert by different notification modes such as garage door open/ close status, overtime notification and overnight notification to remind you close the garage door
- Easy to Install: Installation is much easier than you may think. Pls make sure your wifi strength is acceptable near your garage door. Note: 2.4 GHz Wi-Fi network support only
Do not judge the signal from the kitchen. Stand near the opener with the garage door closed and check the 2.4 GHz network. If the signal is weak, fix that first with a better router location, mesh node, access point, or properly placed extender. A $40 controller on a bad network creates callbacks.
What It Costs to Make a Garage Door HomeKit Compatible
For a modern, compatible opener in good condition, the typical installed project is modest. For an old or unsafe opener, the smart-home request may expose a larger garage repair need.
| Project Scope | Typical 2026 Cost | What Drives the Price |
|---|---|---|
| DIY HomeKit retrofit controller | $30-$220 | Brand, number of doors, sensor type, adapters, native HomeKit support |
| Professional smart-controller install | $100-$300 labor | Wire routing, opener compatibility, app setup, multi-door configuration |
| Garage door repair before smart upgrade | About $150-$350 common average; some ranges run $235-$695 | Springs, cables, rollers, tracks, sensors, panels, opener electronics |
| Professional opener installation | About $218-$540 average cluster; many projects around $379 | Opener type, rail, horsepower, accessories, old unit removal |
| Full opener replacement installed | Often $300-$900+ for standard residential work | Chain vs belt drive, wall-mount units, battery backup, camera, locks, heavy doors |
| Garage door replacement | Single door often $900-$2,000; double door often $1,600-$4,500 | Door size, insulation, material, windows, custom sizing, premium hardware |
For budgeting, we usually frame it this way: if the door and opener are already in good shape, plan on $30 to $220 DIY or roughly $150 to $520 installed for many retrofit jobs. If the opener should be replaced, plan around $300 to $900+. If the door itself is damaged or worn out, the smart-home portion becomes secondary to a door repair or replacement project.
Independent reader supportYour contribution helps us test, update, and keep practical guides available for everyone.Step-by-Step Installation Overview
Every controller has its own instructions, and those instructions should control the final wiring and commissioning. The general workflow is consistent across most retrofit systems.
1. Confirm the Opener Is Safe and Compatible
Check the opener model, safety sensors, reversal function, door balance, and wall-control wiring. If the controller manufacturer has a compatibility checker, use it before opening the box.
What’s actually slowing this PC down?
Pick the symptom - the matching free tool is one click away.
2. Mount the Controller Near the Opener
Mount the controller where it has a good Wi-Fi signal and can reach the opener terminals without strained wiring. Do not block the opener cover, bulb lens, learn button, safety labels, rail, belt, chain, or manual release.
3. Connect the Low-Voltage Control Wires
Most retrofit controllers connect to the same terminals as the wall button. This is low-voltage control wiring, not 120-volt power. If the opener uses a proprietary wall control, stop and verify the correct adapter or compatibility path.
4. Install the Door-Position Sensor
For wired sensors, mount the magnet and reed switch with the required gap, often less than an inch depending on the kit. For wireless tilt sensors, mount exactly as specified by the manufacturer. Open and close the door several times and watch the status update.
5. Pair With the Manufacturer App and Apple Home
Many devices require setup in the manufacturer’s app first, then pairing to Apple Home using a HomeKit code. Save the code in a homeowner packet or inside the opener area where it will not be lost. The homeowner should own the account, not the installer.
6. Commission the System
Test the wall button, remote, keypad, Home app, Siri, CarPlay where applicable, notifications, left-open alerts, power-cycle recovery, and weak-Wi-Fi behavior. Also test what happens if the door is manually released and moved by hand. The Home app status should recover after the next full cycle.
When to DIY vs. When to Hire a Pro
A homeowner with basic low-voltage wiring comfort can often install a simple controller in 60 to 120 minutes. The job is usually DIY-friendly when the opener is modern, the wall-button terminals are clearly marked, the sensor path is simple, the outlet is proper, and the Wi-Fi signal is strong.
Hire a pro when any of these are true:
- The opener was made before 1993 or has no working photo eyes.
- The door is heavy, crooked, noisy, binding, or poorly balanced.
- The opener fails a reversal test.
- The spring, cable, drum, roller, or track condition is questionable.
- The opener is Chamberlain, LiftMaster, or Craftsman and compatibility is unclear.
- The ceiling outlet is missing, loose, not GFCI-protected where required, or powered by an extension cord.
- The garage is detached and has weak Wi-Fi.
- The home has multiple doors, shared Apple Home users, or complex automations.
Do not DIY torsion spring work. Garage door springs and cables are high-tension parts. A smart controller install should never turn into unplanned spring adjustment by an untrained homeowner.
Rank #4
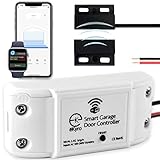
- 🧠 SMARTEN YOUR GARAGE: Universal adapter connects to existing openers & connects to WiFi to allow monitoring and control from your mobile device or voice assistant.
- 🔈 WORKS WITH ALEXA, GOOGLE HOME, IPHONE, SIRI, ANDROID: Use any device including voice assistants, like Alexa, Ok Google, Siri, or even on smart watches.
- 🏡❓👍 WORKS ON MOST OPENERS** (adapter maybe required): Not sure if your openers compatible? It likely is! If it isn't we now have an adapter that expands compatibility - contact us for an adapter 📩 **Sorry RYOBI, the eKyro opener doesn't work with you 😞
- 🏠🏠 WORKS TOGETHER: Multiple eKyro Openers can be paired together if you have more than 1 Garage Door Opener!** **Each Door will need its own eKyro Smart Garage Door Controller
- 💰 NO FEES**: All features come without monthly fees attached including Alexa, Google Assistant (OK Google), Siri, Scheduling, Automatic Door Closing and the ability to open/close the door or monitor anywhere your phone has service! **Additional alerts like SMS messages or phone calls may cost extra, but are not needed for device functions
Automation Rules That Keep the Garage Secure
HomeKit makes automation easy, but a garage door deserves stricter rules than a lamp. Avoid automations that open the door unattended unless there is a clear presence check and a reason for it. A bad location trigger can open a garage when a phone passes nearby or reconnects to the network.
Good automations are usually conservative:
- Notify if the garage is open after 9 p.m.
- Notify if the door stays open longer than 10 or 15 minutes.
- Turn on garage lights when the door opens after sunset.
- Pause close automations during service work.
- Limit shared access to people who actually need it.
For many households, the best setup is manual open/close control plus strong alerts. That gives convenience without turning the largest moving part of the home into an over-automated security risk.
Our Recommended Handoff Checklist
At the end of a professional install, the homeowner should not be left guessing who owns the app account or where the pairing code went. A clean handoff prevents service calls months later.
- Homeowner owns the manufacturer app account.
- Apple Home accessory is assigned to the correct home and room.
- Home hub is confirmed if remote access and automations are expected.
- HomeKit pairing code is stored in a known location.
- Sensor battery type is documented if wireless.
- Warranty and model numbers are saved.
- All household users who need access are invited.
- Notifications are configured for open, close, and left-open events.
- Automations are reviewed and disabled before future door service.
- Manual release operation is demonstrated.
Bottom Line: Most Garage Doors Can Be Made HomeKit Compatible, But Not Every Opener Should Be Retrofitted
If your garage door opener is modern, safe, and compatible, a HomeKit retrofit controller is usually the best path. It is affordable, fast, and gives Apple households the features they actually use: status, alerts, remote control, Siri, CarPlay access, and shared control.
If the opener is old, unsafe, or built around a compatibility-hostile protocol, replacement is the cleaner investment. The right answer is not the cheapest controller on the shelf. The right answer is a garage door that opens smoothly, reverses safely, reports accurately, and works in Apple Home without turning into a maintenance project.
Frequently Asked Questions
Can I make my existing garage door opener work with Apple HomeKit?
Usually, yes, if the opener is modern, safe, has working photo eyes, and supports a compatible wall-button or adapter connection. Most homeowners add a HomeKit-capable retrofit controller rather than replacing the whole door.
Does myQ work with Apple HomeKit in 2026?
Do not assume it does. myQ no longer has broad native HomeKit support, and newer Chamberlain/LiftMaster Security+ 3.0 openers can block many third-party wired controller approaches. Verify the exact opener model and learn-button generation before buying hardware.
How much does it cost to make a garage door HomeKit compatible?
DIY retrofit hardware commonly costs about $30 to $220. Professional installation for a straightforward smart-controller retrofit often adds $100 to $300 in labor. If the opener needs replacement, many standard installed projects run about $300 to $900+.
Do I need to replace my garage door opener for HomeKit?
Not always. Replacement is recommended if the opener is pre-1993, lacks working photo eyes, fails reversal testing, has damaged wiring, uses an incompatible proprietary control system, or is attached to a door that needs mechanical repair.
Recommended Free Tools
What is the most reliable sensor type for a smart garage door?
A wired door-position sensor is usually the most reliable because it avoids battery issues and false tilt readings. Wireless tilt sensors can work well when mounted exactly as specified and tested through repeated open and close cycles.
Do I need an Apple home hub for a HomeKit garage door?
For basic local control, a compatible accessory can be added to the Apple Home app. For remote access, stronger automations, and a better shared-user experience, plan on a HomePod, HomePod mini, or Apple TV set up as the home hub.
Quick Recap
Product prices and availability are accurate as of the date/time indicated and are subject to change. Any price and availability information displayed on Amazon at the time of purchase will apply.

