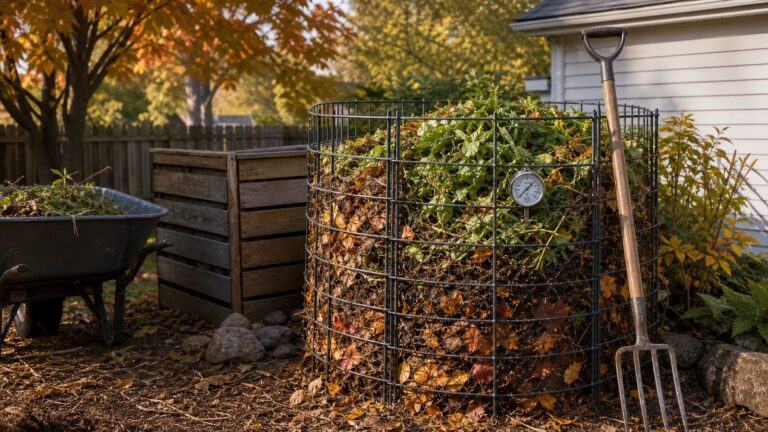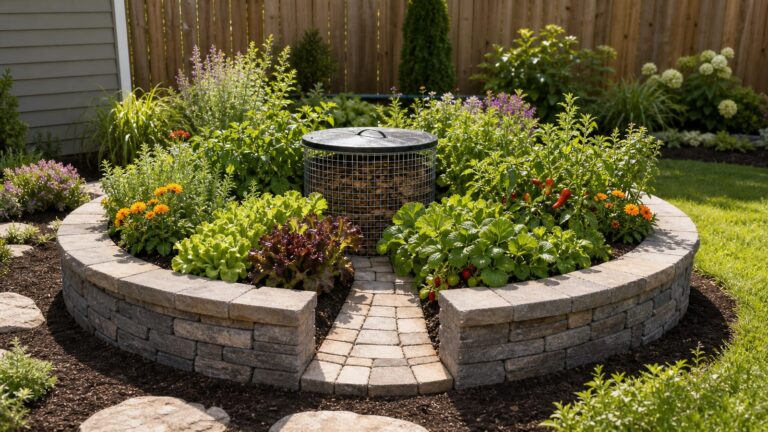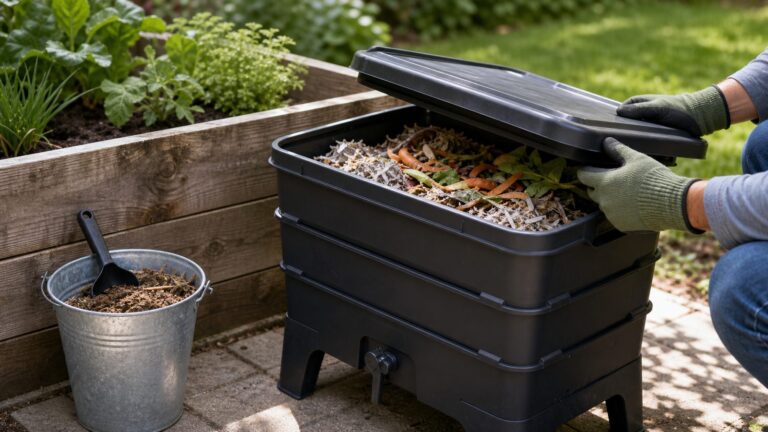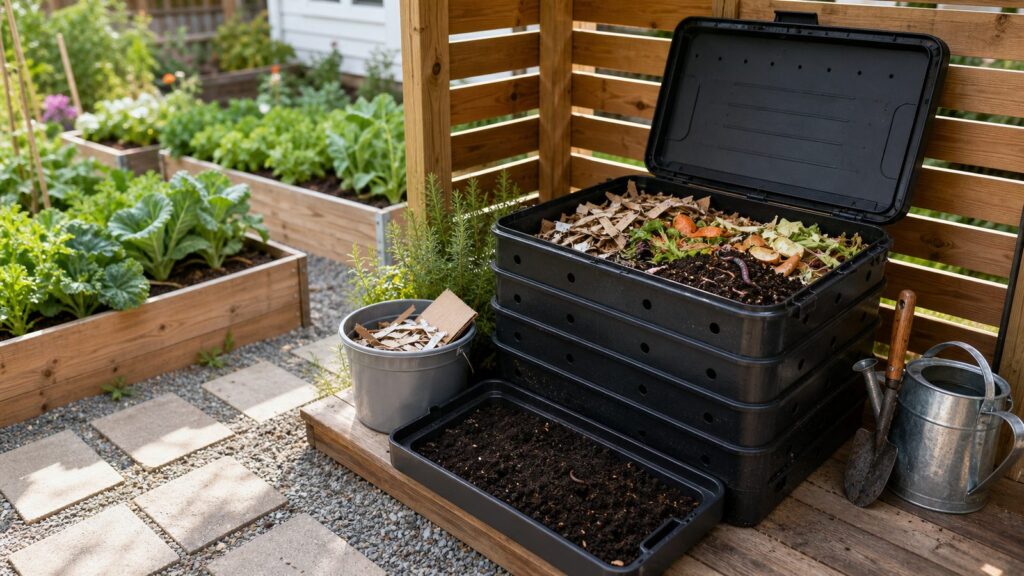
Worm farming, better called vermicomposting, is one of the most practical ways a homeowner can turn kitchen scraps into a high-value soil amendment without needing a large compost pile. A good worm bin takes fruit and vegetable scraps, coffee grounds, shredded cardboard, paper, dry leaves, and small amounts of garden residue and converts them into worm castings: dark, crumbly material that helps soil hold moisture, support microbial life, and make nutrients more available to plants.
The concept is simple, but the execution matters. On our job sites, the difference between a clean, useful composting setup and a smelly nuisance usually comes down to the same details we care about in construction: location, drainage, ventilation, access, moisture control, and keeping pests out. A cheap open tote left in sun beside a fence is not the same thing as a properly ventilated, rodent-resistant bin placed where temperature, water, and service access are controlled.
For most households, a starter worm farm costs about $65 to $135 when you include a DIY bin, bedding, and 1 pound of red wigglers. A commercial stacked system usually lands closer to $130 to $260+ with worms included. That will not always beat bulk compost on dollars alone, but it can reduce trash volume, keep food waste out of the landfill, and give you a premium amendment for raised beds, containers, lawns, and landscape plantings.
What Worm Farming Actually Does
Worm farming uses composting worms, microbial activity, moisture, and carbon bedding to break down organic waste in a controlled container. The worms eat partially decomposed material and leave behind castings. Those castings are not magic fertilizer, and they are not a complete replacement for soil, but they are one of the better soil amendments available to a homeowner working at small scale.
Do these 3 things before closing this tab:
1Fix the driver behind crashes, sound loss and screen glitches2Clear out junk files and repair common Windows errors3Scan for outdated or missing drivers - takes under a minute#1 Best Overall

- Compact, High-Efficiency Footprint Designed to maximize composting capacity while minimizing floor space.
- Odor-Reducing System Composting worms consume food scraps quickly, helping reduce odors. An improved lid design with a built-in V-Board and coconut mat supports airflow and moisture balance.
- Moisture Management The V-Board helps retain moisture and maintain a comfortable environment for worms, supporting consistent composting performance.
- Worm Saver Tray Prevents worms and compost material from falling into the liquid collection area while improving airflow throughout the system.
- Protective Base Feet (“Shoes”) This is special design to adding some water to pevent ants going into the worm bin.
Healthy vermicompost improves soil structure, increases water-holding capacity, supports beneficial microbes, and helps create a better root-zone environment. In a raised bed, that means soil that crumbles instead of crusting. In containers, it can help potting mix stay biologically active. In a lawn, a thin topdressing can support tired soil without the mess of heavy compost applications.
There is also a waste side to the story. Food waste is a major part of the American landfill stream. The EPA has reported that municipal solid waste landfills are the third-largest source of human-related methane emissions in the United States, accounting for about 14% of U.S. methane emissions in 2022, and that wasted food is responsible for an estimated 58% of landfill methane emissions. ReFED’s 2026 food waste reporting estimates food as the number one input to U.S. landfills at about 24%, with surplus food accounting for 2.6 million metric tons of methane in 2024. A home worm bin will not solve that national problem by itself, but it is a practical household-level reduction.
The Right Worms for the Job
Do not dig earthworms out of the lawn and expect them to perform in a bin. Common garden worms are usually soil dwellers. Vermicomposting needs worms that naturally work near the surface in rich organic material.
The standard choice is red wigglers, usually sold as Eisenia fetida or Eisenia andrei. They tolerate crowded, shallow, organic-rich conditions better than most earthworms and are well suited to bins, trays, and worm towers.
A common starter amount is 1 pound of red wigglers, often described by suppliers as roughly 1,000 worms. In 2026, online U.S. pricing is commonly about $40 to $60 for 1 pound shipped, with many listings around $50 to $55. Two pounds may run around $85 depending on supplier, shipping, and season. Local garden clubs, farmers, or marketplace sellers can be cheaper, but make sure you are getting composting worms, not bait worms or random soil worms.
Best Location for a Worm Bin
Location is the most overlooked part of worm farming. We treat a worm bin like a small utility feature in a landscape plan. It needs shade, drainage, pest control, service access, and enough distance from sensitive areas to avoid future problems.
Red wigglers are most comfortable around 55 to 77 degrees F, with many extension programs pointing to 65 to 70 degrees F as an ideal working range. Activity slows when temperatures move outside that band. Heat above the low to mid-80s can become dangerous, especially in a dark plastic bin sitting in sun. Freezing conditions can kill worms if the bin is exposed and uninsulated.
Good Indoor Locations
Indoor worm bins work well in a basement, laundry room, mudroom, utility closet, attached garage that stays moderate, or under a kitchen-area bench if ventilation and access are good. A healthy worm bin should smell earthy, not rotten. For indoor use, choose an opaque bin with a tight lid, screened ventilation, and a catch tray. Do not place it directly on finished flooring without a waterproof tray underneath.
Recommended Free Tools
Good Outdoor Locations
Outdoors, place the bin in full shade or steady filtered shade. North or east sides of structures are often better than west or south exposures. Keep it off low spots where stormwater collects. Set it on pavers, compacted gravel, a concrete pad, or another stable surface that drains.
For a typical yard, we like at least 2 to 3 feet of service clearance in front of the bin so a homeowner can open the lid, add bedding, harvest castings, and clean around it. Do not tuck it tight against siding, a wood fence, HVAC equipment, or a crawlspace vent. Keep it away from foundation drainage paths and avoid placing it where roof runoff will splash or flood the system.
Placement Near Property Lines and Living Areas
Most small residential worm bins do not require a permit, but local ordinances, HOA rules, and nuisance standards still matter. Some communities regulate composting by setback, enclosure type, odor, pests, or whether the system is visible from the street. If you live in an HOA, check the rules before placing a bin along a shared fence or patio line.
As a practical rule, keep the bin neat, enclosed, and out of direct neighbor-facing view when possible. A worm bin that is well managed is quiet and clean. A worm bin that smells or draws flies becomes a neighbor issue quickly.
Quick wins for a faster PC:
Fix the driver behind crashes, sound loss and screen glitchesFind Drivers →Repair Windows errors before they cause bigger problemsFix Now →Scan for outdated or missing drivers - takes under a minuteDriver Scan →Rank #2

- Compact, High-Efficiency Footprint Designed to maximize composting capacity while minimizing floor space.
- Odor-Reducing System Composting worms consume food scraps quickly, helping reduce odors. An improved lid design with a built-in V-Board and coconut mat supports airflow and moisture balance.
- Moisture Management The V-Board helps retain moisture and maintain a comfortable environment for worms, supporting consistent composting performance.
- Worm Saver Tray Prevents worms and compost material from falling into the liquid collection area while improving airflow throughout the system.
- Integrated Liquid Collection Base The liquid collection tray and base are molded as one piece, eliminating extra assembly and allowing easy collection of excess liquid.
DIY Bin, Commercial Bin, or Outdoor Build?
A worm bin does not need to be fancy, but it does need to function. Worms feed near the surface, so surface area matters more than deep volume. A wide, shallow container will usually outperform a tall narrow bin.
For a starter household system, look for a bin footprint around 18 by 24 inches to 24 by 36 inches and a working bedding depth of 8 to 12 inches. That gives worms enough surface area while keeping the material shallow enough to breathe. A common tote size is 10 to 18 gallons for a small indoor setup or 18 to 27 gallons for a larger garage or porch setup.
| System Type | Typical 2026 Cost | Best For | Builder’s Notes |
|---|---|---|---|
| DIY plastic tote bin | $25-$75 before worms | Small households, beginners, indoor or sheltered use | Use opaque totes, drilled ventilation, drainage control, and a catch tray. Cheap lids warp outdoors. |
| Commercial stacked tray bin | $90-$200+ before worms | Homeowners who want easier harvesting and a cleaner appearance | Good for patios, garages, and townhomes. Check tray depth, spigot quality, and replacement part availability. |
| Wood outdoor worm box | $75-$250+ before worms | Gardeners with steady feedstock and a shaded yard location | Use rot-resistant lumber detailing, hardware cloth, drainage, and a lid that sheds rain. |
| In-ground worm tower | $20-$80 before worms | Raised beds and small gardens | Simple and low-profile, but processing capacity is limited and harvesting castings is less convenient. |
If you build a tote system, use two totes if possible: one active bin and one lower catch tray. Drill 1/8-inch to 1/4-inch air holes high on the sidewalls and lid, and add small drainage holes in the bottom of the active bin. Cover larger openings with screen or hardware cloth if pests are a concern. The goal is oxygen without easy access for flies or rodents.
For outdoor wood boxes, use a sloped or overhanging lid to shed rain. Keep untreated wood away from constant ground contact or accept that it is a replaceable garden component. For rodent resistance, use 1/4-inch hardware cloth at vulnerable openings and avoid gaps at corners, lids, and drainage points.
Materials and Tools You Need
A reliable starter setup does not require much, but skipping the basics usually creates odor and moisture problems.
- Bin: Opaque plastic tote, stacked tray system, wood box, or worm tower with lid, ventilation, and drainage management.
- Worms: 1 pound of red wigglers for a typical starter bin.
- Bedding: Shredded cardboard, brown paper, dry leaves, non-glossy newspaper, coco coir, or aged compost.
- Catch tray: Plastic tray, second tote, boot tray, or shallow pan to protect floors and catch excess liquid.
- Tools: Drill with 1/8-inch to 1/4-inch bit, utility knife, gloves, hand rake or trowel, spray bottle, and thermometer.
- Optional monitoring: Basic soil thermometer and moisture meter, usually $10 to $40. pH strips or a small meter may add $8 to $25.
- Grit: Crushed eggshells, clean sand, or mineral grit in small amounts to support worm digestion.
Bedding is not filler. It is the carbon buffer that controls moisture, odor, acidity, and oxygen. Keep a dry-bedding reserve next to the bin. When a worm bin starts to smell or get wet, shredded cardboard is often the fastest fix.
How to Start a Worm Bin
Start smaller than your household waste stream. A new worm bin needs time to stabilize. The worms, microbes, bedding, and food supply need to settle into balance before you ask the system to handle several pounds of scraps a week.
Step 1: Prepare the Bedding
Shred cardboard and paper into strips roughly 1/2 inch to 1 inch wide. Soak it, then squeeze it until it feels like a wrung-out sponge. That moisture description matters. NC State guidance puts worm-bin moisture in the 60% to 85% range, with about 80% as optimum. Too dry stresses worms. Too wet creates anaerobic pockets and odor.
Windows Errors? Fix Them Before They Spread
Repair common Windows errors and clear accumulated junk for a smoother, more stable PC - no reinstall needed.Free scan · no reinstallCrashes, No Sound, or Screen Glitches?
Random freezes, missing sound and display glitches usually trace back to one bad driver. Find and replace yours safely.Free scan · under a minuteAdd 6 to 8 inches of fluffed bedding to the bin. Mix in a few handfuls of finished compost, garden soil, or old potting mix to introduce grit and microbes. Do not pack the bedding down.
Step 2: Add a Small Food Charge
Before the worms arrive, bury a small amount of food, about 1 to 2 cups, under 2 to 3 inches of bedding. Let the bin sit for a day or two if you can. That gives microbes time to begin softening the material. Worms eat the microbial-rich breakdown zone more than fresh hard scraps.
Step 3: Add the Worms
Place the worms on top of the bedding and leave the lid off or light on briefly. Red wigglers naturally move away from light and into the bedding. After they settle, close the bin and give them several days without heavy feeding.
Step 4: Feed in Zones
Feed one corner or strip of the bin at a time, then rotate to the next zone. Always bury food under 2 to 3 inches of bedding. This reduces fruit flies, odor, and surface mold. Zone feeding also lets you see whether previous food has been consumed before adding more.
Rank #3

- 50L COMPOST BIN: TOP XIAN NEW Worm Composters are made of high-quality black PP plastic, the total capacity of 3 reusable worm trays is up to 50L. It comes with a faucet, which can be directly opened to let the fertilizer flow out.
- EFFICIENT DECOMPOSITION: The large-sized worm bin can accelerate the conversion of organic waste into nutrient-rich compost, which is more convenient, faster and more efficient than traditional methods.
- CONVENIENT & EASY TO INSTALL AND USE: The five-layer composting bins can be easily stacked to add earthworms and waste, and the tray can also be easily removed for collection cause every tray has a carrying handle. You can store your food scraps, vegetable peelings, tea leaves, flowers, coffee grounds and other compost materials, Which greatly enhances the experience of the composting journey.
- AIR VENTILATION AND ODOR REDUCTION: The closed design prevents odors from overflowing, and there is also proper ventilation to allow oxygen to enter and speed up decomposition. The odorless design makes this worm farm a good solution for small spaces.
- NO-WORRY AFTER-SALES SERVICES: The compost bin set includes 3-layer compost box x1, gloves x1, coconut bricks x1, plastic rake x1, plastic shovel x1 and measuring cup x1. If for whatever reason you are not absolutely satisfied with our outdoor compost bin, please get in touch, and we will make it right - guaranteed!
What to Feed Worms, and What to Avoid
Worms do best with a balanced diet of soft plant scraps and plenty of carbon bedding. Chop larger scraps into pieces under 1 to 2 inches to speed processing. Freezing and thawing scraps before adding them can reduce fruit-fly eggs and break down plant cells faster.
| Good Inputs | Use With Caution | Keep Out |
|---|---|---|
| Fruit and vegetable scraps | Citrus peels in small amounts | Meat and fish |
| Coffee grounds and paper filters | Onion and garlic scraps in small amounts | Dairy products |
| Tea leaves and plain tea bags | Starchy foods like rice, pasta, and bread | Oils, grease, and fatty foods |
| Crushed eggshells | Grass clippings in thin, mixed layers | Pet waste and cat litter |
| Shredded cardboard and paper | Fresh garden trimmings | Salty foods and heavily seasoned leftovers |
A new 1-pound worm bin may only handle 1 to 2 pounds of scraps per week at first. Some guidance sizes systems around 1 pound of worms per pound of kitchen waste per week, while faster daily processing requires more worm mass, more bin surface area, and stable conditions. Watch the bin instead of forcing a formula. If food is still visible and wet after a week, reduce feeding and add bedding.
Moisture, Air, and Temperature Control
A worm bin is a small living system. Most failures are not mysterious. They come from too much food, too much water, too little air, or bad temperature.
The bedding should feel like a wrung-out sponge. If you squeeze a handful and water streams out, it is too wet. Add dry shredded cardboard, loosen compacted areas, and stop feeding wet scraps for several days. If the bedding feels dusty or worms are trying to leave, mist it lightly and mix in pre-moistened bedding.
Ventilation is just as important. Worm bins need oxygen. Compacted bedding turns sour and can create rotten odors. Fluff the top few inches gently during feeding, but do not churn the whole bin like a cement mixer. Worm eggs, young worms, and active feeding zones should remain mostly undisturbed.
Temperature control is where indoor and shaded systems win. A black tote in direct summer sun can become unsafe fast. A garage can also exceed safe temperatures during a heat wave. In cold climates, an outdoor bin needs insulation, seasonal relocation, or acceptance that the system will slow dramatically in winter. For year-round production, keep the bin somewhere the bedding stays roughly 55 to 77 degrees F.
Common Problems and Fast Fixes
Rotten Smell
A healthy worm bin smells earthy. Rotten odor means the bin is too wet, overfed, compacted, or short on carbon. Remove obvious rotting food, add several inches of dry shredded cardboard, fluff the top layer, and stop feeding for 5 to 7 days.
Ammonia Smell
Ammonia usually means too much nitrogen-rich material or not enough bedding. Coffee grounds, fresh grass, and wet vegetable waste can overload a small system. Add dry carbon, reduce feeding, and avoid dumping in large batches of any single material.
What’s actually slowing this PC down?
Pick the symptom - the matching free tool is one click away.
Fruit Flies
Fruit flies usually come from exposed food or eggs riding in on fruit peels. Freeze scraps before feeding, bury food under 2 to 3 inches of bedding, and keep a dry cover layer on top. A tight lid and screened vents help, but food management matters more.
Worms Climbing the Walls
A few explorers are normal after setup. Many worms trying to leave means the bin is too wet, too dry, too acidic, too hot, or short on oxygen. Check moisture first, then temperature. Add bedding and crushed eggshells if the bin has become sour from fruit-heavy feeding.
Pests or Rodents
Rodents are usually attracted by prohibited foods, exposed scraps, or easy access. Keep out meat, dairy, oils, and cooked leftovers. Use tight lids, hardware cloth over openings, and a stable base without gaps. Outdoors, do not place the bin in overgrown areas where pests already travel.
When and How to Harvest Worm Castings
Most starter bins produce usable castings in about 3 to 6 months, depending on worm population, temperature, food volume, and bin size. Finished material is dark, crumbly, and earthy smelling, with few recognizable scraps.
The Tool Desk
Outbyte PC Repair FREERepair Windows errors before they cause bigger problemsFix Now →Outbyte Driver Updater FREEFix the driver behind crashes, sound loss and screen glitchesFind Drivers →Rank #4

- 🌲【Rapid & Effective Vermicomposting】- The Blütezeit worm composter speeds up composting by breaking down organic waste quickly. It turns waste into nutrient-rich compost faster than traditional methods, giving you high-quality compost for your plants in less time.
- 🌲【Easy Setup & Durable】 - Crafted from high-quality PP material, this worm bin is built to last. Its simple design allows for easy stacking of trays, bedding, and worms, making it ideal for both beginners and experienced composters.
- 🌲【Odor Control】 - Our worm compost bin features optimal ventilation with air holes in each tray to ensure proper airflow, keeping odors at bay. With balanced composting environment and clear waste guidelines, you can enjoy a clean, odor-free composting experience.
- 🌲【Compact Yet Spacious】 - The Blütezeit worm farm features a compact design, making it ideal for both indoor and outdoor spaces like apartments, balconies, gardens, and kitchens. With a generous 13Gal (50L) capacity, it offers plenty of room for efficient composting without taking up much space.
- 🌲【All-in-One Composting Kit】 - Enhance your composting journey with our all-in-one kit, including a Turning Fork, Shovel, Soil Meter, Non-woven Fabric, Coco-coir Brick, Anti-slip Feet, Cup, and Spigot for worm tea. The Soil Meter ensures ideal moisture, pH, and light levels, while our detailed User Manual offers fun and easy step-by-step guidance for success compost. Worms NOT included.
Do not harvest every bit of material at once. The bin bedding contains worms, cocoons, microbes, and habitat. Removing everything sets the system back. Instead, use one of these methods:
- Side migration: Push finished material to one side, add fresh bedding and food to the other side, and give worms 1 to 3 weeks to move.
- Light sorting: Pile compost under bright light. Worms move downward, and you skim finished material from the top.
- Tray harvesting: In stacked systems, feed the upper tray and allow worms to migrate upward before removing the lower finished tray.
Screening through 1/4-inch hardware cloth gives a finer product for potting mixes and lawn topdressing. Larger unfinished pieces can go back into the bin.
How to Use Worm Castings in Lawns and Gardens
Worm castings are a soil amendment, not a complete soil replacement. Use them as part of a broader soil plan, especially for lawns and larger beds. A soil test is still the right way to understand pH, phosphorus, potassium, and nitrogen needs.
Raised Beds
Mix castings into the top 3 to 6 inches of soil before planting. A practical rate is 1/2 inch to 1 inch across the bed surface, blended with existing soil or compost. For new raised beds, castings can be part of the mix, but avoid using them as the main bulk ingredient.
Free tools Windows power users keep installed
One-click scans. No signup required.
Container Gardens
Blend castings at about 10% to 20% of the potting mix volume. For a 10-gallon container, that means roughly 1 to 2 gallons of castings mixed with a proper potting medium. Using 100% castings can hold too much moisture and lacks the structure that container roots need.
Lawns
For lawns, apply a thin topdressing of about 1/8 inch to 1/4 inch, then rake or brush it into the canopy. Focus on thin, compacted, or recently repaired areas. For a full lawn renovation, castings are usually too expensive to use alone; combine soil testing, aeration, compost topdressing, seed selection, and irrigation corrections.
Trees, Shrubs, and Perennials
Topdress around the root zone with 1/4 inch to 1/2 inch of castings, keeping material away from direct contact with trunks and stems. Water it in. For new plantings, mix a modest amount into the backfill only if existing soil conditions support it. Do not create a rich pocket in poor surrounding soil that discourages roots from moving outward.
Independent reader supportYour contribution helps us test, update, and keep practical guides available for everyone.Realistic 2026 Costs and Payback
Purchased worm castings in 2026 commonly range from about $1.20 to $3.00+ per pound, depending on bag size, brand, organic claims, local pickup versus shipping, and whether the product is pure castings or a blended soil amendment. A 30-pound bag can be useful, but serious bed improvement can use material quickly.
Quick wins for a faster PC:
Repair Windows errors before they cause bigger problemsFix Now →Scan for outdated or missing drivers - takes under a minuteDriver Scan →Clear out junk files and repair common Windows errorsFree Scan →A home worm bin may not pay for itself immediately if you compare it only to bulk compost. The better value case is narrower and more honest: it reduces trash volume, handles scraps in small spaces, works indoors during winter, and produces a premium amendment for high-value areas like seed starting, containers, herbs, raised beds, and spot lawn repair.
| Item | Typical 2026 Cost | Notes |
|---|---|---|
| DIY starter bin | $25-$75 | Two totes, lid, drill bit if needed, bedding, and catch tray. Cost varies by tote quality and whether tools are already owned. |
| Commercial residential bin | $90-$200+ | Stacked trays, spigots, recycled plastic, made-in-USA models, and larger systems cost more. |
| 1 lb red wigglers | $40-$60 shipped | Often sold as about 1,000 worms. Local sources may be cheaper. |
| Bedding | $0-$25 | Cardboard, leaves, and paper may be free. Coco coir or bagged compost adds cost. |
| Thermometer and moisture meter | $10-$40 | Useful for garages, basements, and outdoor bins with seasonal swings. |
| Purchased worm castings | $1.20-$3.00+ per lb | Varies by bag size, purity, organic claims, and shipping. |
When to DIY vs When to Hire a Pro
Most homeowners can DIY a worm bin. If you can drill a tote, manage kitchen scraps, and check moisture once or twice a week, you can run a basic system. DIY makes the most sense for indoor bins, townhomes, raised-bed gardeners, and homeowners who want to reduce waste without building a full compost area.
Hiring help makes sense when the worm bin is part of a larger landscape or soil-health project. For example, a professional landscape or construction crew can help when you are building raised beds, correcting drainage, adding a gravel service pad, screening a utility area, integrating composting into a side-yard plan, or dealing with compacted lawn soil. Small residential consultations often include labor or trip costs and may be bundled with soil testing, irrigation checks, bed installation, or garden renovation.
Call a pro if the proposed location affects grading, foundation drainage, retaining walls, hardscape, fencing, or outdoor living areas. A worm bin should never create water against the house, block service paths, stain finished surfaces, or become a pest corridor beside a deck or crawlspace.
Free tools Windows power users keep installed
One-click scans. No signup required.
Best Value

- Customizable Tray Options for Versatile Composting: Worm Factory 360 offers 4 trays, perfect for any household size. Customize your composting system to meet your specific needs for efficient food waste recycling.
- Durable and Space-Efficient Design: Made from high-quality plastic, the Worm Factory 360 is sturdy and compact. Its compact form and sleek black color fit seamlessly into any home without taking up too much space.
- Simple and User-Friendly Setup: Easy assembly and operation with clear instructions. Set up the stand, place the first tray, add bedding, food scraps, and worms, then continue adding materials to the top tray.
- Optimized Composting with Nested Trays: Nested tray design encourages worms to migrate upward as they process food scraps, leaving finished compost in the lower trays for easy harvesting.
- Proudly Made in the USA: Ensuring superior quality and supporting local industry. The Worm Factory 360 is built to last, offering greater sturdiness and reliability compared to competitors.
Safety, Permits, and Neighbor Considerations
For a small enclosed residential worm bin, permits are uncommon, but rules vary. Check municipal composting rules, HOA documents, and nuisance ordinances before installing a visible outdoor system. Some communities care about setbacks, enclosure, odor, pests, and whether composting is allowed in certain residential or shared spaces.
Keep the system clean and enclosed. Do not compost pet waste in a home worm bin used for garden amendments. Do not add meat, dairy, oil, grease, or salty leftovers. Keep the bin out of stormwater flow paths and away from open drains. Wash hands after handling bedding, scraps, or castings, especially before preparing food.
If you share walls, fences, patios, or alleys, treat odor and pests as design failures, not normal composting. A properly managed worm bin should be quiet, contained, and earthy smelling. If it is not, reduce feeding, add bedding, and correct the moisture before the problem grows.
A Simple Maintenance Schedule
A worm farm works best with light, regular attention. It should not be another complicated household system.
- Every feeding: Bury scraps under 2 to 3 inches of bedding and rotate feeding zones.
- Weekly: Check moisture, smell, visible food, and worm activity. Add dry bedding if the bin is wet.
- Monthly: Check drainage holes, lid fit, pests, and bedding depth. Add fresh bedding as the material consolidates.
- Seasonally: Check temperature risk. Move or insulate the bin before summer heat or winter freezing conditions.
- Every 3 to 6 months: Harvest part of the finished castings while leaving enough active bedding and worms behind.
The best worm bins are boring in the right way. They do not smell, leak, attract pests, or need daily attention. They sit in a well-chosen location, process a realistic amount of scraps, and produce a steady supply of castings for the parts of the landscape where quality soil matters most.
Frequently Asked Questions
What is worm farming and how is it different from regular composting?
Worm farming, or vermicomposting, uses red wigglers and bedding in a controlled bin to process food scraps into worm castings. Regular composting usually relies more on heat, pile volume, turning, and outdoor yard waste. Worm bins are smaller, cooler, and better suited to kitchens, basements, garages, patios, and small yards.
How many red wigglers do I need to start a home worm bin?
A practical starter amount is 1 pound of red wigglers, often sold as about 1,000 worms. Start with modest feeding, usually 1 to 2 pounds of scraps per week at first, then increase only after the bin is stable and food is being consumed.
Can I keep a worm composting bin indoors?
Yes. Indoor worm bins work well in basements, laundry rooms, mudrooms, utility closets, and moderate garages. Use an opaque bin with a tight lid, ventilation, drainage control, and a waterproof tray underneath. A healthy bin should smell earthy, not rotten.
Do these 3 things before closing this tab:
1Fix the driver behind crashes, sound loss and screen glitches2Clear out junk files and repair common Windows errors3Scan for outdated or missing drivers - takes under a minuteWhat foods should never go in a worm farm?
Keep out meat, fish, dairy, oils, grease, salty foods, heavily seasoned leftovers, pet waste, and cat litter. Use caution with citrus, onion, garlic, bread, rice, pasta, and fresh grass clippings. Too much of these can sour the bin, attract pests, or create odor.
How much does a worm farm cost in 2026?
A DIY starter bin usually costs about $25 to $75 before worms. Red wigglers commonly cost $40 to $60 for 1 pound shipped. Commercial stacked worm bins often cost $90 to $200+ before worms, depending on size, tray design, spigots, and materials.
How do I use worm castings in lawns, raised beds, and containers?
Use castings as an amendment, not as 100% soil. Mix 1/2 inch to 1 inch into raised beds, blend about 10% to 20% into container mixes, and topdress lawns at roughly 1/8 inch to 1/4 inch before raking it into the turf canopy.
Quick Recap
Product prices and availability are accurate as of the date/time indicated and are subject to change. Any price and availability information displayed on Amazon at the time of purchase will apply.