Recommended Free Tools
Some links on this page are affiliate links: if you buy through them we may earn a commission, at no extra cost to you.
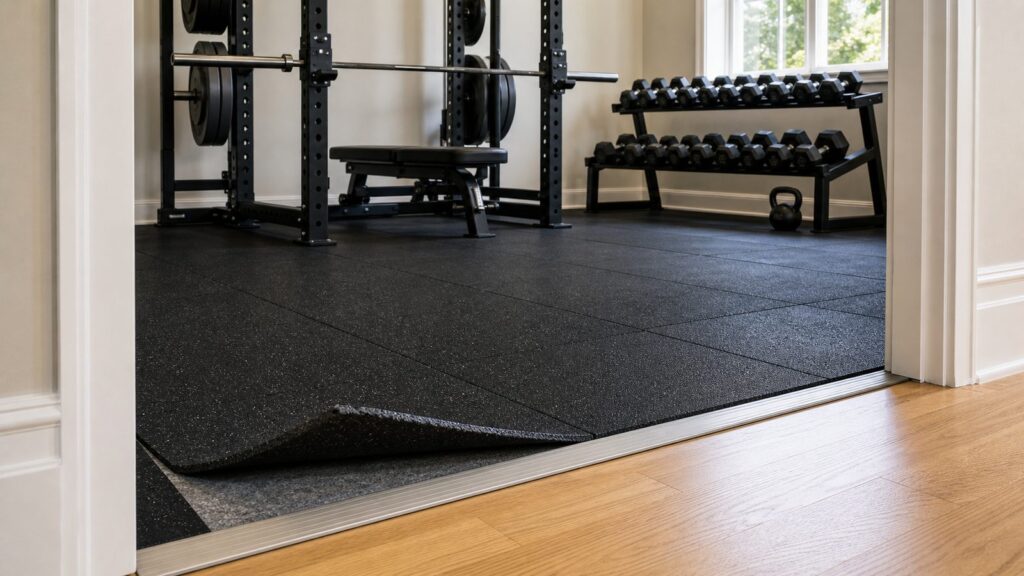
The best home gym flooring over hardwood is not one product. It is a layered system that protects the finish, spreads equipment loads, controls moisture, and can be removed later without ruining the room. For most homeowners, the best all-around choice is 8 mm to 10 mm dense rubber tile or roll flooring installed over a non-staining protective slip sheet. For heavy barbell work, use a dedicated lifting platform with plywood and rubber impact zones. For yoga, stretching, bodyweight training, and light dumbbells, foam can be comfortable, but it should not be trusted as serious impact protection.
On our jobs, we treat hardwood differently than concrete. A basement slab can tolerate a lot of abuse. A finished hardwood floor over wood framing has finish chemistry, movement, fasteners, subfloor seams, joist spans, humidity, and resale value to think about. The mistake is assuming that a thick mat solves every problem. Flooring can protect against abrasion and blunt impact, but it does not increase the structural capacity of the floor system underneath.
As an Amazon Associate I earn from qualifying purchases.
Free tools Windows power users keep installed
One-click scans. No signup required.
If you want the short answer: put nothing directly on hardwood until you have tested it. Use a removable barrier layer, choose flooring based on the actual workout zone, avoid adhesives, keep some airflow at the perimeter, and check whether the floor framing can handle the equipment. A 150-square-foot home gym can be protected for a few hundred dollars with basic rubber, or it can run over $1,500 in premium removable flooring before labor. The right answer depends on how you train.
Best Flooring Choices Over Hardwood
Hardwood needs protection from two different kinds of damage. The first is physical damage: dents from rack feet, scuffs from grit under mats, compression marks, dropped dumbbells, treadmill vibration, and seams that pinch the finish. The second is chemical damage: rubber additives, plasticizers, dyes, cleaning residue, sweat, and trapped moisture reacting with polyurethane or older floor finishes.
#1 Best Overall

- MAT IS THE MUST HAVE: The Cycleclub bike mat saves money and is practical; It stops floors from scratches and protects against sweat damage; Ideal for pelobike or small treadmill. Get it before your bikes to build your gym. Don't have one? Buy it
- QUALITY MATTERS! Cycleclub stationary bike mat is made of premium materials. No aging or fading. Leaves no marks on floors or carpets; You can freely cut to your desired shape and size; slight smell which will disappear in a few days.
- TAILOR-MADE FOR PELOBIKE: The Cycleclub bike mat is designed for exercise bikes and small walking treadmills. It's 30"x60", 56% larger than the standard 24"x48" mat. 6 mm(+-0.3mm), 50% thicker (than 4 mm) for better protection.
- NON-SLIP & EASILY CLEANED: Cycleclub bike mat is produced with a special process, fully sealed against sweat and water. It has anti-slip textures on both sides, keeping your bike in place and It's easily cleaned. Just wipe and it looks new
- VERSATILE MAT FOR VARIOUS FLOORS AND EQUIPMENT: This 30" x 60" mat can be used on wood floor, tile floor, vinyl floor, low-pile carpets and cement floors; It is compatible with spinning bikes, small treadmill, small elliptical and weight benches etc
That is why the best system usually has three parts: the existing hardwood, a protective slip sheet or manufacturer-approved underlayment, and the gym surface above it. Keep the installation floating and reversible unless you are intentionally converting the room.
Best overall: 8 mm to 10 mm dense rubber tiles or rolls
For general strength training, adjustable dumbbells, benches, cable machines, racks, and cardio equipment, 8 mm to 10 mm rubber is the most practical starting point. It is dense enough to resist everyday gym abuse, thin enough to avoid awkward transitions in many rooms, and widely available in rolls, straight-edge tiles, and interlocking tiles.
Use a protective layer between rubber and hardwood. Common job-site options include rosin paper, kraft paper, clean felt underlayment, or a flooring manufacturer-approved barrier. The goal is to reduce staining and abrasion while allowing the assembly to remain removable. Do not tape rubber directly to the hardwood finish. If seams need control, use tape on the top side of the rubber or use manufacturer-approved seam tape that does not bond to the wood below.
Expect basic recycled rubber rolls or tiles to cost about $1.39 to $4.00 per square foot in 2026, with many 8 mm products landing near $1.65 to $3.00 per square foot before shipping, trim, transitions, and installation.
Best for heavy lifting: a layered lifting platform
If barbells may be dropped from deadlift height, clean height, or overhead, build a platform. Rubber alone is not enough for repeated impact over hardwood and wood framing. A common residential platform uses two layers of 3/4-inch plywood as the structural deck, with 3/4-inch rubber stall mat or impact tile zones where plates land. Many platforms are 8 feet by 8 feet, though a compact deadlift platform can be smaller if the bar path and plate landing areas are planned carefully.
The platform spreads load across more floor area, gives the lifter a stable center panel, and prevents the plates from repeatedly driving force through one narrow line in the floor. Material cost often runs $250 to $700 or more depending on plywood grade, rubber thickness, finish, fasteners, and edge trim. On upper floors, platform placement matters as much as platform thickness. Place heavy lifting areas near bearing walls when practical, orient equipment across joists where possible, and verify joist direction before final layout.
Best budget choice: 3/4-inch horse stall mats
Horse stall mats are popular because they are thick, tough, and inexpensive. A common mat size is 4 feet by 6 feet by 3/4 inch. In many regions, cost falls around $2.00 to $3.50 per square foot depending on store, delivery, and availability.
The tradeoffs are real. Stall mats are heavy, often smell strongly at first, can vary slightly in size, and may leave residue or discoloration if placed directly on hardwood. Let them air out outdoors, in a garage, or in another ventilated area before bringing them into a finished room. Use a barrier layer under them. Because they are heavy and not always perfectly square, plan the layout before carrying them upstairs.
Best for finished living spaces: premium removable tiles
For a home office gym, spare bedroom, finished den, or room where appearance matters, premium rubber, PVC, polyurethane, or engineered gym tiles can be worth the extra cost. These products often have cleaner edges, lower odor, color options, wood-look finishes, or backing systems intended for removable installation.
Expect premium finished-room flooring to cost about $5.00 to $10.00 or more per square foot. It is not automatically stronger than a well-built platform, but it usually looks better, installs cleaner, and is easier to remove in sections for inspection or future moving.
Best for yoga and light training: foam or foam-rubber hybrid tiles
EVA foam tiles are inexpensive, soft underfoot, and quick to install. Material cost is commonly about $1.00 to $3.00 per square foot. Use them for stretching, yoga, bodyweight training, play areas, and light dumbbell work.
Rank #2
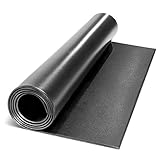
- HIGH-IMPACT FOAM SURFACE– Constructed from premium 1/4-inch EVA foam, this gym mat boasts a sturdy construction that resist damages against high impacts caused by dropping equipment such as barbells, dumbbells, kettle bells, and wall balls during training
- ABSORBS IMPACT – Created as a reliable gym accessory that will help enhance your training, this protective flooring has a cushioned surface that absorbs shock, making it ideal to use as a floor protector or as a fitness mat when performing exercises
- STABILIZES MACHINES–A matte layer delivers firm placement of exercise machines and features a premium material blend that showcases a non-slip surface. The protective barrier reduces noise and vibration caused by working treadmills, climbers, and steppers
- LIGHTWEIGHT STRUCTURE– Combining practical design and functionality, it features a lightweight yet heavy-duty structure that facilitates efficient pressure and weight distribution. The pliable nature of the mat also makes it easy to work out anywhere
Do not use plain foam under squat racks, heavy dumbbell racks, treadmills with small feet, or dropped iron plates. Foam compresses. That compression can make equipment less stable and can still allow point loads to transfer into the hardwood. Foam is comfort flooring, not structural protection.
Comparison Table: What Works Best Over Hardwood
| Flooring Type | Typical 2026 Material Cost | Best Use | Hardwood Protection Notes |
|---|---|---|---|
| 8 mm to 10 mm dense rubber roll or tile | $1.39-$4.00 per sq ft | General strength training, racks, benches, cardio | Use rosin paper, kraft paper, felt, or approved underlayment below rubber |
| 3/4-inch horse stall mats | $2.00-$3.50 per sq ft | Budget weight zones and garage-style gyms | Heavy and impact-resistant, but can smell and should not sit bare on hardwood |
| Layered lifting platform | $250-$700+ materials for typical platform | Deadlifts, Olympic lifts, repeated barbell drops | Best way to spread impact; still requires structural planning on upper floors |
| EVA foam tiles | $1.00-$3.00 per sq ft | Yoga, stretching, light bodyweight training | Comfort layer only; not reliable for heavy point loads |
| Premium PVC, polyurethane, or low-odor rubber tile | $5.00-$10.00+ per sq ft | Finished rooms where appearance and removability matter | Choose hardwood-safe backing and follow manufacturer limits |
For a 150-square-foot room, foam tiles may cost $150 to $450 material-only. Basic rubber tile or roll material may run $250 to $900. Premium finished-room systems may run $750 to $1,500 or more before labor. Professional installation can add roughly $2.00 to $8.00 or more per square foot depending on layout, cutting, stairs, transitions, adhesive decisions, subfloor prep, and waste disposal.
Do Not Put Rubber Directly on Hardwood Without Testing
Rubber gym flooring and hardwood finish do not always get along. Some recycled rubber products contain additives or residues that can react with polyurethane finishes. Some mats leave black transfer marks. Some trap moisture against the wood long enough to cloud the finish or create dark staining. The risk is higher when mats stay in place for months, the room has humidity swings, or the homeowner cleans the gym surface with too much water.
Before covering a visible floor, make a test patch in a closet or another inconspicuous spot. Place the exact barrier layer and rubber product you plan to use on the hardwood for several days. If possible, test for one to two weeks. Check for odor, tackiness, finish softening, discoloration, trapped condensation, or residue on the underside of the barrier.
The test patch is cheap insurance. We use the same thinking on remodels when two materials will be in contact for a long time. A product can be perfectly good gym flooring and still be the wrong product to lay directly over a finished wood floor.
How Thick Should Gym Flooring Be Over Hardwood?
Thickness matters, but density and load path matter more. A soft 1-inch foam tile can protect knees during stretching and still be a poor choice under a rack. A dense 8 mm rubber tile can handle routine strength work better than a thicker soft material because it resists compression.
For cardio equipment, benches, adjustable dumbbells, and general workouts, 8 mm rubber is often enough when paired with a proper barrier. For heavier free weights, 10 mm to 3/8 inch rubber is a better baseline. For dumbbell drop zones, kettlebells, and garage-style training, 1/2 inch to 3/4 inch rubber gives more impact resistance. For barbell drops, use a platform with plywood and 3/4-inch rubber landing zones.
The Tool Desk
Outbyte Driver Updater FREEFix the driver behind crashes, sound loss and screen glitchesFind Drivers →Outbyte PC Repair FREEClear out junk files and repair common Windows errorsFree Scan →Under racks, treadmills, cable machines, and dumbbell storage, watch the feet. A 400-pound rack on four small feet can create concentrated pressure. A 300-pound treadmill can vibrate thousands of times during a workout. A loaded dumbbell rack can place 600 to 1,000 pounds along a narrow strip. Add wider feet, rubber pads, plywood load spreaders, or a platform where equipment contacts the floor.
Structural Loads Matter More Than Most Flooring Guides Admit
Residential floor design is not based on gym use as the default. Under common IRC live-load tables, sleeping rooms are often designed for 30 pounds per square foot, other rooms for 40 pounds per square foot, and passenger-vehicle garage floors are commonly listed at 50 pounds per square foot. Those numbers are useful, but they are not a simple permission slip to load a room however you want.
A home gym creates concentrated loads, dynamic loads, and vibration. A lifter, loaded bar, rack, plates, bench, and storage tree may all sit in one corner of a room. A treadmill may bounce rhythmically. Dropped weights create impact that is much different from a sofa or bed.
If the gym is on a concrete slab, the concern is usually hardwood protection, moisture, and comfort. If the gym is on a framed first floor, second floor, or over a basement, verify the framing. Find the joist direction. Look for span length, joist size, spacing, bearing walls, beams, and any visible notches or penetrations. Heavy equipment is usually better placed near bearing walls than in the middle of a long unsupported span.
Rank #3

- 【Built for Peloton, Bikes & Treadmills】Compatible with Peloton Bike, Bike+, walking pads, rowing machines, and compact treadmills. If you’ve got a machine, this mat should come first
- 【Thick & Quiet – 6mm That Makes a Difference】Not your average floor mat—this 6mm dense PVC absorbs impact, kills noise, and keeps things steady. Early workout? Upstairs apartment? You’re covered
- 【Stay in Place – No Curl, No Slip, No Stress】Workout hard, the mat won’t budge. Textured top and anti-skid bottom keep your equipment where it belongs. Zero distractions, just motion.
- 【Protects What You Paid For】Floors matter. This mat shields wood, tile, vinyl, carpet—even cement—from sweat, scratches, and dents. One less thing to worry about
- 【Sized for Real Setups, Not Toy Gyms】Available in 5 sizes from 48"x24" to 84"x36". Whether it's for a small bike or a full-size treadmill, there's a fit for your space and your gear
Flooring can spread some force at the surface, but it does not magically upgrade undersized joists. If you are planning a power rack, heavy dumbbell storage, treadmill, functional trainer, and barbell platform in an upstairs bedroom, that is the point where a contractor or structural engineer should review the layout.
Moisture, Airflow, and Hardwood Movement
Hardwood moves with seasonal humidity. It also needs protection from trapped moisture. Large rubber sheets can trap cleaning water, sweat, spills, pet accidents, or humid air against the finish. Over time, that can cause cupping, mildew smell, dark marks, or finish clouding.
Do not seal the entire perimeter airtight. Leave a small expansion and ventilation gap at walls where the layout allows it. Avoid wet-mopping rubber over hardwood. Use a lightly damp mop only when the gym flooring manufacturer allows it, and dry the surface promptly. In the first month, lift a few corners weekly. After that, check monthly and after major humidity swings.
If the room is over a damp basement or crawl space, fix that condition first. Gym flooring is not a moisture-control system for the house. If moisture is already moving through the floor assembly, covering the hardwood may hide symptoms until damage is advanced.
Quick wins for a faster PC:
Fix the driver behind crashes, sound loss and screen glitchesFind Drivers →Clear out junk files and repair common Windows errorsFree Scan →Scan for outdated or missing drivers - takes under a minuteDriver Scan →Room-by-Room Recommendations
Spare bedroom gym
Use interlocking rubber tiles or premium removable tiles over a protective slip sheet. Keep heavy storage close to walls, avoid dropped weights, and use transition strips at the doorway. If the room has closets, leave access clear so the flooring can be lifted and inspected.
Living room or finished den
Choose low-odor rubber, polyurethane, PVC, or designer tiles with finished edges. This is where premium products make sense. Straight-edge rolls can look clean, but interlocking tiles are easier to remove. Use felt or approved underlayment, and avoid adhesive.
Garage with hardwood or wood-look overlay
If the garage has a wood finish or raised floor system, treat it like a finished room. If it is a concrete slab, rubber can usually be installed more aggressively, but moisture vapor still matters. Stall mats and thicker rubber are common for garage gyms because looks are less critical.
Second-floor gym
Keep the gym lighter and quieter. Use dense rubber under equipment, avoid routine drops, place heavy items near bearing walls, and consider acoustic underlayment if sound transmission matters. A second-floor treadmill, rower, or bike may need vibration pads in addition to gym flooring.
What’s actually slowing this PC down?
Pick the symptom - the matching free tool is one click away.
Transitions, Edges, and Trip Hazards
A 3/4-inch mat sitting on top of hardwood creates a real edge. So does a platform. That edge needs to be planned, especially near doorways, closets, stairs, and traffic paths. Use reducer strips, beveled rubber edges, or wood trim where height changes are exposed.
Door clearance is another common miss. Before ordering 3/4-inch material, check whether the door will swing over it. Measure from the finished hardwood to the bottom of the door. If clearance is tight, you may need thinner flooring near the door, a threshold transition, or door modification.
Also check floor registers, baseboard heaters, closet tracks, built-ins, and low outlets. Do not block HVAC registers with rubber. If the room has a floor outlet, keep access visible and protected.
Rank #4
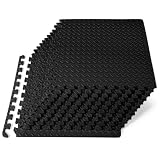
- PROTECTIVE GYM FLOOR MAT: Durable, non-skid gym flooring for home gym that covers and protects your floor or carpet while creating a comfortable workout room or play mat
- HIGH QUALITY FOAM: High-density EVA foam mat provides excellent support and cushion; Contains NO toxic phthalates; Excellent alternative to rubber gym mats; Color and texture may vary slightly by production batch
- VERSATILE: The water-resistant, noise-reducing design is easy to clean, great for indoor purposes including your garage floor mat, carpet tiles protector, gyms, a home fitness room, and more; Best results on flat, hard surfaces
- EASY ASSEMBLY: Lightweight interlocking foam floor mats connect easily, and can be disassembled just as fast for quick storage of your home gym equipment; Foam may compress slightly under heavy objects causing minor surface variation
- COVERS 48 SQ FT: Each tile measures 24 in x 24 in x 1/2 in - thick from the highest point of the texture; Includes 12 tiles with end borders for a polished look. Care: Apply warm water and dish soap with a soft cloth or towel and air dry
Installation Sequence That Protects the Hardwood
Start by cleaning the hardwood thoroughly. Vacuum grit, then clean according to the hardwood finish manufacturer’s guidance. Let the floor dry fully. Do not trap cleaning moisture under mats.
Outdated Drivers Are Slowing You Down
One free scan finds every outdated or missing driver and matches the right update for your exact hardware.Free scan · exact hardware matchPC Slower Than It Used to Be?
A free scan shows the junk files, broken settings and background clutter dragging Windows down - then fixes them in one click.Free scan · Windows 10 & 11Next, lay the protective barrier. Rosin paper, kraft paper, felt, or a manufacturer-approved underlayment should lie flat without wrinkles. Avoid plastic sheeting unless the flooring manufacturer and site conditions support it; plastic can trap moisture. Tape barrier seams to each other if needed, not to the hardwood.
Then install the gym flooring. Dry-fit the layout before cutting. Keep factory edges at visible transitions where possible. Use a sharp utility knife and straightedge for rubber cuts, making multiple passes instead of forcing one deep cut. Leave a small gap at the perimeter for movement and inspection. Add transition ramps or trim at exposed edges.
Finally, place equipment with load spreading in mind. Wide rack feet are better than small contact points. Plywood under a rack can be useful when hidden below rubber or integrated into a platform. For heavy machines, use manufacturer-approved pads that do not stain the floor system below.
Independent reader supportYour contribution helps us test, update, and keep practical guides available for everyone.When to DIY and When to Hire a Pro
A careful homeowner can usually DIY a small floating gym floor. A 10-foot by 12-foot room with interlocking rubber tiles, no barbell drops, and simple doorway transitions is a reasonable weekend project. Plan on a few hours for cleaning and layout, plus cutting time. Heavy mats are awkward, so have a second person available for 3/4-inch rubber.
Do these 3 things before closing this tab:
1Scan for outdated or missing drivers - takes under a minute2Repair Windows errors before they cause bigger problems3Fix the driver behind crashes, sound loss and screen glitchesHire a pro when the room has expensive hardwood, complex cuts, stairs, multiple transitions, built-ins, floor registers, moisture history, or heavy equipment. Also bring in a contractor or engineer when the gym is above grade and includes a loaded rack, large dumbbell set, treadmill, functional trainer, or lifting platform. The review is not just about total weight. It is about where that weight lands and how the floor carries it to beams, walls, and foundation.
Permits are not typically required for loose-lay flooring. A permit may be relevant if the project includes structural reinforcement, electrical changes, wall removal, new HVAC work, or converting a space in a way that changes occupancy or egress. Local rules vary, so check before opening framing or modifying building systems.
What We Would Install in Common Scenarios
For a light workout room over hardwood, we would use a breathable protective layer and 8 mm interlocking rubber tiles or premium low-odor tiles. That gives the homeowner a clean surface, good traction, and future removability without overbuilding the room.
For a dumbbell and rack room, we would step up to 10 mm rubber and add load spreaders under storage and rack feet. If the rack will be heavily loaded, we would evaluate the framing and consider a plywood layer below the rubber in the rack zone.
Recommended Free Tools
For deadlifts, we would build a platform. A typical setup is two layers of 3/4-inch plywood with 3/4-inch rubber landing strips. The platform edge should be trimmed or beveled, and the location should be chosen based on framing, not just where it looks good in the room.
For a high-end finished room, we would avoid bargain recycled rubber unless the homeowner accepts odor and finish-risk tradeoffs. Premium removable flooring with hardwood-safe backing costs more, but it fits the room better and reduces the chance that a temporary gym becomes a permanent floor repair.
Best Value

- 【Foldable, Space Saving Mat】The treadmill mat for hardwood & carpet floors unfolds to 78.7" x 39.4" x 0.16" , it can easily fit into a cabinet or backpack, convenient to store and carry than traditional exercise mats, and you can take it anywhere
- 【Heavy Duty Protection】The treadmill mat for hardwood floors which made of high-density and heavy-duty PVC material. The durability and cushioning can withstand heavy fitness equipment, fully protects floors and carpets. You can freely cut to your desired shape and size. Saves money and practical
- 【Noise Absorbing & Vibration absorption】The mat efficiently absorbs vibration, reducing noise generated by various equipment types, and extends the lifespan of your fitness gear. It provides cushioned rebound for a comfortable workout experience
- 【Wide Applications】This under treadmill mat can be used as a protective mat for flooring and fitness equipment. It also features a foldable and waterproof and sweatproof design, and can also be used as a yoga exercise mat for aerobic training. Will easily fit your peloton or other bike on top. Perfectly fits most equipment
- 【Waterproof & Easy to Clean】This treadmill mat for carpet is 100% waterproof, which prevents sweat or water droplets from sticking to the carpet and wooden floor, just use a towel or cloth to wipe off the sweat, easy to clean
Maintenance Schedule After Installation
For the first month, inspect weekly. Lift corners or removable tiles and look for condensation, odor, grit, finish dulling, or discoloration. After the first month, inspect monthly for the next season. After that, inspect during major humidity changes and after any spill.
Vacuum regularly. Grit under rubber can act like sandpaper if mats shift. Keep seams tight, but do not create an airtight bathtub over the hardwood. Clean sweat promptly. Use minimal water. If a mat smells musty, lift it and dry the area before reinstalling.
Quick wins for a faster PC:
Fix the driver behind crashes, sound loss and screen glitchesFind Drivers →Repair Windows errors before they cause bigger problemsFix Now →Re-check equipment feet every few months. Heavy racks and treadmills can creep slightly. If you see compression marks, add a load spreader or relocate the equipment before the mark becomes permanent.
Bottom Line
The best home gym floor over hardwood is usually dense rubber over a protective slip sheet, but the room’s use determines the details. Use 8 mm to 10 mm rubber for general training, 3/4-inch mats or thicker rubber for budget weight zones, foam only for comfort areas, and a real platform for dropped barbells. Keep the system floating, removable, and inspectable.
The hardwood is only one part of the equation. The framing below it matters, especially on upper floors. Plan the load path, protect the finish from rubber chemistry, manage moisture, and treat transitions as part of the installation. Done right, a home gym can be tough enough for training and still leave the hardwood floor worth showing when the equipment moves out.
Frequently Asked Questions
Can you put rubber gym flooring directly over hardwood floors?
It is not recommended. Rubber can stain, dull, or react with some hardwood finishes, especially over time. Use a protective slip sheet such as rosin paper, kraft paper, felt, or a manufacturer-approved underlayment, and test a small hidden area first.
What thickness gym flooring is best over hardwood for weights?
For general strength training, 8 mm to 10 mm dense rubber is a good baseline. For heavy dumbbells or weight zones, consider 1/2 inch to 3/4 inch rubber. For dropped barbells, use a lifting platform with plywood and rubber impact areas.
Will horse stall mats damage hardwood?
They can if installed directly on the floor. Stall mats are heavy, durable, and affordable, but they may smell, transfer residue, or discolor finish. Use a barrier layer, air them out before installation, and inspect underneath regularly.
Is a second-floor home gym safe?
It depends on the framing, equipment weight, layout, and workout style. Common residential live-load values are 30 psf for sleeping rooms and 40 psf for other rooms, but gym equipment creates concentrated and dynamic loads. Heavy setups should be reviewed by a contractor or structural engineer.
Do I need a permit for home gym flooring?
Loose-lay gym flooring usually does not require a permit. Structural reinforcement, electrical work, HVAC changes, wall changes, or major space conversions may require one depending on local rules.
What’s actually slowing this PC down?
Pick the symptom - the matching free tool is one click away.
How do I prevent moisture under gym mats?
Start with a dry, clean floor, avoid wet-mopping, leave small ventilation gaps at the perimeter, and inspect under removable sections monthly at first. Address basement, crawl space, or humidity problems before covering hardwood.
Quick Recap
Product prices and availability are accurate as of the date/time indicated and are subject to change. Any price and availability information displayed on Amazon at the time of purchase will apply.

