Do these 3 things before closing this tab:
1Repair Windows errors before they cause bigger problems2Fix the driver behind crashes, sound loss and screen glitches3Clear out junk files and repair common Windows errorsSome links on this page are affiliate links: if you buy through them we may earn a commission, at no extra cost to you.
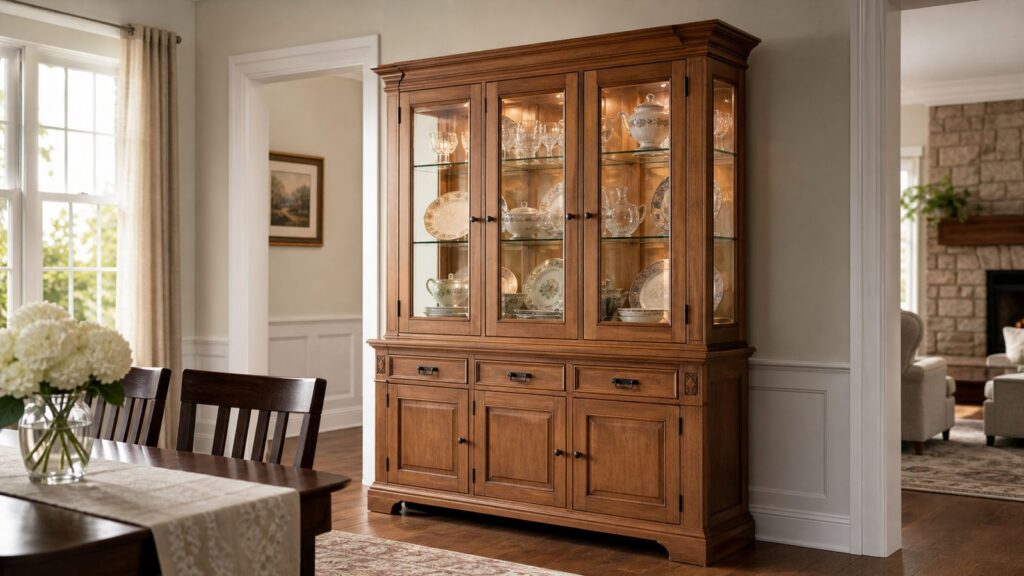
A good heirloom china cabinet is not just a pretty box with glass doors. It is a tall, loaded cabinet that has to stay square, carry real weight, protect fragile dishes, survive seasonal humidity changes, and stay safely anchored for decades. If you are planning to build one yourself, start with the same priorities we use on our job sites: accurate dimensions, stable cabinet construction, properly rated shelves and hinges, tempered glass, a durable finish, and a real anti-tip plan.
For a furniture-grade DIY build in 2026, a realistic material budget is about $900 to $3,500+. A paint-grade poplar and plywood cabinet can land near the lower end. Cherry, walnut, rift oak, inset doors, custom tempered glass, interior LED lighting, premium hinges, and shop-grade finishing can push the material cost past $3,000 before any labor. Professionally built custom cabinetry commonly runs about $500 to $1,200+ per linear foot, and high-end work can exceed $1,500 per linear foot when the project becomes custom millwork with field scribing, delivery, installation, lighting, and finishing.
As an Amazon Associate I earn from qualifying purchases.
The plan below is written for a serious homeowner or woodworker who wants a cabinet that looks refined without becoming fragile or fussy. The example dimensions are for a freestanding cabinet, but the same planning logic applies to a dining room built-in.
Start With the Dishes, Not the Cabinet
The biggest design mistake is drawing a cabinet around a nice elevation and then discovering the serving platter, soup tureen, or stacked dinner plates do not fit. Before choosing door sizes or shelf spacing, measure what the cabinet must actually hold.
#1 Best Overall

- Baby Safety Guard: Let your little one explore and climb to their heart's content! Baby proof furniture anchors help keep furniture secure from the potential tip-over hazard of curious children. This anchor will help keep furniture upright even if your children pull out the dresser drawer to form a ladder and climb onto the dresser for fun.
- Easy to Install: Secure your dressers and other large furniture in just a few minutes with anti-tip furniture straps! Following the included instructions, use the hardware pieces provided with the package and easily install with a screwdriver and a drill driver. Choose from vertical or horizontal siding installation for your furniture and potentially save a life!
- Earthquake-Resistant: Secure your furniture from the unexpected with our heavy-duty straps! Perfect for anchoring bookcases or tall furniture, they can help prevent sliding or toppling during an earthquake with a 5.5 magnitude or lower. For optimal protection, we recommend using two straps per item.
- Versatile Use: Our anti-tip furniture anchors are the perfect solution for securely anchoring furniture, such as bookcases, bookshelves, dressers, cabinets and wardrobes, to the wall and protecting against unnecessary incidents with toddlers. Additionally, the anti-tip anchor is detachable, so you can easily remove it when needed for cleaning or furniture removal.
- High Quality Material: These furniture anchors for baby proofing are crafted from high-quality stainless steel material, offering superior corrosion resistance and lasting protection against rust. Fire and heat resistant, they are sturdier and more durable than plastic straps, providing the perfect safeguard for your baby.
On our cabinet projects, we ask for the tallest platter, widest serving bowl, tallest stemware, and a typical full place-setting stack. Those measurements drive the inside openings. For most homes, a useful china cabinet lands in these ranges:
- Overall width: 36 to 60 inches for a freestanding cabinet.
- Overall height: 72 to 90 inches, depending on ceiling height and crown detail.
- Upper display depth: 14 to 18 inches.
- Lower storage depth: 18 to 24 inches.
- Upper shelf spacing: 10 to 14 inches adjustable, with at least one taller opening for platters or pitchers.
- Door gaps: 3/32 inch to 1/8 inch for a crisp furniture look.
A practical freestanding plan is 48 inches wide, 84 inches tall, 18 inches deep at the base, and 15 inches deep at the upper display section. That size gives enough presence for a dining room without becoming difficult to move, finish, or anchor. If you go wider than 60 inches, start thinking like a built-in: break the cabinet into sections, add center partitions, and control shelf spans carefully.
A Proven Cabinet Layout
A traditional heirloom china cabinet usually has three working zones: a closed lower base, a glass-front upper display case, and a finished top and base detail that makes the piece feel intentional.
Lower Base
The lower base should handle heavier items: serving bowls, seasonal dishes, linens, silverware trays, and table accessories. A strong layout is two doors below with one or two adjustable shelves inside. If you want drawers, keep them in the upper portion of the base so you are not bending to reach small items. A common base height is 30 to 36 inches.
Upper Display Cabinet
The upper section is where proportion matters most. Glass doors should align with the base doors or drawer stack below. If the cabinet is 48 inches wide, two upper glass doors around 22 to 23 inches wide each usually look balanced after allowing for stiles, gaps, and center meeting rails. Three doors can work on wider cabinets, but the stiles and muntins need to be kept restrained or the cabinet starts to look busy.
Back, Crown, and Base
A 1/4-inch plywood back is common for furniture, but for a tall cabinet that will be anchored, we prefer a stronger back strategy: use a 1/2-inch back panel or add internal nailers and a continuous wall cleat. Crown height should fit the cabinet, not overpower it. On an 84-inch cabinet, a 3- to 5-inch crown assembly is usually enough. The base can be a recessed toe-kick, small bracket feet, or a furniture plinth, but it needs to allow leveling.
Materials: Plywood for Stability, Hardwood Where It Shows
For an heirloom cabinet, the most reliable construction is not an all-solid-wood box. Wide solid panels move across the grain as humidity changes. If the sides, shelves, or back are built without accounting for that movement, doors can bind, panels can split, and joints can telegraph through the finish.
Use cabinet-grade plywood for the carcass and shelves, then use solid hardwood for the parts people see and touch: face frame, doors, edge banding, crown, base, applied moldings, and trim. This is how we get long-term stability without giving up the feel of real wood.
| Component | Recommended Material | Typical Spec | Why It Works |
|---|---|---|---|
| Cabinet sides and partitions | Cabinet-grade plywood | 3/4 inch | Stable, flat, and strong for tall casework |
| Back panel | Plywood | 1/4 to 1/2 inch | 1/2 inch adds stiffness and better anchoring support |
| Wood shelves | Plywood with hardwood front edge | 3/4 inch with 1 to 1-1/2 inch edging | Reduces sag and hides plywood edges |
| Face frame | Solid hardwood | 3/4 inch stock | Durable, repairable, and visually refined |
| Doors | Solid hardwood frame with glass panel | 1-3/4 to 2-1/4 inch rails and stiles | Holds hinges and glass retainers securely |
| Crown and base | Solid hardwood or paint-grade poplar | Profile varies | Creates furniture character and covers installation tolerances |
In 2026, big-box 3/4-inch birch plywood is commonly listed around $75 per 4×8 sheet, with birch plywood products ranging roughly $10 to $150 depending on size, grade, and core. A cabinet this size may need 3 to 6 sheets plus thinner material for the back or door panels if the lower doors are not glass.
Rank #2

- Peace Of Mind With Furniture Wall Anchors: This metal furniture straps are designed to withstand earthquakes,windstorms and also babyproofing. The metal anti tip furniture strap will secure your furniture up to 400 lbs so you can be assured that your baby won't be the victim of unnecessary injury in your own home. Never again will you worried about the injuries that could crush or seriously injure your little one
- Widely Application To Anchor Different Furniture: The anti-tip furniture straps includes all hardware including screws, adjustable straps, brackets, wall anchors. It is widely used to anchor furniture such as bookshelf, bookcase, cabinet, drawer, dresser, TV stand, armoires, wardrobes, any baby furniture and leaning mirror wall anchors. Ideal for protecting children and pets from the dumping of furniture
- Anti Tip Straps With High Bearing Capacity: The furniture wall straps are made of sturdy metal which has the features of impact resistant, good flame-retardant, stability, anti-aging and cracking. The anti tip bracket for furniture, when properly installed, can support up to 400 pounds for each set! We recommend installing 2 sets per piece of furniture for keeping the furniture in place
- Easy Installation & Quick Release Detachable: The furniture strap simply attaches to the reverse of the furniture and the other end connects to the wall. 1 set includes 1 strap and 2 brackets. Screws and wall anchors are included. As the furniture safety straps are detachable, you can easily to release the straps when you want to move the furniture or clean the behind of the furniture
- Earthquake Resistant Furniture Straps: Earthquakes strike without warning. Our heavy-duty straps can safely secure your furniture items especially the bookcases or tall furniture that could slide or fall when earthquake occurs below 5.5 quake. We would advise 2 straps are used per furniture item for the ideal result
Hardwood pricing varies by region and grade. Current lumber-yard examples put cherry around $5 to $6 per board foot, hard maple around $6 to $7 per board foot, walnut around $8.50+ per board foot, red oak around $5.50 per board foot, and poplar around $3.75 to $5 per board foot. Wide boards, S4S milling, premium grades, and local availability can raise those numbers quickly.
2026 Cost Breakdown
Below is a realistic material budget for a 48-inch-wide, furniture-grade china cabinet. Labor is not included. A careful DIY builder should also budget for extra test pieces, finish samples, and at least one replacement board or sheet because mistakes happen during milling, door fitting, and glass preparation.
| Item | Budget Range | Notes |
|---|---|---|
| Cabinet plywood | $225-$600 | 3 to 6 sheets depending on layout, grade, backs, and shelves |
| Solid hardwood | $250-$1,200+ | Poplar and red oak cost less; cherry, maple, walnut, and rift oak cost more |
| Glass doors or inserts | $300-$1,500+ | Glass cabinet doors can run about $150-$500+ per door installed; specialty glass adds cost |
| Hinges and hardware | $75-$350 | Quality hinges matter on heavy glass doors; pulls commonly run $3-$30+ each |
| Shelf pins, retainers, fasteners | $40-$150 | Use shelf supports rated for the actual load |
| LED lighting materials | $75-$400+ | Tape, channels, diffusers, driver, switch, and wiring accessories |
| Finish supplies | $75-$300+ | Stain, dye, sealer, topcoat, abrasives, tack cloths, and test boards |
| Anchoring and leveling | $10-$75 | Cleats, brackets, shims, adjustable feet, or wall anchors tied to framing |
| Total DIY materials | $900-$3,500+ | Premium hardwood, inset doors, and custom glass can exceed this |
Professional pricing is different because you are buying design time, shop labor, machinery, finishing, delivery, installation, insurance, and accountability. As a broad 2026 benchmark, custom cabinetry commonly runs $500 to $1,200+ per linear foot, with high-end work reaching $1,500+ per linear foot. National cabinet-building estimates also place individual cabinet builds around $1,256 to $1,534 per cabinet, but a china cabinet with glass, lighting, finish work, and installation can price well above a basic cabinet box.
Joinery and Case Construction
The cabinet box has one job: stay square. If the case is out of square by even 1/8 inch, the glass doors will advertise it. Before cutting, confirm your plywood thickness. Many 3/4-inch sheets are slightly undersized, so dadoes and rabbets should be cut to the actual material, not the label.
For a durable build, use dadoes or rabbets for fixed shelves, partitions, tops, and bottoms. Pocket screws can help with face frames and hidden assembly, but they should not be the only thing keeping a tall cabinet square. Glue surfaces, mechanical fasteners, and a stiff back panel all work together.
What’s actually slowing this PC down?
Pick the symptom - the matching free tool is one click away.
A clean sequence is:
- Mill and label all plywood case parts.
- Cut dadoes or rabbets for fixed shelves, tops, bottoms, and backs.
- Dry-fit the case and measure both diagonals.
- Glue and clamp the carcass on a flat surface.
- Install the back or temporary squaring braces while the glue cures.
- Build and attach the face frame.
- Fit lower doors, upper glass doors, shelves, and trim after the case is stable.
For a 48-inch cabinet, we would normally add at least one center partition or fixed shelf to reduce racking and control shelf spans. Long adjustable shelves should have a hardwood front edge. A 1- to 1-1/2-inch solid hardwood nosing on a 3/4-inch plywood shelf makes a major difference in stiffness and appearance.
Doors, Glass, and Shelf Loads
Glass is where a china cabinet becomes unforgiving. Do not order glass until the doors are built, squared, sanded, and measured. A 1/16-inch mistake can make a pane unusable, especially with tempered glass, because tempered glass cannot be cut after tempering.
For doors and shelves where breakage risk exists, specify tempered glass. Low-iron clear glass gives a cleaner color, while seeded, reeded, or frosted glass changes the look and can hide visual clutter. Textured glass often suits older homes, but keep the door design simple so the cabinet does not fight with the dishes.
Typical glass choices include:
- Clear tempered glass: Best for full visibility and traditional display.
- Low-iron glass: Clearer, with less green tint, usually more expensive.
- Seeded glass: Good for a handmade, older-house character.
- Reeded glass: Adds vertical texture and softens what is behind the door.
- Frosted glass: Better for concealment than display.
Use proper glass retainers rather than caulk alone. Small wood stops, rubber setting blocks, and removable retainers make future glass replacement possible. For shelves, confirm thickness, span, and support rating with the glass supplier. Heavy dishes on a wide glass shelf are a different load than a few teacups.
Free tools Windows power users keep installed
One-click scans. No signup required.
Rank #3

- 【450LBS ANTI TIP FURNITURE ANCHORS】 Reinforced steel baby proofing anchors secure dressers, cabinets, and bookcases up to 450lbs – prevents tipping when children climb or pets jump. Essential anti tip furniture anchors for nursery and living room safety
- 【3-MINUTE EASY WALL ANCHORS INSTALLATION】 Simply mark → drill → install expansion tubes and screws → attach to furniture. No professional tools needed! Ideal wall anchors for furniture with step-by-step diagrams
- 【PREMIUM STEEL ANCHORS】 Anti-rust metal outperforms plastic anchors (3X lifespan), with fire-resistant properties for kitchen cabinet locks baby proofing. Durable furniture anchors ensure long-term safety
- 【PET & BABY PROOFING ESSENTIAL】 Adjustable anti tip furniture anchors create a secure zone for crawling infants and pets. Allows furniture movement for cleaning; perfect for cabinet locks baby proofing solutions
- 【12-PACK COMPLETE BABY PROOFING KIT】 Includes 12 furniture anchors, 12 expansion nails, and 24 screws for 6+ units. Comprehensive wall anchors for furniture to safeguard your entire home
Hinges also need respect. Glass doors are heavier than panel doors. Cheap hinges sag, and once a door sags, the reveal around the glass makes it obvious. Use hinges rated for the door weight and height, and make sure screws bite into solid hardwood, not just a thin veneer edge.
Lighting and Electrical Planning
Interior lighting can make a china cabinet feel finished, but it needs to be planned before assembly. Retrofitting wiring after the cabinet is finished usually means visible wires, awkward switches, or inaccessible drivers.
Warm LEDs in the 2700K to 3000K range usually flatter wood and china better than cool blue-white light. We prefer LED tape or small linear fixtures set into aluminum channels with diffusers. The channel protects the tape, reduces glare, and gives a cleaner line of light. Place lighting toward the front inside edge of the cabinet, aimed back slightly, so dishes are lit from the front instead of silhouetted.
Plan for:
- Driver access: Put the LED driver where it can be replaced later.
- Switching: Door-activated switches, touch dimmers, or a wall switch all need different wiring routes.
- Heat: LEDs run cooler than older lighting, but drivers still need ventilation.
- Wire paths: Rout channels or drill chases before finishing.
- Serviceability: Removable backs or accessible top compartments prevent future damage.
Plug-in LED systems are often DIY-friendly if installed according to the manufacturer’s instructions. Hardwired lighting is different. Local electrical rules vary, and some jurisdictions require permits or licensed electrical work when adding or modifying permanent wiring. If the cabinet is part of a larger dining room remodel, coordinate lighting before drywall, trim, and paint are finished.
Outdated Drivers Are Slowing You Down
One free scan finds every outdated or missing driver and matches the right update for your exact hardware.Free scan · exact hardware matchPC Slower Than It Used to Be?
A free scan shows the junk files, broken settings and background clutter dragging Windows down - then fixes them in one click.Free scan · Windows 10 & 11Anchoring: The Safety Detail You Cannot Skip
A loaded china cabinet is tall, front-heavy when doors are open, and often filled with fragile weight above waist height. It must be anchored. This is not optional on our projects, whether the piece is freestanding or built in.
The best method is a continuous French cleat or concealed wall cleat tied into studs or blocking. For a freestanding piece, the cleat can be hidden behind the upper back rail. For a built-in, add blocking during wall preparation if studs do not land where the cabinet needs support.
A good anchoring plan includes:
- Locate studs with verification, not just a stud finder beep.
- Use structural screws long enough to penetrate framing, commonly 2-1/2 to 3 inches depending on wall buildup.
- Anchor through a solid cabinet rail or cleat, not a thin back panel alone.
- Level the base first so the anchor is not pulling the cabinet out of shape.
- Recheck door swing and reveals after anchoring.
Federal safety campaigns have continued to emphasize furniture tip-over prevention, and the practical field lesson is simple: tall furniture needs a mechanical connection to the wall. Adjustable feet, shims, and a solid base help the cabinet sit correctly, but they do not replace anchoring.
Finish System for a Cabinet That Will Be Used
An heirloom finish is not just a color. It is a system that works on the actual wood, plywood veneer, glue lines, exposed edges, and interior surfaces. Always make sample boards using the same plywood and hardwood from the project. Stain can look very different on veneer, end grain, cherry, maple, oak, and poplar.
Recommended Free Tools
For clear or stained cabinets, we like a durable topcoat that resists handling, dusting, and occasional moisture from wiped dishes. Waterborne finishes stay clearer and have lower odor. Oil-based finishes can add warmth but may amber over time. Painted cabinets need careful sanding, primer matched to the substrate, and a hard enamel or cabinet-grade coating.
Rank #4

- 1,Baby anti-tip furniture wall straps secure furniture to the wall with screws to help against furniture tipping over. Create and maintain a safe environment for your kids and pets!The furniture strap perfect for anchoring TV stand, drawer, cabinets, bookcases, dresser, armoires, bookshelf,wardrobes, and any furniture.
- 2,The furniture anchor wall strap is comprised of two brackets tethered by a strap and fix with screws. The application of new material (Nylon 6t) provides the furniture anchors kit a higher stiffness and strength. The straps also have good flame-retardant property, high stability, anti-aging and cracking property, which effectively enhances the safety and stability for keeping your furniture in place.
- 3,NOTE: for best protection and results, 2 anchor wall straps are required per piece of furniture at least and fix with screws.Each furniture straps can bear a weight of 100 pounds. Suitable for light furniture, not suitable for heavy or super heavy furniture.
- 4, The package includes 6 pack furniture safety straps. The adjustable straps also come with illustrated instructions and all needed hardware for installation.
- 5,Every anti-tip furniture anchor wall straps you ordered from us enjoy a free replacement in 30 days.
Do not finish only the visible faces. Unfinished backs, shelf bottoms, and interiors can absorb moisture unevenly and contribute to movement, odor, or inconsistent aging. At minimum, seal all surfaces. For removable shelves, finish both faces and all edges before installation.
Expect finishing to take longer than assembly. A realistic schedule is 2 to 4 days for milling and case construction, 2 to 5 days for doors, trim, sanding, and fitting, and 3 to 7 days for finishing depending on product cure times and weather. If you rush the finish, the cabinet may look good on day one and disappoint by month six.
Permits, Lead Paint, and Job-Site Safety
A freestanding furniture build in a garage or shop usually does not need a building permit. A built-in cabinet can be different if it affects electrical work, walls, trim, egress, or other building elements. Local rules vary, so check your city or county before cutting into walls or adding hardwired lighting.
For homes built before 1978, lead paint rules matter when disturbing painted surfaces. If a built-in installation requires sanding, cutting, or demolition of old painted trim, walls, or casing, the work may fall under lead-safe renovation requirements. Do not treat old paint dust as ordinary sawdust.
Wood dust is another real hazard. Use dust collection, a properly fitted respirator, eye protection, and hearing protection when milling plywood and hardwood. Some hardwoods are more irritating than others, and plywood cutting adds adhesive and fine particulate exposure. On our job sites, dust control is not a cleanup preference; it is part of the work plan.
Independent reader supportYour contribution helps us test, update, and keep practical guides available for everyone.When to DIY vs. When to Hire a Pro
This is a good DIY project if you already have accurate cutting tools, clamps, a flat assembly area, door-building experience, and patience for finishing. It is not a good first cabinet project. The glass doors, tall case, tight reveals, and anchoring raise the difficulty.
DIY makes sense when:
- You are building a freestanding cabinet under about 60 inches wide.
- You can work from a detailed cut list and keep parts square.
- You are comfortable fitting doors to 3/32- to 1/8-inch reveals.
- You are using plug-in lighting rather than hardwired electrical work.
- You have time for finish samples and careful cure times.
Hire a cabinetmaker, remodeler, or finish carpenter when:
The Tool Desk
Outbyte PC Repair FREEClear out junk files and repair common Windows errorsFree Scan →Outbyte Driver Updater FREEScan for outdated or missing drivers - takes under a minuteDriver Scan →- The cabinet is a wall-to-wall or floor-to-ceiling built-in.
- The room has noticeably uneven floors, out-of-plumb walls, or old plaster.
- You want inset doors, curved glass, premium hardwood, or a shop-sprayed finish.
- Lighting needs to be hardwired or tied into existing switching.
- The cabinet must integrate with baseboards, crown, wainscoting, or adjacent openings.
The cost difference can be substantial, but so can the result. A professional built-in includes field measurement, scribing, installation sequencing, and finish coordination. That is why a project that starts as a furniture idea can quickly become custom millwork pricing.
Common Mistakes to Avoid
The mistakes that ruin china cabinets are usually not dramatic. They are small decisions made early that become visible late.
Best Value

- 【Maximum Stability for Child Safety】:Includes 4 furniture anchors designed to resist up to 400 lbs force, effectively preventing furniture tip-overs and safeguarding curious toddlers around cabinets, dressers, and bookshelves.
- 【Earthquake-Proof & Universal Compatibility】:owering pieces like bookcases are susceptible to toppling over during ground vibrations or earthquakes. Our versatile furniture wall anchors offer protection against such accidents for loved ones in all households, not just those with children, as data reveals that adults too can be injured by furniture tip-overs.
- 【Easy Installation & Removable】:Our bookshelf anchors come with a generous supply of mounting screws, making installation effortless. Follow the comprehensive instructions, utilize all hardware components included in the package, and installation becomes a breeze with the aid of a screwdriver and a power drill. Moreover, users have the option to choose between vertical or horizontal siding installations based on different furniture configurations.
- 【Premium Quality Construction】:Crafted from robust, rust-proof metal for a lifetime of durability, these anti-tip straps surpass plastic alternatives, providing superior strength and longevity in any environment.
- 【Broad Compatibility】:Top-tier, durable child safety anchors for bookshelves. Optimal choice. Suitable for bookcases, dressing cabinets, cabinets, etc.
- Skipping the wall anchor: A tall cabinet full of dishes must be tied to framing.
- Building wide panels from solid wood without movement planning: Seasonal expansion can split panels or rack the cabinet.
- Underbuilding shelves: Long plywood or glass shelves need proper thickness, edging, span control, and rated supports.
- Ordering glass too early: Build and measure the final door openings first.
- Using weak hinges: Heavy glass doors need hardware rated for the load.
- Ignoring the floor: Leveling problems show up as crooked door gaps and uneven crown lines.
- Finishing only what shows: Seal interiors, backs, shelf edges, and undersides.
- Hiding lighting drivers permanently: Every electrical component should be serviceable.
A Practical Build Specification
For a cabinet that balances cost, durability, and heirloom character, this is the specification we would consider a strong starting point:
- Size: 48 inches wide, 84 inches tall, 18-inch base depth, 15-inch upper depth.
- Case: 3/4-inch cabinet-grade plywood with dadoed fixed shelves and a stiff back.
- Face frame: 3/4-inch cherry, maple, white oak, red oak, or paint-grade poplar.
- Upper doors: Solid hardwood frames with tempered glass and removable retainers.
- Lower doors: Solid frame-and-panel doors or plywood panels with hardwood frames.
- Shelves: Adjustable 3/4-inch plywood shelves with 1- to 1-1/2-inch hardwood front edging, or tempered glass shelves with rated supports.
- Lighting: 2700K to 3000K LED tape in aluminum channels with accessible driver.
- Hardware: Load-rated hinges, quality shelf pins, restrained knobs or pulls.
- Safety: Continuous cleat or concealed anchor tied into studs or blocking.
- Finish: Sampled stain or paint system with all surfaces sealed.
That specification avoids the two extremes: a fragile decorative cabinet that looks good but ages poorly, and an overbuilt showpiece that costs more than the room justifies. The result is a cabinet that can be used, moved carefully if needed, repaired, refinished, and trusted around a family.
Quick wins for a faster PC:
Scan for outdated or missing drivers - takes under a minuteDriver Scan →Repair Windows errors before they cause bigger problemsFix Now →Final Builder’s Advice
The best china cabinets are quiet in the right way. The proportions are balanced, the doors close cleanly, the shelves do not sag, the glass feels secure, the lighting flatters the contents, and the cabinet does not move when a child pulls on a door. That kind of quality comes from planning the hidden parts as carefully as the visible ones.
If you are building this yourself, spend more time on layout, mockups, and sample boards than you think you need. Measure the dishes, confirm the room, check the floor, build the case square, fit the doors patiently, and anchor the finished cabinet into framing. If the project involves built-in installation, hardwired lighting, old painted surfaces, or high-end finish expectations, bring in the right professional early. It is cheaper to plan the cabinet correctly than to repair a tall, glass-front mistake after it is finished.
Frequently Asked Questions
How much does it cost to build a china cabinet in 2026?
A furniture-grade DIY china cabinet typically costs about $900 to $3,500+ in materials. Paint-grade plywood, poplar, and basic hardware can stay near the low end, while cherry, walnut, custom tempered glass, LED lighting, premium hinges, and high-end finish materials can exceed $3,000 before labor.
What wood is best for an heirloom china cabinet?
Use cabinet-grade plywood for the box and solid hardwood for the face frame, doors, edging, crown, base, and trim. Cherry, maple, white oak, red oak, and walnut are strong furniture choices. Poplar is a practical paint-grade option.
The Tool Desk
Outbyte Driver Updater FREEFix the driver behind crashes, sound loss and screen glitchesFind Drivers →Outbyte PC Repair FREEClear out junk files and repair common Windows errorsFree Scan →Should china cabinet doors use tempered glass?
Yes, tempered glass is the safer choice for cabinet doors and shelves where breakage risk exists. It costs more than standard glass, but it is better suited for a tall family-use cabinet with moving doors and heavy dishes.
How do you keep a tall china cabinet from tipping over?
Anchor it to wall framing with a concealed cleat, French cleat, or anti-tip hardware tied into studs or blocking. Level the cabinet first, then fasten through a solid rail or cleat rather than relying on a thin back panel.
Do I need a permit to install a china cabinet?
A freestanding furniture cabinet usually does not need a permit. A built-in may require code review if it involves electrical work, wall changes, or hardwired lighting. Homes built before 1978 also require lead-safe planning when disturbing old painted surfaces.
Quick Recap
Product prices and availability are accurate as of the date/time indicated and are subject to change. Any price and availability information displayed on Amazon at the time of purchase will apply.
Free tools Windows power users keep installed
One-click scans. No signup required.

