The Tool Desk
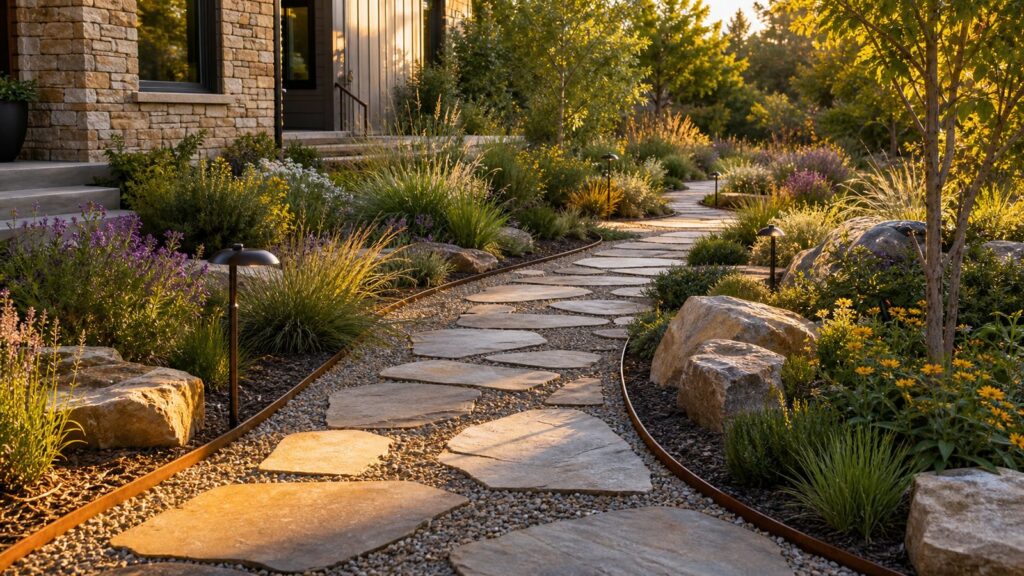
Outbyte PC Repair FREEClear out junk files and repair common Windows errorsFree Scan →Outbyte Driver Updater FREEFix the driver behind crashes, sound loss and screen glitchesFind Drivers →A beautiful garden nature path should feel like it belongs in the landscape, but it still has to behave like a small construction project. The best paths are comfortable to walk, dry after rain, stable underfoot, easy to maintain, and scaled to the way people actually move through the yard.
For most homes, that means planning the route first, then designing the base, drainage, edging, and surface material around the soil, slope, climate, and expected use. A narrow stepping-stone path through a pollinator garden is a different project than a 48-inch-wide paver walk from the driveway to the patio.
As an Amazon Associate I earn from qualifying purchases.
In 2026, simple gravel or mulch-style paths commonly run about $3 to $8 per square foot installed. Basic paver paths often land around $9 to $20 per square foot, while higher-quality paver walkways are commonly $15 to $40 per square foot. Natural stone and flagstone usually start around $16 to $35 per square foot and can go higher with thick stone, tight joints, steps, curves, or difficult access.
Start With the Route, Not the Material
On our job sites, we do not start by asking whether the path should be gravel, stone, brick, or pavers. We start by asking where the path needs to work. A path that looks good on paper but fights the way people move will eventually get bypassed by worn grass, muddy shortcuts, or awkward planting beds.
#1 Best Overall
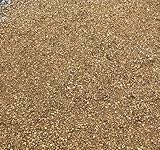
- NATURAL DECOMPOSED GRANITE – Finely crushed natural granite with a warm, earthy appearance for pathways, patios, garden areas and landscaping projects.
- COMPACTABLE FOR PATHWAYS & PATIOS – DG can be spread, graded and compacted to create a firmer walking surface for garden paths, walkways, patio areas and other outdoor projects.
- PAVER BASE & LANDSCAPING – Versatile material for small paver projects, landscape borders, garden areas and other applications where compactable crushed stone is useful.
- 40 LB SIZE FOR LARGER PROJECTS – Best option in this family for pathways, patios, landscaping, paver projects and other applications requiring greater coverage.
- REAL NATURAL STONE – Color, particle size and texture naturally vary. Decomposed granite contains a mixture of small granite particles and fines that help the material compact.
Lay out the proposed route with a garden hose, marking paint, stakes, or flags. Walk it for several days before digging. Carry a laundry basket, push a wheelbarrow, drag a hose, and approach the path from the driveway, patio, gate, shed, and garden beds. Those tests expose tight curves, poor sightlines, awkward transitions, and routes that are too narrow for real use.
Good path widths are fairly predictable. An 18- to 24-inch stepping-stone path works for a quiet secondary route through plantings. A 30- to 36-inch path is comfortable for one person. A 42- to 48-inch path is better where two people may pass, where a wheelbarrow or stroller is common, or where accessibility matters. If the path connects a main entry, driveway, patio, or outdoor kitchen, err on the wider side.
Also look at the destination. A garden path should lead somewhere: a bench, gate, patio, water feature, compost area, shed, raised beds, or a loop back to the house. Dead-end paths can work, but they need a reason to exist and enough space at the end to turn around comfortably.
Free tools Windows power users keep installed
One-click scans. No signup required.
Plan Drainage Before You Dig
Drainage is where many attractive garden paths fail. Water that crosses the surface creates mud on mulch paths, algae on stone, washouts in gravel, and ice in cold climates. Water pushed toward the house, garage, basement window wells, or a neighbor’s property can create bigger problems than the path was meant to solve.
Hard paths should usually have a subtle pitch away from structures. A common target is about 1/8 inch to 1/4 inch of fall per foot, depending on the surface, site conditions, and accessibility goals. The path should not be perfectly flat unless the surrounding grading and drainage system already handle water well.
Watch the yard during a heavy rain if you can. Note where downspouts discharge, where mulch floats, where puddles sit longer than 24 hours, and where soil stays soft. If the proposed path crosses a drainage path, solve that before installation. Options include regrading, a shallow swale, a drain inlet, a dry creek bed, permeable paving, or an overflow route that sends water safely away from structures.
Permeable materials such as gravel, decomposed granite, open-joint pavers, and permeable pavers can reduce runoff and erosion, but they are not magic. They still need a properly designed base, containment, grading, and maintenance. If the subsoil is compacted clay, water may enter the path and then sit there unless the base has somewhere to drain.
Quick wins for a faster PC:
Clear out junk files and repair common Windows errorsFree Scan →Scan for outdated or missing drivers - takes under a minuteDriver Scan →Call 811 and Check Local Rules
Call 811 a few business days before digging, even for a shallow garden walkway. Landscape projects can still hit irrigation lines, low-voltage lighting, gas, electric, communication, drainage, or private utility lines. Public utility marking does not always locate every private line, so ask the homeowner, review irrigation plans if available, and use caution around known service areas.
Permit requirements vary by city, county, HOA, and project scope. A simple loose gravel garden path may not need a permit, while a front walkway, work near a public sidewalk, major grading, retaining edges, steps, lighting, drainage tie-ins, or accessibility-related work may trigger local requirements. In neighborhoods with HOAs, material, color, width, and front-yard changes may also require approval.
Accessibility is another early design decision. ADA standards are not automatically required for every private residential garden path, but they provide useful guidance. Accessible routes should be firm, stable, slip-resistant, and generally at least 36 inches clear. A walking surface should not be steeper than 1:20. Steeper sections become ramps in ADA contexts, where 1:12 is a key maximum slope and additional ramp rules apply.
Choose the Right Garden Path Material
The right material depends on the path’s job. A woodland path can be informal and soft. A main entry walk should be stable, clean, and easy to shovel or sweep. A kitchen-garden path should handle carts, wet shoes, dropped soil, and repeated use. Match the material to the traffic level, maintenance tolerance, soil, slope, and desired style.
Recommended Free Tools
Mulch and Wood Chip Paths
Mulch and wood chips are the most natural-looking and forgiving options for informal garden paths. They are comfortable underfoot, easy to shape around planting beds, and inexpensive compared with stone or pavers. They work well in woodland gardens, vegetable gardens, and secondary paths where a soft surface is acceptable.
The tradeoff is maintenance. Mulch decomposes, migrates, and needs topping up. Expect to refresh it every 1 to 3 years depending on rainfall, slope, traffic, and material quality. It is not ideal for wheelchair access, snow removal, steep slopes, or areas that receive concentrated runoff.
Gravel and Crushed Stone Paths
Gravel can be durable, attractive, and cost-effective when installed correctly. For walking stability, angular crushed stone usually performs better than rounded pea gravel because the pieces lock together. Pea gravel looks soft and decorative, but it shifts underfoot and needs strong edging. It is not the best choice where walkers, wheelchairs, strollers, bikes, or snow shovels are expected.
A typical gravel path may use excavation, compacted subgrade, geotextile where soil conditions warrant, 3 to 5 inches of compacted crushed aggregate, edging, and a finish layer. Fabric can help separate soil from aggregate in some installations, especially over soft or silty soil, but it does not eliminate weeds. Weed seeds still blow in from above and germinate in organic debris that collects on the surface.
Windows Errors? Fix Them Before They Spread
Repair common Windows errors and clear accumulated junk for a smoother, more stable PC - no reinstall needed.Free scan · no reinstallOutdated Drivers Are Slowing You Down
One free scan finds every outdated or missing driver and matches the right update for your exact hardware.Free scan · exact hardware matchDecomposed Granite
Decomposed granite, often called DG, gives a more refined natural look than loose gravel. It can be installed loose or with a stabilizer. Stabilized DG is firmer and better for frequent walking, but it still needs proper base prep, compaction, edging, and occasional maintenance. It works best on gentle grades and in climates where heavy freeze-thaw movement is not severe.
Stepping Stones and Flagstone
Stepping stones are ideal for informal garden movement where the path should feel light and integrated with planting. For comfort, test spacing before setting the stones. Many adults are comfortable around 24 inches center-to-center, but the right spacing depends on stone size, stride, and the users of the garden.
Flagstone can be set as individual stones, tight-jointed on a compacted base, or mortared over a concrete slab. Dry-laid flagstone with planted joints gives a natural look, but uneven stones can create trip points if not selected and installed carefully. Thicker stone costs more but is less likely to rock or crack when properly supported.
Brick and Concrete Pavers
Pavers are a strong choice for main garden paths, entries, patios, and high-traffic routes. They offer predictable dimensions, good slip resistance when selected properly, and easier repair than poured concrete because individual units can be lifted and reset.
Rank #2
- NATURAL DECOMPOSED GRANITE – Finely crushed natural granite with a warm, earthy appearance for pathways, patios, garden areas and landscaping projects.
- COMPACTABLE FOR PATHWAYS & PATIOS – DG can be spread, graded and compacted to create a firmer walking surface for garden paths, walkways, patio areas and other outdoor projects.
- PAVER BASE & LANDSCAPING – Versatile material for small paver projects, landscape borders, garden areas and other applications where compactable crushed stone is useful.
- 10 LB SIZE FOR DIY PROJECTS – Convenient quantity for small pathways, garden areas, landscape borders, paver projects and other targeted DIY applications.
- REAL NATURAL STONE – Color, particle size and texture naturally vary. Decomposed granite contains a mixture of small granite particles and fines that help the material compact.
For interlocking concrete pavers, pedestrian walks commonly need a 4- to 6-inch compacted aggregate base, a bedding layer, edge restraints, joint material, and a drainage plan. Skipping edge restraints is one of the most common causes of paver spread, uneven joints, and edge failure.
Concrete Walkways
Concrete is clean, durable, and practical for primary routes. It is often the best choice where snow removal, accessibility, heavy use, or low maintenance matters more than a natural look. It can be broom-finished, edged, colored, stamped, or combined with planting pockets, but concrete is less forgiving of poor subgrade prep and drainage. Cracks are easier to reduce than eliminate.
2026 Garden Path Cost Guide
Walkway pricing varies widely because the visible surface is only part of the job. Excavation, base depth, soil condition, compaction, edging, drainage work, curves, access, disposal, steps, lighting, and local labor rates can change the final number quickly.
As a planning example, a 3-foot-wide by 40-foot-long path is 120 square feet. At $8 per square foot, that is about $960. At $25 per square foot, it is about $3,000. At $40 per square foot, it is about $4,800. That same footprint may cost much more if it needs drainage correction, retaining edges, hand-cut stone, or difficult hauling access.
| Path Material | Typical 2026 Installed Cost | Best Use | Main Tradeoff |
|---|---|---|---|
| Mulch or wood chips | About $3-$8 per sq. ft. | Informal garden and woodland paths | Needs regular replenishment |
| Pea gravel or basic gravel | About $3-$8 per sq. ft.; small pea gravel walks average around $335 nationally | Budget garden paths with good edging | Loose rounded gravel shifts underfoot |
| Concrete | National average around $1,620 for typical walkway projects | Main walks, utility routes, accessibility | Can crack if base or joints are wrong |
| Concrete pavers | About $9-$20 per sq. ft. for basic work; $15-$40 per sq. ft. for higher-quality installs | Durable garden walks and entries | Requires proper base and edge restraints |
| Natural stone or flagstone | About $16-$35+ per sq. ft. | Premium natural garden paths | Higher labor, irregular thickness, more fitting |
National 2026 averages put pea gravel walkways around $335, concrete around $1,620, and paver walkways around $2,480. Those numbers are useful for orientation, not as a substitute for a site-specific bid. A premium paver or stone walkway can easily run $3,000 to $8,000 or more for a 40-foot path wide enough for two people.
DIY material-only budgets often look much lower because they leave out compactor rental, aggregate base, delivery fees, hauling and disposal, edging, drainage fixes, tool wear, and the cost of rework if the path settles. For a small secondary path, DIY can make sense. For a primary walkway, the base and drainage deserve the same respect as the surface material.
Build the Base Correctly
The base is the path. The surface is what you see. When a path settles, rocks, puddles, spreads, or grows weeds, the failure usually started below the finish layer.
For a typical paver garden path, the sequence is excavation, subgrade shaping, compaction, aggregate base, compaction in lifts, bedding layer, pavers, edge restraints, joint material, and final compaction. For pedestrian paver walks, a 4- to 6-inch compacted aggregate base is a common minimum. Poor soil, freeze-thaw climates, wet areas, or heavier use may require more.
What’s actually slowing this PC down?
Pick the symptom - the matching free tool is one click away.
For gravel, we still want structure. A compacted subgrade, appropriate separation fabric when soil conditions call for it, angular crushed base, a finish layer, and firm edging all matter. Loose stone dumped over grass or topsoil may look fine for a season, then sink, spread, and invite weeds.
Soil type changes the details. Sandy soil drains well but may need stronger containment. Clay soil holds water and can pump fines into the base if separation and drainage are ignored. Organic topsoil should be removed from the path footprint because it compresses and decomposes. In cold regions, saturated bases are especially risky because freeze-thaw cycles move water, lift surfaces, and open joints.
Compaction should not be an afterthought. On small paths, a hand tamper may work for minor repairs or stepping stones, but larger gravel and paver paths typically need a plate compactor. Compact aggregate in manageable lifts rather than dumping the full depth at once. If the base feels soft underfoot before the finish goes down, the finished path will not improve with time.
Use Edging That Matches the Surface
Edging keeps the path from slowly becoming part of the lawn or planting bed. Gravel, decomposed granite, brick, and pavers all need restraint. Without it, foot traffic, freeze-thaw movement, carts, and rain push material outward.
For natural garden paths, edging can be steel, aluminum, stone, brick, pressure-treated lumber rated for ground contact, concrete curb, or manufactured paver edge restraint. Steel and aluminum give a clean, minimal line. Stone and brick feel more traditional. Plastic edging can work in light-duty areas, but it must be installed firmly and pinned well or it will heave and wave over time.
Set edging high enough to contain the surface but not so high that it becomes a trip edge. On gravel paths, the finished stone should sit slightly below the top of the edging. On pavers, the edge restraint should lock the field in place without being visually distracting.
Blend the Path Into the Garden
A nature path should not look like a sidewalk dropped into a planting bed. The route, material, joints, edges, and planting should work together. That does not mean the path has to be rustic. It means the construction should feel intentional.
Use curves where they serve the garden, not just for decoration. A gentle curve can reveal a bench, specimen tree, water feature, or change in planting texture. Tight curves look forced and are hard to navigate with wheelbarrows or garden carts. If maintenance equipment will use the path, make the turns broad enough to move without cutting corners into the beds.
Planting matters. Keep mature plant size in mind. A one-gallon shrub may look harmless beside a new path, but in three years it may cover 18 inches of walking space and trap moisture against stone. Low groundcovers can soften stepping stones, but choose varieties that tolerate foot traffic and do not create slippery mats. Avoid thorny, brittle, or high-water plants right at the path edge.
Lighting should be deliberate. We usually focus lights at steps, transitions, curves, destination points, and grade changes rather than lining both sides of a path like a runway. Low-voltage fixtures, shielded downlights, and warm color temperatures can improve safety without overpowering the garden at night.
Independent reader supportYour contribution helps us test, update, and keep practical guides available for everyone.Make the Path Comfortable and Safe
A path should feel stable under normal walking conditions. Avoid high lips, rocking stones, slick surfaces, uneven joints, and sudden changes in height. Where a path meets a patio, driveway, deck stair, gate, or lawn, make the transition obvious and smooth.
Rank #3
- NATURAL DECOMPOSED GRANITE – Finely crushed natural granite with a warm, earthy appearance for pathways, patios, garden areas and landscaping projects.
- COMPACTABLE FOR PATHWAYS & PATIOS – DG can be spread, graded and compacted to create a firmer walking surface for garden paths, walkways, patio areas and other outdoor projects.
- PAVER BASE & LANDSCAPING – Versatile material for small paver projects, landscape borders, garden areas and other applications where compactable crushed stone is useful.
- 20 LB SIZE FOR MEDIUM PROJECTS – More material for garden paths, patio areas, landscaping, paver projects and other medium-size home improvement applications.
- REAL NATURAL STONE – Color, particle size and texture naturally vary. Decomposed granite contains a mixture of small granite particles and fines that help the material compact.
For stepping stones, set each stone firmly on a compacted base or bedding layer, not loose soil. The top should sit slightly above surrounding mulch or groundcover so it does not disappear, but not so high that it catches toes. Test the path with different users if children, older adults, or guests will use it regularly.
Do these 3 things before closing this tab:
1Fix the driver behind crashes, sound loss and screen glitches2Clear out junk files and repair common Windows errors3Scan for outdated or missing drivers - takes under a minuteFor accessible or stroller-friendly routes, loose pea gravel and large irregular stepping stones are usually poor choices. Concrete, well-installed pavers, stabilized decomposed granite, or compacted crushed stone with the right gradation can perform better. Keep cross-slope modest, avoid abrupt vertical changes, and maintain at least 36 inches of clear width where accessibility is a goal.
In freeze-thaw climates, avoid trapping water in the path section. Water that sits in joints, under stones, or in the base can freeze, expand, and move the surface. Proper excavation, aggregate selection, compaction, drainage, and joint maintenance are what keep the path usable after winter.
When to DIY and When to Hire a Pro
A homeowner with patience, basic tools, and a free weekend can often handle a small mulch path, stepping-stone path, or short gravel garden path. A realistic DIY pace for excavation, base prep, and finish work is slower than most people expect. For a 30- to 50-foot path, plan on multiple days if you are hauling material by wheelbarrow, cutting sod, compacting base, and setting edging.
DIY is most reasonable when the path is short, the grade is gentle, drainage is already good, the material is forgiving, and the path is not a primary entry or accessibility route. It also helps if disposal is simple and bulk materials can be delivered close to the work area.
Recommended Free Tools
Hire a professional when the path affects drainage near the house, crosses a slope, needs steps or railings, must meet accessibility or HOA standards, connects to public walks, requires concrete or paver cutting, or needs a long-lasting base in poor soil. A pro is also worth considering when the project involves lighting, drain lines, retaining edges, large stone, tight tolerances, or expensive finish materials.
The cost of professional installation is not just labor. It includes layout, excavation, base design, compaction equipment, hauling, drainage judgment, cutting, edge restraint, cleanup, and accountability. For a path you will use every day, those details decide whether it still looks good in year five.
Maintenance by Material
Every garden path needs maintenance. The question is how much and what kind. Mulch paths need replenishing and occasional reshaping. Gravel paths need raking, weed removal, and top-dressing where stone migrates. Decomposed granite may need recompaction and surface renewal. Paver paths need joint maintenance, edge inspection, and occasional resetting if settlement occurs. Natural stone needs cleaning, joint care, and correction of any rocking pieces.
Weeds are best handled by combining good construction with routine care. Remove organic topsoil from the path base, use proper aggregate, keep edges tight, and blow or sweep leaves before they break down into soil. Landscape fabric can help separate layers in some gravel installations, but it is not a permanent weed shield. Most weeds in mature paths come from seeds landing on top.
Do these 3 things before closing this tab:
1Clear out junk files and repair common Windows errors2Scan for outdated or missing drivers - takes under a minute3Repair Windows errors before they cause bigger problemsPlan seasonal checks. After heavy rain, look for washouts, ponding, or sediment crossing the path. After winter, check for heaved edges, loose stones, open paver joints, and low spots. Fix small movement early. A 20-minute reset is better than rebuilding a failed section later.
A Practical Build Sequence
For a durable garden path, use this sequence as a planning checklist. First, mark the route and live with it for several days. Second, call 811 and confirm local restrictions. Third, establish the finished width, slope, and drainage direction. Fourth, excavate organic material and shape the subgrade. Fifth, compact the subgrade and install separation fabric if the soil calls for it. Sixth, place and compact aggregate base in lifts. Seventh, install edging or edge restraints. Eighth, place bedding or finish material. Ninth, set stones, pavers, gravel, mulch, or DG to the correct elevation. Tenth, test the path in wet and dry conditions and adjust before planting tight to the edge.
The most beautiful garden paths are not the ones with the most expensive stone. They are the ones that fit the yard, drain correctly, feel good underfoot, and age well. When the route, base, edging, material, and planting all work together, the path becomes part of the garden instead of a repair project waiting to happen.
Frequently Asked Questions
How much does it cost to build a garden path in 2026?
Most simple gravel or mulch-style garden paths cost about $3 to $8 per square foot installed. Basic paver paths often run $9 to $20 per square foot, higher-quality paver walkways commonly cost $15 to $40 per square foot, and natural stone or flagstone paths usually run $16 to $35+ per square foot.
Quick wins for a faster PC:
Fix the driver behind crashes, sound loss and screen glitchesFind Drivers →Repair Windows errors before they cause bigger problemsFix Now →What is the cheapest material for a garden path?
Mulch, wood chips, and basic gravel are usually the cheapest garden path materials. They are good for informal paths, but they need edging, periodic maintenance, and proper drainage to avoid spreading, weeds, and muddy spots.
How wide should a garden path be?
Use 18 to 24 inches for a narrow stepping-stone path, 30 to 36 inches for a comfortable single-person garden path, and 42 to 48 inches where two people, a wheelbarrow, stroller, or accessibility may matter.
What is the best base for a paver garden path?
A paver garden path typically needs compacted subgrade, 4 to 6 inches of compacted aggregate base for pedestrian use, a bedding layer, edge restraints, joint material, and a drainage plan. Poor soil, wet areas, or freeze-thaw climates may require a deeper base.
Are gravel paths accessible for wheelchairs or strollers?
Loose pea gravel is usually not a good accessible surface because it shifts under wheels and feet. For better access, consider concrete, properly installed pavers, stabilized decomposed granite, or compacted angular crushed stone designed to be firm, stable, and slip-resistant.
Do I need a permit to build a garden walkway?
Permit rules vary by location. Small informal garden paths often do not need permits, but work near public sidewalks, drainage changes, front-yard hardscaping, steps, lighting, retaining edges, or HOA-regulated areas may require approval. Always call 811 before digging.
Quick Recap
Product prices and availability are accurate as of the date/time indicated and are subject to change. Any price and availability information displayed on Amazon at the time of purchase will apply.

