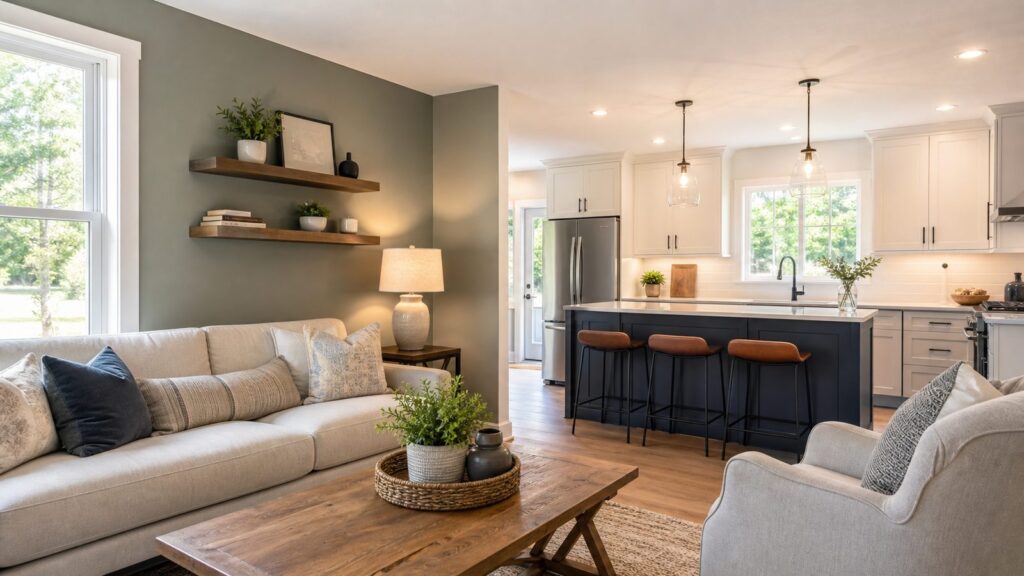
The easiest DIY home projects are not the ones that skip planning. They are the ones that stay cosmetic, use existing wiring or plumbing, avoid structural changes, and improve what you see every day: color, light, hardware, clean edges, and finished surfaces.
On our job sites, the fastest room transformations usually come from the same handful of upgrades: fresh paint, better lighting, new cabinet pulls, a cleaner faucet, corrected caulk lines, and trim that makes a plain wall look intentional. Most of these can be completed in a weekend with basic tools. The difference between a clean DIY result and a frustrating one is almost always prep, layout, and knowing when the work has crossed into electrical, plumbing, moisture, or code territory.
Use this guide as a practical filter. If a project is reversible, surface-level, and uses existing services, it is usually a good DIY candidate. If it requires new wiring, moving plumbing, opening unknown walls, fastening heavy loads, disturbing old paint, or penetrating the exterior envelope, price the project with a qualified pro before you start.
As an Amazon Associate I earn from qualifying purchases.
Free tools Windows power users keep installed
One-click scans. No signup required.
Quick Cost and Difficulty Comparison
Costs vary by region, house age, material quality, and how much repair work is hiding behind the finish. The figures below reflect common 2026 U.S. ranges from national cost data and what homeowners should realistically budget before buying materials.
| Project | Typical DIY Time | Common DIY Cost | Typical Pro Cost Range | Best DIY Fit |
|---|---|---|---|---|
| Paint a room or accent wall | 4-12 hours | $75-$350 | About $1,000-$2,900 for many room projects | Sound drywall, simple color change |
| Swap cabinet knobs or pulls | 1-4 hours | $40-$400 | Often $100-$300 for simple installs; larger kitchens vary widely | Existing cabinets, careful layout |
| Install backsplash | 1-2 days | $150-$800 | About $480-$1,500 for many 35 sq ft projects | Clean, flat wall and simple pattern |
| Replace a faucet | 1-3 hours | $100-$500 | Often $97-$369; complex kitchen installs can run higher | Good shutoff valves and matching holes |
| Update light fixtures | 30-90 minutes each | $60-$600 per fixture | About $75-$125 for basic installs; more for difficult work | Existing rated electrical box |
| Refresh caulk and grout | 2-6 hours plus cure time | $25-$150 | Often handyman-priced by time and scope | Cosmetic gaps, no active leak |
1. Paint an Accent Wall or Full Room
Paint is still the highest-impact DIY update because it changes the largest visible surface in the room. A single accent wall can be done in half a day. A full bedroom or office usually takes one full day when you include patching, sanding, masking, two coats, and cleanup.
#1 Best Overall

- Sold as 1 Each.
- Paint ready in only 30 minutes to finish the job faster..
- Excellent flexibility and adhesion for a crack proof seal.
- Easy to apply and tool, low in odor and cleans up easily with water..
- Cured caulk. Exceeds ASTM Specification C834. Interior or Exterior use.. 10.1 fl oz, White.
For 2026 budgeting, professional interior painting often lands around $1,000-$2,900 for many room or wall painting projects, with common pricing near $2-$3 per square foot depending on prep and scope. DIY paint for one room is usually much lower, often $75-$350 for paint, primer, rollers, trays, tape, drop cloths, patch compound, sanding sponges, and caulk.
How to make paint look professional
Start with the wall, not the color. Fill nail holes, cut out loose paper, sand raised patches, and wipe dust before opening the paint can. Use a stain-blocking primer where you have water marks, smoke residue, raw drywall compound, or patched areas that flash under light. For most living spaces, eggshell or matte washable paint gives a modern look without highlighting every small wall defect. In baths, laundry rooms, and kitchens, use a moisture-tolerant paint rated for frequent cleaning.
Buy a quart sample and paint a 2-foot by 2-foot test area or sample board. Check it in morning light, evening light, and with the bulbs you actually use. A warm 2700K bulb can make a neutral wall look creamy; a 4000K bulb can make the same color read gray or stark.
When to stop
If the home was built before 1978, do not sand or scrape old paint casually. Lead dust is a serious hazard. Paid renovation work in pre-1978 housing is subject to EPA lead-safe rules, and homeowners doing their own work should still use lead-safe containment, cleanup, and testing practices. Stop if paint is peeling broadly, plaster is crumbling, or you find moisture stains that are still damp.
2. Swap cabinet knobs and pulls
Cabinet hardware is a small project that changes the feel of a kitchen, bath vanity, laundry room, or built-in without touching the cabinets themselves. It is also one of the easiest places to make a visible mistake, because one crooked pull repeats across the whole room.
Basic hardware can cost $2-$15 per knob and $5-$30 per pull, with premium finishes and larger appliance pulls costing more. Simple professional installation is often around $100-$300, while larger kitchens with 20-40 pulls can vary from roughly $120-$2,400 depending on labor, layout, wood species, and hardware count.
Quick wins for a faster PC:
Clear out junk files and repair common Windows errorsFree Scan →Scan for outdated or missing drivers - takes under a minuteDriver Scan →Layout before drilling
Use a cabinet hardware jig or make a painter’s-tape template. For doors, many pulls look right with the lower or upper hole about 2-1/2 to 3 inches from the corner, but stile width and door style matter. For drawers, center the pull horizontally and vertically on flat drawer fronts. Wide drawers over 30 inches often look better with two pulls, usually placed around the outer thirds.
Drill from the finished face and hold scrap wood tight against the back side to reduce tear-out. If you are replacing existing pulls, measure center-to-center spacing exactly. Common sizes include 3 inches, 3-3/4 inches, 5 inches, and 6-5/16 inches, but older cabinets do not always follow current hardware standards.
3. Install a Peel-and-Stick or Simple Tile Backsplash
A backsplash updates a kitchen quickly because it sits at eye level and ties together counters, cabinets, fixtures, and lighting. The simplest DIY path is peel-and-stick tile over a clean, sound, flat wall. A traditional tile backsplash is still approachable for a careful homeowner, but it requires more layout discipline and drying time.
For professional backsplash installation in 2026, many projects fall around $480-$1,500 for about 35 square feet, with averages near $1,000. Per-square-foot figures often range from $15-$40, while detailed cost models can start around $32.95-$56.21 per square foot depending on material, cuts, grout, edge trim, and wall prep. DIY peel-and-stick can be under $300 for a small kitchen. DIY ceramic or porcelain tile commonly lands around $250-$800 once you include tile, adhesive, spacers, trim, grout, sealer, and a tile cutter or wet saw rental.
Recommended Free Tools
Backsplash prep checklist
Remove switch plates, shut off power to the work area when working around outlets, clean the wall with degreaser, and scrape off raised paint or old adhesive. Establish a level reference line rather than trusting the countertop, because many counters are slightly out of level. Dry-fit the first row, corners, outlets, and exposed ends before adhesive touches the wall.
Plan edge terminations. A backsplash that stops randomly on an open wall looks unfinished. Use bullnose tile, metal edge trim, a clean vertical stop aligned with an upper cabinet, or a full-height return at the side of a cabinet run.
When to hire a pro
Bring in help if the wall is wavy, the pattern is herringbone or another layout-heavy design, outlets need to be extended properly, or the backsplash area has water damage. Tile is a finish, not a repair for a bad substrate.
4. Replace a Faucet Without Moving Plumbing
A new faucet can make an older kitchen or bath feel cleaner immediately, especially when paired with matching cabinet hardware and a fresh drain trim. The key phrase is without moving plumbing. Replacing like-for-like is a reasonable DIY project. Changing sink holes, moving supply lines, replacing corroded valves, or modifying drains can become real plumbing work quickly.
Crashes, No Sound, or Screen Glitches?
Random freezes, missing sound and display glitches usually trace back to one bad driver. Find and replace yours safely.Free scan · under a minuteWindows Errors? Fix Them Before They Spread
Repair common Windows errors and clear accumulated junk for a smoother, more stable PC - no reinstall needed.Free scan · no reinstallIn 2026, many faucet installations run around $97-$369, with common bathroom faucet replacement averages near $270. Kitchen faucet installations can cost more, with detailed models starting around $467-$773 where access, sink configuration, sprayers, filters, disposals, or old connections complicate the job. DIY cost is usually the faucet plus supply lines and small parts, often $100-$500 depending on quality.
Before buying the faucet
Take photos under the sink. Confirm the number of sink or countertop holes, hole spacing, supply line size, shutoff valve condition, deck thickness, backsplash clearance, and whether there is room for the handle to move. A common bathroom spread is 4 inches for centerset faucets or 8 inches for widespread faucets. Kitchen sinks may use one, two, three, or four holes depending on sprayers, soap dispensers, and air gaps.
Rank #2

- The information below is per-pack only
- Sold as 1 Each.
- Paint ready in only 30 minutes to finish the job faster..
- Excellent flexibility and adhesion for a crack proof seal.
- Easy to apply and tool, low in odor and cleans up easily with water..
Test the shutoff valves before starting. If they do not close fully, feel frozen, or start weeping when touched, stop and schedule a plumber. A $180 faucet project can become an emergency if a brittle shutoff valve fails after the supply house has closed.
5. Update Light Fixtures
Lighting changes both style and perceived quality. A dated dome light, builder-grade vanity bar, or undersized dining fixture can make a finished room feel temporary. Replacing a fixture at an existing, properly rated electrical box is often straightforward. Adding new lights, moving fixtures, installing new boxes, or opening ceilings is different work.
What’s actually slowing this PC down?
Pick the symptom - the matching free tool is one click away.
Basic fixture installation is commonly advertised around $75-$125 in simple conditions. Broader 2026 ranges often run about $191-$631 for typical lighting installation, with standard fixture projects from roughly $158-$1,021 and heavy chandeliers reaching much higher. DIY material cost is the fixture, bulbs, connectors, and possibly a dimmer, commonly $60-$600 per location.
Size and temperature matter
For dining rooms, a fixture diameter of about one-half to two-thirds the table width usually looks balanced. Over an island, leave about 30-36 inches from the countertop to the bottom of pendants. In hallways and small rooms, check door swings and head clearance before buying a deep fixture.
Use consistent bulb temperature. Warm white 2700K works well in bedrooms, living rooms, and dining spaces. A 3000K lamp is a clean middle ground for kitchens and baths. Avoid mixing 2700K, 3000K, and 5000K bulbs in one open area unless you want the room to feel patched together.
Electrical limits
Turn off the breaker, verify power is off with a tester, and confirm the fixture box is secure. If you find scorched wires, brittle insulation, aluminum wiring, knob-and-tube wiring, no electrical box, or a fixture hanging from drywall alone, stop. That is electrician territory.
The Tool Desk
Outbyte PC Repair FREERepair Windows errors before they cause bigger problemsFix Now →Outbyte Driver Updater FREEFix the driver behind crashes, sound loss and screen glitchesFind Drivers →6. Add Dimmers or smart switches Where Wiring Is Compatible
Dimmers are a small upgrade with a big effect because they let one room handle tasks, meals, and evening use without changing fixtures. Smart switches can add scheduling and app control, but only when the wiring and load are compatible.
Many dimmers cost $20-$70. Smart switches often cost $25-$100 each. Professional electrical visits vary by market, but bundling several switches or fixtures into one visit usually makes more sense than paying separate trip charges.
Check the wall box before buying. Many smart switches need a neutral wire. Older switch loops may not have one. Also confirm the dimmer is compatible with LED bulbs and with the fixture type. A cheap incompatible dimmer can cause flicker, buzzing, limited range, or early bulb failure.
Do not guess on wiring
If the box is crowded, wiring colors do not match diagrams, there is no ground, the insulation is brittle, or you are not fully comfortable identifying line, load, neutral, and ground, hire an electrician. Switch work looks simple from the outside, but bad connections can overheat inside the wall.
Do these 3 things before closing this tab:
1Clear out junk files and repair common Windows errors2Scan for outdated or missing drivers - takes under a minute3Repair Windows errors before they cause bigger problems7. Install floating shelves That Are Actually Rated for the Load
Floating shelves are a useful update for kitchens, offices, laundry rooms, and living rooms, but they are only easy when the wall and load are understood. A shelf holding framed photos is different from a shelf holding dishes, books, or small appliances.
Rank #3

- Paintable caulk has strong multi-surface adhesion and won't shine through or discolor paint
- Alex Plus caulk is a Siliconized Acrylic Formula that is flexible, durable, and creates a long lasting waterproof seal
- DAP caulk is paintable in 30 minutes, low in odor and cleans up easy with water making projects fast and easy
- Cured caulk creates a quality seal that lasts
- Alex Plus white caulk is for interior and exterior applications with a water ready time of 24 hours
Decide the load before buying hardware. A 30-inch shelf with light decor may only carry 15-25 pounds. A shelf for cookbooks or dinnerware may need 50-100 pounds of real capacity. Manufacturer ratings usually assume proper installation into studs or masonry, not just drywall anchors.
Use a stud finder, verify with a small pilot hole when needed, and fasten the bracket into framing wherever possible. Standard wood studs are commonly 16 inches on center, but remodels, old homes, and partition walls vary. For drywall-only locations, use rated toggle anchors and stay well below the published maximum, especially for anything projecting far from the wall.
Where DIY gets risky
Be careful near plumbing walls, electrical panels, tile, fireplaces, and exterior walls. Do not drill blindly above or below outlets and switches. If the shelf supports valuable items or could injure someone if it fails, use structural blocking or a pro-installed support system.
8. Add peel-and-stick wallpaper or wall panels
Wallpaper and wall panels can add pattern, depth, and a finished backdrop faster than furniture shopping. Peel-and-stick wallpaper works well for powder rooms, offices, backs of built-ins, closet interiors, and single feature walls. Paintable wall panels or picture-frame molding can make a plain wall look custom at a modest cost.
Professional wallpaper installation often varies widely based on wall condition, pattern matching, ceiling height, and paper type. DIY peel-and-stick rolls commonly cost $30-$80 each, and many feature walls need 2-5 rolls. Thin wall panel kits and molding packages may range from $100-$600 for a small room or accent wall, depending on material.
Test adhesion first
Apply a sample piece and leave it for several days. Fresh paint, textured walls, high humidity, and dusty surfaces can all cause failure. Most peel-and-stick products perform best on smooth, clean, fully cured paint. If the wall was painted recently, wait the manufacturer’s recommended cure time, often 2-4 weeks.
For panels or molding, map outlet locations, baseboard height, switch plates, and furniture placement. Use a level and a story pole so repeated rectangles or battens stay consistent. A 1/8-inch layout error at the first piece can become obvious by the last piece.
9. Replace Bath Accessories and mirrors
Bathrooms date themselves through small pieces: towel bars, robe hooks, toilet paper holders, mirror shape, vanity light, faucet finish, and caulk color. Replacing accessories and a mirror can update the room without opening plumbing or tile.
Budget $75-$400 for towel bars, hooks, paper holder, mirror, anchors, and touch-up materials in a typical bath. Larger framed mirrors, medicine cabinets, and heavy round mirrors can push costs higher. A handyman can often bundle these with hardware, shelving, and caulk work in one visit.
Fastening is the project
Do not rely on the tiny anchors that come in every box. Towels pull outward and downward every day. Hit studs where possible, or use high-quality anchors rated for the wall material. For mirrors, use the manufacturer’s mounting system and check the weight. A 24-inch by 36-inch framed mirror can easily weigh 15-35 pounds, while larger glass can weigh much more.
If you are removing a glued builder mirror, work slowly. Large mirrors can crack without warning. Tape the glass, protect the vanity top, wear gloves and eye protection, and get a second person. If the mirror is oversized or tightly trapped between walls, hire someone who does this regularly.
Rank #4

- White caulk adheres to wood, plaster, drywall, & masonry
- All purpose acrylic DAP caulk is water ready in 24 hours
- Paintable caulk is paint ready in 2 hours
- Alex Painters caulk is low in odor and cleans up easily with just water
- Alex Painters caulking works for interior and exterior applications
10. Refresh Caulk and Grout
Clean caulk lines can make a bath or kitchen look maintained immediately. Failed caulk can also be an early sign of movement or moisture, so treat this project as both cosmetic and diagnostic.
DIY materials are inexpensive: $8-$15 per tube of caulk, $10-$25 for remover or scraper tools, $10-$20 for grout cleaner, and $15-$40 for grout colorant or sealer. Most small bathrooms can be addressed for $25-$150 in materials.
Use the right product
Use 100% silicone at wet joints: tub-to-tile, shower corners, sink backsplashes, and countertops near water. Use paintable acrylic-latex caulk where trim will be painted, such as baseboards, casing, and crown molding. Do not use painter’s caulk inside a shower and do not paint over standard silicone unless the product specifically allows it.
Remove failed caulk fully before applying new material. Cut a small angled tip, apply a steady bead, tool it once, and leave it alone. Many silicone products need 24 hours before water exposure, and some need longer depending on bead size and humidity.
When caulk is not enough
Stop if you find soft drywall, loose tile, black staining that continues behind the finish, swollen baseboards, active leaks, or a persistent sewage smell. New caulk can hide a problem for a few weeks while water keeps damaging the assembly.
Independent reader supportYour contribution helps us test, update, and keep practical guides available for everyone.11. Add Crown Molding, Trim, or Picture-Frame Molding
Trim gives a room architecture. Crown molding can make a ceiling line feel finished, while picture-frame molding or chair rail can add depth to flat drywall. This is a good DIY project for patient homeowners with a miter saw, level, nailer, and tolerance for measuring twice.
Professional crown molding installation often ranges widely by material and complexity. National 2026 cost references commonly show several dollars per linear foot for simpler work, with higher totals when rooms have many corners, tall ceilings, stain-grade wood, plaster conditions, or extensive paint prep. DIY MDF or finger-jointed pine trim for one room may cost $150-$600 in material, caulk, nails, primer, and paint.
Choose forgiving materials
Paint-grade MDF or finger-jointed pine is more forgiving than stain-grade hardwood. In rooms with normal 8- or 9-foot ceilings, a 3-1/4-inch to 4-5/8-inch crown profile often looks balanced. Oversized crown in a small room can feel heavy. For picture-frame molding, keep spacing consistent, often 3-4 inches from adjacent trim and corners, and align panels with outlets, switches, and furniture where possible.
Outdated Drivers Are Slowing You Down
One free scan finds every outdated or missing driver and matches the right update for your exact hardware.Free scan · exact hardware matchPC Slower Than It Used to Be?
A free scan shows the junk files, broken settings and background clutter dragging Windows down - then fixes them in one click.Free scan · Windows 10 & 11Inside corners are rarely perfect 90-degree angles. Cope inside corners where you can, or use test pieces to tune your miter cuts. Fill nail holes, caulk paint-grade gaps, prime raw edges, and paint with a durable trim enamel. The finish work is what makes trim look built-in rather than tacked on.
smart thermostat Bonus: Useful, But Check Compatibility
A smart thermostat is not always a visual update, but it can modernize how the home functions. ENERGY STAR reports average savings of about 8% on heating and cooling bills, or roughly $50 per year, though actual savings depend on climate, occupancy, settings, HVAC equipment, and utility rates.
DIY installation is reasonable when the thermostat wiring is labeled, the system is compatible, and the wall has the right conductors. Many smart thermostats need a C-wire or an approved adapter. If the home has a heat pump, dual fuel, boiler, line-voltage thermostat, zone controls, or unlabeled wiring, get HVAC help. Incorrect thermostat wiring can damage control boards or leave the system inoperable.
When to DIY vs. When to Hire a Pro
Easy DIY work has three traits: it is cosmetic, it is reversible, and it uses what is already there. Painting sound walls, replacing cabinet hardware, swapping a mirror of similar size, applying peel-and-stick wallpaper, and refreshing caulk are usually good homeowner projects.
The Tool Desk
Outbyte Driver Updater FREEFix the driver behind crashes, sound loss and screen glitchesFind Drivers →Outbyte PC Repair FREEClear out junk files and repair common Windows errorsFree Scan →Hire a pro when the work involves new wiring, new circuits, moving outlets, moving plumbing, structural attachment, ceiling fan support, exterior penetrations, uncertain older-home materials, or anything that could create water damage, fire risk, or a failed inspection. Local permit rules vary by municipality and adopted code cycle. Many cosmetic finish projects do not need permits, but electrical, plumbing, structural changes, multifamily properties, and HOA-controlled buildings may require approvals.
The stop-work list
Stop DIY work and reassess if you uncover active leaks, mold behind finishes, scorched wiring, no electrical box, a non-fan-rated ceiling box where a fan is planned, crumbling plaster, suspected asbestos, suspected lead paint, structural damage, or shutoff valves that will not close. The right move is not to push through. The right move is to protect the house before the project gets more expensive.
How to Make Several Small Updates Feel Like One Finished Design
The best quick updates look intentional because they repeat a few decisions. Pick one main metal finish for the room: matte black, brushed nickel, polished chrome, oil-rubbed bronze, or warm brass. Then use it consistently on knobs, pulls, faucet, mirror frame, towel bars, and light fixtures. It does not have to match perfectly, but it should look deliberate.
Best Value

- Paintable caulk in a 2.8 ounce size is ideal for small touch-ups and repairs, has strong multi-surface adhesion and won't shine through or discolor paint
- Alex Plus in a compact size with a Siliconized Acrylic Formula that is flexible, durable, and forms a long-lasting waterproof seal
- DAP caulk is paintable in 30 minutes, low in odor and cleans up easy with water making projects fast and easy
- Cured caulk creates a quality seal that lasts no matter what the size of project
- Alex Plus white caulk is for interior and exterior applications with a water ready time of 24 hours
Control contrast. A matte wall color, clean white trim caulk, warmer bulbs, and simple hardware can update a room faster than adding more decor. In kitchens and baths, repeat one finish and one color temperature. In living spaces, pair paint with lighting before judging furniture. Poor light can make good finishes look flat.
Free tools Windows power users keep installed
One-click scans. No signup required.
Bundle small pro tasks when DIY stops making sense. One electrician visit for two fixtures, a dimmer, and a fan-rated box is usually more efficient than three separate calls. One handyman visit for shelves, mirrors, cabinet hardware, and trim touch-ups can reduce trip-charge waste and get the small details finished in one day.
Bottom Line
You do not need a full remodel to make a room feel current. Start with the surfaces and details that carry the most visual weight: paint, light, hardware, faucets, mirrors, caulk, backsplash, and trim. Keep the work in existing locations, test finishes before committing, and respect the hidden systems behind the walls.
That is the builder’s definition of an easy project: low demolition, clear limits, sound materials, and a finish that still looks good after daily use.
Frequently Asked Questions
What DIY project updates a room the fastest?
Paint, lighting, cabinet hardware, mirrors, and faucets usually create the fastest visual change because they affect color, reflectance, finish, and sightlines without changing the floor plan.
What’s actually slowing this PC down?
Pick the symptom - the matching free tool is one click away.
How much should I budget for easy DIY home updates?
Small updates can start around $25-$150 for caulk, grout, or hardware. Paint often costs $75-$350 for a DIY room, while backsplashes, faucets, fixtures, and trim commonly run a few hundred dollars in materials.
Do cosmetic DIY projects need permits?
Many cosmetic projects do not need permits, but rules vary locally. Electrical work, plumbing changes, structural fastening, new outlets, new circuits, multifamily buildings, and HOA properties may require approval.
When should I stop a DIY project and call a pro?
Stop if you find active leaks, mold, scorched wiring, missing electrical boxes, corroded shutoff valves, crumbling plaster, suspected asbestos or lead paint, or structural damage.
Is peel-and-stick backsplash a good DIY option?
It can be, as long as the wall is smooth, clean, dry, and sound. Degrease the surface, dry-fit around outlets and corners, and plan exposed edges before installing.
Do these 3 things before closing this tab:
1Scan for outdated or missing drivers - takes under a minute2Repair Windows errors before they cause bigger problems3Fix the driver behind crashes, sound loss and screen glitchesAre smart thermostats worth installing?
They can be worthwhile when the HVAC wiring is compatible. ENERGY STAR reports average savings around 8% of heating and cooling bills, or about $50 per year, but savings vary by home and usage.
Quick Recap
Product prices and availability are accurate as of the date/time indicated and are subject to change. Any price and availability information displayed on Amazon at the time of purchase will apply.

