PC Slower Than It Used to Be?
A free scan shows the junk files, broken settings and background clutter dragging Windows down - then fixes them in one click.Free scan · Windows 10 & 11Outdated Drivers Are Slowing You Down
One free scan finds every outdated or missing driver and matches the right update for your exact hardware.Free scan · exact hardware matchSome links on this page are affiliate links: if you buy through them we may earn a commission, at no extra cost to you.
For dependable drywall finishing, first choose the finish level required by the final decoration and lighting. Then embed tape in wet joint compound, let each coat dry under the product’s stated conditions, apply progressively wider feathered coats, sand only where necessary, remove dust, and prime before painting or covering the wall. This sequence prevents the most common problems: visible seams, crowned joints, ridges, torn paper and flashing through paint.
There is no single universal coat count or drying time. The Gypsum Association’s GA-214-2022 finish-level guide and manufacturer instructions from USG and CGC define the scope; temperature, humidity, compound type and the intended decoration determine how the work should be completed.
As an Amazon Associate I earn from qualifying purchases.
Do these 3 things before closing this tab:
1Fix the driver behind crashes, sound loss and screen glitches2Repair Windows errors before they cause bigger problems3Scan for outdated or missing drivers - takes under a minuteWhat finish level should you choose?
Choose the finish level before work starts, based on the project specification, the final wall covering and the lighting the surface will receive. A finish level describes how much treatment is applied to joints, inside angles, fasteners, accessories and the panel face; it is not a guarantee that every joint will disappear under every light.
| Level | What the GA-214-2022 quick reference describes | Typical decision point |
|---|---|---|
| 0 | No finishing work. | Temporary construction or a surface that will receive later work. |
| 1 | Tape is embedded in joint compound. | Concealed areas where appearance is not important. |
| 2 | Tape is embedded and wiped; accessories and fasteners receive one coat. | Utility areas or locations receiving a heavy texture. |
| 3 | Additional treatment is applied to joints, fasteners and accessories beyond Level 2. | Areas receiving medium or heavy texture or a less demanding decoration. |
| 4 | Further joint, fastener and accessory coats are applied for a more uniform appearance. | The common choice for many painted, textured or wall-covered interiors. |
| 5 | A thin skim coat or purpose-made surface treatment covers the entire panel face in addition to joint work. | Critical lighting, gloss or other finishes that reveal minor surface variations. |
Levels 3 through 5 are not simply “three, four or five coats everywhere.” The GA-214 table separates flat joints, inside angles, accessories, fasteners and surface treatment. Confirm the exact specification with the builder, designer or project documents, especially where strong side lighting or a smooth sheen will expose differences.
Popular on Amazon

- Great Value Paint Brush Set: Soucolor 20 acrylic paint brushes come in 10 different sizes, making them ideal for fine detailing, model painting, rock painting, nail art, face painting, DIY crafts, and general art projects. The varied brush sizes give you better control for both delicate lines and broader color coverage, while the soft bristles deliver smooth, consistent results on acrylic, oil, watercolor, canvas, wood, ceramic, and more.
- Awesome Set of Paint brushes: Professional paint brushes can cover all of your needs. The multi-purposed brushes are ideal for Watercolor, Oil, Gouache, enamel, Acrylic Painting, Body, Nail, Face Painting, Miniature, Model, Wood, Glass, Cup, Ceramic, Fine work, Art class, Craft Art Painting, DIY Art Crafts etc.
- Soft and long-lasting: The bristles are soft and strong, with nickel metal ferrules and blue wooden handles. After cleaning, the bristles will become soft and fluffy again and will not fall off.
- Easy to clean: it’s very convenient to Wash well in soap and water. Retain shape after drying. the brushes hold up very well. Nice selection to beginners and professionals. Keep them clean and they last a long time.
- Perfect for All Painters & Occasions: Suitable for art beginners, hobbyists and professional artists. Great for art class, home creation, travel painting and DIY handmade projects. A practical art gift for students, teachers, family and craft lovers.
A higher level can reduce, but cannot promise to eliminate, visible joint effects. Framing movement, board installation, light direction and the reflective quality of the decoration still matter.
What do you need before finishing drywall?
Gather clean tools and keep the compound free of dried crumbs or other contamination. The source-supported basic kit is joint compound, paper or other approved drywall tape, finishing knives, a sanding block or pole sander, fine abrasive such as the 150-grit paper described in the CGC/USG guide, a sanding sponge for wet sanding, a damp sponge for dust removal, and drywall primer.
- Joint compound: USG describes all-purpose compound as suitable for embedding tape and filling, leveling and finishing panel joints, fasteners, bead and trim. Its selection guide describes taping compound for embedding tape and topping compound for later coats when easy application and sanding are priorities. Follow the label for the product you bought.
- Tape: The cited USG and CGC guides both require tape to be embedded in wet compound over joints.
- Knives: The example sequence uses 5-inch, 8-inch and 10-inch knives for progressively wider coats. Those widths are examples from the guides, not mandatory sizes for every joint or product.
- Sanding supplies: Fine-grade paper on a block or pole sander is used for dry sanding; a sanding sponge provides a wet-sanding alternative.
- Primer: Use drywall primer or a good-quality flat white latex primer compatible with the selected paint, texture or wall covering.
Keep ready-to-use compound from freezing. The CGC/USG guide recommends at least 13°C (55°F) before, during and after finishing until the compound is dry and the surface is decorated. Treat that as the cited guide’s condition, not as a substitute for the exact label and local requirements.
How do you finish drywall joints?
The reliable sequence is to embed the tape, allow the coat to dry, widen and feather each later coat, inspect the joint, sand sparingly and prime. Work on one manageable area at a time so the compound remains workable and the edges can be feathered before they begin to set.
1. Prepare the board and compound
Make sure panels are firmly fastened and that joint edges, corners and accessories are clean. Remove loose paper, protruding fasteners and obvious lumps without gouging the board. Mix or condition the compound only as the product instructions allow; do not reintroduce dried bits into a fresh batch. A clean pan and clean knife prevent hard particles from dragging grooves through a coat.
2. Embed the tape
Spread a thin, even layer of compound over the joint. Center the tape over the seam, then draw the knife along it to press it into the wet compound while leaving enough material beneath the tape for a continuous bond. Wipe away excess compound at the edges, but do not starve the tape of compound.
Also popular on Amazon
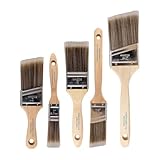
- COMPLETE 5-PIECE BRUSH SET FOR EVERY PAINTING TASK — Includes 1 Inch Flat, 1.5 Inch Angle, 2 Inch Flat, 2 Inch Angle Stubby, and 2.5 Inch Angle brush giving you every size professional painters use daily. Get all 5 for less than the price of a single brush from hardware store brands — professional grade performance at a fraction of the cost. Perfect for walls, trim, cabinets, doors, furniture, and detailed cutting-in work on any project.
- ZERO BRISTLE LOSS — GUARANTEED BY PRECISION ADHESIVE BONDING — Every bristle is locked in place with precision-set adhesive that keeps them in the brush — not in your paint job. The coated steel ferrule provides structural support while the adhesive bond ensures clean performance on every stroke. Premium SRT synthetic filaments load more paint and release it evenly for a smooth streak-free finish on walls, ceilings, and trim. Works with latex, oil-based paint, primer, sealer, and wood stain.
- INCLUDES THE ANGLE STUBBY MOST SETS LEAVE OUT — Professional painters know the 2 Inch Angle Stubby is the go-to brush for tight cabinet interiors, window sashes, inside corners, and detailed trim where standard angle brushes are too long. Combined with the 1.5 and 2.5 inch angle sash brushes you have precision cutting-in covered at every scale — baseboards, crown molding, door casings, and ceiling lines.
- FLAT BRUSHES FOR BROAD SMOOTH COVERAGE ON ANY SURFACE — The 1 and 2 inch flat brushes deliver even coverage on walls, furniture, shelving, doors, fences, decks, and wood surfaces. Ideal for applying primers, stains, varnishes, polyurethane, and specialty coatings. Solid wood handles provide all-day comfort and control for both professional contractors and weekend DIY homeowners tackling interior or exterior painting projects.
- TRUSTED BY PROFESSIONAL PAINTERS AND CONTRACTORS NATIONWIDE — Pro Grade delivers professional-grade results at a price that makes sense for crews who go through brushes on every job. Ideal for property managers, remodeling contractors, apartment turnover crews, maintenance teams, and commercial painting operations. Backed by thousands of verified reviews from working painters. Washable and reusable for multiple projects.
The CGC guide also describes applying a thin coat over the embedded tape. This helps reduce curling and leaves the tape easier to conceal with the next coat. At inside corners, fold the tape accurately into the angle and work one side at a time when the product instructions call for it; letting one side dry gives the knife a firm edge for the other side.
3. Apply progressively wider coats
Wait until the embedded coat is dry, then scrape or knife off raised imperfections carefully. Apply the next coat wider than the preceding one and feather its edges into the panel. In the USG and CGC examples, a 5-inch knife is used for the taping coat, an 8-inch knife for a later flat-joint coat and a 10-inch knife for the finish coat.
Keep each coat thin. Piling compound directly over the center of a seam creates a crown that remains visible under paint. Instead, distribute the material farther out so the transition from compound to board is gradual. On a butt joint or any crowned area, feathering may need to extend even farther than the nominal knife width.
For fasteners, cover the screw or nail head with a thin coat, allow it to dry and apply additional coats as required by the selected finish level. Treat bead, trim and other accessories in the same staged manner rather than trying to hide them with one thick application.
4. Check the joint before the final coat
Use a wide knife blade as a straightedge across a tapered joint. If the blade rocks over a hump, the joint is crowned. A wider, thinner feathered coat can make that crown less noticeable; adding more compound only at the center usually makes it worse.
Look along the joint from several angles and under the lighting that will be present after decoration. Remove ridges and tool marks while the compound is workable or after it has dried enough to scrape safely. Grooves left in the last coat can telegraph through paint, so correct them before sanding.
Also popular on Amazon
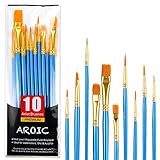
- 【All sizes of art brushes】: The 10 sizes of multi-functional brushes have various shapes, making the mixing color easier, which is very suitable for artists, students, teenagers, children and painters at all levels. Wonderful Present ideas for friends and family who like painting!
- 【general brush set】: Professional paint brush can meet all your needs. Multifunctional brush is very suitable for watercolor, oil, gouache, acrylic painting, body, nail, face painting, miniature, model, ceramics, arts and crafts painting, etc.
- 【high quality process】: It is designed with anti falling bristles, anti-rust nickel ferrule and solid wood handle. You can use the brush to focus on the painting and always be creative.
- 【easy to maintain】: After using the brush, it is very convenient to clean the brush with warm soapy water and reshape the tip of the brush. Air dry the brush and place it on top of the top for long use.
- 【100% satisfaction guarantee - buy now】1 packs of set brushes, you can also get friendly customer service, any questions feel free to contact us, within 24 hours to help you! There is no risk in buying our paint brush kit.
How long should drywall mud dry before recoating?
Use the compound manufacturer’s drying guidance and judge the actual site conditions. Temperature, humidity, coat thickness, ventilation and the substrate all change the drying rate. The CGC/USG guide specifies at least 24 hours for certain coat transitions, but that is not a universal interval for every compound or room.
Do not recoat a surface that is still cool, soft, dark or otherwise damp. A premature coat can trap moisture, shrink unevenly or pull the underlying tape loose. Conversely, extending the wait beyond the label’s minimum is normally safer than sanding or recoating a partially cured layer. Maintain the cited minimum 13°C (55°F) condition until the compound is dry and the surface is decorated, and follow any stricter project specification.
What’s actually slowing this PC down?
Pick the symptom - the matching free tool is one click away.
Should you sand between coats of drywall compound?
Usually, sand only where necessary. USG’s guidance states, “Do not sand unless it is necessary.” A clean scrape or a light pass with the knife often removes a nib or ridge with less risk of damaging the panel face paper than aggressive sanding.
When sanding is needed, wait until the coat is thoroughly dry. Use fine-grade abrasive on a block or pole sander, applying light pressure and keeping the tool flat. The CGC/USG guide describes 150-grit paper for its sanding instructions. Stop as soon as the ridge or transition is smooth; do not chase a tiny imperfection until the paper around it is exposed.
Protect the drywall paper. Scuffing or cutting the paper creates a visible fuzzy area that absorbs primer and paint differently and may require repair. Dry sanding creates airborne dust, so use the suitable dust mask and ventilation specified for the compound and sanding method. A vacuum-equipped power sander can reduce airborne dust where the equipment and manufacturer instructions permit it.
Wet sanding with a sanding sponge is an alternative described by the CGC/USG guide. Use a damp, not dripping, sponge and rinse it often so softened compound is not smeared across the wall. Allow the surface to dry before inspecting it and before applying primer.
Quick wins for a faster PC:
Clear out junk files and repair common Windows errorsFree Scan →Scan for outdated or missing drivers - takes under a minuteDriver Scan →Also popular on Amazon

- 【KIDS PAINT BRUSHES SET】Anezus paint brushes for kids come with 10 pcs paint brushes of 5pcs round paintbrushes and 5 flat paint brushes with colorful handles, good for the young artist to explore their creativity in painting and crafting
- 【HIGH QUALITY PAINT BRUSHES FOR KIDS】These toddler paint brushes made of soft hog bristle, bright colored handles and rust proof ferrules. The bristles are firmly fixed in the kids paint brushes and no shedding. Each children paint brush measure 6 1/4 inches (16cm) in length and ferrules 1/2"(1.3cm) diameter, large enough for the little hand to grip and control
- 【WIDE APPLICATIONS】With combination of round and flat craft paint brushes for kids, work great with washable paint, tempera paint and acrylic paint. Great for arts and craft, rock, leather, gesso and ceramic, or body, nail and face art painting.
- 【EASY TO CLEAN 】After using paint brushes for acrylic, oil or watercolor painting, it’s very convenient to clean them with warm soapy water and reshape the paint brush tips. Keep these craft paint brushes clean and they last a long time.
- 【GREAT GIFT IDEA】Perfect for students, teens, kids, children and painters of all levels. Wonderful gift idea for girls, boys and kids who love painting! These all-purpose paint brushes for kids are ideal for kids' school projects, birthday parties, painting parties, art parties, back to school supplies, classroom decoration and more.
How do you keep drywall seams from showing?
Prevent visible seams by controlling the shape of the joint, not by leaving a thick ridge of compound. Center the tape, keep compound beneath it, make each later coat wider and feather the edges thinly. Check for a crown with a wide knife, and extend the feathered area when the joint is wider or the lighting is unforgiving.
- Match the finish level to the decoration. A smooth sheen or critical side lighting may require the full-surface treatment of Level 5 rather than stopping at a lower level.
- Keep coats thin and broad. Thin material dries more predictably and creates a gradual transition.
- Remove tool marks before the last coat cures. A groove in the final coat is easier to correct before it is primed.
- Inspect from multiple angles. Light aimed across a wall reveals ridges that may be invisible when viewed straight on.
- Prime the entire prepared surface. Primer equalizes absorption between paper and compound so the finish coat does not highlight every joint.
No finish level can overcome movement, poor framing or a decoration that magnifies every variation. If the specification calls for a particular level, document that requirement before work begins instead of relying on the phrase “smooth finish.”
What is the final preparation before painting or wall covering?
Let the drywall and compound become thoroughly dry, remove sanding dust, then apply a compatible drywall primer. The CGC/USG guide recommends drywall primer or a good-quality flat white latex primer before paint, texture, skim coating or another wall covering.
Use a damp sponge or the dust-control method appropriate to your compound to remove residue without soaking the surface. Inspect under the planned lighting and correct remaining ridges, pinholes or exposed paper before priming. After the primer dries, follow the decoration manufacturer’s instructions; a primer coat is preparation, not a substitute for the specified finish paint or wall-covering adhesive.
Which compound should you use for each coat?
The right choice depends on the product instructions and the work stage. USG describes all-purpose compound as a single-product option for embedding tape and finishing joints, while its selection guide describes taping compound for embedding tape and topping compound for later coats where ease of application and sanding are desired.
Those are manufacturer descriptions, not independent comparative test results. If you change products between coats, verify compatibility and drying requirements. Never assume that a compound designed for a thin finish coat can safely replace a product specified for tape embedding, or that a premixed product has the same drying time as a setting-type product.
Also popular on Amazon

- 【162-Piece Bulk Set | Dual Brush System】Maximize versatility with 81 flat brushes (0.59 inch edge for bold strokes) and 81 round brushes (0.39 inch tips for details) – 3X more tools than standard kits! Pre-sorted in labeled compartments for instant access during painting sessions. Ideal for art classrooms, mural projects, and multi-artist households.
- 【Pro-Grade Durability | Zero Shedding Guarantee】 "Engineered with triple-crimped nylon bristles (43% higher resilience vs. standard) and aerospace aluminum ferrules tested for 10,000+ flex cycles. Lab-verified 0.01% shedding rate even with heavy impasto techniques – outperforms flimsy bristles in budget brushes."
- 【Multi-Scenario Readiness | Event & Daily Use】 Optimized for: Thanksgiving/Christmas face designs classroom projects ceramic decorating fabric printing and model painting; Lightweight plastic handles each reduce hand fatigue during prolonged sessions
- 【Effortless Maintenance | Long-Term Durability】 Clean with warm soapy water in 10 seconds; Reshape tips and air-dry vertically to preserve bristle integrity,After use, air-dry brushes thoroughly and store upright in the provided case to preserve bristle shape. The premium nylon filaments naturally regain their original form after each stroke. For cleaning, simply rinse in warm soapy water and gently reshape bristles with fingertips."
- 【Multiple Application】These acrylic paint brushes can be applied for most occasions,such as:watercolor,oil, gouache paint,face paint, acrylic paint, suitable for Thanks Giving Day, Christimas, Halloween face and body painting, canvas painting, fabric, rock, miniature, model, ceramics, arts and crafts painting, etc.
What common drywall-finishing problems mean—and how do you fix them?
- Tape bubbles or curls
- The tape may not have been fully embedded or may lack compound beneath it. Cut out a loose section, apply fresh compound, embed replacement tape and rebuild with thin, wider coats after the repair dries.
- A visible hump over the seam
- The joint is crowned by excess material or framing movement. Knock down the high spot carefully, then feather a wider final coat rather than adding more compound to the center.
- Ridges at the knife edge
- The knife angle or pressure left a raised edge. Scrape the ridge when dry, apply a thin feathered coat and sand only the remaining high points.
- Fuzzy or torn paper
- Sanding or scraping cut into the panel face. Stop, remove loose fibers, seal the damaged area with a compatible primer or repair material as directed by its label, and avoid further aggressive sanding.
- Pinholes after sanding
- Air pockets or an overly dry skim can leave small voids. Press a thin coat into the pinholes, let it dry fully and sand lightly before priming.
- Joint shows through paint
- Possible causes include an insufficient finish level, a crowned or narrow feathered joint, incomplete dust removal or skipped primer. Correct the surface and priming problem before adding more finish paint.
- Compound remains soft
- Low temperature, high humidity, poor ventilation or an overly thick coat can delay drying. Restore the product’s recommended conditions and wait; do not seal damp compound beneath primer.
How do you plan a professional-looking result?
Write the finish level and decoration into the scope before taping. Confirm which compound is approved, what temperature must be maintained, how drying will be judged and whether the project requires dust controls or wet sanding. This prevents a dispute in which one person expects a utility Level 2 surface and another expects a Level 5 surface under glossy paint.
During the work, keep a simple sequence: clean tools; tape embedded with adequate compound beneath it; dry; scrape high spots; apply a wider coat; dry; inspect for crowns and grooves; apply the thin finish coat; dry; sand lightly only where needed; remove dust; prime. The method is straightforward, but patience at each drying and inspection stage determines whether the seams remain quiet after decoration.
How we selected these drywall finishing recommendations
The process above follows the GA-214-2022 finish-level framework and the USG/CGC installation and finishing guides supplied for this topic. The recommendations emphasize the documented distinctions between tape embedding and later coats, progressively wider feathering, product- and condition-dependent drying, paper-safe sanding, dust control and primer before decoration. Numeric examples such as 13°C (55°F), 150-grit abrasive, 5-, 8- and 10-inch knives, and a 24-hour interval are presented as source-specific guidance, not universal guarantees.
Bottom line: what is the safest drywall-finishing sequence?
Agree on the finish level, use clean tools and compatible compound, embed centered tape in wet compound, let each coat dry fully, widen and feather successive coats, inspect for crowns and grooves, sand lightly without scuffing the paper, remove dust and prime before decoration. When conditions or product instructions differ, the label and project specification take priority over a generic coat count or drying time.
Frequently Asked Questions
Can I finish drywall without tape on the joints?
No. The cited USG and CGC methods rely on tape embedded in joint compound to reinforce the joint. Compound alone can crack or telegraph the seam, so use the tape type and installation method specified for the drywall system.
Why does a drywall seam appear only after the room is painted?
Paint and directional light can reveal differences in absorption and tiny changes in surface angle. Inadequate feathering, an unprimed compound-to-paper transition or a finish level that is too low for the decoration can all make a seam appear after painting.
Free tools Windows power users keep installed
One-click scans. No signup required.
Is a Level 5 finish required for every room?
No. Level 5 adds a thin surface treatment over the entire panel face and is intended for demanding appearance conditions. The appropriate level depends on the specification, final decoration and lighting; many utility or heavily textured areas need less treatment.
Can I speed up drywall compound with a heater or fan?
Only if the product instructions and site safety rules allow it. Drying depends on temperature, humidity and ventilation, and excessive heat or airflow can create uneven drying, cracking or unsafe conditions; maintain at least the cited minimum temperature and follow the label.
What should I do if I sand through the drywall paper?
Stop sanding and remove loose fibers without enlarging the damaged area. Seal or repair it with a compatible product according to that product’s instructions, allow it to dry, then apply a thin compound coat and prime so the exposed paper does not absorb finish unevenly.

