The Tool Desk
Outbyte Driver Updater FREEScan for outdated or missing drivers - takes under a minuteDriver Scan →Outbyte PC Repair FREEClear out junk files and repair common Windows errorsFree Scan →Some links on this page are affiliate links: if you buy through them we may earn a commission, at no extra cost to you.
A smooth drywall finish comes from matching the finish level to the final decoration and lighting, applying joint compound without leaving ridges, and preparing the dry surface with primer before painting or texturing. A full-surface skim coat is not necessary for every wall: it is most useful when a more uniform surface is needed, especially under critical lighting or a finish that highlights imperfections. For the highest drywall finish level described in the cited guidance, Level 5, the skim coat covers the entire surface.
What does a drywall finish coat do?
Drywall finishing uses joint compound to cover tape, joints, fasteners, corners, and accessories, then blends that work into the surrounding board. The aim is a surface that will look consistent after its final decoration—not necessarily a perfectly flat, plaster-like wall. The term “finish coat” can refer to different stages of finishing, so it does not mean one universal coat count or a single mandatory final pass.
As an Amazon Associate I earn from qualifying purchases.
Quick wins for a faster PC:
Repair Windows errors before they cause bigger problemsFix Now →Fix the driver behind crashes, sound loss and screen glitchesFind Drivers →Clear out junk files and repair common Windows errorsFree Scan →The Gypsum Association’s GA-214-10 finish-level guidance describes levels with different requirements. The intended finish and project specification determine which level is appropriate. The cited document is the 2010 edition, while USG’s finish drywall resource lists GA-214-2021. Check the edition and specification applicable to your project before treating any finish-level description or coat count as a current contract requirement.
For example, the cited Level 4 description calls for tape embedded at joints and interior angles; two separate coats over flat joints; one additional coat over interior angles; and three coats over fastener heads and accessories. It also recommends drywall primer before final finishes. These counts describe that guidance’s finish level; they are not a blanket instruction that every wall needs the same number of coats regardless of its specification or intended decoration.
Popular on Amazon

- Great Value Paint Brush Set: Soucolor 20 acrylic paint brushes come in 10 different sizes, making them ideal for fine detailing, model painting, rock painting, nail art, face painting, DIY crafts, and general art projects. The varied brush sizes give you better control for both delicate lines and broader color coverage, while the soft bristles deliver smooth, consistent results on acrylic, oil, watercolor, canvas, wood, ceramic, and more.
- Awesome Set of Paint brushes: Professional paint brushes can cover all of your needs. The multi-purposed brushes are ideal for Watercolor, Oil, Gouache, enamel, Acrylic Painting, Body, Nail, Face Painting, Miniature, Model, Wood, Glass, Cup, Ceramic, Fine work, Art class, Craft Art Painting, DIY Art Crafts etc.
- Soft and long-lasting: The bristles are soft and strong, with nickel metal ferrules and blue wooden handles. After cleaning, the bristles will become soft and fluffy again and will not fall off.
- Easy to clean: it’s very convenient to Wash well in soap and water. Retain shape after drying. the brushes hold up very well. Nice selection to beginners and professionals. Keep them clean and they last a long time.
- Perfect for All Painters & Occasions: Suitable for art beginners, hobbyists and professional artists. Great for art class, home creation, travel painting and DIY handmade projects. A practical art gift for students, teachers, family and craft lovers.
How do I choose between a standard finish and a skim coat?
Choose based on the final wall covering or paint and the light that will fall across the wall. A full-surface skim coat is a way to improve uniformity, not an automatic requirement for every drywall installation.
A skim coat is a thin film of joint compound, or material made for that purpose, applied across the entire board surface. Its objective is full coverage: compound is worked into pores and small imperfections, and excess is sheared away. It can smooth the texture of board paper and make the surface more uniform. It is not a fixed, measurable thickness, and the Gypsum Association cautions that “A skim coat will not approximate a plastered surface.” A skim coat can address small surface variations; it should not be mistaken for a way to create a plaster wall or correct substantial underlying unevenness.
In the cited guidance, Level 5 adds a thin skim coat over the entire surface after the joint, angle, fastener, and accessory work. It is described as the highest finish level and as a way to provide a more uniform surface and minimize the possibility that joints or fasteners will show through the final decoration. Consider this level when the finish specification calls for it or when the visual demands make greater uniformity important.
A less intensive finish may be suitable when the chosen decoration and lighting are more forgiving. Texture can help conceal small variations, while smooth, glossy, or reflective finishes tend to make them easier to notice. The right choice is therefore not simply “more compound is better”: it is the finish that meets the project requirements and looks acceptable under the conditions in which the wall will be seen.
Also popular on Amazon
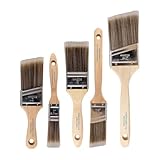
- COMPLETE 5-PIECE BRUSH SET FOR EVERY PAINTING TASK — Includes 1 Inch Flat, 1.5 Inch Angle, 2 Inch Flat, 2 Inch Angle Stubby, and 2.5 Inch Angle brush giving you every size professional painters use daily. Get all 5 for less than the price of a single brush from hardware store brands — professional grade performance at a fraction of the cost. Perfect for walls, trim, cabinets, doors, furniture, and detailed cutting-in work on any project.
- ZERO BRISTLE LOSS — GUARANTEED BY PRECISION ADHESIVE BONDING — Every bristle is locked in place with precision-set adhesive that keeps them in the brush — not in your paint job. The coated steel ferrule provides structural support while the adhesive bond ensures clean performance on every stroke. Premium SRT synthetic filaments load more paint and release it evenly for a smooth streak-free finish on walls, ceilings, and trim. Works with latex, oil-based paint, primer, sealer, and wood stain.
- INCLUDES THE ANGLE STUBBY MOST SETS LEAVE OUT — Professional painters know the 2 Inch Angle Stubby is the go-to brush for tight cabinet interiors, window sashes, inside corners, and detailed trim where standard angle brushes are too long. Combined with the 1.5 and 2.5 inch angle sash brushes you have precision cutting-in covered at every scale — baseboards, crown molding, door casings, and ceiling lines.
- FLAT BRUSHES FOR BROAD SMOOTH COVERAGE ON ANY SURFACE — The 1 and 2 inch flat brushes deliver even coverage on walls, furniture, shelving, doors, fences, decks, and wood surfaces. Ideal for applying primers, stains, varnishes, polyurethane, and specialty coatings. Solid wood handles provide all-day comfort and control for both professional contractors and weekend DIY homeowners tackling interior or exterior painting projects.
- TRUSTED BY PROFESSIONAL PAINTERS AND CONTRACTORS NATIONWIDE — Pro Grade delivers professional-grade results at a price that makes sense for crews who go through brushes on every job. Ideal for property managers, remodeling contractors, apartment turnover crews, maintenance teams, and commercial painting operations. Backed by thousands of verified reviews from working painters. Washable and reusable for multiple projects.
Why does lighting change how a drywall finish looks?
Strong light that travels across a wall can cast small shadows from ridges and depressions, making otherwise minor irregularities more visible. This is often called critical lighting or sidelighting.
The Gypsum Association identifies examples such as light from window mullions or skylights, long hallways, and large surfaces with strong natural or artificial light. A wall that appears even under diffuse lighting may look less uniform when a bright window or surface-mounted fixture throws light nearly parallel to it. Gloss, semi-gloss, and enamel finishes also tend to highlight surface defects more than less reflective finishes.
Think about the wall’s actual setting before deciding whether to skim coat. If a large, smooth wall will receive strong light from the side, the finish and preparation are more likely to be visually important. The cited guidance identifies skim coating, medium or heavy texture, and softening shadows with draperies or blinds as ways to reduce the effect. These options address the appearance in different ways: a skim coat improves surface uniformity, texture changes what the surface reveals, and window treatments soften the light.
How do I apply compound smoothly and feather the edges?
Apply joint compound as smoothly as possible and blend its edges into the surrounding board. Feathering means spreading the compound outward so the transition is gradual rather than leaving a sharp edge, raised ridge, or obvious patch boundary.
Also popular on Amazon
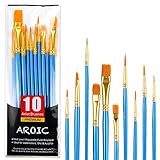
- 【All sizes of art brushes】: The 10 sizes of multi-functional brushes have various shapes, making the mixing color easier, which is very suitable for artists, students, teenagers, children and painters at all levels. Wonderful Present ideas for friends and family who like painting!
- 【general brush set】: Professional paint brush can meet all your needs. Multifunctional brush is very suitable for watercolor, oil, gouache, acrylic painting, body, nail, face painting, miniature, model, ceramics, arts and crafts painting, etc.
- 【high quality process】: It is designed with anti falling bristles, anti-rust nickel ferrule and solid wood handle. You can use the brush to focus on the painting and always be creative.
- 【easy to maintain】: After using the brush, it is very convenient to clean the brush with warm soapy water and reshape the tip of the brush. Air dry the brush and place it on top of the top for long use.
- 【100% satisfaction guarantee - buy now】1 packs of set brushes, you can also get friendly customer service, any questions feel free to contact us, within 24 hours to help you! There is no risk in buying our paint brush kit.
- Choose compound for the task. Use a joint compound whose product instructions support the work you intend to do, such as taping, filling and finishing joints or skim coating. For example, USG identifies its Sheetrock Brand Midweight Joint Compound for taping, filling and finishing joints and fasteners, skim coating, and simple hand-applied texture. That is a manufacturer’s description of that product’s uses, not an independent comparison of compounds. Follow the label and instructions for the actual material you select.
- Spread a controlled layer. Use a taping or broad knife to apply compound over the joint or area. A broad knife is also useful for spreading a thin film during a skim coat and shearing away excess. USG’s drywall finishing guidance describes using graduated arcs to conceal joints and fasteners. The practical goal is to leave enough material to cover the feature while avoiding a bulky edge.
- Blend beyond the repair. Work the compound outward so it merges with the surrounding surface instead of ending in a narrow, raised line. Pay attention to the outer edge of a joint or patch: a ridge there can cast a shadow just like a ridge over the joint itself.
- Keep the surface as smooth as you can. Smooth application reduces the amount of sanding that may be needed later. It also helps avoid replacing one visible problem—an exposed joint or fastener—with another, such as a tool ridge. Check the surface as you work and use the knife to remove or blend excess while the compound is workable, following the material’s directions.
- Let the work dry before judging it. Do not judge the final appearance or begin correction while the compound is still wet. Follow the product manufacturer’s directions for drying and for any further coats. Drying conditions and product instructions vary, so do not assume one universal wait time.
The cited guidance supports smooth application and feathering, but it does not establish one knife width, coat thickness, or drying schedule for every compound and job. Use the tool and product instructions appropriate to your surface and specification rather than treating a single technique as a substitute for those requirements.
How should I correct ridges and tool marks?
Once the compound is dry, correct remaining imperfections lightly rather than aggressively removing material. The Gypsum Association says tool marks and ridges may be lightly sanded or wiped with a dampened sponge, while cautioning against raising the gypsum-board facing paper.
Windows Errors? Fix Them Before They Spread
Repair common Windows errors and clear accumulated junk for a smoother, more stable PC - no reinstall needed.Free scan · no reinstallCrashes, No Sound, or Screen Glitches?
Random freezes, missing sound and display glitches usually trace back to one bad driver. Find and replace yours safely.Free scan · under a minuteUSG also describes damp-sponge wet sanding as a no-dust option that is less likely to scuff the panel. Treat this as an option for light smoothing—not as a universal solution for every defect, compound, or sanding need. The sources do not establish that wet sanding is best in all situations. Avoid using a damp sponge as though it could remove a large ridge or correct a major surface problem; the cited advice is for light correction.
Take care not to expose or damage the paper facing while smoothing. The aim is to blend small marks and ridges, not to sand down the board surface. If an imperfection is too pronounced for light correction, follow the compound’s instructions for addressing it rather than continuing to abrade the surrounding paper.
Also popular on Amazon

- 【KIDS PAINT BRUSHES SET】Anezus paint brushes for kids come with 10 pcs paint brushes of 5pcs round paintbrushes and 5 flat paint brushes with colorful handles, good for the young artist to explore their creativity in painting and crafting
- 【HIGH QUALITY PAINT BRUSHES FOR KIDS】These toddler paint brushes made of soft hog bristle, bright colored handles and rust proof ferrules. The bristles are firmly fixed in the kids paint brushes and no shedding. Each children paint brush measure 6 1/4 inches (16cm) in length and ferrules 1/2"(1.3cm) diameter, large enough for the little hand to grip and control
- 【WIDE APPLICATIONS】With combination of round and flat craft paint brushes for kids, work great with washable paint, tempera paint and acrylic paint. Great for arts and craft, rock, leather, gesso and ceramic, or body, nail and face art painting.
- 【EASY TO CLEAN 】After using paint brushes for acrylic, oil or watercolor painting, it’s very convenient to clean them with warm soapy water and reshape the paint brush tips. Keep these craft paint brushes clean and they last a long time.
- 【GREAT GIFT IDEA】Perfect for students, teens, kids, children and painters of all levels. Wonderful gift idea for girls, boys and kids who love painting! These all-purpose paint brushes for kids are ideal for kids' school projects, birthday parties, painting parties, art parties, back to school supplies, classroom decoration and more.
Do I need primer after the drywall finish coat?
Before paint or texture, the finished surface should be dry and free of dust, and primer helps even out differences between the board and compound. Those materials can differ in porosity and texture, which may make the final paint or texture look uneven if the surface is not prepared appropriately.
USG describes primer as a way to minimize texture variation and equalize porosity between joint compound and the board surface so paint or texture has a more uniform finish. The Gypsum Association’s cited finish guidance also recommends drywall primer before final finishes. Follow the directions for the primer, compound, and final finish you are using; product instructions govern preparation and application.
Free tools Windows power users keep installed
One-click scans. No signup required.
Do not confuse primer with a finish coat of joint compound. Compound creates and blends the surface; primer prepares that surface for decoration. Priming does not replace careful finishing, and it is not a reason to leave dust or obvious ridges behind.
Independent reader supportYour contribution helps us test, update, and keep practical guides available for everyone.What materials and tools are useful?
Choose tools and materials according to the job rather than looking for a universally “best” mud or tool. The core items are compound appropriate to the step, a knife for spreading and feathering, and primer before paint or texture.
Also popular on Amazon
- 【162-Piece Bulk Set | Dual Brush System】Maximize versatility with 81 flat brushes (0.59 inch edge for bold strokes) and 81 round brushes (0.39 inch tips for details) – 3X more tools than standard kits! Pre-sorted in labeled compartments for instant access during painting sessions. Ideal for art classrooms, mural projects, and multi-artist households.
- 【Pro-Grade Durability | Zero Shedding Guarantee】 "Engineered with triple-crimped nylon bristles (43% higher resilience vs. standard) and aerospace aluminum ferrules tested for 10,000+ flex cycles. Lab-verified 0.01% shedding rate even with heavy impasto techniques – outperforms flimsy bristles in budget brushes."
- 【Multi-Scenario Readiness | Event & Daily Use】 Optimized for: Thanksgiving/Christmas face designs classroom projects ceramic decorating fabric printing and model painting; Lightweight plastic handles each reduce hand fatigue during prolonged sessions
- 【Effortless Maintenance | Long-Term Durability】 Clean with warm soapy water in 10 seconds; Reshape tips and air-dry vertically to preserve bristle integrity,After use, air-dry brushes thoroughly and store upright in the provided case to preserve bristle shape. The premium nylon filaments naturally regain their original form after each stroke. For cleaning, simply rinse in warm soapy water and gently reshape bristles with fingertips."
- 【Multiple Application】These acrylic paint brushes can be applied for most occasions,such as:watercolor,oil, gouache paint,face paint, acrylic paint, suitable for Thanks Giving Day, Christimas, Halloween face and body painting, canvas painting, fabric, rock, miniature, model, ceramics, arts and crafts painting, etc.
- Joint compound: The finishing material for joints, fasteners, and—in a skim coat—the full board surface. Check the label to confirm it is intended for the task.
- Taping or broad knife: Used to spread compound and blend its edges. USG specifically describes a drywall broad knife for skim coating.
- Drywall primer: Used to reduce porosity and texture differences ahead of paint or texture. USG’s Sheetrock Brand First Coat Primer is one manufacturer example; consult its current instructions and do not assume every primer has identical directions.
- Sanding sponge: One possible aid for light smoothing. The cited guidance supports light sanding or damp-sponge smoothing but does not specify a particular sponge or brand.
These are task-based examples, not a product ranking. The cited product information comes from the manufacturer, and it does not establish independent comparative performance, current availability, or price.
What common finish-coat problems should I look for?
Before decorating, inspect for the defects most likely to show through: ridges, tool marks, uneven transitions, visible joints or fasteners, and dust left on the surface. Strong sidelighting and reflective paint can make small defects easier to see, so judge the finish with the room’s lighting and planned decoration in mind.
Do these 3 things before closing this tab:
1Fix the driver behind crashes, sound loss and screen glitches2Repair Windows errors before they cause bigger problems3Scan for outdated or missing drivers - takes under a minute- A raised line at a joint or patch: The transition may not be feathered broadly enough. After the compound is dry, use light correction where appropriate and avoid damaging the board paper.
- Tool marks or small ridges: The compound may not have been spread smoothly. Light sanding or damp-sponge smoothing may help, within the limits described by the guidance.
- Joints or fasteners visible under the intended finish: The finish level may not provide the uniformity the decoration and lighting demand. Review the finish specification; a Level 5 skim coat is the cited highest-level approach for minimizing the possibility of joint photographing and fasteners showing through.
- Uneven paint or texture appearance: Check that the surface was dry and dust-free and that primer was used as directed. Primer helps reduce differences in porosity and texture, but it does not correct poor compound work.
When a project has a written finish specification, treat that as the controlling requirement. Aesthetic tips cannot replace the applicable contract documents, manufacturer directions, or current finish-level guidance.
Frequently Asked Questions
Can a skim coat fix a wavy or badly uneven wall?
A skim coat is intended to smooth paper texture and small imperfections, not to create a plastered surface or correct substantial unevenness. If the wall is markedly wavy, assess the underlying problem and the project specification before relying on a thin surface coat.
Can I paint directly over drywall joint compound?
The cited guidance recommends drywall primer before final finishes and explains that primer helps equalize porosity and texture between compound and board. Check the paint and primer manufacturers’ directions for the preparation system they require.
Should I sand between every coat of drywall compound?
The cited sources support smoothing remaining tool marks and ridges, but do not prescribe sanding between every coat. Follow the compound’s instructions and focus on a smooth, properly feathered surface without raising the board’s paper facing.
Does a Level 5 finish mean the wall will look perfectly flawless?
No finish description can guarantee that every surface will appear flawless under every light and paint. Level 5 is described as the highest finish level in the cited guidance and is intended to improve uniformity and minimize the chance of joints or fasteners showing through.

