Recommended Free Tools
A clean dryer vent is one of the cheapest home maintenance jobs with one of the biggest payoffs. It helps clothes dry faster, lowers stress on the dryer, reduces moisture problems, and cuts a real fire risk. The short answer: clean the lint screen every load, check the outside vent regularly, and clean the full dryer exhaust duct at least once a year. Heavy-use homes, pet owners, long vent runs, roof exits, and prior clogs should plan on every 6 months.
On our job sites, we treat dryer exhaust as a home-system item, not a housekeeping chore. The vent path matters. The duct material matters. The number of elbows matters. A dryer that vents 6 feet straight through an exterior wall is a different animal than a stacked laundry closet with 28 feet of concealed duct, three elbows, and a roof cap.
As an Amazon Associate I earn from qualifying purchases.
That is where many homeowners get into trouble. They vacuum the lint screen and assume the vent is clear, while lint is packed inside the transition hose, an elbow, the wall duct, or the exterior hood. Cleaning is the right fix for normal lint buildup. Replacement or rerouting is the right fix when the duct is crushed, unsafe, too long, disconnected, or venting anywhere other than outdoors.
Crashes, No Sound, or Screen Glitches?
Random freezes, missing sound and display glitches usually trace back to one bad driver. Find and replace yours safely.Free scan · under a minuteWindows Errors? Fix Them Before They Spread
Repair common Windows errors and clear accumulated junk for a smoother, more stable PC - no reinstall needed.Free scan · no reinstallHow Often Should You Clean a Dryer Vent?
Use the schedule below as a practical starting point. If drying times are getting longer, the dryer is running hot, or the outside airflow is weak, clean sooner.
#1 Best Overall

- Home Essentials: Fireplace chimney brushes includes two high quality synthetic brush head and flexible rods that extend up to 30 feet
- Home Improvement with Simple Instructions: Dryer vent brush can be used with or without any kind of power drill and will help you achieve professional results; By sealing the connection points of the rod with tape, the risk of the rod falling off is reduced
- Improve Dryer Working Efficiency: Improving cloth dryer working performance by using this cleaning tools to clean the build up lint and dust in dryer vent, duct and exhaust port; It is recommended to select the area to be cleaned according to the diameter of the brush head
- Effortless Maintenance: Skip the service calls. Clean your dryer vent yourself in minutes and keep everything running smoothly, year after year.
- Preventing Fire Risks: Lint buildup can be dangerous and failure to clean it is the leading cause of clothes dryer fires; So remove the lint periodically is the only way to prevent dryer fires risk
| Household or Vent Type | Recommended Schedule | Why It Matters |
|---|---|---|
| Average single-family home | Full vent cleaning once per year | Normal lint buildup can restrict airflow over time. |
| Heavy laundry use, large family, or pets | Every 6 months | More loads and pet hair increase lint volume. |
| Long duct run, multiple elbows, roof exit, or second-story termination | Every 6 months, sometimes more often | Longer paths collect more lint and are harder to inspect. |
| Vacation home or low-use laundry | Every 18 to 24 months if airflow is strong | Lower use means slower buildup, but pests and exterior caps still need checks. |
| Multi-family or commercial laundry room | Documented maintenance schedule, often quarterly to semiannual | Higher usage and shared responsibility require routine records. |
The lint screen should be cleaned before or after every load. If you use dryer sheets, wash the screen occasionally with warm water and mild soap. Residue can build up on the mesh and reduce airflow even when the screen looks clean.
The exterior termination should be checked monthly or seasonally. With the dryer running, the damper should open fully and you should feel a steady exhaust flow. When the dryer is off, the damper should close to keep weather and pests out. If the flap barely moves, lint is collecting around the hood, or you see a bird screen packed with fuzz, the vent needs attention.
Why Dryer Vent Cleaning Is a Safety Issue
Dryer lint is dry, lightweight, and combustible. When airflow drops, the dryer runs hotter and longer. That creates a bad combination: heat, lint, and restricted exhaust.
National fire data has consistently pointed to cleaning as the main controllable factor. NFPA data for 2010 to 2014 is commonly cited at about 15,970 annual home fires involving clothes dryers or washing machines, with dryers involved in 92% of those fires. Failure to clean was the leading factor in dryer fires. A focused U.S. fire report estimated 2,900 residential clothes-dryer fires per year for 2008 to 2010, causing 5 deaths, 100 injuries, and $35 million in property loss annually. Failure to clean accounted for 34% of those fires.
Those numbers are why we do not treat this as optional. A homeowner may notice the performance problem first: towels taking two cycles, the laundry room feeling humid, or the dryer shutting off mid-cycle. But the safety problem is developing in the same place: the exhaust path.
What Counts as the Dryer Vent?
The dryer vent is the entire exhaust route from the appliance to the outdoors. Cleaning only the lint screen is not vent cleaning. A complete cleaning should address the full path:
- Lint screen and screen slot
- Lint trap housing inside the dryer opening
- Flexible transition connector behind the dryer
- Rigid or semi-rigid duct inside the wall, floor, ceiling, or chase
- Elbows and offsets
- Accessible cleanouts, if present
- Exterior wall hood or roof termination
- Damper operation at the termination
The transition connector behind the dryer is often the weak point. It gets crushed when the appliance is pushed back. It may be too long, kinked, or made from flimsy foil. If that short connector collapses, the rest of the vent can be clean and the dryer will still perform poorly.
Quick wins for a faster PC:
Fix the driver behind crashes, sound loss and screen glitchesFind Drivers →Clear out junk files and repair common Windows errorsFree Scan →Signs Your Dryer Vent Is Clogged
A clogged dryer vent usually gives several warnings before it becomes an emergency. Do not ignore these signs:
- Clothes take longer than normal to dry, especially towels and jeans.
- Clothes come out unusually hot.
- The dryer exterior feels hotter than it used to.
- You smell a burning or overheated odor during operation.
- The dryer shuts off before the cycle is complete.
- The laundry room feels humid or warmer than normal.
- Lint collects around the exterior hood.
- The exterior damper does not open fully while the dryer runs.
- Airflow at the outside termination feels weak.
- You hear birds or suspect nesting near the hood or roof cap.
One long drying cycle is not always a vent problem. Overloading the dryer, a failing heating element, a bad moisture sensor, or a washing machine that is not spinning water out properly can also cause slow drying. But if airflow at the exterior termination is weak, the vent path is the first place to investigate.
Rank #2
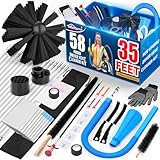
- 【Efficient dryer cleaning tool set】-Professional cleaning tool set can help you deep clean buildup lint in the dryer. Including 35feet Dryer Vent Brush × 1, Dryer Lint Vacuum Attachment × 1, Lint Trap Brush × 1, Vacuum Cleaner Adapter x1, Dryer Adapter x1, Drill Bit x 1, Multi-Use Lint Cleaner Brush x1, Anti-SLip Gloves x1, Strong Tape x2, Rods Collection Bag x1, Laundry Bag x1, Lint Collection Bag x33, Lint Grabber x1, Blockage Removal Tool x1, Gap Brush x2,MULT-FUNCTIONALCLEANINGBRUSH x4,SELF-ADHECIVEHOOK x5
- 【35Feet Dryer Vent Brush】- Easy to use with your drill, the flexible nylon rods can be quickly connected and extended to 35ft.Included adapters enable you to use the air from the clothes dryer, shop vacuum or electric blower to completely remove lint from the vent while rotary cleaning at the same time. The Dryer Vent Brush also suitable for pipes/air duct or corners
- 【Dryer Lint Vacuum Attachment】 - Easy to connect and suitable for most vacuum cleaners except for some dyson and shark vacuum cleaners. The flexible vacuum hose can deeply clean the lint accumulated in the dryer for many years
- 【Long Lint Trap Brush】- Using this extra long brush to cleaning the trapped lint and dust in dryer gap and exhaust port, and also for cleaning the coils behind your refrigerator
- 【Save Your Money】- No need to pay a professional service cost $150 per cleaning when you buy our Dryer duct Cleaning Kit
How to Clean a Dryer Vent the Right Way
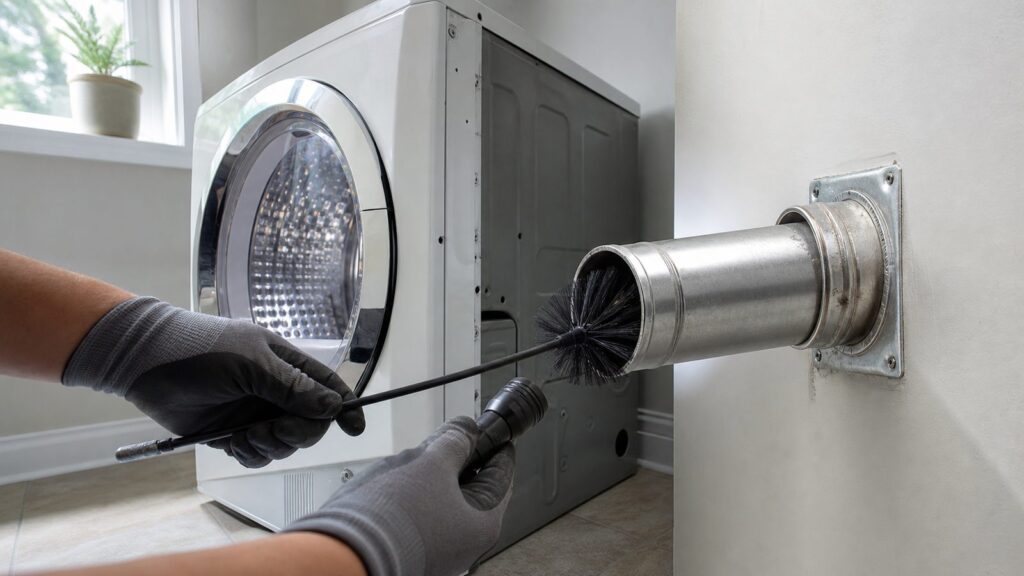
For a short, straight, ground-floor vent, many homeowners can do a basic cleaning safely with a vacuum, dryer vent brush kit, screwdriver or nut driver, work gloves, and a flashlight. Plan on 45 to 90 minutes for a straightforward setup. Stop and hire a pro if the vent exits at the roof, the dryer is gas and must be moved far, the duct disappears into a tight chase, or anything feels loose or damaged.
1. Shut Down the Dryer
Unplug an electric dryer before moving it. For a gas dryer, be careful with the gas connector. If the appliance must be pulled out far enough to strain the line, stop and call a qualified technician. Gas connections should be checked for leaks after movement or reconnection.
The Tool Desk
Outbyte Driver Updater FREEScan for outdated or missing drivers - takes under a minuteDriver Scan →Outbyte PC Repair FREERepair Windows errors before they cause bigger problemsFix Now →2. Pull the Dryer Out Carefully
Move the dryer only far enough to access the transition connector. Avoid yanking it forward. Many laundry rooms are tight, and it is easy to tear foil duct, loosen a clamp, kink a gas connector, or damage flooring.
3. Disconnect the Transition Duct
Loosen the clamp at the dryer outlet and the wall connection. Inspect the connector. If it is plastic, vinyl, crushed, torn, kinked, or made from flimsy foil that collapses easily, replace it with a safer metal transition duct. Cleaning a bad connector is wasted effort.
4. Vacuum the Dryer Outlet and Lint Trap Housing
Use a crevice tool or lint trap vacuum attachment to remove lint from the screen slot and dryer outlet. Do not force tools deep into the dryer where they can damage sensors, wiring, or the blower wheel.
5. Brush the Wall Duct
Use a dryer vent brush kit sized for a 4-inch duct. Feed it gently into the duct and rotate as directed by the tool manufacturer. Work in sections. If the brush binds hard, do not force it. You may be hitting an elbow, a disconnected joint, a screw tip, compacted lint, or a nest.
Free tools Windows power users keep installed
One-click scans. No signup required.
Be careful with drill-powered brush kits. They can work well in the right duct, but they can also separate loose joints or damage thin material if used aggressively. Keep the rotation controlled, advance slowly, and stop if the rod twists or the duct rattles heavily.
6. Clean the Exterior Termination
Go outside and remove lint from the hood and damper area. The damper should move freely. A dryer termination should not have a screen, hardware cloth, or mesh cover that catches lint. Pest protection must be dryer-rated and must not block airflow.
7. Reconnect Without Crushing the Duct
Reconnect the transition duct with proper clamps. Keep the connector as short and smooth as practical. Push the dryer back slowly while watching the duct. A clean vent can become restricted immediately if the connector folds behind the appliance.
Rank #3

- [Stretch Universal Connector] PetOde dryer lint vacuum cleaner attachment is designed with a premium elasticated stretch universal connector that can be connected to most vacuum cleaners! Say goodbye to the worry of purchasing incompatible attachment models
- [Suitable for Most Dryers] The inner height of our Vacuum Hoses attachment is the same as on the market at 0.4", while the outer height is 0.73" which is thinner than the hose opening on the market, so it can enter narrower gaps
- [Practical Dryer Lint Brush] This long brush is specially designed to clean the dryer lint, and can also be used to clean the refrigerator coils, radiators and other hard-to-reach places
- [Cleans Years of Build-up Lint] A dryer that is not cleaned for many years will accumulate a lot of lint. Ventilation openings can become narrow or even blocked. It can help you effectively clean your dryer vent, making your dryer more efficient
- [Cleaning Supplies] The flexible and convenient dryer vent cleaner kit is long enough, making it a perfect choice for cleaning places like behind appliances and gaps in the sofa in your home
8. Run a Before-and-After Airflow Check
Turn the dryer on an air or heat cycle and check the outside hood. The damper should open fully and exhaust should feel stronger than before. A professional may measure airflow or static pressure for documentation, which is useful on long runs, rental properties, multi-family buildings, and repeated service calls.
Dryer Vent Materials and Code Basics Homeowners Should Know
Dryer exhaust ducts are not the place to improvise. Most residential dryers use a 4-inch exhaust connection. The concealed duct should be smooth metal, with joints installed in the direction of airflow and without fasteners that protrude into the duct and snag lint. Screws driven through the duct wall may seem secure, but the tips can collect lint and start a clog point.
The vent must terminate outdoors. It should not discharge into an attic, crawlspace, garage, basement, wall cavity, soffit, or chimney. Dumping warm, wet dryer air into a building cavity can create moisture damage, mold risk, and lint accumulation in places that are hard to inspect.
Many code references use a maximum developed length around 35 feet for dryer exhaust ducts, reduced by fittings unless the dryer manufacturer allows a different length. Some older references and appliance instructions use 25 feet as a baseline. The important concept is equivalent length. A duct that looks like 25 feet of pipe can behave like a much longer run after you add elbows. A 90-degree elbow may count as several feet of additional resistance depending on the fitting and code table being used.
For remodels, additions, and laundry relocations, we plan the dryer vent before walls are closed. The best route is short, straight, smooth, accessible, and outdoors. When practical, we place the laundry near an exterior wall. We minimize elbows, avoid hidden offsets, preserve service access, and label concealed duct length where required so future owners and service technicians know what they are dealing with.
Clean It or Replace It?
Cleaning is the right move when the vent is properly built and has normal lint buildup. Replacement or rerouting is the right move when the vent itself is the problem.
| Condition | Best Action | Reason |
|---|---|---|
| Normal lint buildup in a short metal duct | Clean | The system is sound; airflow needs to be restored. |
| Plastic or vinyl duct | Replace | Unsafe material for dryer exhaust. |
| Crushed or kinked transition hose | Replace | Airflow remains restricted even after cleaning. |
| Disconnected duct in wall, attic, or crawlspace | Repair immediately | Lint and moisture are being dumped into the structure. |
| Exterior termination has a screen packed with lint | Replace or modify with dryer-rated termination | Screens catch lint and restrict airflow. |
| Repeated clogs after cleaning | Inspect route and consider reroute | Long runs, excessive elbows, bad slope, nests, or damaged duct may be causing recurrence. |
| Wet lint or condensation in the duct | Diagnose and repair | May indicate long cold runs, poor routing, sagging duct, or termination problems. |
One of the most common mistakes we see is treating repeat clogs as a cleaning problem. If the same vent clogs every few months, the route deserves a closer look. The duct may be too long, sagging, crushed behind the dryer, full of protruding screws, blocked at the hood, or routed through a cold area where condensation helps lint stick.
When to DIY and When to Hire a Pro
DIY is reasonable when the vent is short, straight, accessible from both ends, and terminates at a ground-floor exterior wall. If you can see the route, reach the hood safely, and reconnect the dryer without disturbing a gas line, a homeowner-grade brush kit can handle routine maintenance.
Hire a professional for roof exits, second-story wall hoods, long concealed runs, tight laundry closets, stacked units, suspected bird or rodent nests, repeated overheating, gas dryers that need to be moved, or any vent that may need code correction. Also hire out if the dryer shuts off mid-cycle, you smell burning, or the duct path is unknown.
Rank #4

- COMPREHENSIVE DRYER VENT CLEANER KIT: Premium clothes dryer replacement vents will help you deep clean buildup lint in the dryer. Package Includes:DRYER VENT BRUSH HEAD x1,NYLON RODSx1,BLUE LONG VACUUM HOSE(31.5”) x1,BLUE ADAPTER(5.5”)x1,HOSE CONNECTION ACCESSORIER(7.5”) x1,DRYER LINT BRUSH x1,DRYER ADAPTER x1,VACUUM CLEANER ADAPTER x1,GAP CLEANING BRUSH x2, LINT TRAP BRUSH x1,ANTI-SLIP GLOVES x2,LINT GRABBER x1,COLLECTION BAG x1,LAUNDRY BAG x1,STRONG TAPE(FOR NYLON ROD) x2,DUST COLLECTOR BAG x30,DRILL BIT x1,TRANSPARENT SELF-ADHESIVE HOOK x5,SMALL GAP BRUSH x2,GROOVE GAP BRUSH x2
- DRYER VENT CLEANING BRUSH: Dryer vent cleaner kit can be used with or without any kind of power drill and will help you achieve professional results; Just always turn the rod clockwise and keep moving in&out slowly; Kindly remind that while cleaning around corners and turns or stubborn lint trap, slow down and then accelerate slowly
- DRYER LINT VACUUM ATTACHMENT: Handy vacuum hose attachment measures over 3.5 feet long to reach deep into difficult places, perfect for cleaning behind appliances beyond your reach; NOTICE: It suitable for most vacuum, but not fit for Dy-son and cordless vacuum cleaners
- MULTIFUNCTIONAL CLEANING KIT: The goal of this kit is to achieve a complete cleaning of the dryer; Except several large tools, small products also play an irreplaceable role; Lint trap brush is better for the tight place,strong tape can reinforce the connection of rods, lint grippers clean deeper and remove stubborn dirt or fluff, anti-slip gloves protect your hands during the cleaning process, collection bag stores these tools
- PREVENTING FIRE RISKS: Lint buildup can be dangerous and failure to clean it is the leading cause of clothes dryer fires; So remove the lint periodically is the only way to prevent dryer fires risk
A reputable dryer vent cleaning visit should be more than a quick brush pass. The technician should inspect the visible duct and transition connector, clean from both ends when needed, protect the dryer and blower, avoid damaging joints, verify the exterior damper works, check airflow before and after where possible, and flag unsafe materials or bad routing. If the only recommendation is another cleaning without any explanation of why the vent clogged, that is not enough for a repeat problem.
What Dryer Vent Cleaning Costs in 2026
For a standard residential dryer vent cleaning in the U.S., expect many jobs to land around $100 to $300 in 2026, with common market averages near $145 to $200. Basic accessible vents may come in lower. Long, difficult, or roof-terminated vents can cost more.
| Service or Condition | Typical 2026 Cost | Notes |
|---|---|---|
| Standard residential dryer vent cleaning | $100 to $300 | Many average jobs fall near $145 to $200. |
| Basic standard vent cleaning | $80 to $185 | Usually short, accessible runs. |
| Roof vent cleaning | $150 to $250+ | Higher access risk and more setup time. |
| Basic cleaning calculator range | $169 to $386 per vent | Varies by location, site conditions, and options. |
| Marketplace booked-service range | $186 to $510 | Often reflects more complex jobs and higher-cost markets. |
| Bird nest removal | $120 to $250, sometimes $150 to $350 | Depends on access and severity. |
| Inspection only | $30 to $60 | May be credited toward service by some contractors. |
| DIY brush kit | $15 to $50 | Best for short, accessible vents. |
Cost drivers are straightforward: duct length, number of elbows, roof or second-story access, stacked appliance access, severity of blockage, pest nests, local labor rates, gas dryer disconnect complexity, replacement parts, and whether the visit includes airflow testing or minor repairs. In high-cost cities, pricing can climb. A 30- to 35-foot vent run may cost several hundred dollars, especially if access is poor.
Common add-ons include replacing the transition duct, installing a dryer-rated exterior hood, adding pest protection that does not block airflow, repairing a disconnected duct, rerouting a poor vent path, or adding a permanent duct-length label during remodeling work.
Roof Dryer Vents: Not Automatically Wrong, But Higher Maintenance
A roof dryer vent is not automatically a code violation or a bad design. Sometimes it is the practical route, especially in interior laundry rooms. But it is harder to inspect, harder to clean, and usually more expensive to service. It also needs the right termination: a dryer-rated roof cap with a damper and no screen.
The risk with roof exits is neglect. Homeowners do not usually climb onto the roof to see whether the damper opens. If the cap clogs, clothes take longer to dry and the dryer runs hotter, but the exterior warning signs are out of sight. For roof vents, we recommend professional cleaning at least annually, and every 6 months for heavy laundry use or prior clogs.
Permit and Remodel Notes
Routine dryer vent cleaning usually does not require a permit. Repairing a transition connector or replacing an exterior hood typically does not either, though local rules vary. Rerouting concealed ductwork during a remodel, relocating a laundry room, cutting new exterior penetrations, or changing gas dryer connections may require permits or inspections depending on the jurisdiction and project scope.
During construction, the best time to solve dryer vent problems is before drywall, cabinets, and finished flooring are installed. A poor route hidden behind new finishes becomes expensive later. On our remodels, we look for a route that keeps the developed length short, limits elbows, avoids inaccessible joints, terminates outdoors in a serviceable location, and leaves enough room behind the dryer for a proper transition connector.
What’s actually slowing this PC down?
Pick the symptom - the matching free tool is one click away.
Common Mistakes That Cause Dryer Vent Problems
The same failures show up again and again. Avoid these:
Best Value

- All-in-One Dryer Duct Cleaning Kit — No more running to the hardware store for missing parts. This complete vent cleaning kit includes a heavy-duty dryer vent cleaning brush for 4-inch pipes, a set of flexible nylon rods, a dedicated lint brush, a dryer vent cleaner drill attachment, and protective gloves—everything you need in one box, ready to use right away.
- Help Improve Dryer Operation — Lint and pet hair buildup can slow down your dryer and raise energy use. This dryer cleaner vent kit reaches into filters and ducts to lift out stubborn debris, supporting more efficient operation and may help shorten drying times—so laundry day goes faster.
- Simple Operation for Deep Cleaning — Designed for dryer vent lines, the easy-screw handle and drill connector attach to standard household drills in seconds. The rotating motion reaches deep into ducts to pull out hidden lint that traditional duct cleaning tools can't access.
- Helps Clear Stubborn Lint Buildup — Lint can build up in dryer vent lines over time. Using this dryer vent snake cleaning tool regularly helps clear debris from vent walls, supporting a tidier laundry space—whether it's a busy holiday or a quiet family evening.
- Cost-Effective DIY Cleaning — Why pay for professional duct cleaning every few months? This dryer exhaust vent cleaning kit lets you handle the job yourself and keep your dryer running smoothly—keeping costs low over time.
- Cleaning only the lint screen and assuming the duct is clear.
- Pushing the dryer back until the transition duct is crushed.
- Using plastic, vinyl, PVC, or flimsy foil duct.
- Leaving a bird screen or hardware cloth over the exterior termination.
- Venting into an attic, crawlspace, garage, basement, soffit, or wall cavity.
- Building long runs with several elbows without checking equivalent length.
- Using screws that protrude into the duct and snag lint.
- Using a leaf blower carelessly and packing lint deeper into the route or blowing lint into cavities.
- Ignoring roof exits because they are inconvenient to reach.
- Moving a gas dryer without protecting the gas connector or checking for leaks afterward.
- Skipping the exterior airflow check after cleaning.
The Bottom Line
Clean the lint screen every load. Check the exterior damper regularly. Clean the full dryer vent at least once a year, or every 6 months for heavy use, pets, long runs, roof exits, or any home with a history of clogs. Budget roughly $100 to $300 for a normal professional cleaning in 2026, with higher costs for roof access, long duct runs, pest removal, or repairs.
Most importantly, know when cleaning is not enough. A dryer vent made from unsafe material, crushed behind the appliance, routed into the wrong space, screened at the termination, or repeatedly clogging needs correction. A good dryer vent is short, smooth, metal, accessible, and exhausted outdoors. That is what keeps the dryer working efficiently and the house safer.
Frequently Asked Questions
How often should a dryer vent be cleaned?
Clean the lint screen every load and clean the full dryer exhaust duct at least once per year. Homes with pets, heavy laundry use, long duct runs, roof exits, or prior clogs should clean the full vent about every 6 months.
Do these 3 things before closing this tab:
1Scan for outdated or missing drivers - takes under a minute2Repair Windows errors before they cause bigger problems3Fix the driver behind crashes, sound loss and screen glitchesCan I clean a dryer vent myself?
Yes, if the vent is short, straight, accessible, and exits at a ground-floor wall. Use a dryer vent brush kit, vacuum, and basic hand tools. Hire a pro for roof vents, long concealed runs, stacked units, suspected nests, gas dryer movement, or repeat overheating.
How much does dryer vent cleaning cost in 2026?
Most standard residential dryer vent cleanings cost about $100 to $300 in 2026, with many average jobs near $145 to $200. Roof vents, long runs, nests, tight access, repairs, and high-cost markets can push the price higher.
What are the signs of a clogged dryer vent?
Common signs include longer drying times, hot clothes, a hot dryer exterior, burning smells, weak airflow outside, lint around the exterior hood, excess laundry room humidity, or the dryer shutting off mid-cycle.
What type of dryer vent hose is safest?
The concealed dryer exhaust duct should be smooth metal, typically 4 inches in diameter. The short transition connector behind the dryer should be metal and kept short, smooth, and uncrushed. Avoid plastic, vinyl, PVC, and flimsy foil duct.
Why does my dryer vent keep clogging after cleaning?
Repeat clogs usually mean there is a design or condition problem: a long run, too many elbows, crushed transition duct, protruding screws, a screened termination, pest nesting, condensation, or a disconnected or damaged duct.
Quick Recap
Product prices and availability are accurate as of the date/time indicated and are subject to change. Any price and availability information displayed on Amazon at the time of purchase will apply.

