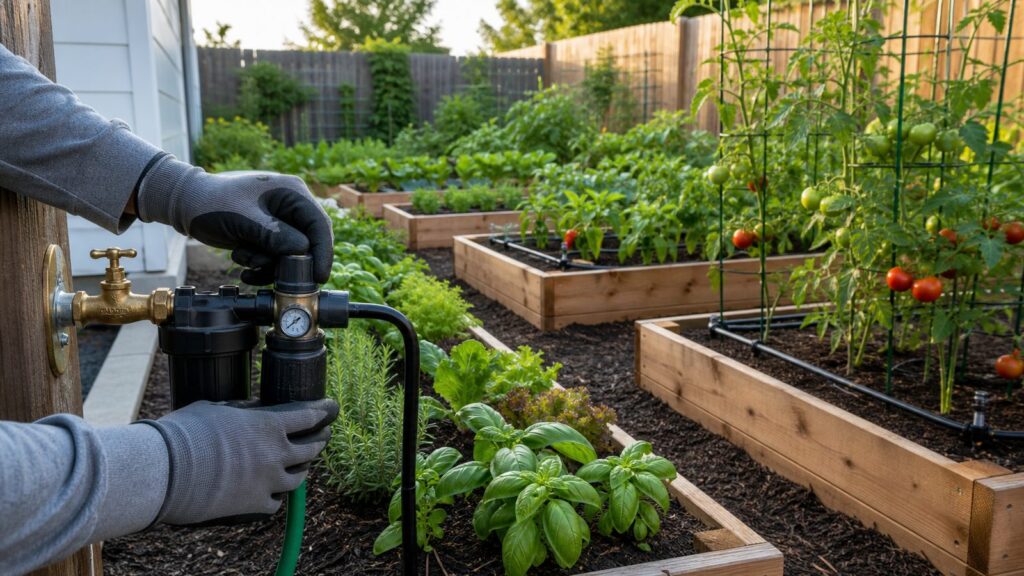
Drip irrigation is one of the most effective upgrades you can make to a vegetable garden, raised bed, shrub border, foundation planting, or narrow planting strip. A good system puts water at the root zone instead of spraying it into the air, onto siding, across sidewalks, or into the street. That means less evaporation, less runoff, fewer wet leaves, and more consistent soil moisture where plants actually use it.
For a typical small residential garden zone in 2026, expect a professionally installed drip irrigation system to cost about $310 to $815, with a common national average around $520. A basic DIY kit for a small garden or patio bed can start around $55 to $200, but the real cost depends on the filter, pressure regulator, timer, tubing length, emitter density, backflow protection, and whether the system ties into an outdoor faucet or a permanent irrigation supply.
On our job sites, the difference between a drip system that works for years and one that becomes a nuisance usually comes down to five things: proper zoning, pressure regulation, filtration, backflow protection, and service access. Tubing and emitters are the visible parts, but the connection point is where most homeowner mistakes start.
As an Amazon Associate I earn from qualifying purchases.
What a Drip Irrigation System Does
A drip irrigation system delivers water slowly through tubing, dripline, drip tape, bubblers, or individual emitters. Instead of broadcasting water over the entire landscape like a sprinkler head, it targets the soil near plant roots. That is why drip irrigation works especially well for:
- Raised vegetable beds
- In-ground garden rows
- Shrub and perennial beds
- Foundation plantings
- Containers and patio planters
- Narrow side yards and planting strips
- Sloped beds where sprinklers cause runoff
- Hot, exposed areas where spray irrigation evaporates quickly
Drip is not always the best choice for large turf areas. Lawns usually need broad, even coverage, and sprinklers are often simpler to adjust when turf edges or use patterns change. But for garden beds and landscape plantings, drip is usually more efficient and more precise.
#1 Best Overall

- Convenient Drip irrigation kit has everything needed to water up to a 4’ x 8’ raised bed garden
- Ideal for all types of raised garden beds with professional-grade components that are built to last
- Waters at low volume near roots for healthier plants, higher yields and up to 80% water-savings
- Pressure-compensating emitters deliver even watering throughout garden beds
- Easy-to-install: detailed user manual features illustrated instructions with various system layouts
The EPA WaterSense program notes that residential outdoor water use in the United States is nearly 8 billion gallons per day, mostly for landscape irrigation, and as much as 50% can be wasted through overwatering and inefficient systems. Drip irrigation helps address that problem, but only when the system is designed correctly. A smart timer cannot fix missing filtration, excessive pressure, poor emitter spacing, or plants with different water needs forced onto the same zone.
Drip Irrigation Cost in 2026
For a small garden zone, the typical professional installation cost in 2026 is about $520, with many projects landing between $310 and $815. Small garden-bed systems are often priced around $3.25 per square foot for areas in the 100 to 275 square foot range. Larger or more complex systems can reach $1,000 to $2,850 or more when they include multiple zones, buried mainline, electric valves, controller wiring, backflow assemblies, permits, inspections, hardscape crossings, or difficult access.
Free tools Windows power users keep installed
One-click scans. No signup required.
| Project Type | Typical 2026 Cost | What It Usually Includes |
|---|---|---|
| Basic DIY patio or raised-bed kit | $55-$200 | Tubing, emitters or dripline, fittings, stakes, simple hose-bib timer |
| Small professional garden zone | $310-$815 | One garden zone, tubing layout, fittings, filter, pressure regulator, basic connection |
| Average small residential drip project | About $520 | Typical garden-bed installation with standard parts and labor |
| Installed small garden-bed pricing | About $3.25 per sq. ft. | Useful benchmark for 100-275 sq. ft. beds |
| Complex multi-zone system | $1,000-$2,850+ | Valves, controller, trenching, backflow assembly, permits, inspections, difficult routing |
Cost is not driven by square footage alone. A 150-square-foot vegetable bed with dense rows may need more dripline and fittings than a 300-square-foot shrub bed with widely spaced plants. The main cost drivers are garden size, number of zones, tubing length, emitter spacing, water pressure, available flow, soil type, slope, controller choice, trenching, mulch or bed preparation, backflow preventer type, and local permit requirements.
Backflow preventers and permits vary heavily by jurisdiction. If the system connects to potable water, budget extra for code-compliant backflow protection, especially in communities that require inspection or annual certified testing.
Main Parts of a Garden Drip System
A reliable drip system is more than tubing. The correct order from the water source is usually:
- Water source
- Backflow prevention
- Filter
- Pressure regulator
- Timer or controller
- Mainline tubing
- Lateral lines or dripline
- Emitters, drip tape, or bubblers
- Flush point or removable end cap
Backflow Preventer
A backflow preventer protects the drinking water supply from irrigation water flowing backward into the plumbing system. Irrigation water can contain soil, fertilizer, bacteria, and other contaminants. Most permanent irrigation connections to potable water require some form of backflow protection, but the approved device type depends on local plumbing code and the risk classification.
Crashes, No Sound, or Screen Glitches?
Random freezes, missing sound and display glitches usually trace back to one bad driver. Find and replace yours safely.Free scan · under a minuteWindows Errors? Fix Them Before They Spread
Repair common Windows errors and clear accumulated junk for a smoother, more stable PC - no reinstall needed.Free scan · no reinstallA simple hose-end vacuum breaker may be acceptable for some temporary hose-bib setups. A permanent irrigation system may require a pressure vacuum breaker, double-check assembly, reduced-pressure principle assembly, permit, inspection, or annual test. Local rules control this. Do not assume the small size of a garden bed exempts the connection.
Filter
Filtration is not optional. Drip emitters have small passages, and debris will clog them. Many garden systems use 200-mesh filtration for emitter tubing. Mesh filtration is especially important if the water source has sediment, if the system connects to an older line, or if fertilizer injection is used.
Rank #2

- Be a Gardening Master with the help of our superior and complete Drip Irrigation Kit: 50ft flexible & durable PVC 5/16" Irrigation Tubing + 50ft 1/4" Drip Distribution Tubing + 2 x Female Thread Water Connectors for 5/16" Mainline + 20 Barbed Drip Emitters Stream + 10 Barbed Drip Emitters Vortex + 4 x 1-Way, 6 x 2-Way and 2 x 4-Way Barbed Splitters from 5/16" to 1/4" + 5 x 1/4" Tubing Tee Splitters + 2 x 5/16" Mainline End Plugs + 5 x 1/4" Distribution Tubing End Plugs
- Make your own garden irrigation system kit easier than ever: run a 3/4 connection from your water source to the watering area. Use the 5/16 irrigation tubing as the mainline. Branch off with the 1/4 drip irrigation tubing and connect a maximum of 30 drip irrigation emitters. Stick the dripper stake into the soil, adjust the desired irrigation spray, and feed your plants with your own drip irrigation system. Designed to work with between 20 - 45 PSI and a maximum output of 60 gallons/hour/emitter
- Enjoy taking care of your garden with high quality adjustable spray emitters and forget about broken irrigation sprayer stakes and clogged drip heads. With a length of 7.5 inch and a sharp bottom, the irrigation bubbler stake can be easily fixed into the ground and stays still even in loose soil. Perfect for long time application, the drip irrigation emitter heads are detachable and easy to clean so you don’t worry about clogging. Make gardening less of a chore!
- Spend less, get more - UV resistant and designed for underground or above-ground installation, the Carpathen 1/4 inch drip irrigation tubing will last year-round in any weather. Use the 4 ways/2 ways/1 way couplers to create the perfect branch for your plants. Season after season the distribution tubing part of the irrigation drip system will keep your plants hydrated with minimal waste from evaporation. Choose to cut down your water bills!
- Save Your Time with Carpathen Garden Irrigation System. Our automatic drip watering system minimizes water loss by directly hydrating the roots of your plants. Easily adjust the drip emitters by rotating the cap for precise hydration. Designed for up to 3 raised garden beds, this irrigation system for the garden is ideal as a garden starter kit for healthy vegetables, an automatic watering system for potted plants, a raised garden bed watering system, or a reliable garden grid watering system
Pressure Regulator
Household water pressure is commonly much higher than drip tubing needs. Many drip components operate at low pressure. Common drip tubing operating pressures are often in the 6 to 12 psi range, while many landscape drip systems are regulated around 25 psi. Running drip tubing directly off high pressure can pop fittings, distort flow rates, overwater beds, or shorten the life of the tubing.
Tubing and Emitters
Typical garden systems use 1/2-inch or 5/8-inch mainline tubing with smaller 1/4-inch distribution tubing where needed. Inline drip tubing comes with built-in emitters at set spacing. Common emitter spacing ranges from 6 to 36 inches, depending on crop, soil, slope, and plant spacing. Some 1/4-inch tubing is available with 6, 12, or 24 inch spacing, while 1/2-inch tubing may be available with 9, 12, 18, 24, 36, or 48 inch spacing.
The Tool Desk
Outbyte PC Repair FREERepair Windows errors before they cause bigger problemsFix Now →Outbyte Driver Updater FREEFix the driver behind crashes, sound loss and screen glitchesFind Drivers →Use pressure-compensating emitters or dripline on slopes, long runs, and mixed-elevation beds. They help keep output more uniform from the start of the line to the end.
How to Plan the Layout
Start with a measured sketch before buying parts. Measure each bed, note the water source, mark walkways and hardscape, and group plants by water need. A good plan does three things: it keeps plants with similar water demand on the same zone, keeps tubing runs within manufacturer limits, and provides access for maintenance.
We typically separate vegetables, shrubs, containers, foundation plantings, and high-water annuals where possible. A vegetable bed that needs frequent watering should not be on the same schedule as drought-tolerant shrubs. Containers dry out faster than in-ground beds and often need their own zone or separate timer schedule.
Step 1: Measure Flow at the Source
Before designing the zone, check available flow from the hose bib or supply point. A simple bucket test works: place a 5-gallon bucket under the faucet, open the faucet fully, and time how long it takes to fill. If it fills in 30 seconds, that is about 10 gallons per minute. If it takes 60 seconds, that is about 5 gallons per minute. Leave a margin instead of designing right up to the maximum.
What’s actually slowing this PC down?
Pick the symptom - the matching free tool is one click away.
Step 2: Estimate Total Emitter Flow
Add up the flow from every emitter or dripline segment in the zone. If you install 100 emitters rated at 0.5 gallons per hour, the zone uses 50 gallons per hour, or about 0.83 gallons per minute. If you use dripline, calculate output by length using the manufacturer rating. This step prevents weak end-of-line performance and uneven watering.
Step 3: Match Spacing to Soil
Sandy soil drains quickly and usually needs closer emitter spacing or shorter, more frequent cycles. Clay soil spreads water laterally but absorbs slowly, so long run times can cause puddling and runoff. Loam is more forgiving. As a starting point, use closer spacing such as 6 to 12 inches for vegetable rows, 12 to 18 inches for many mixed beds, and wider spacing only where plant spacing and soil conditions support it.
Step 4: Design for Access
Keep filters, regulators, valves, timers, and flush caps accessible. Mulch over surface dripline to reduce UV exposure and evaporation, but do not bury service points where they cannot be inspected. Before covering lines, photograph or sketch the layout. That one step can save a punctured line later when edging, planting, or adding landscape lighting.
Rank #3

- 【10-Min Push-To-Connect Setup】 Build your drip irrigation system faster with a simple cut, push, and lock design. No heating, no tools, and no forcing sharp barbed fittings. Beginner-friendly for raised beds, flower beds, patios, and greenhouse layouts. Watch the main video to see how easy setup can be.
- 【Locking, Leak-Resistant Connections】 Traditional barb fittings can be hard to install and may pop off when pressure changes. This push-to-connect drip irrigation kit uses locking clips and inner sealing O-rings to help reduce leaks and keep tubing securely connected. Works best under normal household water pressure.
- 【50FT 1/2" Mainline for Better Flow Stability】 Many drip irrigation kits use short mainlines that can limit layout flexibility and cause weak flow at the far end. This system includes an extended 50FT 1/2" mainline to carry water farther before branching into 1/4" drip lines—ideal for raised beds, greenhouse rows, vegetable gardens, and long backyard layouts.
- 【Adjustable Drip, Stream & Spray Watering】 Includes stream emitters, vortex emitters, and sprayers so you can fine-tune water flow for vegetables, shrubs, flower beds, potted plants, and landscaping. Adjustable watering helps deliver moisture closer to the roots, reduce water waste, and create a more customized micro-irrigation layout.
- 【Complete 2-Zone DIY Drip Irrigation Kit】 Includes 50FT 1/2" mainline, 115FT 1/4" tubing, 32 adjustable emitters/sprayers, 2 faucet adapters, push-to-connect tees, end plugs, and 3-way/4-way/6-way splitter fittings. Build 2 watering zones, split the mainline into multiple runs, and expand anytime with compatible Spalolen tubing, fittings, and emitters.
Installation Sequence That Works
A clean installation sequence prevents most early failures. First, assemble the connection point: backflow protection, filter, pressure regulator, and timer or valve. Then run the mainline to the bed, keeping it protected from foot traffic and sharp edges. Use stakes to hold the tubing in place while you test the layout.
Flush the mainline before installing emitters. Dirt and plastic shavings from installation can move through the tubing and clog new emitters immediately. After installing laterals or dripline, flush those lines again before capping the ends. Then run the system and check every connection under pressure.
For raised beds, design around rows and future crop rotation instead of only today’s plants. Removable drip tape can make sense for annual vegetable beds because it is easy to change between seasons. For permanent shrub beds, use durable landscape dripline or individual emitters, and expand the wetting pattern as plants mature. A young shrub may start with two emitters, but a mature shrub often needs multiple emission points around the wider root zone.
How Long to Run Drip Irrigation
Run time depends on emitter output, soil type, plant type, weather, mulch depth, and root depth. There is no universal 20-minute setting that works everywhere. A better method is to run the system, check soil moisture, and adjust.
For vegetable beds, many homeowners start with 30 to 60 minutes per cycle, then adjust after checking moisture 4 to 6 inches deep. In hot weather, sandy raised beds may need shorter, more frequent watering. Clay beds may need longer intervals with slower application to avoid puddling. Shrubs and perennials often benefit from deeper, less frequent watering once established.
Recommended Free Tools
A WaterSense-labeled smart controller can reduce overwatering by adjusting schedules based on plant needs, weather, or seasonal conditions. Smart controls are useful for permanent irrigation, but they still need verification. After setup, check seasonal adjustment, rain-skip settings, zone names, and actual soil moisture. We see plenty of systems with smart controllers that still overwater because the zones are mismatched or the emitters are spaced poorly.
Drip Irrigation vs Sprinklers
Drip and sprinklers solve different problems. Drip is precise and efficient for beds. Sprinklers are practical for turf and broad areas. Many well-built landscapes use both.
| Category | Drip Irrigation | Sprinklers |
|---|---|---|
| Best use | Vegetables, shrubs, raised beds, narrow strips, slopes | Lawns and broad open planting areas |
| Water placement | At or near root zone | Over plant canopy and soil surface |
| Evaporation and overspray | Usually low | Can be high in wind or heat |
| Visibility | Often hidden under mulch | Spray pattern is easy to see |
| Maintenance | Filter cleaning, flushing, clog checks | Nozzle adjustment, head repair, coverage checks |
| Layout flexibility | Good for beds, less ideal for changing turf | Good for open areas, less precise in tight beds |
If your main problem is dry vegetable beds, overspray on siding, runoff down a slope, or water hitting a walkway, drip is usually the better tool. If your main problem is a large lawn, sprinklers are usually more practical.
Rank #4
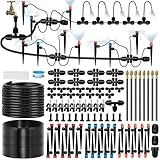
- 【Upgraded Tube Design & Water Saving】 Our garden watering system is upgraded to 1/2” diameter to support high water pressure. The 1/2” tee connector allows seamless splitting into 2 independent zones for customized watering schedules. By delivering moisture directly to root zones, this drip Irrigation system significantly reduces evaporation and runoff—saving more water compared to conventional sprinklers while eliminating the need for manual watering.
- 【Quick Connect & Tool-Free Set Up】 Designed for simplicity with push-to-connect fittings that secure instantly without heating, gluing, or specialized tools. The intuitive 1/2" to 1/4" 4-way connector link 1/2" main lines to 1/4" drip lines in quickly, allowing you to build a custom layout exactly where needed. Connections stay firmly sealed under pressure, preventing leaks and making installation a breeze. This drip irrigation kit saving you time and effort!
- 【Durability & Nozzle Variety】 This drip system features adjustable sprinklers, adjust each sprinkler head by rotating the cap for precise watering. The stake at the bottom of the sprinkler secures firmly into the soil. 3 nozzle types—vortex, stream, and misting—for tailored watering across different plants, plus 8 copper nozzles can be bent and fixed 360 ° to adjust the place where the spray is needed and the spraying direction. This makes gardening less tedious!
- 【Versatility & Wide Application】 Ideal for a wide range of applications, including raised garden beds, greenhouses, vegetable patches, flower borders, patios, and lawns. Flexible tubes, a variety of nozzles, and connection components allow you to easily customize different irrigation methods. Suitable for both above-ground and elevated installations, this quick-connect garden watering system is your all-in-one solution for a thriving and well-maintained garden.
- 【Complete Kit & All You Need】 The irrigation system for garden comes with a variety of components to meet your needs: 10 drip vortex emitters, 10 drip stream emitters, 10 misting nozzles, 8 360° bendable metal spray nozzles, 33 FT 1/2" main line, 197 FT 1/4" drip line, 15 1/4" tee splitter, 8 1/2" to 1/4" 4-way connector and more. Precise and efficient watering is no longer a tedious process, but an easily achievable reality.
Permits, Backflow, and Safety
Any time irrigation connects to potable water, backflow protection should be treated as a core requirement, not an accessory. Local code determines the device, location, installation height, testing schedule, and whether a licensed plumber or irrigation contractor is required.
Quick wins for a faster PC:
Scan for outdated or missing drivers - takes under a minuteDriver Scan →Repair Windows errors before they cause bigger problemsFix Now →A permit may be required when the project includes a new irrigation connection, new supply line, permanent valves, a backflow assembly, controller wiring, trenching in regulated areas, or work near utilities. Some cities also require rain and freeze sensors, specific controller settings, inspections, or annual backflow testing.
Before trenching, call 811 and have underground utilities marked. Even shallow garden lines can cross low-voltage lighting, communications cable, gas service, water service, or drain lines. Keep irrigation components accessible and protected from mower damage, foot traffic, and freeze exposure.
Independent reader supportYour contribution helps us test, update, and keep practical guides available for everyone.When to DIY and When to Hire a Pro
A homeowner with basic tools can often install a small hose-bib drip kit for a raised bed, patio planter group, or simple vegetable row. DIY makes sense when the system is temporary, above grade, connected to an outdoor faucet, and limited to one or two small zones. Expect to spend $55 to $200 for a basic kit, plus more for a better timer, filter, regulator, pressure-compensating dripline, or extra fittings.
Hire a pro when the project becomes plumbing or landscape construction. That includes a new supply line, buried mainline, hardscape crossings, multiple electric valves, controller wiring, backflow assembly installation, permit coordination, trenching near utilities, large elevation changes, or tying into an existing irrigation manifold. Professional installation also makes sense when poor water pressure, long runs, clay soil, slopes, or high-value landscaping make mistakes expensive.
A professional should also be involved where local code requires a licensed installer for backflow devices or irrigation connections. Saving a few hundred dollars upfront is not worth a failed inspection, contaminated water risk, or a system that has to be rebuilt.
Maintenance Schedule
Drip irrigation is low maintenance, not no maintenance. During the growing season, check the system at least monthly. Look for dry spots, puddling, clogged emitters, chew damage, popped fittings, kinked tubing, shifted mulch, and controller schedule drift.
Clean or replace filters as needed. Flush line ends at the start of the season and after repairs. Replace clogged emitters instead of increasing run time for the whole zone. In freeze climates, winterize the system before hard freezes. Depending on the setup, that may mean draining exposed lines, removing hose-end timers, insulating backflow components, or having the system blown out according to manufacturer and local requirements.
At the start of each season, run every zone while watching it. At midseason, check soil moisture rather than assuming the controller is right. At the end of the season, inspect tubing before mulch and plant debris hide problems.
Do these 3 things before closing this tab:
1Clear out junk files and repair common Windows errors2Fix the driver behind crashes, sound loss and screen glitches3Repair Windows errors before they cause bigger problemsBest Value

- NO MORE HARD INSTALLATION - SET UP IN MINUTES. Tired of struggling with stiff barbed fittings? This drip irrigation system features quick-connect fittings that let you push, lock, and secure tubing effortlessly. No tools, no leaks, just a smooth setup experience. Enjoy a frustration-free installation and get your garden watering system running in minutes.
- LEAK-FREE & SECURE CONNECTIONS. Traditional connectors often loosen or leak over time. Our upgraded quick-connect design creates a tight seal, keeping water flowing exactly where you need it without waste or mess. Save water, avoid puddles, and keep your garden neat and efficient.
- COMPLETE 230FT KIT - READY TO BUILD YOUR SYSTEM. Includes 230FT tubing (197FT 1/4” + 33FT 5/16”), adjustable emitters, connectors, and stakes. Everything you need to customize your irrigation layout for raised beds, potted plants, or greenhouse setups. No extra trips, no missing parts—build your system right out of the box.
- ADJUSTABLE WATER FLOW FOR EVERY PLANT. Different plants need different care. With 3 types of adjustable stake sprayers, you can control water flow from gentle drip to full spray, ensuring each plant gets exactly what it needs. Promote healthier growth while avoiding overwatering or underwatering.
- AUTOMATIC WATERING WITH TIMER COMPATIBILITY. Connect easily to a hose timer and automate your watering schedule. Perfect for vacations or busy days when manual watering isn’t possible. Keep your plants thriving—even when you’re away.
Common Mistakes to Avoid
The most common drip irrigation mistake is skipping the connection hardware. A hose, tubing, and emitters are not a complete system. Without a backflow preventer, filter, and pressure regulator, the system can become unsafe, clogged, or unreliable.
Other frequent problems include mixing plants with different water needs on one zone, using one emitter for a large shrub, running laterals beyond manufacturer limits, failing to flush lines, placing emitters too far from roots, and burying service points under mulch. We also see homeowners install a smart timer and assume the system is efficient. A controller only controls time. It does not correct bad hydraulics or poor layout.
Design the system so it can be inspected, flushed, repaired, and adjusted as the garden changes. Plants grow. Vegetable rows rotate. Mulch shifts. A good drip system is planned for maintenance from the beginning.
Bottom Line
Drip irrigation is worth considering for most home gardens because it puts water where plants need it and reduces waste from overspray, evaporation, and runoff. For 2026, budget about $310 to $815 for a typical small professional garden-zone installation, around $520 as a national average, or $55 to $200 for a basic DIY kit.
The best results come from treating drip irrigation as a small water-delivery system, not just garden tubing. Plan the zones, check flow, regulate pressure, filter the water, protect the potable supply, and leave the system serviceable. That is the difference between a weekend project that limps along and a garden upgrade that quietly does its job season after season.
Frequently Asked Questions
How much does a drip irrigation system cost in 2026?
A small professional garden drip irrigation zone typically costs $310 to $815 in 2026, with a national average around $520. Basic DIY kits usually run $55 to $200, while complex multi-zone systems with valves, trenching, backflow protection, permits, and controller wiring can reach $1,000 to $2,850 or more.
Do I need a permit to install drip irrigation in my garden?
Possibly. Simple hose-bib kits may not require a permit in some areas, but permanent irrigation connections, new supply lines, backflow assemblies, buried valves, controller wiring, and trenching may trigger permit or inspection requirements. Local plumbing and irrigation rules control the answer.
Does a drip irrigation system need a backflow preventer?
Usually, yes, when the system connects to potable water. The required device type depends on local code and the installation. Some temporary hose-bib systems may use a hose-end vacuum breaker, while permanent systems may require a tested backflow assembly.
What pressure should garden drip irrigation run at?
Most drip systems run at much lower pressure than household plumbing. Some drip tubing operates around 6 to 12 psi, while many landscape drip components are commonly regulated around 25 psi. Always match the regulator to the tubing and emitter manufacturer’s specifications.
How far apart should drip emitters be in a vegetable garden?
Common spacing ranges from 6 to 12 inches for many vegetable rows, but the right spacing depends on crop spacing, soil type, slope, and tubing output. Sandy soil usually needs closer spacing, while clay soil may allow wider spacing but requires slower watering to prevent runoff.
Is drip irrigation better than sprinklers for a home garden?
For vegetable beds, shrubs, raised beds, containers, slopes, and narrow planting strips, drip irrigation is usually better because it applies water directly near the root zone. For large lawns, sprinklers are often more practical because they cover broad turf areas more evenly.
Quick Recap
Product prices and availability are accurate as of the date/time indicated and are subject to change. Any price and availability information displayed on Amazon at the time of purchase will apply.

