Quick wins for a faster PC:
Scan for outdated or missing drivers - takes under a minuteDriver Scan →Clear out junk files and repair common Windows errorsFree Scan →Fix the driver behind crashes, sound loss and screen glitchesFind Drivers →Some links on this page are affiliate links: if you buy through them we may earn a commission, at no extra cost to you.
DIY plant markers are one of the cheapest ways to make a garden easier to manage and more finished-looking, but only if they survive real outdoor conditions. A label that fades by July, disappears under mulch, or snaps under a string trimmer is not a garden upgrade. It is clutter.
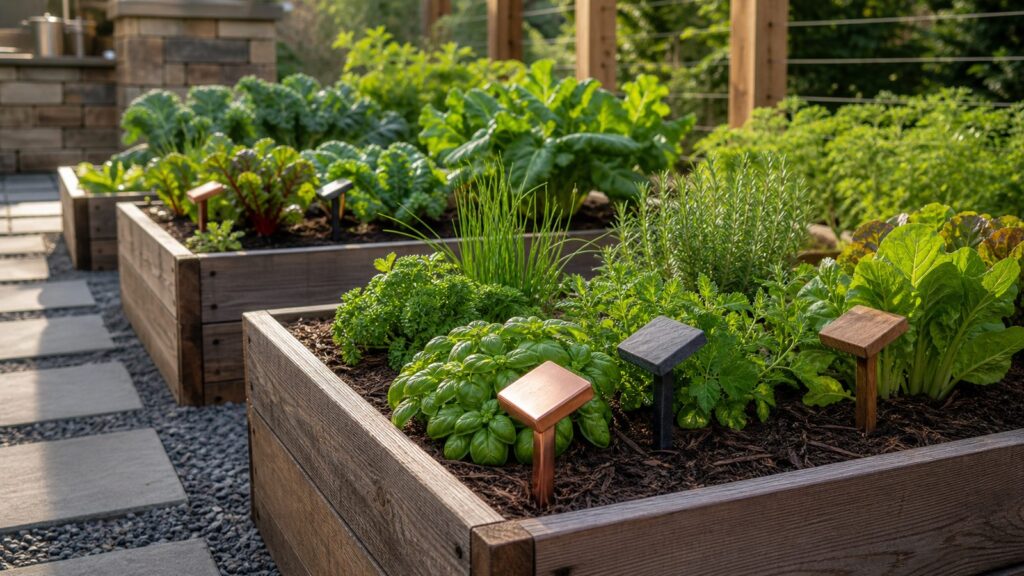
The best plant marker depends on where it will live. Seed trays can use wood craft sticks. Seasonal vegetable rows do well with UV-stable plastic, bamboo, or painted wood if you expect to replace them. Perennial beds, herb gardens, and front-yard planting areas deserve metal, slate, ceramic, sealed hardwood, or another material that reads as a permanent exterior detail.
As an Amazon Associate I earn from qualifying purchases.
On our job sites, small exterior details matter because they sit in the same weather as siding, trim, railings, irrigation heads, edging, and hardscape. Plant markers are no different. Choose the material by exposure, prep the surface before labeling, leave enough clearance for maintenance, and use a marking method that matches the lifespan of the plant.
Start With the Right Marker for the Garden
Before choosing a cute design, decide how long the marker needs to last. A tomato label and a front-yard hydrangea label should not be built the same way.
#1 Best Overall

- Metal Plant Markers: Enhance your gardening experience with the Cureder 30 Pack Metal Plant Labels. These waterproof garden markers are perfect for labeling a wide variety of plants, including seedlings, herbs, flowers, vegetables, succulents, fruits, and trees. Made from stainless steel metal, these plant labels are rust-resistant, ensuring they withstand outdoor elements and remain legible for years to come.
- DIY Writing: With their waterproof and weatherproof feature, these garden markers can withstand rainy or humid conditions without fading or smudging. You can now label your plants with confidence, knowing that the important information will stay intact regardless of the weather.
- Widely Used: In addition to labeling plants, these markers can also be used for leaving notes, instructions, or dates about your plants. Whether you want to remind yourself of specific care instructions or track the growth of your plants, these markers are a versatile and practical solution.
- Attractive Design: Not only are these plant labels practical, but they also add a touch of elegance to your garden. The sleek metal design complements any outdoor space, giving it a polished and organized look. Use these markers to create a well-organized garden or to add a decorative touch to your potted plants.
- The Ideal Gift for Plant Lovers: Don't settle for flimsy plastic labels that fade or break easily. Invest in the durability and style of the Cureder 30 Pack Metal Plant Labels and take your gardening to the next level. These markers are not only functional but also add a decorative element to your garden, making them a must-have for any plant enthusiast.
For seed starting and annual flowers, plan on a seasonal marker. A 4- to 6-inch craft stick, bamboo label, recycled blind strip, or cut plastic container tag is usually enough. These are low-cost, quick to write, and easy to replace. Expect many wood and bamboo labels to look tired after one wet season unless they are sealed.
For vegetable beds, use 8- to 12-inch markers with a writing face large enough for the crop, variety, and planting date. For example, “Roma tomato, transplanted 5/10” is more useful than “tomato.” If you plant multiple varieties, add a bed or row code such as “B2-R3.”
Recommended Free Tools
For herbs, perennials, shrubs, and trees, use longer-lasting markers. Metal tags, slate, ceramic, engraved acrylic, or sealed cedar are better choices. These plants may stay in place for years, so the label should be built for years. For shrubs and trees, avoid rigid tags tight to a stem. Use a metal tag on stainless wire or a flexible tie with room for growth.
A good size rule is simple: 4 to 6 inches tall for seedling labels, 8 to 12 inches for vegetable row markers, and 12 to 18 inches for ornamental bed markers. Taller labels are easier to read, but they become visible landscape elements. In a front bed, standardize the size and material so the markers look intentional rather than scattered.
Material Comparison: Cost, Lifespan, and Best Use
Most plant marker failures come from using indoor craft logic outdoors. Sun, irrigation, soil splash, freeze-thaw cycles, mulch contact, and maintenance equipment all shorten the life of weak materials. The table below gives realistic 2026 US cost ranges and where each option makes sense.
| Marker Type | Typical 2026 Cost | Expected Outdoor Lifespan | Best Use | Notes |
|---|---|---|---|---|
| Recycled plastic, blinds, corks, rocks, scrap wood | $0-$10, plus $4-$12 for a paint marker | One season to several years | Budget gardens, seed trays, kids’ gardens | Best when edges are smoothed and writing is tested outdoors first. |
| Wood craft sticks or bamboo labels | $4-$12 per 50-100 pack | Weeks to one season unsealed; longer if sealed | Seed trays, annuals, temporary rows | Attractive but prone to rot, fading, and splintering. |
| Plastic T-labels or nursery tags | $5-$15 per 25-100 labels | One to three seasons, depending on UV exposure | Vegetable beds and container gardens | Use matte or textured plastic with graphite pencil or outdoor marker. |
| Slate labels | $12-$35 for small packs; $25-$40 each for larger handmade labels | Several years if not dropped or hit | Herbs, patios, ornamental beds | High-end look, but slate can crack and hardware may rust if low quality. |
| Copper, zinc, aluminum, stainless steel | $10-$30 for simple 10-25 packs; $20-$60+ for premium sets | Several years to long-term | Perennials, specimen plants, front beds | Stamped or engraved metal outlasts ink. File sharp edges. |
| Ceramic or acrylic decorative markers | $15-$45 per set, or $2-$5+ per custom label | Several seasons to years | Decorative herb gardens, containers, gift gardens | Check frost resistance, thickness, and stake attachment. |
If you want the best value, spend money on the writing method before the marker body. A $5 plastic tag with the right pencil or paint pen can outperform a $20 decorative tag labeled with the wrong marker.
The Best Writing Methods for Outdoor Plant Labels
Regular permanent marker is the common weak link. It can fade quickly in full sun, especially on glossy plastic. For a marker that needs to last through summer heat, irrigation, and rain, choose the writing method as carefully as the label.
Oil-Based Paint Pens
Oil-based paint pens usually cost $3-$15 each, with multi-packs commonly $8-$25. They work well on wood, stone, slate, ceramic, and prepped metal. Shake thoroughly, test the flow on scrap, and let the paint cure fully before installing. Depending on the brand and weather, cure time can range from a few hours to 24 hours.
Surface prep matters. Lightly sand glossy plastic or slick metal with fine sandpaper, wipe it clean, and label only when dry. If you clear coat over paint pen, test one label first. Some clear coats smear uncured paint or peel from plastic.
Grease Pencils and China Markers
Grease pencils, also called china markers, are a practical choice for plastic, metal, and glass-like surfaces. They resist water better than many standard markers and are easy to refresh. They are not as polished as engraving or stamping, but they work well for vegetable beds where labels change each season.
The Tool Desk
Outbyte Driver Updater FREEScan for outdated or missing drivers - takes under a minuteDriver Scan →Outbyte PC Repair FREERepair Windows errors before they cause bigger problemsFix Now →Graphite Pencil
Graphite pencil is underrated. On matte plastic, wood, or bamboo, pencil can outlast many ink markers because it does not bleach the same way in UV exposure. Use a soft pencil on a roughened surface. It is not flashy, but it is cheap, reliable, and easy to update.
Stamped, Embossed, or Engraved Metal
For long-term plant identification, mechanical marking beats ink. Aluminum, copper, zinc, and stainless tags can be stamped, embossed, or engraved. Basic metal letter stamp sets run about $10-$30. Small engraving pens are commonly $15-$40. Metal snips cost about $10-$25, and files or sandpaper are usually $3-$10.
Stamped metal is a good choice for Latin names, cultivar names, and permanent herb or perennial beds. Copper develops a patina, aluminum stays lighter, zinc has a softer gray look, and stainless is the most restrained and durable. Metal heats in sun, so avoid placing large metal plates directly against tender stems.
DIY Plant Marker Ideas That Actually Hold Up
The best DIY markers are simple, repeatable, and suited to the bed. Pick one material per area. A row of matching cedar shims looks cleaner than ten unrelated craft ideas in one planting bed.
1. Recycled Plastic Tags
Cut tags from clean HDPE containers, yogurt tubs, nursery pots, or old vinyl blinds. Aim for a 1-inch by 6-inch seedling tag or a 2-inch by 8-inch vegetable label. Round the corners with scissors and smooth any rough edges.
Use graphite pencil on rough plastic or an oil-based paint pen on a lightly sanded face. These are nearly free if you have materials on hand. For a small garden, the total cost is often $0-$10 plus the price of a marker.
2. Cedar Shim or Paint-Stirrer Markers
Cedar shims, paint stir sticks, and thin hardwood scraps make warm-looking labels. Cut them to 8 to 12 inches for vegetable beds or 12 to 18 inches for ornamental beds. Sand the writing face, label with paint pen, and seal with an exterior clear coat after testing compatibility.
Exterior clear coat usually costs $6-$15. Sealed wood lasts longer than raw pine or bamboo, but the buried end will still eventually break down. Keep wood markers out of constant irrigation spray when possible.
Rank #2

- Durable Plant Stakes - A weatherproof, long-lasting and attractive way to label and identify flowers, plants, shrubs, herbs, vegetables and indoor plants. Use them in flower beds, plant pots, balcony boxes, rockeries, tree, veggies, rose, rapiclip, dahlia, herb garden, mint, vegetable patches and more.
- 25 Pack Banner Copper Plant Labels - A set of 30 reusable planting plant markers made of copper, you can make a mark with permanent marker, metal stamp or label-maker. Copper nameplate measures 2.56x0.9in (6.5x2.3cm), each label has plenty of space for you to write on. The total height is 10in (25.4cm), and the sturdy two-foot design are easy to insert into the soil and relocate around the garden.
- Marking Protection & Retention - Comes with 50pcs self-adhesive white writing tags and 50pcs PET transparent films, it can be used to protect your handwriting mark. You can write on white labels with any type of pen, such as pencils, water-based pens, ballpoint pens, permanent ink markers, and more. The transparent film protects the marking from being washed away by rain and has a strong sun protection effect, which can effectively prevent the marking from fading due to time or weather problems.
- Unique Identification Plant Tags – Copper nameplate is durable and long-lasting. When exposed to the elements copper develops a patina over time, it will add class to a garden. If you like to maintain the shiny copper, please coat the labels with a clear exterior polyurethane/lacquer. If you like the patina more, using a vinegar-water solution to make it aging more quickly.
- Multipurpose - In addition to our usual planting and use, it can also be used as a perfect gift to gardeners or vegetable growers. In addition, during Arbor Day or Parent-child Day, parents and children can use these labels to mark the plants you planted together, let the children personally experience the feeling of being hands-on and the awareness of protecting the environment, also leave you a beautiful memories.
3. River Stone Labels
Flat river stones work well for herbs, containers, and low beds. Wash and dry the stone, write with an oil-based paint pen, and use an exterior sealant if the stone is porous. Stone is durable, but flat labels can disappear under mulch or foliage. Place them at the front edge of the plant’s mature spread, not at the stem.
4. Slate Tile Markers
Slate gives a garden a finished, architectural look. Use small slate tiles with stainless or galvanized stakes, or repurpose leftover slate if you already have it. Label with paint pen, exterior vinyl, or engraving if the slate is thick enough.
Slate is best for herb gardens, patios, and ornamental beds where appearance matters. It is less forgiving around mowing and edging. If a slate marker is dropped or struck, it can crack.
5. Copper or Aluminum Tags
Metal tags are worth using for perennial herbs, roses, specimen shrubs, and labeled collections. Buy blanks or cut metal sheet to size, then stamp, emboss, or engrave the name. A practical tag size is 1 inch by 3 inches for short names and 2 inches by 4 inches for longer plant names.
What’s actually slowing this PC down?
Pick the symptom - the matching free tool is one click away.
Always file corners and burrs. If using wire, choose stainless wire rather than plain steel, which rusts quickly. For trees and shrubs, make a loose loop and inspect it once or twice a year so it does not girdle the plant.
6. Ceramic Tile Labels
Small ceramic tiles can look excellent in containers and formal herb beds. Use frost-resistant tile in cold climates and avoid thin pieces that crack easily. Attach to a stake with exterior-rated adhesive or drill carefully with the right bit. Ceramic and acrylic decorative markers commonly cost $15-$45 per set, with custom labels often $2-$5 or more each.
Design Rules for a More Polished Garden
DIY does not have to look random. The fastest way to elevate plant markers is to standardize them. Use one material, one height, one lettering color, and one placement rule per bed.
In a vegetable garden, white or black labels are fine because function leads. In an herb garden near a patio, slate, copper, zinc, or sealed cedar looks more deliberate. In a front-yard perennial bed, keep labels smaller, angled, and consistent so they support the planting rather than competing with it.
Do these 3 things before closing this tab:
1Fix the driver behind crashes, sound loss and screen glitches2Clear out junk files and repair common Windows errors3Scan for outdated or missing drivers - takes under a minuteUse an angled face when readability matters. A marker that can be read while standing is more useful than a flat tag at soil level. For vegetable rows, an 8- to 12-inch stake with a 15- to 30-degree angled face is usually comfortable. For ornamental beds, 12 to 18 inches can work if the marker is slim and placed near the mature edge of the plant.
Place markers where maintenance crews and homeowners will not destroy them. Keep them outside mower paths, away from edging lines, and a few inches clear of string-trimmer zones. If irrigation heads spray directly onto the label face every morning, expect faster wear. Turn the label slightly or move it to the dry side of the plant when possible.
Mulch depth also matters. A 4-inch label in a bed with 2 to 3 inches of mulch will be half buried before the plant grows. For mulched beds, use taller markers or install them after mulch is placed so the readable face sits above the final grade.
What to Write on Plant Markers
A plant marker should do more than name the plant. The right information saves work later.
PC Slower Than It Used to Be?
A free scan shows the junk files, broken settings and background clutter dragging Windows down - then fixes them in one click.Free scan · Windows 10 & 11Crashes, No Sound, or Screen Glitches?
Random freezes, missing sound and display glitches usually trace back to one bad driver. Find and replace yours safely.Free scan · under a minuteFor edible beds, include the crop, variety, and sowing or transplant date. “Basil, Genovese, 5/12” is better than “basil.” For tomatoes, peppers, squash, and beans, the variety matters because harvest timing, size, disease resistance, and flavor can vary dramatically.
For perennials, include the Latin name and cultivar when practical. Common names overlap. A tag that reads “Echinacea ‘Magnus’” is more useful than “coneflower” when replacing plants or matching an existing bed.
For shrubs and trees, use a durable tag with botanical name, cultivar, and planting year. Keep the tag off the trunk itself unless it is designed for that use. A flexible tie or loose wire loop is better than a tight fastener.
For a higher-end system, use a two-layer label. Put the visible plant name on the front and add small notes on the back: planting date, seed source, mature size, spacing, or bed code. You can also use a small QR code tied to a garden spreadsheet, but treat QR labels as a backup, not the only identifier. Outdoor vinyl and printed labels still need UV resistance.
Safety and Site Considerations Homeowners Miss
Plant markers are small, but they still interact with a real site. That means sharp edges, buried utilities, irrigation, soil contact, and food safety all matter.
Call 811 Before Digging When Stakes Get Serious
Most small plant labels only go a few inches into loose soil. That said, long metal stakes, permanent bed signs, trellised labels, or any marker installed near utilities can become a digging issue. In the US, 811 is the national call-before-you-dig service. If a project involves driving longer stakes, installing posts, changing bed edges, or working near known utility paths, request utility marking before you dig.
Rank #3

- .Premium Galvanized & Rust-Proof Material – Crafted from thickened galvanized iron with electrostatic spray coating, these plant labels are waterproof, weather-resistant, and built to withstand harsh outdoor conditions (rain, sun, frost) without fading, rusting, or breaking, ensuring long-lasting use for years
- Ergonomic Design for Easy Use – Featuring a 25° slanted top and dual-pronged base, our garden markers are easy to read without bending over and stay firmly anchored in soil, preventing tipping or blowing away. The smooth surface is compatible with permanent markers and label printers for clear, smudge-free labeling
- Complete Set with Bonus Pens – Each package includes 30 metal plant tags and 2 free waterproof markers, so you can start labeling your garden right away. The vibrant silver finish adds a sleek, modern touch to your outdoor space while keeping your plants organized
- Versatile for All Gardening Needs – Ideal for labeling vegetables, herbs, flowers, succulents, and indoor potted plants. Perfect for home gardens, greenhouses, nurseries, and professional landscaping projects, helping you keep track of plant names, growth stages, and care instructions
- Eco-Friendly & Reusable – Unlike flimsy plastic or paper labels that tear or decompose, our metal plant tags are 100% reusable and recyclable, making them a sustainable choice for environmentally conscious gardeners
Also think about shallow systems that may not be marked like private irrigation lines, low-voltage landscape lighting, invisible dog fence wires, and homeowner-installed drainage. If you did not install the system and you do not know where it runs, probe carefully and keep stakes short.
Avoid Unsafe Salvage in Edible Gardens
Do not use unknown salvaged lumber, old painted wood, pressure-treated scraps of uncertain age, or metal with sharp burrs in vegetable beds. Older CCA-treated wood is no longer used for most residential purposes, and guidance from pesticide and extension sources warns against placing older CCA-treated material where routine food or feed contact can occur.
Free tools Windows power users keep installed
One-click scans. No signup required.
If you want wood in an edible bed, use clean cedar, bamboo, untreated pine for short-term use, or a known food-garden-safe material. Do not assume every construction offcut belongs near lettuce, herbs, or strawberries.
Remove Sharp and Splintered Edges
Metal corners should be rounded or filed. Bamboo and wood should be sanded if hands, knees, kids, or pets will be near them. Avoid spear-like stakes in play areas or narrow paths. A good marker should bend, pull free, or sit out of the way before it injures someone.
Check HOA and Sign Rules for Larger Displays
Normal plant labels rarely need permits. Larger garden signs, front-yard educational displays, business signage, or community garden signs can fall under local sign rules or HOA standards. Municipal sign rules vary widely, and some cities require permits based on sign size, placement, illumination, or location. If your marker becomes a sign, especially in a front yard or public-facing area, check local rules first.
DIY vs. Buying vs. Hiring a Pro
Most plant markers are a good DIY project. A homeowner can make a useful set in one afternoon with $15-$60 in materials and tools, especially if basic tools are already on hand. For a 20-label vegetable garden, recycled plastic tags plus a paint marker may cost under $15. A more polished herb bed with slate or metal markers may land between $25 and $75 depending on the material.
Do these 3 things before closing this tab:
1Repair Windows errors before they cause bigger problems2Scan for outdated or missing drivers - takes under a minute3Clear out junk files and repair common Windows errorsBuy ready-made labels when consistency matters more than customization. Plastic T-labels at $5-$15 per pack are hard to beat for speed. Simple metal sets at $10-$30 for 10 to 25 markers make sense for perennials. Premium engraved or artisan labels at $20-$60 or more per set are reasonable when the garden is highly visible and you want a finished look without tooling up.
Hire a pro when plant markers are part of a larger exterior project. If you are rebuilding beds, adding irrigation, installing lighting, edging paths, building raised beds, or designing a front landscape, marker placement should be coordinated with the overall layout. A construction or landscape professional can keep labels clear of mower paths, irrigation spray, buried lines, drainage flow, and future maintenance zones.
It is also worth involving a pro for permanent interpretive signage, public gardens, community gardens, accessible raised beds, or custom metal and masonry work. Once posts, footings, masonry, electrical lighting, or public access are involved, the job has moved beyond simple plant labels.
Independent reader supportYour contribution helps us test, update, and keep practical guides available for everyone.Step-by-Step: A Durable Weekend Marker Project
For a polished DIY set, use this practical build sequence. It works for cedar, plastic, slate, and many metal blanks with small adjustments.
Quick wins for a faster PC:
Repair Windows errors before they cause bigger problemsFix Now →Scan for outdated or missing drivers - takes under a minuteDriver Scan →Clear out junk files and repair common Windows errorsFree Scan →1. Count and categorize plants. Count labels by bed and add 10 percent extra. A 30-plant garden should have at least 33 blanks so replacements match.
2. Choose one material per area. Use plastic or bamboo for seed trays, plastic or sealed wood for vegetable rows, and metal, slate, ceramic, or sealed hardwood for long-term beds.
3. Cut to consistent size. Seedling labels can be 1 by 4 to 6 inches. Vegetable markers can be 2 by 8 to 12 inches. Ornamental markers can be 2 by 12 to 18 inches or smaller tags on wire stakes.
4. Prep the surface. Sand glossy surfaces lightly. Wash dirt and oil off metal, plastic, stone, or wood. Let everything dry fully before writing.
What’s actually slowing this PC down?
Pick the symptom - the matching free tool is one click away.
5. Label with the right tool. Use oil-based paint pen, grease pencil, graphite pencil, stamp, embossing tool, engraving pen, or exterior-grade vinyl. Avoid regular permanent marker for full-sun locations.
6. Cure and test. Let paint cure according to the marker instructions, commonly several hours to 24 hours. Put one sample outdoors for a few days, wet it, rub it lightly, and check for smearing before making the full set.
7. Seal only after testing. If using clear coat, test it over the writing on one marker. Some coatings react badly with paint pens or peel off plastic.
8. Install at the mature plant edge. Do not jam the marker right against the stem. Place it where the plant will not cover it and where weeding will not disturb roots.
The Tool Desk
Outbyte PC Repair FREERepair Windows errors before they cause bigger problemsFix Now →Outbyte Driver Updater FREEFix the driver behind crashes, sound loss and screen glitchesFind Drivers →Rank #4

- ♥ 30-Pack Metal Plant Labels: Our set of 30 metal plant labels are made of galvanized iron, can withstand any weather conditions and the color will never change or fade. Note: Don’t scratches the surface and no engraver, it is easy to rust if the coating scraped off.
- ♥ Best Choice of Plant Labels: Total height 10.63”, Label Area 3.58” x 1.24”, providing ample space for you to write any identifying information you need.
- ♥ Stable Two-Foot & Tilted Angle: The stable 2-foot design of the plant label stakes are simple to insert into the soil and will stay put for years to come. The slightly sloping angle makes it easy to read when you're standing up, it really helps to remind you what's the where.
- ♥ Reusable Garden Signs: These garden makers come with an oil-based paint pen. If reusing, wipe clean before relabeling. Perfect for green thumb growers!
- ♥ Keep Your Garden Organized: Our plant label garden signs are great for marking what type of seed you plant. Label with name, date planted, variety, instructions. Ideal to decorate, organize and tag your plants, pots, garden and flower beds.
9. Map the bed. Take a photo or draw a simple bed map. If a marker breaks or disappears, the plant ID is not lost.
Maintenance: Keep Labels Legible All Season
Check markers at the same time you weed, mulch, or inspect irrigation. In a vegetable bed, that may mean every two to four weeks during the growing season. In a perennial bed, inspect in spring and again after midsummer growth fills in.
Refresh grease pencil and paint pen before labels become unreadable. Pull and reset markers that are sinking into mulch. Replace cracked plastic before it breaks into pieces. File metal if corners become exposed. Loosen tree and shrub tags at least once a year so ties do not cut into bark.
If you use a garden map, update it when plants move. A marker system only works if the physical label and the record agree.
Windows Errors? Fix Them Before They Spread
Repair common Windows errors and clear accumulated junk for a smoother, more stable PC - no reinstall needed.Free scan · no reinstallOutdated Drivers Are Slowing You Down
One free scan finds every outdated or missing driver and matches the right update for your exact hardware.Free scan · exact hardware matchCommon Plant Marker Mistakes to Avoid
The most common mistake is using a standard permanent marker on glossy plastic in full sun. It looks fine the day you write it, then fades when you need it most. Use the right marking tool from the start.
Another common failure is making labels too short. Mulch, soil splash, and plant growth can hide a small tag by midsummer. For vegetable rows, 8 to 12 inches is usually more practical than tiny seedling labels.
Do not place markers in mower, edger, or trimmer paths. Broken plastic and sharp metal fragments are more than an inconvenience. They create maintenance hazards.
Do not use unknown salvaged materials in edible beds. Old paint, unknown treated wood, and rusty sharp metal do not belong near food crops.
Finally, do not skip the backup map. Even good markers get pulled by accident, buried by mulch, or moved during weeding. A quick photo of each bed can save the season’s labeling.
The Bottom Line
The best DIY plant markers are not complicated. They are built like small exterior details: appropriate material, durable marking method, clean layout, safe edges, and smart placement. For a few dollars, you can label a seed tray. For $25-$75, you can build a polished herb or perennial marker system that looks intentional and lasts for years.
If the garden is purely seasonal, keep it simple and replace labels as needed. If the bed is permanent or visible from the house or street, use better materials and mechanical labeling. That small upgrade makes the whole garden easier to maintain and more finished from the first week of spring through the end of the season.
Frequently Asked Questions
What is the best material for DIY plant markers?
For temporary seed trays, wood craft sticks, bamboo, or recycled plastic are fine. For vegetable beds, use UV-stable plastic, sealed wood, or bamboo. For long-term beds, metal, slate, ceramic, acrylic, or sealed cedar hold up better and look more finished.
Recommended Free Tools
How do you keep plant markers from fading in the sun?
Avoid regular permanent marker on glossy plastic. Use oil-based paint pens, grease pencils, graphite pencil on matte surfaces, stamped metal, engraving, embossing, or exterior-grade vinyl. Lightly sand glossy surfaces and let paint cure before installation.
Can I use pressure-treated wood scraps for vegetable garden labels?
Do not use pressure-treated scraps of uncertain age or unknown salvaged lumber in edible beds. Older CCA-treated wood is not appropriate where routine food or feed contact can occur. Use clean cedar, bamboo, untreated short-term wood, plastic, slate, or metal instead.
How tall should plant markers be?
Use 4- to 6-inch markers for seed trays, 8- to 12-inch markers for vegetable rows, and 12- to 18-inch markers for ornamental beds where readability matters. Install them above final mulch height and near the plant’s mature edge.
Are metal plant markers worth the cost?
Yes, for perennials, herbs, shrubs, trees, and front-yard beds. Simple metal marker sets often cost $10-$30, while premium or engraved sets can run $20-$60 or more. Stamped or engraved metal lasts much longer than ink on cheap plastic.
Do garden plant markers need a permit or HOA approval?
Small plant labels usually do not need permits. Larger front-yard signs, community garden displays, illuminated signs, or public-facing educational signage may be subject to local sign codes or HOA rules. Check before installing anything that functions like a sign.
Quick Recap
Product prices and availability are accurate as of the date/time indicated and are subject to change. Any price and availability information displayed on Amazon at the time of purchase will apply.

