Quick wins for a faster PC:
Repair Windows errors before they cause bigger problemsFix Now →Fix the driver behind crashes, sound loss and screen glitchesFind Drivers →If your cabinet boxes are solid, square, and securely attached, you may not need new cabinets. You may need better surfaces, better hardware, better storage, and a more current finish. That is a much smaller project than tearing out the kitchen.
On our job sites, we start cabinet conversations with a condition check before we talk about paint colors or door styles. Cosmetic work is money well spent when the cabinet boxes are dry, rigid, and still fit the way the family cooks. It is poor spending when it hides swollen particleboard, loose wall cabinets, failing drawer boxes, or a layout that needs to change.
As an Amazon Associate I earn from qualifying purchases.
For 2026 budgets, a simple DIY hardware swap can be under $300 in many kitchens. DIY cabinet painting often lands around $200 to $600 in supplies if you already own basic tools. Professional cabinet painting can range from under $1,500 to $6,500 depending on the process and market. Refacing is commonly several thousand dollars, often around $6,750 to $15,000. Full cabinet replacement can make sense, but it is usually the costliest and most disruptive path.
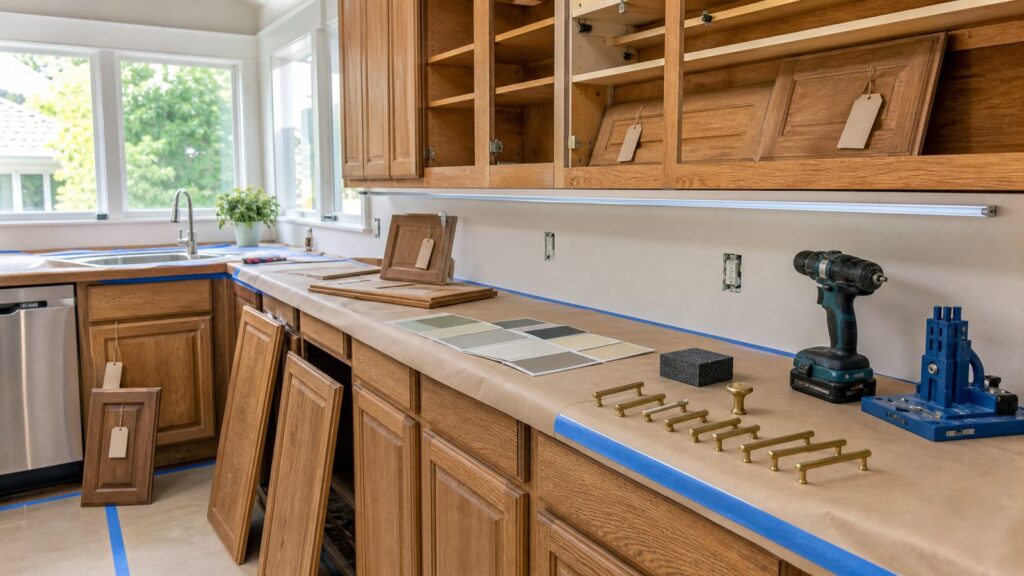
Here are 26 practical cabinet updates that can make an older kitchen look and work better without automatically replacing everything.
#1 Best Overall

- ⭐【Unique Advantages】- In order to avoid drilling directly with an electric drill will cause the jig to shake, we provide an "Automatic Center Punch". Use jig finded the location, you just need to use the "hole punch" to directly punch the small holes, and then use the electric drill to punch the big holes on have already been punched small holes. It is a very ingenious way.
- ⭐【Metric + Imperial Scale】- Contains metric + imperial double sizes. Super high-definition tick board marks made of ABS, and the ruler is made from stainless steel. Ensure the jig’s premium durability, high corrosion resistance, high strength.
- ⭐【Detachable & Portable】- Cabinet hardware installation template quick-release '' drill guide'' sliders can be split into small parts by taking a small Space to easily carry. The storage bag we present will solve all your troubles of carrying.
- ⭐【Time Saver Quick Drilling】- Cabinet hardware template tool a full day of measuring and re-measuring. Set it up once and use it repeatedly with no further measurements, A good accessory, and helper for woodwork or DIY. The installation efficiency is greatly improved.
- ⭐【Jig Widely Application】- Cabinet hardware jig is ideal for installing pulls or handles and knobs on DRAWERS, CABINETS, DOOR and so on. Works on any cabinet door stile and rails including shaker doors & recessed drawer fronts. The product size is 16 inches, please confirm your cabinet/door size before purchasing
Start With a Cabinet Condition Audit
Before you buy paint, hinges, or drawer organizers, spend 30 to 60 minutes checking the cabinets like a contractor would. Open every door and drawer. Look under the sink. Push gently on wall cabinets. Check whether the doors close, whether drawer slides rack sideways, and whether the cabinet boxes are still square.
Good DIY candidates usually have cabinet boxes that are securely fastened to the wall, shelves that are not sagging badly, doors that are not warped, and no swelling, rot, mold, or pest damage. The layout should still work. If the sink base is soft, the dishwasher panel is swollen, or a wall cabinet shifts when loaded, do not cover the problem with trim or paint.
Poor candidates include water-damaged particleboard, delaminating thermofoil, warped slab doors, failing wall attachment, pest damage, and cabinets that need electrical, plumbing, or structural changes to function. In those cases, a replacement or partial rebuild may be the better investment.
Recommended Free Tools
2026 Cost and Disruption Comparison
The right cabinet update depends on budget, time, condition, and how much visual change you need. Use this table as a planning range, not a bid. Door count, finish type, regional labor, repairs, and material choice can swing the numbers sharply.
| Project | Typical 2026 Cost | DIY Difficulty | Kitchen Downtime |
|---|---|---|---|
| Clean and degrease cabinets | $20-$75 in cleaners, pads, and cloths | Easy | 2-6 hours |
| Replace knobs or pulls | $1-$25 per simple piece; $5-$50 for ornate hardware | Easy | One afternoon |
| Add backplates | Often $2-$15 per door or drawer | Easy | One afternoon |
| DIY cabinet painting | About $200-$600 in common supplies | Moderate | Several days plus cure time |
| Professional cabinet painting | Commonly reported from about $425-$6,500 depending on scope | Hire out | Several days to 2 weeks |
| Cabinet refinishing or restaining | Small jobs around $307-$1,359; full kitchens often $1,500-$5,000 | Moderate to advanced | Several days |
| Cabinet refacing | Often $3,000-$15,000 depending on materials and kitchen size | Advanced or pro | Several days |
| Full cabinet replacement | Cabinets alone often $3,000-$12,000; full renovations commonly $35,000-$50,000+ | Pro recommended | Weeks |
Quick Weekend Cabinet Updates
1. Deep clean and degrease the cabinets
This is the least glamorous update and one of the most effective. Cooking oil, hand residue, and airborne grease dull cabinet finishes and make hardware areas look darker. Use a cabinet-safe degreaser, microfiber cloths, and non-scratch pads. Around knobs and pulls, a soft toothbrush helps break up buildup without gouging the finish.
Plan on 2 to 6 hours for an average kitchen. If cleaning alone makes the doors look dramatically better, you may be able to stop at hardware, hinges, and interior upgrades.
2. Replace knobs and pulls
New hardware changes the visual rhythm of the kitchen fast. Simple knobs and pulls commonly run $1 to $25 each, ornate hardware often runs $5 to $50, and novelty or designer pieces can climb to $10 to $200 each. For a kitchen with 30 doors and drawers, the difference between $6 hardware and $28 hardware is $660 before tax.
Measure existing hole spacing center-to-center before ordering pulls. Common pull sizes include 3 inches, 3-3/4 inches, 5 inches, and 6-5/16 inches. If you change from knobs to pulls, use a drilling jig and test on scrap first.
3. Add backplates to hide old marks
Backplates are useful when old hardware left grease shadows, worn finish, or extra holes. They sit behind the knob or pull and can make a hardware change look intentional instead of patched. They are especially useful on stained cabinets where filling and color-matching holes is difficult.
4. Swap exposed hinges
If your cabinets have visible dated hinges, replacing them can clean up the whole elevation. Match overlay, screw pattern, and hinge style carefully. Bring one old hinge to the store or order a single sample first. A hinge that is off by even 1/8 inch can create uneven gaps or doors that will not close.
5. Adjust door alignment
Many kitchens look tired because the doors are uneven, not because the cabinets are bad. European-style concealed hinges usually have screws for side-to-side, in-and-out, and vertical adjustment. A 20-minute alignment pass can tighten reveals and make cabinets look better maintained.
The Tool Desk
Outbyte Driver Updater FREEScan for outdated or missing drivers - takes under a minuteDriver Scan →Outbyte PC Repair FREEClear out junk files and repair common Windows errorsFree Scan →Rank #2
- Align Sizes:2.5 inch(64mm) 3inch(76mm) 3.5inch(90mm) 3.75inch(96mm) 4inch(102mm) 4.5inch(115mm)5inch(128mm) 6.25inch(160mm);Precision drilling to make install handle easy and perfectly
- Package Include: 1 of Pull Drilling Template;1 of Knob Drilling Template;1 of 3/16" Drill bit
- Function:If you want to decorate or update your cabinet door and drawer,please chose the goldenwarm pull drill mounting template,they would help you to install fast and easy
- Material:The goldenwarm pull drill mounting template made of high quality plastic material with measurement lines,sturdy and nice
- 100% Quality Guarantee:If you have any problem,don't worry,please let us know,we will patiently serve you
6. Add soft-close dampers
If the hinges are still serviceable, clip-on or screw-on soft-close dampers are a budget-friendly comfort upgrade. They are usually easier than replacing every hinge. Install one damper per small door and test larger doors before deciding whether they need two.
Paint, Stain, and Finish Updates
7. Paint the cabinets
Painting is the biggest visual change most homeowners can make without replacing doors. It is also where rushed DIY work fails. The finish quality depends more on prep, labeling, cleaning, sanding, priming, thin coats, and cure time than on the paint label alone.
A proper sequence is simple but not short: remove doors and drawer fronts, label every piece, remove hardware, clean twice, scuff sand, vacuum, tack cloth, prime, sand lightly, apply thin coats, and allow cure time before hard daily use. Many cabinet enamels feel dry in hours but need days or weeks to reach full hardness.
DIY supplies often land around $200 to $600 for a small to medium kitchen if you already own basic tools. Add more if you need a sprayer, respirator, sanding system, drying racks, or premium cabinet enamel. For older homes, lead paint screening matters. In pre-1978 homes, disturbing painted surfaces can trigger lead-safe work practices under the EPA Renovation, Repair and Painting rule.
8. Restain wood cabinets
Restaining works best on real wood doors and face frames with enough material to sand evenly. It is less forgiving than paint because the old color, grain, and blotching can telegraph through. National cost references vary: small refinishing jobs can be around $307 to $1,359, while full-kitchen refinishing often lands around $1,500 to $5,000.
9. Add glaze for depth
Glaze can settle into profiles and soften a flat painted finish. Use it carefully. Heavy brown glaze in every corner can date a kitchen quickly. It works best on detailed doors, islands, furniture-style pieces, or accent zones where a little shadow adds dimension.
10. Try a whitewash or limewash look
A whitewashed or limewashed effect can lighten wood while keeping some grain visible. It suits rustic, coastal, cottage, and softer transitional kitchens. Test on the back of a door or inside panel first. Oak, maple, birch, and pine all take wash finishes differently.
11. Use two-tone color strategically
Painting lower cabinets a deeper color and uppers a lighter color can make a kitchen feel updated without repainting every surface the same way. In 2026, warm neutrals, natural wood tones, greens, blues, matte black accents, satin brass, brushed nickel, and restrained mixed metals all remain practical choices. Limit mixed hardware finishes to two and assign them by category, such as island versus perimeter or knobs versus pulls.
Crashes, No Sound, or Screen Glitches?
Random freezes, missing sound and display glitches usually trace back to one bad driver. Find and replace yours safely.Free scan · under a minutePC Slower Than It Used to Be?
A free scan shows the junk files, broken settings and background clutter dragging Windows down - then fixes them in one click.Free scan · Windows 10 & 11Test colors in morning light, afternoon light, and nighttime lighting. Cabinet colors shift noticeably under warm LEDs and in north-facing rooms.
Trim and Door Style Updates
12. Add shaker-style trim to flat doors
Flat slab doors can be converted to a simple shaker look with thin wood strips, careful layout, adhesive, brad nails, caulk, primer, and paint. Keep proportions consistent. A common rail-and-stile width is 2 to 2-1/2 inches, but small drawer fronts may need narrower trim so they do not look crowded.
This is best for paint-grade doors that are flat, stable, and not thermofoil that is already peeling. If the doors are warped or swollen, trim will not fix them.
Rank #3

- ⭐【King&Charles Unique Kit】- In order to avoid drilling directly with an electric drill will cause the jig to shake, we provide an "Automatic Center Punch". Use jig finded the location, you just need to use the "hole punch" to directly punch the small holes, and then use the electric drill to punch the big holes on have already been punched small holes. It is a very ingenious way by King&Charles. Perfect suit, Only need to buy once, In one step.
- ⭐【Punch & 3 Point Wood Bits 】- Set extra include metal punch + 3 sizes of Point Wood bits。AUTOMATIC PUNCH is constructed from heavy-duty metal to resist against corrosion. Pro-WOODWORKING BITS is 3mm/4mm/5mm can meeting different installation requirements. Bits top with pointed tip ,keep won't jitter when drilling.
- ⭐【Cabinet Hardware Jig】- Contains metric + imperial double Scale sizes. Super high-definition tick board marks made of ABS, and the ruler is made from stainless steel. Ensure the jig’s premium durability, high corrosion resistance, high strength.
- ⭐【Detachable & Portable】- Cabinet hardware installation template quick-release '' drill guide'' sliders can be split into small parts by taking a small Space to easily carry. The storage bag we present will solve all your troubles of carrying.
- ⭐【Good Hepler】- Set it up once and use it repeatedly with no further measurements, A good accessory set, and helper for woodwork or DIY. The installation efficiency is greatly improved. This is a complete set, and only one set is needed to meet the installation requirements
13. Add crown molding
Crown molding helps older wall cabinets look more built-in, especially when there is a gap below the ceiling. Measure the ceiling first. Many ceilings are not perfectly level, and gaps that look minor at one end can grow to 1/2 inch or more across a long cabinet run. A two-piece crown build-up gives you more room to scribe and hide irregularities.
14. Add light rail molding
Light rail sits under upper cabinets and hides under-cabinet lighting channels, wires, and diodes. It also gives plain uppers a finished lower edge. Make sure it does not reduce working clearance too much over small appliances. Under many wall cabinets, even 1-1/2 inches of trim can matter.
15. Add toe-kick trim
Scuffed toe kicks make a kitchen look older than it is. New toe-kick panels, shoe molding, or a painted toe recess can sharpen the base line. Use moisture-resistant material near dishwashers and sink bases. Avoid raw MDF in wet areas unless it is sealed thoroughly.
16. Cover exposed end panels
Plain cabinet sides can be upgraded with applied panels, beadboard, matching veneer, or furniture-style trim. This is a strong update on refrigerator panels, island ends, and exposed peninsula sides. Keep the added thickness in mind around appliance clearances and drawer pulls.
17. Add beadboard panels
Beadboard adds cottage or traditional texture to island ends, cabinet backs, and selected door panels. Use it selectively. Too much beadboard can make a kitchen feel busy and harder to clean. In high-splash areas, use a durable painted finish and caulk the edges carefully.
Selective Door and Display Changes
18. Add cane or webbing inserts
Cane and woven inserts can warm up painted cabinets and give the kitchen a custom detail. Use them on a few upper doors, a pantry zone, or a beverage area. They are not ideal for every cabinet because they can collect dust and expose visual clutter.
19. Add glass inserts
Glass inserts lighten a wall of upper cabinets. Clear glass works best when the contents are organized. Reeded, seeded, or frosted glass is more forgiving. Before cutting door panels, confirm the rails and stiles are wide enough to hold the insert safely. Heavy glass can also change hinge behavior on older doors.
20. Remove select upper doors
Removing two or three upper doors can create an open display area without rebuilding the cabinet boxes. Fill hinge holes, paint the interior, and keep the shelves edited. This works best for dishes used daily, not mixed pantry storage.
21. Add open shelves in one zone
If one upper cabinet is awkward or visually heavy, replacing it with open shelves can improve the room. Use proper wall anchoring and respect load limits. Dishes are heavy. A shelf that looks fine empty may sag when loaded with stacks of plates.
Do these 3 things before closing this tab:
1Fix the driver behind crashes, sound loss and screen glitches2Clear out junk files and repair common Windows errors3Scan for outdated or missing drivers - takes under a minuteLighting and Interior Function Upgrades
22. Add under-cabinet lighting
Under-cabinet lighting makes old cabinets feel more current and makes food prep safer. DIY plug-in or battery LEDs can be low cost, but hardwired lighting is a different category. Choose a warm or neutral color temperature that matches nearby fixtures, commonly 2700K to 3500K. Use channels or diffusers so you see even light on the counter, not dots reflected in polished stone.
Plan wire concealment before buying kits. If new wiring, switches, or receptacles are involved, check local electrical requirements and hire a licensed electrician where required. Kitchen island and peninsula receptacle rules have changed in recent code cycles, so do not assume an old layout meets current standards when electrical work is being modified.
Rank #4

- Application Hole Center:Cabinet hardware with 2.5"(64mm) 3"(76mm) 3.5"(90mm) 3.75"(96mm) 4"(102mm) 4.5"(115mm) 5"(128mm) 6.25"(160mm) hole centers; The wide size scope of application can satisfied what you different needs.
- What's included:1pc cabinet door drilling Template, 1pc Drawer Drilling Template, and 1pc 3/16" Drill Bit.
- Easy Installation: The mounting template will help install cabinet pulls fast and easily. Clear measurement lines ensure drilling accurate installation holes. Find one of the pre-defined hole centers which worked best for your pulls, use a pencil to circle it, and it was easy to mark a drilling spot on all of the cabinets with a pencil.
- Drill Fearlessly: Once you've marked the hole center, fit the 3/16" drill bit into your drill, but make sure the screws are 8/32" firstly. And be sure to drill from front to back. If you do have splintering, it will be on the inside where nobody can see it.
- Our Guarantee: Your satisfaction is our pursuit. If you have any problem, please feel free to contact us, we will solve your worries, and your purchase is absolutely zero risk.
23. Add pull-out shelves
Pull-out shelves can make base cabinets feel almost new. They are especially useful in deep cabinets, pantry cabinets, and blind corners. Measure the clear opening, not just the cabinet box. Hinges and face frames often reduce usable width. Many pull-out units need 1/2 inch to 1 inch of clearance on each side.
24. Add drawer dividers and tray storage
Drawer dividers, knife blocks, spice inserts, and vertical tray partitions improve daily use without changing the cabinet faces. These are good DIY projects because mistakes are usually contained inside the cabinet. Use removable or adjustable systems when possible so the kitchen can adapt later.
Free tools Windows power users keep installed
One-click scans. No signup required.
25. Paint or line drawer interiors
Clean interiors matter. Drawer liners, fresh interior paint, or thin plywood bottoms can make old drawers feel more sanitary and finished. Use low-odor, durable coatings and allow full cure before putting utensils or food-contact items back inside. For sink-base interiors, consider a waterproof mat that can catch small leaks early.
26. Add magnetic, chalk, cork, or message panels
Message panels work well on pantry doors, cabinet ends, mudroom-adjacent cabinets, and family command areas. Keep them out of heavy grease zones beside the range. Magnetic primer often needs several coats to hold well, and chalk finishes need proper curing before use.
Material Compatibility: What Fails in Kitchens
Cabinet materials do not all behave the same. Laminate, melamine, thermofoil, oak, factory-finished maple, and previously waxed surfaces each need different prep. Paint over the wrong surface without the right primer and the finish may chip, peel, or stay soft.
Oak is a common example. You can paint oak successfully, but the grain will usually remain visible unless you use grain filler and sand carefully. That is not a defect; it is a finish decision. If you want a factory-smooth modern slab look, replacing only the doors and drawer fronts may be smarter than trying to erase heavy grain with paint.
What’s actually slowing this PC down?
Pick the symptom - the matching free tool is one click away.
Thermofoil is another caution area. If it is tight and sound, specialty primer may work. If it is peeling or bubbling near heat and moisture, paint is usually a temporary patch. Near dishwashers, ranges, and sink bases, heat and steam expose weak materials quickly.
Independent reader supportYour contribution helps us test, update, and keep practical guides available for everyone.When to DIY and When to Hire a Pro
DIY is a good fit for cleaning, hardware, backplates, hinge adjustment, soft-close dampers, drawer organizers, liners, simple trim, and carefully planned paint work. These projects have manageable risk if you measure accurately, test finishes, and give coatings time to cure.
Hire a pro when the cabinets need structural repair, wall cabinets feel loose, sink-base damage is present, doors are being cut for glass, electrical work is needed, or the finish expectations are high. Sprayed cabinet finishes require masking, ventilation, dust control, proper products, and a realistic cure schedule. A professional painter who removes doors and sprays them off-site is offering a different process than a quick brush-and-roll refresh.
Professional cabinet painting price reports vary widely in 2026. Angi reports a range around $425 to $1,465 with an average near $941. Thumbtack reports about $1,390 to $3,353 with an average near $2,164. Fixr reports $2,500 to $6,500 with a national average around $4,000. Those numbers are not contradictions as much as different job scopes: door count, repairs, spraying versus rolling, finish system, region, and whether doors are removed all matter.
Refacing is worth pricing when the cabinet boxes are good but the doors are dated. Modernize reports about $6,750 average or $100 to $250 per linear foot. Fixr reports $3,000 to $13,500 with an average around $8,250. Home Depot reports roughly $7,600 to $14,900 and about $15,000 average for its refacing projects. Laminate and MDF are usually lower cost, wood veneer lands in the middle, and hardwood or custom doors cost more.
Best Value
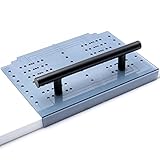
- Align Sizes: 2.5"(64mm) 3"(76mm) 3.5"(90mm) 3.75"(96mm) 4"(102mm) 4.5"(115mm) 5"(128mm) 6.25"(160mm) handle; The wide size scope of application can satisfied what you different needs
- Attention: Please refer to the images of measurement and installation guide before your order. And please attention that our template can be used up to 6-1/4" hole center handles.
- Clear Plastic Material: With measurement lines, this clear plastic material cabinet pull template ensure that you can see the position through the template and drill holes with accuracy
- Package includes: 1 of Pull Drilling Template;1 of Knob Drilling Template;1 of 3/16" Drill bit
- Customer Support: We are committed to your satisfaction. If you encounter any issues, please reach out to us, and we will assist you promptly.
Safety, Code, and Permit Notes
Cosmetic cabinet updates usually do not require a building permit, but the line changes when you alter electrical, plumbing, walls, ventilation, or structural attachment. Local rules vary. If you add hardwired lighting, move receptacles, change an island, remove walls, or relocate plumbing, check local permit requirements before work starts.
For homes built before 1978, lead paint is a serious screening item. Sanding, scraping, or cutting painted surfaces can create lead dust. Contractors working on covered pre-1978 housing must follow EPA lead-safe requirements under the Renovation, Repair and Painting program.
Wall cabinet attachment also matters. Cabinets are loaded with plates, glassware, pantry goods, and small appliances. If a cabinet is pulling from the wall, do not add heavier doors, glass, or shelving until the attachment is corrected. Use proper fasteners into framing or approved backing, not drywall anchors for loaded wall cabinets.
Recommended Free Tools
How to Choose the Right Cabinet Update
If the cabinets are structurally sound and the layout works, start with the least invasive updates: clean, align doors, replace hardware, add soft-close, and improve storage. If the kitchen still feels dated, move to paint, stain, trim, inserts, or lighting.
If the cabinet boxes are good but the door style is the problem, compare painting against new doors and drawer fronts. Replacing only fronts can deliver a larger style change than painting routed or arched doors. If the layout is wrong, storage is inadequate, water damage is present, or several boxes need repair, replacement may be the more honest spend.
The best cabinet update is not the trendiest one. It is the one that matches the cabinet condition, the kitchen’s daily use, and the budget without creating rework. A $400 hardware and alignment project can be the right move in one kitchen. A $10,000 refacing job can be right in another. The difference is the condition audit.
Frequently Asked Questions
Is it worth updating old kitchen cabinets instead of replacing them?
Yes, if the cabinet boxes are square, dry, securely attached, and the layout still works. Updating is usually not worth it when cabinets have water-damaged particleboard, warped doors, loose wall attachment, pest damage, or a layout that needs major changes.
What is the cheapest way to make kitchen cabinets look better?
Start with cleaning, door adjustment, and new hardware. A deep clean may cost $20-$75 in supplies, while simple knobs or pulls often run $1-$25 each. Backplates can hide old holes and grease shadows when changing hardware.
How much does DIY cabinet painting cost in 2026?
DIY cabinet painting supplies commonly cost about $200-$600 for a small to medium kitchen if you already own basic tools. Costs rise if you need a sprayer, respirator, sanding system, drying racks, or premium cabinet enamel.
Can I paint oak cabinets smooth?
You can paint oak cabinets, but the grain usually remains visible unless you use grain filler and careful sanding. If you want a factory-smooth slab look, replacing the doors and drawer fronts may be a better choice.
Do cabinet updates require a permit?
Most cosmetic updates, such as painting, hardware, trim, and organizers, usually do not require a permit. Electrical work, plumbing changes, wall changes, island modifications, and structural cabinet work may require permits depending on local rules.
Free tools Windows power users keep installed
One-click scans. No signup required.
When should I hire a professional for cabinet updates?
Hire a pro for loose wall cabinets, sink-base water damage, structural repairs, hardwired lighting, glass door cutting, major refacing, and high-end sprayed finishes. A contractor can also help decide whether updating still makes financial sense.
Quick Recap
Product prices and availability are accurate as of the date/time indicated and are subject to change. Any price and availability information displayed on Amazon at the time of purchase will apply.

