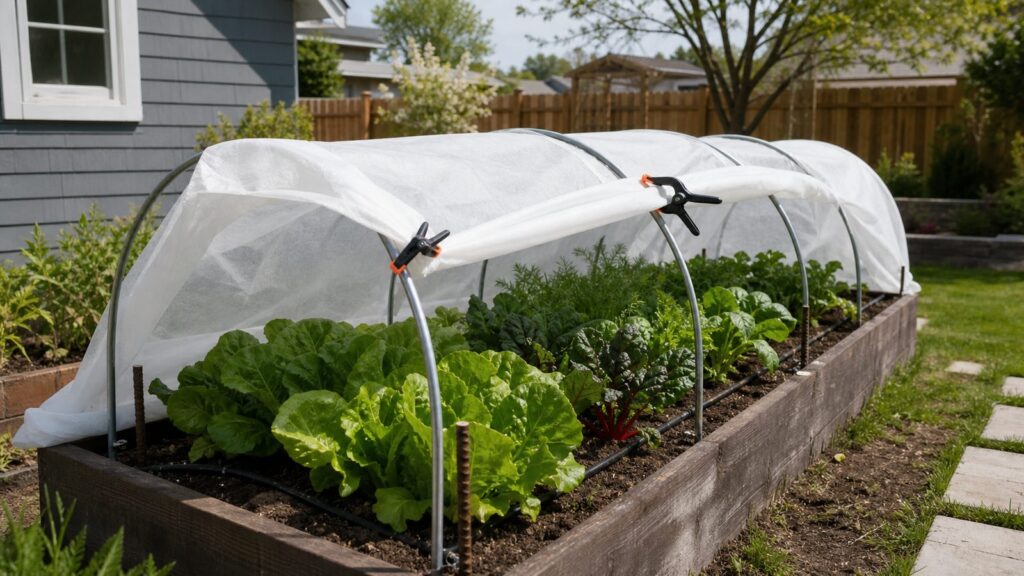
Garden hoops are simple: bend pipe or wire over a row, add a cover, and anchor it well. The difference between a useful low tunnel and a torn-up mess after the first windy night is in the details: hoop spacing, cover width, clamp spacing, end bracing, and whether you chose the right material for the job.
For most homeowners, the best DIY garden hoop setup is a 4-foot-wide raised bed covered with 10-foot lengths of 1/2-inch PVC conduit or 1/2-inch EMT conduit, spaced about 4 to 5 feet apart. A typical 4 ft. x 8 ft. bed costs about $35 to $95 in 2026, depending on whether you use PVC, EMT, row cover, insect netting, frost blanket, greenhouse plastic, or shade cloth.
As an Amazon Associate I earn from qualifying purchases.
On our job sites, we treat even small temporary structures with the same basic thinking we use for larger builds: load path, anchoring, drainage, access, trip hazards, UV exposure, and maintenance. A garden hoop is not complicated, but it still has to resist wind, shed water, avoid sharp edges, and let you work in the bed without fighting the structure every weekend.
Recommended Free Tools
What Garden Hoops Are Best For
Garden hoops, also called low tunnels, are temporary frames placed over garden rows or raised beds. Their job is to hold a cover above the plants. That cover might be lightweight row cover, insect netting, frost blanket, shade cloth, or clear greenhouse plastic.
#1 Best Overall

- Adequate Quantity & Proper Sizing: This set contains 64 greenhouse clips, colored white. Each measures approx 61mm/2.4in in length. Made of PVC, they fit greenhouse frame tubing with an outside diameter of 1/2 inch, meeting daily use and replacement needs for greenhouse setups
- Durable PVC Material: Crafted from PVC, these greenhouse clamps have good strength and toughness. They offer a strong fixing function, are not easy to break, safe and reliable. Compared to stainless steel, they resist rust and decay, suitable for long - term outdoor garden and greenhouse use
- Easy Assembly & Disassembly: These pvc clamps are light and flexible, easy to install, disassemble, and reuse. Designed for convenient setup and rearrangement, they simplify the process of building or modifying greenhouses, row covers, and other garden structures
- Versatile Pipe Compatibility: These pipe clamps (1/2 inch suitable) work with various tubes like PVC plastic pipes. Ideal for attaching greenhouse film, netting, shades, insect screens, etc. Also useful for creating cold frames, shelters, meeting diverse gardening and outdoor covering needs
- Practical Garden Applications: These greenhouse clamps are perfect for garden cover - ups, attaching plastic or mesh to round pipes in raised bed hoop houses. They hold materials securely against strong winds, easy to remove without damaging fabrics, a handy tool for gardeners
A low tunnel can help with mild frost, insects, wind, hail, sudden temperature drops, and sun stress. It can also give cool-season crops a cleaner, more controlled growing space in spring and fall. What it cannot do is perform like a walk-in greenhouse. Low hoops have limited height, limited snow-load capacity, less wind resistance, and much less temperature control.
Use garden hoops for lettuce, spinach, arugula, kale, cabbage, broccoli, strawberries, peppers, herbs, and young tomato plants. They are especially useful over raised beds because the bed frame gives you a consistent layout and solid edges for straps, clamps, or anchors.
Choose the Right Hoop Material
The right material depends on how long you want the tunnel to last, how exposed your yard is, and how often you plan to change covers. The most common DIY choices are heavy wire, PVC conduit, and EMT conduit.
Free tools Windows power users keep installed
One-click scans. No signup required.
Wire Hoops
Wire hoops are the fastest and cheapest option for short seasonal protection. Gardeners often use 9-gauge or 10-gauge wire for light row cover or insect netting. Wire works well for a quick spring pest barrier over greens or seedlings, but it is not the right choice for wide beds, heavy covers, snow, or exposed windy areas.
Use wire when the cover is light, the plants are short, and the tunnel is temporary. Cut the wire cleanly, bend consistent arches, and push the ends 5 to 6 inches into the soil. If the cover starts sagging between hoops, the spacing is too wide or the wire is too light.
PVC Conduit
For a budget raised-bed hoop, 1/2-inch x 10-foot Schedule 40 PVC conduit is hard to beat. In 2026, a listed price for 1/2-inch x 10-foot PVC conduit was about $7.74 per piece, so each hoop costs roughly that amount before stakes, clips, and cover material.
PVC bends by hand, is easy to cut, and works well for 4-foot-wide beds. A 10-foot length makes a practical low arch over a 4-foot bed, with enough room for greens, brassicas, strawberries, peppers, and young tomatoes. PVC is not our first choice for a semi-permanent installation in heavy sun, high wind, or snow-prone sites because it degrades faster than metal and flexes more under load.
Quick wins for a faster PC:
Fix the driver behind crashes, sound loss and screen glitchesFind Drivers →Repair Windows errors before they cause bigger problemsFix Now →Scan for outdated or missing drivers - takes under a minuteDriver Scan →EMT Conduit
EMT, or electrical metallic tubing, is the stronger and more durable choice for multi-season hoops. A 1/2-inch x 10-foot EMT stick is commonly used for raised-bed tunnels. One 2026 pricing table listed 1/2-inch x 10-foot EMT at $5.28, though local metal pricing varies by store and market.
EMT usually requires a hoop bender if you want consistent U-shaped hoops. That tool often costs $60 to $100 or more, so EMT can cost more on the first project even when the conduit itself is competitive. If you expect to build several beds or reuse the hoops for years, EMT often becomes the better long-term value.
| Material | Best Use | Typical Size | Pros | Tradeoffs |
|---|---|---|---|---|
| 9- or 10-gauge wire | Quick pest or frost cover | Cut to suit row width | Cheap, fast, easy to store | Low strength, short height, poor for wind or snow |
| 1/2-inch PVC conduit | Budget raised-bed hoops | 10 ft. lengths over 4 ft. beds | Easy to bend, inexpensive, no specialty bender | Shorter lifespan, UV wear, more flex |
| 1/2-inch EMT conduit | Durable multi-season tunnels | 10 ft. lengths over 4 ft. beds | Stronger, cleaner shape, longer service life | Needs bender, exposed cut ends need attention |
| Commercial high tunnel | Walk-in growing or heavy weather | Varies by kit | Engineered frame, better access, stronger anchoring | Higher cost, possible permits, more site work |
How to Size Garden Hoops for a Raised Bed
Start with the bed width, plant height, and cover width. A common homeowner setup is a 4 ft. x 8 ft. raised bed. For that bed, use three to five hoops made from 10-foot lengths of 1/2-inch PVC or EMT. Three hoops can work in a sheltered yard: one at each end and one in the middle. Five hoops are better if you expect wind, rain, fabric sag, or heavier frost blanket.
For a 4 ft. x 12 ft. bed, use four to six hoops. For a 4 ft. x 16 ft. bed, use five to eight hoops. Typical hoop spacing is about 5 feet apart, but we prefer 3 to 4 feet in windy yards or when using heavier covers. West Virginia Extension notes a common low-tunnel layout with hoops set 5 to 6 inches into the ground and spaced 5 feet apart. That is a sound starting point, not a rule for every site.
Outdated Drivers Are Slowing You Down
One free scan finds every outdated or missing driver and matches the right update for your exact hardware.Free scan · exact hardware matchPC Slower Than It Used to Be?
A free scan shows the junk files, broken settings and background clutter dragging Windows down - then fixes them in one click.Free scan · Windows 10 & 11Rank #2

- [Powerful Fixing Garden Clips] - For better fixing of garden nets and garden hoops, we use 3 times more elastic stiffened and thickened stainless steel springs. Only a few garden clips are needed to do the fixing job well and keep your plants better protected even in wind and snow (30pcs).
- [Clamp Designed For Curved Hoops] – Our expertly designed curved clamps attach snuggly to fit ½ inch PVC pipe garden greenhouse hoops, staying put even in harsh weather conditions. Curved design is unlike any other clamp on Amazon! Patentiert!
- [304 Steel Spring] – You deserve garden care that lasts all year round. At Pirate Ant, we secure our clips with durable 304 steel springs that hold firmly in place . Quick, easy & made to last!
- [Powerful ABS Materials] – Keep your beloved plants securely protected against the elements with Pirate Ant’s maximum strength garden hoop greenhouse clamps. We use premium ABS materials for an ultra secure connection you can count on guaranteed.
- [Made For Multitasking] – Designed for both seasoned gardeners and novice plant lovers alike, our premium garden clips are the perfect accessory for D.I.Y garden greenhouses, outdoor vegetable gardens & anywhere else you could use a helping hand.
Cover width matters. A 4-foot-wide bed with a 10-foot hoop arch usually needs cover material around 10 feet wide so you have enough fabric to reach both sides and still anchor it. If the cover barely reaches the ground, it will be hard to seal, hard to weigh down, and easy for wind to lift.
Materials and Tools for One 4 ft. x 8 ft. Bed
For a practical raised-bed hoop cover, plan on three to five hoops, one cover, clamps, and anchors. A basic PVC version can be built with hand tools in about 60 to 90 minutes once materials are on site. EMT takes longer the first time because you need to bend consistent hoops.
Basic PVC Material List
- Three to five 1/2-inch x 10-foot PVC conduit lengths
- Six to ten rebar stakes, 12 to 24 inches long, or pipe straps screwed to the raised-bed frame
- One 10 ft. x 25 ft. to 10 ft. x 50 ft. cover, depending on bed length and end closure
- Snap clamps, spring clamps, landscape staples, boards, sandbags, or buried edges
- Tape measure, marker, mallet, hand saw or PVC cutter, gloves, and eye protection
Basic EMT Material List
- Three to five 1/2-inch x 10-foot EMT conduit lengths
- Hoop bender sized for your desired bed width
- Rebar stakes or exterior pipe straps
- Cover material and clamps sized for the cover type
- File or deburring tool for cut metal edges
Rebar pricing varies, but 2026 examples included 1/2-inch x 10-foot #4 rebar around $8.92, 1/2-inch x 20-foot #4 rebar around $14.33, 3/8-inch x 10-foot #3 rebar around $5.98, and short 2-foot stakes around $5.67 each. Buying long bars and cutting them is usually cheaper per foot than buying precut stakes, but cut ends must be deburred and capped or kept below the pipe end.
2026 Cost Guide
For one 4 ft. x 8 ft. raised bed, expect about $35 to $95. The low end assumes PVC hoops, a lightweight row cover, and simple hold-downs. The high end assumes EMT, commercial clamps, heavier frost blanket, insect netting, or more anchors for wind.
Do these 3 things before closing this tab:
1Repair Windows errors before they cause bigger problems2Scan for outdated or missing drivers - takes under a minute3Clear out junk files and repair common Windows errorsFor a 4 ft. x 12 ft. to 4 ft. x 16 ft. bed, a realistic 2026 DIY range is $55 to $140. The main cost drivers are hoop count, cover width, fabric weight, UV rating, local metal and plastic pricing, delivery fees for 10- to 20-foot stock, and whether you already own cutting and bending tools.
| Project | Typical 2026 Cost | What Changes the Price |
|---|---|---|
| 4 ft. x 8 ft. PVC raised-bed hoop | $35-$70 | Cover type, clamp count, rebar or straps |
| 4 ft. x 8 ft. EMT raised-bed hoop | $55-$95 before bender | Hoop bender, metal pricing, commercial clamps |
| 4 ft. x 12 ft. to 4 ft. x 16 ft. bed | $55-$140 | More hoops, wider or longer cover, stronger anchors |
| 100 ft. low tunnel | $35-$600 | Thin wire/basic plastic vs premium galvanized kit |
A 10 ft. x 50 ft. frost blanket was listed around $27.48 in one 2026 Lowe’s example, while similar covers commonly run about $25 to $60 depending on weight, brand, and UV rating. Budget another $8 to $30 for clips, clamps, staples, or hold-downs for a small bed. In windy locations, clamp spacing may need to be around 1 foot apart or closer along exposed edges.
Step-by-Step: Build a Raised-Bed Garden Hoop
1. Lay Out the Hoop Locations
Mark hoop locations along both sides of the bed. For an 8-foot bed, place hoops at both ends and one in the center. Add two more hoops if the site is exposed. Keep spacing even so the cover is supported without deep sagging between arches.
2. Install the Anchors
Drive rebar stakes 12 to 18 inches into the ground outside the bed, leaving enough above grade to slide the pipe over. If you are mounting to a wood raised bed, exterior-rated pipe straps can be screwed to the frame. Keep hardware low enough that it does not snag clothing or interfere with paths, mowing, or normal bed access.
3. Set the Hoops
Slide one end of the PVC or EMT over the first stake, bend it across the bed, and seat the opposite end over the matching stake. Repeat for each hoop. Sight down the bed and adjust the hoops so the ridge line is straight. A crooked frame makes the cover harder to tension and more likely to flap.
4. Add a Ridge Pole on Longer Runs
For tunnels longer than 8 to 12 feet, add a ridge pole, also called a purlin, along the top of the hoops. It can be a straight length of conduit, PVC, or other smooth material tied or clamped to each hoop. The ridge pole reduces racking, keeps hoops aligned, and helps the cover shed rain more evenly.
5. Install Drip Irrigation Before Covering
Drip irrigation is much easier to install before the cover goes on. Some fabrics allow rain and overhead water through, but not all do it evenly. Plastic blocks rain completely. A simple drip line or soaker hose under the tunnel saves time and keeps foliage drier.
Rank #3

- Easily attaches poly film, shade cloth, netting and other material to 1/2" EMT conduit
- ABS plastic is reinforced for excellent durability and metal holding clip for extra holding power
- Front resistant and UV stabilized for reliable long-term use outdoors
- Easy attachment for greenhouses, hoop houses, row covers, cold frames, tarps, quilt frames, and more
- Designed to keep tight hold of your material even in windy environments
6. Pull the Cover Tight and Anchor Both Long Edges
Center the cover over the hoops. Pull it snug, then secure it at each hoop with snap clamps, spring clamps, or appropriate clips. Anchor both long edges with boards, sandbags, landscape staples, buried soil edges, or a combination. Loose cover fails before the frame does. If the fabric can whip in the wind, it will tear, unclip, or pull the end hoops inward.
The Tool Desk
Outbyte Driver Updater FREEScan for outdated or missing drivers - takes under a minuteDriver Scan →Outbyte PC Repair FREEClear out junk files and repair common Windows errorsFree Scan →7. Secure the Ends
Gather the cover at each end, pull it tight, and stake or weigh it down. On windy sites, brace the end hoops so cover tension does not bend them toward the center of the bed. Keep access in mind: one end should be easy to open for harvesting, venting, and inspection.
Pick the Right Cover for the Season
The cover is not an afterthought. It controls temperature, airflow, moisture, pest exclusion, and light. Many failed low tunnels use the wrong cover for the season.
Insect Netting
Use insect netting when pests are the main problem and frost protection is not needed. It is breathable and lets light through while blocking insects, depending on mesh size. Seal the edges well; a 2-inch gap defeats the purpose.
Lightweight Row Cover
Lightweight row cover is a good spring and fall choice for mild frost, insects, wind, and sudden weather swings. It allows some light, air, and water through. It is easier to manage than plastic and less likely to overheat plants on a mild sunny day.
Heavier Frost Blanket
Use heavier frost blanket for stronger cold events. The tradeoff is lower light transmission and more weight on the frame. With heavier fabric, reduce hoop spacing and use more clamps so the cover does not sag or pond water.
Shade Cloth
Use 30% to 50% shade cloth for heat-sensitive greens and seedlings in hot weather. Shade cloth reduces sun stress but is not frost protection. Treat it as a summer tool, not a cold-weather blanket.
Clear Greenhouse Plastic
Plastic traps heat and blocks rain. It can be useful for season extension, but it requires active venting. A plastic-covered low tunnel can overheat quickly on a sunny day even when outdoor air feels cool. Add a thermometer inside the tunnel and open the ends or sides when temperatures climb.
Wind, Rain, Snow, and Safety Details
Wind is the main enemy of garden hoops. A frame can be strong and still fail if the cover is loose. In exposed yards, reduce hoop spacing below 5 feet, clamp fabric at every hoop, weigh or bury both long edges, and brace the end hoops.
What’s actually slowing this PC down?
Pick the symptom - the matching free tool is one click away.
Rain and wet snow add vertical load. Sagging fabric creates pockets where water collects, which pulls harder on the frame and cover. Keep the cover tight, use a ridge pole on longer runs, and brush off wet snow promptly. Low tunnels are not engineered snow structures unless specifically designed and braced for that load.
Deal with sharp edges before they cause problems. File cut EMT, smooth cut PVC, and cap or bury rebar ends so they do not tear fabric or injure someone working near the bed. Keep stakes out of walking paths. If a bed sits near a mower route, driveway, or children’s play area, make the structure more visible and keep protruding hardware to a minimum.
Rank #4
- Easily attaches poly film, shade cloth, netting and other material to 1/2" EMT conduit
- ABS plastic is reinforced for excellent durability and metal holding clip for extra holding power
- Front resistant and UV stabilized for reliable long-term use outdoors
- Easy attachment for greenhouses, hoop houses, row covers, cold frames, tarps, quilt frames, and more
- Designed to keep tight hold of your material even in windy environments
| Issue | What We Check | Practical Fix |
|---|---|---|
| Wind uplift | Cover edges, clamp spacing, end tension | Clamp every hoop, weigh both sides, brace ends |
| UV exposure | PVC age, brittle plastic, cover rating | Use UV-rated covers, store covers out of sun |
| Corrosion | Metal contact with wet soil and fertilizers | Use galvanized EMT, inspect ends and fasteners |
| Trip hazards | Rebar, stakes, cords, irrigation lines | Keep anchors tight to bed edges and cap exposed ends |
| Overheating | Plastic tunnels on sunny days | Add thermometer and vent early |
| Setbacks | Location near fences, utilities, easements | Check local rules before building large or fixed tunnels |
Do You Need a Permit?
Small, temporary garden hoops over a raised bed usually do not trigger the same review as a permanent greenhouse, but local rules control the answer. The moment a structure becomes larger, taller, fixed in place, covered with durable plastic, connected to utilities, placed on a foundation, or used as a walk-in growing structure, zoning and building questions become more serious.
Check your city or county rules before building a backyard hoop house, high tunnel, or greenhouse. Look for accessory structure limits, setbacks, lot coverage, height limits, wind and snow requirements, electrical rules, and whether agricultural exemptions apply in your area. Some jurisdictions treat temporary crop protection differently from permanent greenhouses, but you should not assume that a plastic-covered frame is exempt just because it is in a backyard.
If you are adding power, heat, plumbing, a permanent foundation, or a walk-in structure near a property line, stop and verify the requirements first. That is where a simple garden project can cross into building, zoning, or insurance territory.
Independent reader supportYour contribution helps us test, update, and keep practical guides available for everyone.Common Mistakes to Avoid
The first mistake is using clear plastic like row cover. Plastic does not breathe and it blocks rain. If you use it, plan for venting and irrigation from day one.
The second mistake is spacing hoops too far apart. Wide spacing causes fabric sag, ponding water, wind whipping, and collapse under wet snow. Five-foot spacing is a common baseline. In tougher conditions, tighten that to 3 or 4 feet.
The third mistake is buying cover fabric that is too narrow. You need enough width to go over the arch and still anchor both sides. A cover that barely reaches the soil will be frustrating every time you open, close, or vent the tunnel.
The fourth mistake is leaving burrs, sharp pipe ends, cut wire, or exposed rebar. Fabric is not forgiving. One sharp edge can ruin a cover in a weekend of wind.
The fifth mistake is leaving covers outside in the sun when they are not in use. Label covers, roll them dry, and store them out of sunlight. Mark them as frost blanket, insect netting, shade cloth, or plastic so you are not guessing next season.
When to DIY vs. When to Hire a Pro
DIY is the right choice for most small raised-bed hoop covers. If you are covering one to four beds, using hand-bent PVC, installing simple rebar stakes, and relying on row cover or insect netting, this is well within normal homeowner capability.
Consider hiring a pro or at least getting site-specific advice when the structure is walk-in height, close to a property line, exposed to strong wind, intended to stay up all winter, tied into irrigation or electrical systems, or large enough to affect drainage and access. The same applies if you are building for a school, community garden, commercial food production, or a property with HOA rules.
Recommended Free Tools
The practical line is this: if failure would only cost you a cover and a few seedlings, DIY is reasonable. If failure could damage fencing, neighboring property, utilities, or create an injury risk, treat it like a small structure and build it accordingly.
Best Value
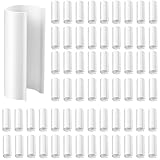
- Package Includes: you will receive 64 pieces white greenhouse clamps, enough quantity to meet your daily use and greenhouse replacement needs; You can also share them with family, friends and neighbors
- Proper Size: the size of this white clamp is approx. 2.4 inch in length and fits greenhouse frame tubing with an outside diameter of 1/2 inch, also ideal for other types of plastic stake or metal round tubes; Enough quantity to meet your daily use and greenhouse replacement needs
- Product Material: the white ABS pipe clamp is made of ABS material, which has good strength and toughness, strong and serviceable to use, strong fixing function, not easy to break, safe and reliable, and easy to remove from the greenhouse film; Compared with stainless steel, it is not easy to rust, resistant to decay, and can be applied for a long time
- Easy to Assemble: this white ABS pipe clips is very light and flexible, ready to move and easy to install, and can be disassembled and applied repeatedly; It is also designed for short term use and rearrangement
- Wide Range of Applications: this white clamp can take a wide range of panels and is suitable for a variety of tubes, including greenhouse film, netting, shades, insect screens, netting, tarpaulins, row covers, etc.; It is also ideal for building greenhouses, floor coverings or other places if needed, very useful in our daily lives
Maintenance and Seasonal Use
Inspect hoops after the first windy day and after heavy rain. Tighten loose clamps, reset lifted edges, and look for fabric wear at contact points. If you see rubbing at the top of a hoop, add a smoother clamp, tape the contact point, or adjust tension.
Vent plastic tunnels early on sunny days. For row cover and frost blanket, open the tunnel periodically for weeding, harvesting, pollination where needed, and pest inspection. Covered plants are not maintenance-free; problems can spread quickly when you are not looking.
At the end of the season, remove covers on a dry day. Shake off soil, let fabric dry, roll it loosely, label it, and store it out of sun. Hoops can often stay in place through the growing season, but remove or reinforce them before winter if your area gets snow and the tunnel was not built for snow load.
The Tool Desk
Outbyte Driver Updater FREEScan for outdated or missing drivers - takes under a minuteDriver Scan →Outbyte PC Repair FREERepair Windows errors before they cause bigger problemsFix Now →The Bottom Line
The best garden hoops are not the fanciest ones. They are the ones matched to the bed, the cover, and the weather. For a standard 4-foot-wide raised bed, 10-foot lengths of 1/2-inch PVC are a good budget choice, while 1/2-inch EMT is better for a cleaner, longer-lasting setup. Space hoops about 5 feet apart in mild conditions and closer in wind or with heavier covers.
Spend as much attention on anchoring as you do on the frame. Clamp the cover at every hoop, secure both long edges, brace the ends, and choose the cover for the actual season: insect netting for pests, row cover for mild frost, heavier frost blanket for cold snaps, shade cloth for heat, and plastic only when you are ready to vent and irrigate. Built that way, a simple low tunnel can give you a stronger start in spring, a longer harvest in fall, and fewer surprises when the weather changes.
Frequently Asked Questions
What is the cheapest way to make garden hoops?
The cheapest practical method is 9- or 10-gauge wire with lightweight row cover for short rows, or 1/2-inch PVC conduit for raised beds. A basic 4 ft. x 8 ft. PVC hoop setup usually costs about $35-$70 in 2026.
How far apart should garden hoops be spaced?
A common spacing is about 5 feet apart. In windy sites, with heavier frost blanket, or where rain and wet snow may sag the cover, use closer spacing around 3 to 4 feet.
Is PVC or EMT better for garden hoops?
PVC is easier and cheaper for quick raised-bed hoops. EMT is stronger, cleaner-looking, and usually better over multiple seasons, but it generally requires a hoop bender for consistent arches.
Do I need a permit for garden hoops?
Small temporary low tunnels over garden beds usually do not need a permit, but larger walk-in hoop houses, fixed greenhouses, structures near property lines, or installations with power, heat, plumbing, or foundations may trigger local zoning or building rules.
What cover should I use for garden hoops?
Use insect netting for pests, lightweight row cover for mild frost and insects, heavier frost blanket for stronger cold events, 30%-50% shade cloth for summer heat, and clear plastic only if you have a venting and irrigation plan.
How do I keep garden hoops from blowing away?
Use closer hoop spacing, anchor hoops with rebar stakes or pipe straps, clamp the cover at every hoop, weigh or bury both long edges, and brace the end hoops so cover tension does not pull them inward.
Free tools Windows power users keep installed
One-click scans. No signup required.
Quick Recap
Product prices and availability are accurate as of the date/time indicated and are subject to change. Any price and availability information displayed on Amazon at the time of purchase will apply.

