A good DIY compost bin does not need to be fancy. It does need to match your yard, your food-scrap volume, your tolerance for turning a pile, and your local pest pressure. For most homeowners, the best starting point is a bin around 3 feet wide, 3 feet deep, and 3 feet tall, set on level soil with a lid, airflow on the sides, and enough front access to turn or shovel finished compost without fighting the structure.
The basic recipe is simple: mix carbon-rich browns with nitrogen-rich greens, keep the pile about as damp as a wrung-out sponge, and maintain oxygen through vents, turning, or bulky materials like dry leaves and wood chips. A practical mix is 2 to 4 parts browns to 1 part greens by volume. Browns include dry leaves, shredded cardboard, straw, and small wood chips. Greens include vegetable scraps, coffee grounds, grass clippings, and fresh garden trimmings.
Where homeowners get into trouble is usually construction, not biology. The bin is too small to heat, too open for food scraps, too wet in a rainy climate, too dry in the sun, or too hard to unload. On our job sites, we build outdoor systems with access, drainage, fastener life, and nuisance control in mind. Those same construction habits make a backyard compost bin cleaner, longer lasting, and easier to use.
Before You Build: Size, Site, Airflow, and Rules
Choose the location before you choose the design. Compost works best on level soil, not on a sealed concrete pad, because soil contact helps drainage and lets beneficial organisms move into the pile. Put pavers, stepping stones, or compacted gravel in front of the bin so you can reach it after rain without standing in mud. Keep the bin convenient to the kitchen or garden, but not tight against siding, fences, vents, or a neighbor’s outdoor living space.
#1 Best Overall

- Twin chambers: Two separate chambers allow one side to finish composting while leaving the other side available to add fresh wastes; Constant alternation of the two sides will create an uninterrupted stream of nutritious compost
- 360⁰ Tumbling Design: The rotating design prevents you from digging or mixing the pile by hand; And the deep fins on eight panels make it easier to turn the compost bin
- Excellent Aeration: Air vents can make the air fully circulate and will not cause an explosion due to excessive internal pressure; Deep fins can better break the clumps, which is conducive to the full fermentation of oxygen
- Sturdy & Durable Construction: Constructed of premium metal frame and high-quality pp plastic body, this tumbling composter is corrosion-resistant, weathering-resistant, sturdy, and durable for long-lasting service life
- Garden Gloves Included: The gloves that not only protect your hands from injury, but are also waterproof, making them easy to clean; With 4 durable ABS plastic claws for easy digging, planting and other gardening work
Backyard composting is usually treated as normal residential yard and garden activity, not as a solid-waste facility. That does not mean anything goes. Local nuisance, odor, rodent, stormwater, setback, and HOA rules can still apply. Before building a permanent bay, check whether your city, county, or HOA has requirements for setbacks from property lines, drainage swales, wells, waterways, or shared fences. A quick check is especially worthwhile if you plan to compost food scraps, build near a lot line, or install a masonry bay.
For hot composting, aim for a working pile close to 1 cubic yard: roughly 3 feet by 3 feet by 3 feet. Smaller bins can work, but they are less likely to hold heat. Larger bins are fine if you can still turn and unload them. Side vents, wire panels, drilled holes, removable slats, and coarse browns all help oxygen move through the pile. Composting is aerobic; when oxygen disappears, the pile gets sour, wet, and smelly.
Moisture control matters just as much. In dry regions, partial shade and a lid reduce water loss. In wet regions, a roofed or lidded bin keeps the pile from saturating. If the pile smells like ammonia, add browns. If it smells rotten, open it up, mix in dry leaves or shredded cardboard, and improve drainage or airflow.
What Not to Put in a Home Compost Bin
For a typical backyard setup, skip meat, bones, fats, oils, dairy, pet waste, diseased plants, coal or charcoal ash, treated wood, glossy or plastic-coated paper, produce stickers, and invasive weed seed heads. These materials can attract animals, create odor, spread disease, or leave contaminants in the finished compost.
If you are composting food scraps in a rodent-prone area, do not use an open pallet pile as your only container. Use an enclosed bin with a tight lid, latched access doors, and galvanized hardware cloth over vents and vulnerable gaps. Quarter-inch hardware cloth is the better pest-exclusion spec. Half-inch hardware cloth is more common and less expensive, and it works well for airflow panels and screening finished compost, but quarter-inch mesh is the tighter choice around food waste.
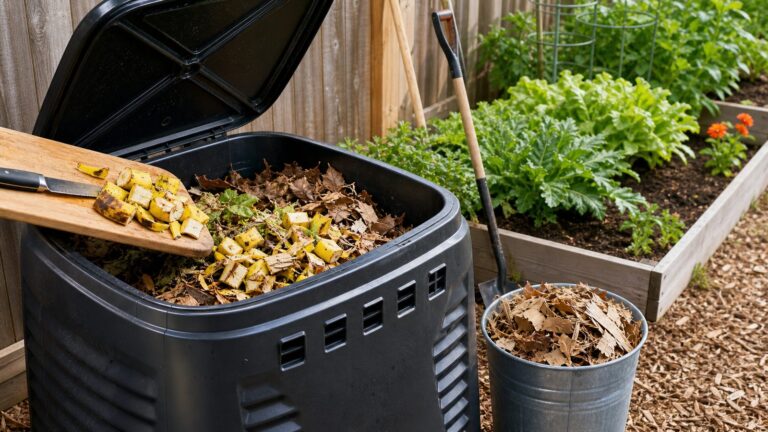
A simple habit prevents many problems: bury fresh kitchen scraps under 4 to 8 inches of browns every time. Keep a covered bucket of shredded cardboard, sawdust from untreated wood, dry leaves, or straw next to the bin so you are not tempted to toss food on top and walk away.
DIY Compost Bin Cost and Design Comparison
DIY compost bins can cost nothing if you already have clean salvage materials, or several hundred dollars if you want cedar, galvanized hardware cloth, lids, removable slats, and a polished look. In 2026, most simple new-material builds land between $35 and $90. Sturdier wood-and-wire bins usually run $100 to $250. Multi-bay systems and DIY tumblers with new hardware often fall between $150 and $450 or more.
| Design | Typical 2026 Cost | Skill Level | Lifespan | Pest Resistance | Best Use |
|---|---|---|---|---|---|
| Wire cylinder | $20-$80 | Easy | 3-8 years | Low to medium | Leaves and yard waste |
| Pallet bin | $0-$40 | Easy | 2-5 years | Low unless lined | Low-cost yard compost |
| Three-bin pallet bay | $30-$120 salvaged | Moderate | 2-5 years | Low to medium | Gardeners with volume |
| Lidded wood-and-wire bin | $100-$220 | Moderate | 5-10+ years | Medium to high | Food scraps plus yard waste |
| Trash-can composter | $15-$60 | Easy | 3-8 years | Medium | Small yards |
| Plastic tote bin | $15-$45 | Easy | 1-4 years | Medium | Starter composting |
| Worm bin | $20-$75 | Easy | 2-6 years | High indoors | Kitchen scraps |
| Barrel tumbler | $60-$300+ | Moderate | 5-10 years | High | Fast, contained batches |
| Cinder-block bay | $80-$250+ | Moderate | 10+ years | Medium | Permanent garden area |
| Straw-bale bin | $30-$100 | Easy | 1 season | Low | Temporary seasonal piles |
Hidden costs are real. A compost thermometer costs about $10 to $30. A compost aerator is usually $20 to $45. A pitchfork can run $25 to $70. Pavers or stone in front of the bin may add $20 to $100. Hardware cloth is often the cost driver, but it is also what separates a clean food-scrap bin from an animal problem.
Free tools Windows power users keep installed
One-click scans. No signup required.
1. Wire Cylinder Compost Bin
A wire cylinder is the fastest useful outdoor compost bin. Form a 10- to 12-foot length of welded wire, chicken wire, or hardware cloth into a circle, overlap the ends by 6 to 12 inches, and fasten them with wire, zip ties, or small carabiners. A 10-foot length makes a bin just over 3 feet in diameter, which is close to the hot-composting target.
Expect to spend $20 to $80 depending on mesh type. Chicken wire is cheap and easy to bend, but it is light-duty and poor against rodents. Welded wire is stronger. Galvanized hardware cloth costs more but lasts longer and controls pests better. Use this design for leaves, weeds before seed, and garden trimmings. For food scraps, add a lid and line vulnerable openings with quarter-inch hardware cloth, or choose a more enclosed design.
2. Simple Pallet Compost Bin
A pallet bin is a budget workhorse. Use three clean heat-treated pallets marked HT for the back and sides, then add a fourth pallet or removable boards at the front. Fasten corners with exterior screws, metal corner brackets, or heavy wire. Avoid pallets that smell like chemicals, show oil staining, or have unknown industrial residue.
Cost is often $0 to $40 if pallets are reclaimed, plus $10 to $35 for screws, brackets, hinges, latch hardware, and optional mesh. Basic pallets usually last 2 to 5 years outdoors. This is a good bin for yard waste and mixed garden material. If you add kitchen scraps, staple galvanized hardware cloth to the inside faces and add a fitted lid.
The Tool Desk
Outbyte Driver Updater FREEScan for outdated or missing drivers - takes under a minuteDriver Scan →Outbyte PC Repair FREEClear out junk files and repair common Windows errorsFree Scan →Rank #2
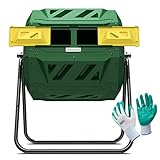
- ✅Speed Up Composing Process: More advanced models use rotating to bring oxygen to the center of the bin and paddles inside the chamber to help mix and aerate the composting materials when turned. These improvements or modifications are designed for one reason: to speed the composting process.
- ✅How do Compost Tumblers work? Simple. You load them with green and brown waste from your yard and kitchen. When full, you give them time to work, in other words, heat up. Turning a compost pile mixing the organic materials and the organisms it contains with heat-producing oxygen is the traditional method of keeping the process going full steam. By turning the tumbler, the organic materials are mixed and infused with fresh oxygen.
- ✅Easy to Access Finished Compost: Just Slide the door open and take the organic fertilizer out when the compost is ready. When a check reveals the compost is complete —and this can happen in a matter of weeks —the same access that allowed you to fill the tumbler lets you empty it. Now is the time to spread the results.
- ✅Dual-Bin Design: The dual bin design takes a different approach to the continuous-use composted concept, Two bins are set side-by-side into a single rotating chamber. Thickly insulated compartments conserve the heat generating by the decaying matter, and this greatly speeds the process. This design also allows you to add food waste to one chamber while the other is composting.
- ✅Totally Organic and Money-Saving: If you're looking for a fast, convenient way to compost your kitchen throw-outs, grass clippings, and organic yard waste, our outdoor kitchen compost bin is just right for you! The Compact Compost Tumbler quickly recycles it into nutrient-rich compost.
3. Three-Bin Pallet Turning System
A three-bin system solves the biggest compost workflow problem: constantly adding fresh material to nearly finished compost. Use one bay for active additions, one bay for cooking or turning, and one bay for curing finished material. Each bay should be about 3 feet wide, 3 feet deep, and 3 to 4 feet tall.
A salvaged pallet version may cost $30 to $120. A new-lumber version with posts, removable front slats, lids, and hardware cloth can run $180 to $450 or more. The build takes a half day to a full weekend depending on how polished you want it. This is the best choice for serious gardeners, large lawns with leaf volume, and households that want steady compost production.
4. Lidded Wood-and-Wire Bin
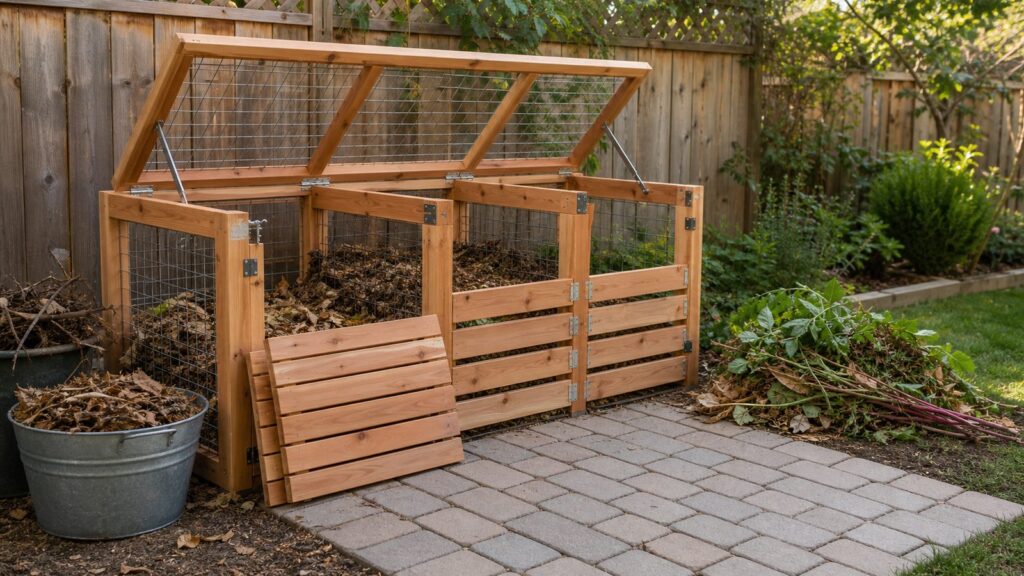
If we had to recommend one all-around backyard design, this is it. Build a square frame with rot-resistant lumber, wrap the sides in galvanized hardware cloth, add a hinged lid, and use removable front slats or a lower cleanout door. The bin looks tidy enough for most suburban yards and performs well with both food scraps and yard waste.
Use cedar or modern non-arsenic pressure-treated 2x4s. Cedar often costs roughly twice as much as standard pressure-treated lumber, but it is stable, attractive, and naturally rot resistant. Use exterior-rated galvanized or coated screws, not drywall screws. A typical 3-foot by 3-foot by 3-foot single bin costs $100 to $220 in 2026.
Quick wins for a faster PC:
Repair Windows errors before they cause bigger problemsFix Now →Scan for outdated or missing drivers - takes under a minuteDriver Scan →Clear out junk files and repair common Windows errorsFree Scan →Cut-list guidance for a sturdy single bin
For a practical build, cut four 4×4 posts or doubled 2×4 corner posts to 36 inches. Build top and bottom square frames from 2x4s, each roughly 36 inches by 36 inches. Add 1/2-inch galvanized hardware cloth to the sides for airflow. If food scraps are common or rodents are a known issue, use 1/4-inch hardware cloth around lower gaps, vents, and the underside. Leave the front partly open with three to five removable 1×6 slats seated in simple vertical channels, or build a hinged lower hatch at least 18 inches tall.
For the lid, frame a lightweight rectangle from 2×2 or 2×4 stock and skin it with exterior plywood, cedar boards, corrugated metal, or hardware cloth plus a rain cap. Add two exterior hinges and a latch. The latch matters; a lid that only rests in place will not stay reliable through wind, animals, and repeated use.
5. Drilled Trash-Can Composter
A trash-can composter is a good small-yard option. Use a 32-gallon plastic or galvanized can with a tight-fitting lid. Drill 1/4- to 1/2-inch holes every 4 to 6 inches around the sides and several holes in the bottom for drainage. Set the can on bricks, pavers, or a small gravel bed so water can escape.
Budget $15 to $60 for the container and hardware. A galvanized can usually costs more than a basic plastic can, but it resists chewing and sun damage better. Use bungee cords or strap latches to secure the lid. To mix, roll the can gently on its side or use an aerator tool. Do not overfill it; once a trash can is packed tight and wet, airflow drops fast.
Do these 3 things before closing this tab:
1Repair Windows errors before they cause bigger problems2Scan for outdated or missing drivers - takes under a minute3Clear out junk files and repair common Windows errors6. Plastic Tote Compost Bin
A tote bin is one of the cheapest starter designs. Choose a heavy-duty storage tote with a locking lid, ideally 18 to 30 gallons. Drill rows of 1/4-inch holes along the upper sides and lid, then add a few bottom drainage holes. If the tote sits on a patio, place a tray underneath and manage moisture carefully.
Cost is usually $15 to $45. The tradeoff is lifespan. Plastic totes can crack in sun and cold, and thin lids warp. This design is best for renters, first-time composters, or small batches of leaves and vegetable scraps. Keep the green load modest and add browns often.
7. Five-Gallon Bucket Worm Bin
A worm bin handles kitchen scraps without needing a yard. Use two food-grade 5-gallon buckets and one lid. Drill drainage and migration holes in the upper bucket, nest it inside the lower bucket, and fill it with damp shredded cardboard, a handful of finished compost or soil, and red wiggler worms. Keep the bedding damp but not soggy.
Expect $20 to $75 depending on whether you already have buckets and whether you need to buy worms. This is not a meat, dairy, or oily-food system. It works best for fruit and vegetable scraps, coffee grounds, tea leaves, and small amounts of crushed eggshell. Keep it in a garage, basement, laundry area, or shaded porch where temperatures stay moderate.
Recommended Free Tools
Rank #3
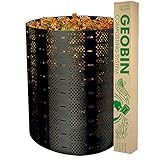
- Large capacity—expandable to 3.75 feet (237 gallon)
- Easy to assemble with closure keys. Easy to move. Easy to reassemble.
- The best value composting bin on the market.
- Excellent ventilation.
8. Stacked Worm Tower
A stacked worm tower uses two or three trays so worms can migrate upward as lower material finishes. You can build it from matching bins or buckets with drilled holes between layers. The bottom tray catches liquid, the middle tray holds active bedding, and the top tray becomes the next feeding zone.
Budget $30 to $100. This design gives you cleaner harvesting than a single bucket because finished castings can be separated by tray. It is a good apartment, townhouse, or garage option, but it requires more attention to moisture and feeding rate than an outdoor yard-waste pile.
9. Food-Grade Barrel Tumbler
A barrel tumbler keeps compost enclosed and easy to turn. Use a food-grade barrel only; never use a container that held chemicals, oils, solvents, pesticides, or unknown industrial products. Mount the barrel on a wood or metal frame with a galvanized pipe axle, add a latched access door, and drill ventilation holes. Cover larger vent openings with hardware cloth.
A DIY tumbler costs about $60 to $180 if you find a used food-grade barrel, or $140 to $300 or more with a new barrel, frame lumber, pipe, fasteners, and latches. Store-bought tumblers commonly range from about $60 to $600 in 2026 depending on capacity, insulation, and build quality. Tumblers work best as batch systems: fill, balance browns and greens, turn every few days, then let the batch finish without constantly adding new scraps.
10. Rolling Trash-Can Tumbler
This is the lower-cost cousin of a barrel tumbler. Drill ventilation and drainage holes in a tight-lidded trash can, secure the lid with straps, and roll the can on the ground to mix. It costs $20 to $70 depending on the can.
The advantage is simplicity. The downside is durability and mess control. Rolling a heavy, wet can is awkward, and lids can leak if the mix is too wet. Use this design for light batches, not for a large household generating daily food scraps.
11. Cinder-Block Compost Bay
A cinder-block bay is heavy, durable, and tidy when built well. Dry-stack blocks in a U-shape on level ground, leaving small gaps between some blocks for airflow. A common single bay is about 3 feet by 3 feet inside, with walls 2 to 3 blocks high. Add cap blocks for a cleaner top edge and a removable wood or metal front if you want better containment.
Budget $80 to $250 or more depending on block count, cap blocks, and lid material. This system can last 10 years or longer. It is not easily moved, so check drainage, access, and local setback rules first. In hot climates, block holds heat; in tight spaces, it can look more intentional than pallets or wire.
What’s actually slowing this PC down?
Pick the symptom - the matching free tool is one click away.
12. Straw-Bale Compost Bin
Straw bales make a quick seasonal compost enclosure. Arrange bales in a square or U-shape, stack one or two high, and pile material inside. The bales insulate the pile and eventually break down themselves.
Cost is usually $30 to $100 per season depending on local bale prices. This is a temporary build with a one-season lifespan. Use straw, not hay, if you can; hay is more likely to contain viable seed. Straw-bale bins are useful for fall leaves, garden cleanup, and temporary garden expansion, but they are not the best choice for food scraps in pest-prone areas.
13. Snow-Fence or T-Post Leaf Mold Bin
Leaf mold is decomposed leaves, and it is one of the easiest soil amendments to make. Drive three or four T-posts, wrap snow fence, welded wire, or mesh around them, and fill the enclosure with shredded leaves. A 4-foot diameter bin can hold a large fall cleanup without much cost.
Expect $20 to $90 depending on whether you own posts and fencing. This is not a fast hot-compost system. Leaves may take 6 to 18 months to break down depending on shredding, moisture, and turning. The payoff is excellent mulch and soil conditioner with very little daily maintenance.
PC Slower Than It Used to Be?
A free scan shows the junk files, broken settings and background clutter dragging Windows down - then fixes them in one click.Free scan · Windows 10 & 11Crashes, No Sound, or Screen Glitches?
Random freezes, missing sound and display glitches usually trace back to one bad driver. Find and replace yours safely.Free scan · under a minuteRank #4

- ✅Speed Up Composing Process: More advanced models use rotating to bring oxygen to the center of the bin and paddles inside the chamber to help mix and aerate the composting materials when turned. These improvements or modifications are designed for one reason: to speed the composting process.
- ✅How do Compost Tumblers work? Simple. You load them with green and brown waste from your yard and kitchen. When full, you give them time to work, in other words, heat up. Turning a compost pile mixing the organic materials and the organisms it contains with heat-producing oxygen is the traditional method of keeping the process going full steam. By turning the tumbler, the organic materials are mixed and infused with fresh oxygen.
- ✅Easy to Access Finished Compost: Just Slide the door open and take the organic fertilizer out when the compost is ready. When a check reveals the compost is complete —and this can happen in a matter of weeks —the same access that allowed you to fill the tumbler lets you empty it. Now is the time to spread the results.
- ✅Dual-Bin Design: The dual bin design takes a different approach to the continuous-use composted concept, Two bins are set side-by-side into a single rotating chamber. Thickly insulated compartments conserve the heat generating by the decaying matter, and this greatly speeds the process. This design also allows you to add food waste to one chamber while the other is composting.
- ✅Totally Organic and Money-Saving: If you're looking for a fast, convenient way to compost your kitchen throw-outs, grass clippings, and organic yard waste, our outdoor kitchen compost bin is just right for you! The Compact Compost Tumbler quickly recycles it into nutrient-rich compost.
14. In-Ground Digester Bucket
An in-ground digester uses a lidded bucket or small barrel with holes drilled in the sides and bottom. Bury it so the lid remains accessible at grade, then add food scraps and browns inside. Soil organisms access the material through the holes while the lid keeps the surface clean.
Cost is typically $10 to $50. Use a food-grade bucket or barrel and drill many 1/2-inch holes below grade. This design is discreet and useful near vegetable gardens, but it has limited capacity. In clay soils or wet sites, drainage can be poor. In areas with digging animals, use a tight lid and consider hardware cloth around the buried sides.
15. Compact Bokashi Bucket
Bokashi is an indoor fermentation system, not traditional aerobic composting. Food scraps are layered with inoculated bran in an airtight bucket, then fermented before being buried, added to a compost pile, or finished in soil. It is useful for apartments, winter kitchens, and households that cannot keep an outdoor active pile year-round.
A simple bucket setup can cost $25 to $75, while more polished kits cost more. Bokashi can handle some materials that backyard compost bins should avoid, but the fermented material still needs a finishing step. If you have no yard, plan ahead for where the finished bucket contents will go.
How to Choose the Right Compost Bin
Match the bin to the waste stream. If you mostly have leaves and grass, an open wire cylinder, pallet bay, or leaf mold bin is enough. If you add food scraps, choose a lidded wood-and-wire bin, trash-can composter, tumbler, worm bin, or bokashi bucket. If you garden heavily, build at least two bays so one pile can cure while the other receives fresh material.
For small yards and HOA-visible spaces, choose compact and tidy: a lidded wood-and-wire bin, barrel tumbler, galvanized trash-can composter, or masonry bay. For rural or large-lot properties, a three-bay system gives better volume and workflow. For renters, totes, buckets, and wire cylinders are easier to move than posts, blocks, or multi-bay lumber systems.
Climate should shape the lid and airflow. In wet regions, prioritize a roof, lid, or covered top so the pile does not become a saturated mat. In hot, dry regions, partial shade and fewer oversized openings help preserve moisture. In cold climates, larger piles, straw-bale insulation, or dark enclosed bins hold heat better than small open containers.
Pest-Proofing Details That Matter
Most pest problems come from exposed food, oversized gaps, weak lids, and piles that stay too wet. If your bin includes kitchen scraps, build it like a small outdoor utility enclosure. Use a lid that overlaps the walls, add a latch, close door gaps, and screen vents with galvanized hardware cloth.
Use 1/4-inch hardware cloth where exclusion matters most: lower side gaps, base openings, vents near food waste, and any opening an animal can work at repeatedly. Use 1/2-inch hardware cloth for general airflow panels and compost screening where rodents are not the main concern. Chicken wire is not rodent-proof; it is a containment material, not an exclusion material.
At the base, soil contact is good for compost, but open soil can be vulnerable in some neighborhoods. A practical compromise is to line the bottom with 1/4-inch or 1/2-inch galvanized hardware cloth, bend it 6 inches up the sides, and fasten it to the frame. Add 2 to 4 inches of coarse browns over the mesh before loading food scraps. This keeps drainage and biology while reducing burrowing access.
Build and Maintenance Tips From the Field
Build for access first. Removable front slats, a hinged lower hatch, or one openable side saves more time than decorative trim. A bin that looks good but cannot be forked out cleanly will frustrate you every harvest.
Do not compact the pile. Chop bulky stems and cardboard into smaller pieces, but leave enough structure for air. Mix wet greens with dry browns as you load. If you dump a full mower bag of fresh grass into a tight bin, it can mat into a hot, slimy layer. Add dry leaves or shredded cardboard at the same time.
Quick wins for a faster PC:
Clear out junk files and repair common Windows errorsFree Scan →Scan for outdated or missing drivers - takes under a minuteDriver Scan →Best Value

- Dual Chamber, High Capacity: Our compost bin features a dual chamber with a generous capacity of 43 gallons. Perfect for large families and avid gardeners, you can simultaneously compost in one chamber while adding new organic material to the other, reducing overall composting time.
- Convenient Access: The dual-chamber composter tumbler features a detachable sliding door with a large opening, making it effortless to add waste or remove compost. The compost bin features a secure seal that effectively keeps out mice, insects, and other pests, ensuring a safe and efficient composting process.
- Built to Last: Crafted from high-quality PP materials and supported by sturdy metal components, our compost bin outdoor boasts a robust load-bearing capacity of 110 lbs. They are BPA-free, UV-resistant, and weatherproof, enduring direct sunlight, typhoons, rain, snow, and more.
- Effortless Tumbling: Say goodbye to the hassle of manual stirring. Our tumbling composter's innovative 360° tumble design ensures thorough mixing, faster decomposition, and higher-quality compost output. Simply roll it every few days, and you'll have compost ready in just 4-6 weeks.
- Optimized Airflow: The garden compost tumbler features strategically placed vents that promote proper air circulation and prevent potential issues. Internal grooves effectively break up clumps, ensuring uniform mixing of materials and accelerating the decomposition of organic matter.
Turn active piles every 1 to 3 weeks if you want faster compost. If you are using a slower cold pile, turn when convenient and expect a longer timeline. Finished compost is dark, crumbly, earthy-smelling, and no longer recognizable as the original scraps. Screen it through 1/4-inch or 1/2-inch hardware cloth if you want a finer garden amendment; toss unfinished pieces back into the active bin.
When to DIY vs. When to Hire a Pro
DIY is the right choice for most compost bins. A wire cylinder, trash can, tote, pallet bin, worm bucket, or straw-bale bin can be built in 30 minutes to 3 hours with basic tools. A lidded wood-and-wire bin or three-bay system is also reasonable for a handy homeowner with a circular saw, drill, square, stapler, and exterior fasteners.
Consider hiring a pro when the compost area is part of a larger landscape project, when drainage has to be corrected, when the bin must match fencing or hardscape, or when you want a permanent masonry or multi-bay structure near a patio, garden wall, or property line. A pro-built setup can also make sense for steep yards, poor soils, tight access, or HOA-visible locations where appearance matters as much as function.
Permits are uncommon for small movable bins, but permanent structures, retaining walls, drainage changes, or installations near easements may trigger local requirements. When in doubt, ask before you build. It is cheaper to adjust a layout on paper than move a block bay after a complaint.
The Best All-Around DIY Compost Bin
For a typical U.S. homeowner who wants to compost both yard waste and kitchen scraps, build a 3-foot by 3-foot by 3-foot lidded wood-and-wire bin with galvanized hardware cloth, removable front slats, and a latched lid. Expect to spend $100 to $220 using cedar or modern pressure-treated lumber. Add quarter-inch hardware cloth at the base and lower gaps if rodents are a concern.
If you have the space, build two bins instead of one. One active bin and one curing bin make composting much easier because you stop mixing fresh scraps into nearly finished material. That simple workflow improvement is often the difference between a compost pile that becomes a routine and one that becomes a messy corner of the yard.
The best compost bin is not the most complicated design. It is the one you can reach after rain, load without attracting pests, turn without dismantling, and empty without a fight. Build those details in from the start, and the biology will do the rest.
Frequently Asked Questions
What is the easiest DIY compost bin to build?
A wire cylinder is usually the easiest outdoor compost bin. Use a 10- to 12-foot length of welded wire or hardware cloth, form it into a circle, and fasten the overlap. It works best for leaves and yard waste.
Recommended Free Tools
What size should a backyard compost bin be?
For hot composting, aim for about 3 feet wide, 3 feet deep, and 3 feet tall. Smaller bins can work, but they hold less heat and usually break material down more slowly.
How much does it cost to build a DIY compost bin in 2026?
Simple DIY compost bins usually cost $0 to $90 depending on salvaged materials. Sturdy wood-and-wire bins often cost $100 to $250, while multi-bay systems or DIY tumblers can run $150 to $450 or more.
Should I use 1/4-inch or 1/2-inch hardware cloth?
Use 1/4-inch hardware cloth for better pest exclusion around food scraps, lower gaps, vents, and bases. Use 1/2-inch hardware cloth for general airflow panels and screening compost when pest pressure is lower.
Can I put a compost bin on concrete?
You can, but soil is usually better because it improves drainage and gives compost organisms access to the pile. If you must use concrete, manage drainage carefully and add finished compost or soil to introduce biology.
Windows Errors? Fix Them Before They Spread
Repair common Windows errors and clear accumulated junk for a smoother, more stable PC - no reinstall needed.Free scan · no reinstallCrashes, No Sound, or Screen Glitches?
Random freezes, missing sound and display glitches usually trace back to one bad driver. Find and replace yours safely.Free scan · under a minuteDo DIY compost bins need lids?
Yard-waste bins do not always need lids, but food-scrap bins should have one. A tight, latched lid helps control moisture, odor, flies, rodents, and windblown material.
Quick Recap
Product prices and availability are accurate as of the date/time indicated and are subject to change. Any price and availability information displayed on Amazon at the time of purchase will apply.