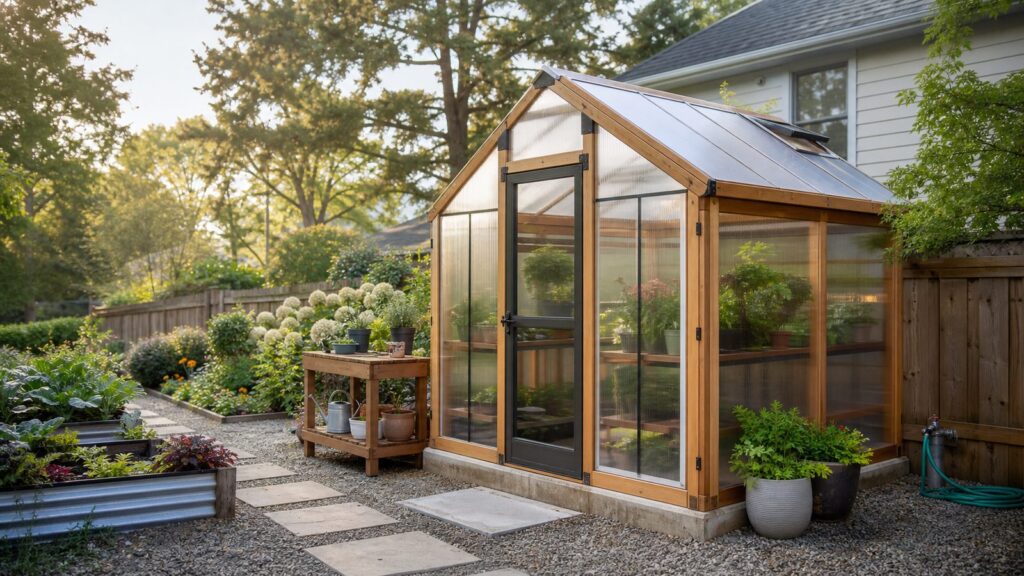
A backyard greenhouse is one of the most useful upgrades a gardener can build, but the successful ones are not just pretty frames with clear panels. They are placed correctly, anchored correctly, ventilated correctly, and built on a base that stays dry and square.
For many homeowners, the sweet spot is a freestanding greenhouse in the 6-by-8, 8-by-10, or 10-by-12-foot range. That gives you room for benches, seed trays, a center aisle, and basic storage without turning the project into a major outbuilding. In 2026, a small seasonal plastic or PVC greenhouse may cost $300 to $700, a budget 8-by-10 polycarbonate kit often lands around $365 to $1,170 before upgrades, and a serious backyard greenhouse can run from several thousand dollars to $11,000 or more once foundation, delivery, vents, heat, benches, and labor are included.
On our job sites, the difference between a greenhouse that feels permanent and one that becomes a maintenance headache usually comes down to the first decisions: site, drainage, code, foundation, wind, snow, and ventilation. This guide walks through the project the way a builder would plan it before the first screw goes in.
As an Amazon Associate I earn from qualifying purchases.
Do these 3 things before closing this tab:
1Repair Windows errors before they cause bigger problems2Fix the driver behind crashes, sound loss and screen glitches3Clear out junk files and repair common Windows errorsStart With the Backyard Plan, Not the Kit
Before buying a kit or lumber package, decide what the greenhouse needs to do. A seed-starting space for spring vegetables is a different project than a four-season orchid house, and both are different from a design-forward glass structure beside a patio.
For most homeowners, a practical backyard greenhouse should answer these questions:
#1 Best Overall

- DUAL SPRING DESIGN: Compared with the single spring vent, our solar heat sensitive roof vent opener adopts double spring design, which has stronger thrust force and more solid; In addition to ordinary areas, it can also be applied in windy mountainous areas, resist wind twist, bringing much convenience to you.
- SOLAR POWERED OPERATION: Our greenhouse vent automatic opener responds to temperature changes, efficiently regulating your greenhouse's internal climate. As the temperature rises, the gas-filled cylinder expands, gently pushing the window open. Once the temperature cools down, the spring mechanism closes the window smoothly.
- DURABLE MATERIAL: Black Color powder coating for frame, crafted from aluminum alloy, this window opener guarantees long-lasting performance. Built to withstand outdoor weather conditions, the corrosion resistant materials ensure reliable performance season after season.
- PRECISE TEMPERATURE CONTROL: Operating between 15°C to 25°C (60°F - 77°F), the greenhouse window opener adapts to various weather conditions. Automatic window opener helps maintain an optimal growing environment inside the greenhouse with temperatures that neither get too hot nor too cold.
- EASY INSTALLATION: Installing the greenhouse vent opener is quick and straightforward with the provided clamps and screws. It fits most greenhouse windows and seamlessly integrates with roof vents for houses, making it a versatile choice for different setups.
- Season: Will you use it only in spring and fall, or through winter?
- Size: Do you need seed trays, raised beds, benches, pot storage, or a small work table?
- Utilities: Will you need water, electricity, heat, fans, or automated vents?
- Appearance: Is this a working garden structure, or part of a finished backyard design?
- Exposure: Does your yard deal with strong wind, snow, heavy rain, intense summer heat, or drifting from nearby roofs and fences?
A 6-by-8-foot greenhouse is compact and manageable, but it fills quickly. An 8-by-10-foot greenhouse is a strong all-around size because it can hold benches on both sides with a usable center aisle. A 10-by-12-foot greenhouse gives more flexibility for taller crops, shelving, and storage, but the larger footprint can trigger more code, foundation, and budget considerations.
Plan for a center aisle of at least 24 to 30 inches. If you want to roll in a wheelbarrow, use a garden cart, or improve accessibility, 36 inches is more comfortable. Do not design every inch for plants. You need room to turn, water, prune, sweep, and carry flats without knocking panels or seedlings loose.
Check Permits, Setbacks, HOA Rules, and Utilities Early
A greenhouse may feel like garden equipment, but many jurisdictions treat it as an accessory structure. That can bring zoning setbacks, height limits, lot coverage rules, utility permits, snow load requirements, wind load requirements, and sometimes drawings.
Common permit thresholds vary widely. Some areas exempt small detached accessory structures under a certain square footage, such as 120 square feet or 200 square feet, while others still regulate placement, anchoring, easements, electrical work, plumbing, and use. A greenhouse attached to the house is almost always treated more seriously than a small freestanding garden structure.
Before you order materials, check:
- Minimum setback from side and rear property lines
- Distance from easements, septic areas, drainage swales, and utility corridors
- Maximum height for accessory structures
- Whether the greenhouse counts toward lot coverage
- Whether electrical circuits, heaters, hose bibs, drains, or gas lines require permits
- HOA approval for placement, roof shape, color, materials, and visibility from the street
In areas with heavy snow, high wind, wildfire rules, frost depth, coastal exposure, or expansive soils, the building department may care about structure and anchoring even on a small greenhouse. That is not red tape to ignore. A lightweight greenhouse can become dangerous when wind gets under it, and snow can collapse a roof that was sold for mild climates.
Choose the Right Greenhouse Type
There is no single best DIY greenhouse. The right type depends on budget, climate, appearance, and how long you expect it to last.
| Greenhouse type | Best use | Typical 2026 budget | Builder’s take |
|---|---|---|---|
| PVC tunnel or small hoop house | Seasonal growing, seed starting, low-cost beds | $300-$700 for very small DIY versions; $1,000-$2,000 for a more complete small hoop house | Affordable and fast, but usually short-lived unless well anchored and maintained. |
| Wood-framed polycarbonate greenhouse | Durable backyard DIY project | Roughly $200-$400 in basic materials for a simple 8-by-6 wood frame, but often $800-$2,500 all-in after panels, doors, vents, gravel, anchors, and benches | Good balance of strength, appearance, and customization if the frame is kept square and protected from moisture. |
| Aluminum polycarbonate kit | Faster assembly with predictable parts | Many budget 8-by-10 kits list around $365-$1,170, with better kits costing more | Convenient, but inspect wind rating, panel thickness, hardware, door quality, and anchoring before buying. |
| Cedar, Victorian, or premium kit | Finished backyard feature | Several thousand dollars; some 8-by-10 premium kits are around $7,499 | Better appearance and stronger components, but foundation and installation quality still matter. |
| Custom glass greenhouse | High-end landscape design or four-season use | $11,000-$25,000+ is common for professionally built projects; premium specialty models can start around $25,000 | Beautiful and long-lasting, but heavier, more expensive, and more demanding structurally. |
For most DIY homeowners, polycarbonate is the practical glazing choice. It is lighter and more impact-resistant than glass, easier to handle, and available in twin-wall panels that improve insulation. Polyethylene film is the cheapest covering, but it has the shortest service life and needs replacement. Glass looks excellent and lasts a long time, but it is heavy, breakable, and less forgiving if the frame moves.
Pick the Best Site in the Yard
Site selection matters as much as the greenhouse itself. A well-built greenhouse in the wrong spot will still overheat, flood, rack out of square, or sit unused because it is inconvenient.
Look for a location with:
- Level or easily leveled ground
- Good drainage after heavy rain
- Winter sun exposure, especially from the south
- Reasonable access to water
- Enough room around all sides for cleaning, repairs, and snow removal
- Some protection from direct prevailing wind, without placing it in deep shade
- A path connection to the house, potting bench, compost, raised beds, or patio
In colder northern climates, a common rule of thumb is to orient the long side east-west to capture more winter sun. In hotter southern climates, the priority shifts toward airflow, shade cloth, afternoon heat control, and light-colored surfaces around the structure that do not radiate as much heat.
Avoid low spots where water collects. Keep the finished floor above surrounding grade, and slope nearby soil away from the greenhouse. Also avoid placing it where snow or rain dumps from a house roof, garage, shed, or fence line. Snow drifting against the sidewall can deform panels, and roof runoff can wash out a base.
PC Slower Than It Used to Be?
A free scan shows the junk files, broken settings and background clutter dragging Windows down - then fixes them in one click.Free scan · Windows 10 & 11Outdated Drivers Are Slowing You Down
One free scan finds every outdated or missing driver and matches the right update for your exact hardware.Free scan · exact hardware matchThink of the greenhouse as part of the backyard design. Align it with paths, raised beds, fence lines, or patio edges so it looks intentional. A greenhouse set crooked in a leftover corner tends to feel temporary even when it is well built.
Rank #2

- 【Optimal Ventilation System】Your plants are optimally ventilated through temperature-controlled opening and closing. Depending on the temperature, the piston of the cylinder moves and opens or closes the window.
- 【Premium Aluminum & Stainless Steel Build】The greenhouse accessories crafted with rust-resistant aluminum and stainless steel for long-lasting performance in humid conditions. Supports up to 15 lbs (7 kg) and opens windows up to 18 inches (45 cm).
- 【Solar Heat Sensitive】Non electric, our window vent opener uses solar energy. Operating between 15°C to 25°C (60°F - 77°F), the greenhouse vent opener works when the temperature exceeds 77°F /25°C, solar vent opener will open. while temperature drops to 59°F /15°C, the greenhouse kit will shut down completely.
- 【Easy Installation】Attach it directly to panels, metal frames, or wooden frames withwith the provided clamps and screws. You can steplessly adjust the opening angle by turning the cylinder and thus achieve the right ventilation for your bed.
- 【Ideal for Your Greenhouse Window】 Greenhouse window opener fits most common garden and greenhouses. Note:Place the cylinder in a chilled environment for approximately 30 minutes. Then take out it, manually extend and retract the cylinder, and reinstall it properly for use.
Build a Base That Stays Square and Dry
The base is where many DIY greenhouses succeed or fail. If the base is out of square, the frame fights you. Doors rub. Panels do not seat correctly. Gaps open up. In wind, those gaps become failure points.
For small freestanding greenhouses, common foundation choices include compacted gravel with a treated wood base, pavers over compacted stone, pier blocks, ground screws, or concrete piers. Larger, attached, heavy, glass, or code-triggered builds may need a concrete slab, stem wall, or frost footings.
Good DIY Base for Many Small Greenhouses
A practical base for an 8-by-10-foot backyard greenhouse often looks like this:
Quick wins for a faster PC:
Fix the driver behind crashes, sound loss and screen glitchesFind Drivers →Clear out junk files and repair common Windows errorsFree Scan →Scan for outdated or missing drivers - takes under a minuteDriver Scan →- Excavate organic material and soft soil from the footprint plus 12 to 18 inches around it
- Install landscape fabric or a weed barrier
- Add 4 to 6 inches of compacted crushed stone or gravel
- Set a pressure-treated 4-by-4 or 6-by-6 timber base, rated for ground contact
- Square the base by measuring diagonals before fastening corners
- Anchor the base to earth with ground anchors, ground screws, rebar stakes, or concrete piers as appropriate for local soil and wind
For many hobby greenhouses, gravel or pavers are better than a sealed concrete slab because drainage and humidity control are easier. Watering, condensation, spilled potting mix, and washing benches are normal greenhouse conditions. A floor that drains reduces algae, puddles, and rot risk.
Concrete makes sense when code requires it, when you need frost protection, when you are attaching a greenhouse to a building, when accessibility requires a hard smooth surface, or when the greenhouse manufacturer specifies concrete anchors. If frost depth is an issue in your area, shallow concrete can move seasonally and rack the frame unless footings are designed correctly.
Square the Base Before Anything Else
Measure diagonally from corner to corner both ways. If the two diagonal measurements match, the rectangle is square. If they do not, shift the frame until they do. On an 8-by-10-foot base, even a half-inch error can show up later as a sticky door or panel gap. Fasten the frame only after the base is level, square, and anchored.
Frame It Plumb, Straight, and Tied Down
Whether you build from lumber or assemble a kit, treat the greenhouse like a small structure. Lay out parts, check fasteners, and read the manufacturer’s sequence before starting. Many kits depend on parts being installed in the right order because panels slide into channels that may be blocked later.
For a wood-framed greenhouse, use exterior-rated fasteners and lumber protected for the conditions. Ground-contact pressure-treated lumber belongs at the base. Above the base, cedar, redwood, treated lumber, or properly primed and painted framing can work depending on budget and design. Use corrosion-resistant screws, structural connectors where needed, and avoid interior drywall screws. They are not made for exterior structural use.
For aluminum kits, do not assume lightweight means simple. Thin aluminum members can twist if forced. Keep bolts loose until sections are aligned, then tighten gradually. Check plumb at the walls and square at the door opening before installing glazing panels.
Anchoring is not optional. A greenhouse is light for its surface area, which means wind uplift is a real concern. Use the manufacturer’s anchor kit, ground screws, earth anchors, concrete anchors, or a treated wood base tied into the ground. In high-wind areas, exposed lots, open fields, ridge sites, coastal areas, or storm-prone regions, get local guidance before trusting a basic kit anchor package.
Install Glazing the Right Way
Greenhouse panels do more than keep rain out. They manage light, heat, condensation, and wind pressure. Rushed panel installation is one of the most common sources of leaks, rattling, overheating, and early failure.
Recommended Free Tools
If you use twin-wall polycarbonate, install the UV-protected side facing out. Most panels are marked by film or label. Do not remove every label before confirming orientation. The internal channels should run so condensation can drain, usually vertically on walls and down-slope on roofs. Follow the manufacturer’s instructions for vent tape, closure strips, U-profiles, and edge sealing. Sealing the wrong edge can trap water and algae inside the channels.
Leave the expansion space required by the panel manufacturer. Polycarbonate expands and contracts with temperature changes. If panels are cut too tight or fastened too rigidly, they can bow, pop, or crack around fasteners. Use the specified washers or cap systems, and do not overdrive screws.
Glass requires a more rigid frame and safer handling. Use proper glazing stops, setting blocks, and exterior-rated sealants. Tempered safety glass is preferred where breakage risk is higher, especially near doors, paths, and active family areas.
Rank #3

- 【Automatic Temperature Control】 Never worry about forgetting to vent your hothouse. This heat sensitive automatic greenhouse window opener responds to temperature changes, efficiently regulating your greenhouse’s internal climate. It automatically opens and shuts your greenhouse window to maintain an optimal growing environment and prevent greenhouse from overheating, keeping your sensitive plants, flowers, and vegetables safe from scorching heat even when you are away.
- 【Heavy Duty Dual Spring Design】 Compared with the single spring vent, our dual spring auto vent opener adopts a premium double spring design that delivers stronger thrust force and more solid stability. It is capable of lifting roof vents weighing up to 15lbs (7kg) smoothly. Not only perfect for ordinary areas, but this heavy-duty mechanism is also engineered to withstand sudden wind gusts and resist wind twist in windy mountain areas, ensuring your vents stay securely in place without slamming.
- 【Solar Powered & Wide Temp Range】 This eco-friendly solar window opener requires zero electricity, batteries, or wiring. Operating as a self-regulating autovent window opener, its gas-filled cylinder expands to push the window open when temperatures rise, and closes smoothly when it cools down. Opening between 60°F - 77°F (15°C to 25°C) with a full open above 86°F (30°C).
- 【Rust-Proof Aluminum Construction】 Made of high-quality rust-proof aluminum alloy with stainless steel accessories, these greenhouse supplies provide stable and long-lasting performance season after season. The corrosion resistant frame is built to handle the high humidity inside greenhouses and withstand daily outdoor weather conditions, making it a reliable choice for your gardening tools.
- 【1PCS Easy Installation】 This 1pcs automatic greenhouse vent opener comes as a complete kit for your greenhouse window. Installing the greenhouse vent opener is quick and straightforward with the provided screws and detailed manual, making it a reliable and hassle-free choice for your garden setup.
Ventilation Is a Core System, Not an Upgrade
A greenhouse can overheat faster than many homeowners expect. On a sunny day, plants can be damaged by heat even when the outdoor temperature feels mild. Ventilation should be planned before the structure is finished.
What’s actually slowing this PC down?
Pick the symptom - the matching free tool is one click away.
At minimum, plan for roof vents plus low side intake. Hot air rises, so a good setup brings cooler air in low and exhausts hot air high. automatic vent openers are useful because they work without electricity and respond to heat while you are away. In 2026, many automatic vent openers cost about $30 to $80 each.
For more control, add an exhaust fan with a thermostat. A basic fan and thermostat setup can add roughly $150 to $600, depending on size and quality. In hot regions, also plan for shade cloth, side vents or louvers, and light-colored paving or gravel around the greenhouse. Dark pavers and walls can radiate heat back into the space.
For an 8-by-10-foot hobby greenhouse, many homeowners use a combination of one or two roof vents, a louvered intake, a small exhaust fan, and seasonal shade cloth. In colder regions, ventilation still matters in winter because condensation encourages disease, mold, and rot.
Plan Heat, Water, Power, and Interior Layout
A greenhouse does not need full utilities to be useful, but you should plan for them honestly. Extension cords and hoses across paths are temporary solutions, not a finished design.
Free tools Windows power users keep installed
One-click scans. No signup required.
Water access can be as simple as a nearby hose bib, but irrigation lines, frost-free hydrants, or buried supply lines may require plumbing permits depending on location. For electricity, use proper exterior-rated circuits, GFCI protection, weatherproof boxes, and code-compliant installation. Hire a licensed electrician for new circuits, heaters, exhaust fans, lighting, or controls.
Heating is where budgets can shift quickly. A small electric heater may cost $100 to $300, while better thermostatic heaters, gas units, or more serious setups can run $500 to $1,000 or more before electrical or gas work. Heating a leaky greenhouse through winter is expensive. Before buying a heater, improve air sealing, choose better glazing, use thermal mass where appropriate, and decide whether you truly need winter production or just frost protection.
Inside the greenhouse, keep the layout simple:
- 24 to 30 inches minimum for a center aisle
- 18 to 30 inches deep for side benches, depending on reach
- 36 inches or wider if rolling carts or accessibility matter
- One clear work surface near the door for potting and tools
- Hooks or shelves high enough to stay clear of walking space
Benches and shelving commonly add $100 to $1,000 depending on material and size. Galvanized, cedar, composite, or plastic benches handle humidity better than unfinished indoor furniture.
Realistic 2026 DIY Greenhouse Budget
Kit price is not project price. The number on the box usually excludes site prep, gravel, anchors, delivery, shelving, fans, shade cloth, irrigation, heaters, permit fees, and the tools or fasteners needed to install everything correctly.
The Tool Desk
Outbyte PC Repair FREEClear out junk files and repair common Windows errorsFree Scan →Outbyte Driver Updater FREEFix the driver behind crashes, sound loss and screen glitchesFind Drivers →| Budget item | Typical 2026 range | Notes |
|---|---|---|
| Small seasonal plastic/PVC greenhouse | $300-$700 | Usually excludes robust anchoring, benches, heat, automation, and replacement film. |
| Budget 8-by-10 polycarbonate/aluminum kit | $365-$1,170 | Common retail range for basic kits; check wind and snow ratings closely. |
| Small simple greenhouse or hoop house | $1,000-$2,000 minimum | More realistic for a complete small structure with better parts. |
| Gravel base | $100-$500+ | Depends on excavation, stone depth, delivery, and compaction. |
| Ground anchors or concrete piers | $50-$600+ | Wind exposure and soil conditions drive cost. |
| Benches and shelving | $100-$1,000+ | Durable greenhouse-ready materials cost more than basic shelving. |
| Automatic vent openers | $30-$80 each | Useful backup ventilation when you are away. |
| Fan and thermostat | $150-$600+ | More important in hot climates and larger greenhouses. |
| Heater | $100-$1,000+ | Operating cost can exceed equipment cost in cold climates. |
| Irrigation | $50-$500+ | Ranges from drip kits to more permanent water service. |
A professionally built greenhouse often averages around $11,000, with many projects falling from about $2,000 to $25,000 depending on size, foundation, glazing, utilities, and complexity. Broad greenhouse build ranges can stretch from about $500 for a very basic structure to $35,000 or more for custom work. Premium backyard greenhouse packages commonly start around $11,000, while specialty models can start around $25,000.
The practical takeaway: if a kit is listed at $899, a realistic finished backyard project may still land at $1,800 to $4,000 once the base, anchors, ventilation, benches, delivery, and small hardware are counted.
Independent reader supportYour contribution helps us test, update, and keep practical guides available for everyone.Step-by-Step DIY Build Sequence
1. Mark the Footprint
Stake the greenhouse corners and mark the door location. Confirm the door opens comfortably and that you have at least 2 to 3 feet around the sides for maintenance where possible. Check setbacks before digging.
2. Prepare the Site
Remove sod, roots, soft soil, and organic material. Level the area. If drainage is questionable, fix it now with grading, gravel, or a better location. Do not build in a puddle and hope the greenhouse will solve it.
3. Install the Base
Add weed barrier and compacted gravel or set the specified foundation. Use a level and string lines. Square the base with diagonal measurements before fastening corners. Anchor the base before or during frame assembly according to the system you chose.
4. Assemble the Frame
Build walls or assemble kit sections on a flat surface when possible. Stand them carefully, brace temporarily, and check plumb. Keep the door opening square. Tighten hardware gradually after alignment is confirmed.
Rank #4
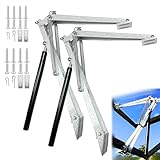
- Galvanized Steel Sheet Construction: Greenhouse window opener features galvanized steel sheets that offer excellent corrosion resistance. The vent opener's strength and toughness are well-balanced, allowing them to withstand large external forces without deformation or fracture, while the galvanized layer is uniform and smooth with a beautiful appearance
- Dual Spring Design: The double spring greenhouse vent opener can bear 30lbs (15kg), and the thrust is stronger than the single spring, allowing the automatic greenhouse vent opener to be used in different weather conditions
- Solar Heat Sensitive Operation: The greenhouse window opener operates between 15 to 25 (60 - 77) and cannot be used at temperatures above 60(140). The window opener adapts to various weather conditions and helps maintain an optimal growing environment inside the greenhouse with temperature control
- Adjustable Indoor Ventilation Control: Greenhouse window opener kit features a maximum window opening of about 45cm (17.72 inches). The window opening time can be manually adjusted to control the temperature, and the solar automatic window opener optimizes plant health through temperature management
- Easy Installation Process: Installing the greenhouse vent opener is quick and straightforward with the provided clamps and screws. Place the black bar into the refrigerator for at least 5 minutes to make the automatic window opener cylinder rod fully retracted before assembling the roof vent opener
5. Add Roof Framing and Bracing
Install rafters, ridge pieces, purlins, cross ties, or kit roof members in the required order. In snow regions, use a greenhouse with a rated roof, steeper pitch, and a snow removal plan. Do not place the greenhouse where a house roof or fence drift dumps snow onto it.
6. Install Panels or Covering
Confirm UV side, panel orientation, expansion gaps, and closure details before fastening. Work from one side consistently. Use correct washers, caps, clips, or glazing stops. Do not over-tighten fasteners.
Quick wins for a faster PC:
Repair Windows errors before they cause bigger problemsFix Now →Scan for outdated or missing drivers - takes under a minuteDriver Scan →7. Install Doors, Vents, and Fans
Hang the door after the frame is square. Install roof vents, side vents, louvers, automatic openers, and fans. Test operation before filling the greenhouse with benches and plants.
8. Seal Selectively
Seal gaps that leak wind and rain, but do not block designed drainage paths or polycarbonate weep paths. Greenhouses need controlled airflow and drainage. More caulk is not always better.
9. Build the Interior
Add benches, shelves, potting space, hose storage, and paths. Keep heavy storage low. Leave enough aisle width to work without twisting between plants.
10. Test Before Planting Heavily
Run the greenhouse empty for a few sunny days. Track temperatures morning, afternoon, and evening. Watch where condensation forms. Check for leaks after rain. It is much easier to add shade cloth, adjust vents, or fix panel gaps before the greenhouse is full.
Common Mistakes That Make DIY Greenhouses Fail
The biggest mistake is buying based only on footprint. An 8-by-10 greenhouse can be a good size, but not if the frame is flimsy, the door hardware is weak, the panels are too thin, or the kit has no meaningful anchoring system.
Other common problems include skipping setbacks because the structure is “just for gardening,” building on unlevel soil, ignoring wind uplift, failing to plan ventilation, using a sealed slab without drainage thinking, and underestimating the cost of benches, fans, heaters, shade cloth, irrigation, and replacement parts.
Another frequent issue is treating the greenhouse like a shed. A shed wants to stay dry and closed. A greenhouse must manage heat, moisture, airflow, and condensation every day. The materials, fasteners, sealants, and layout need to tolerate humidity.
When to DIY and When to Hire a Pro
A homeowner with solid carpentry skills can often build a small freestanding greenhouse, especially a 6-by-8, 8-by-10, or 10-by-12 kit on a gravel and timber base. DIY makes sense when the site is level, utilities are not required, the greenhouse is freestanding, exposure is moderate, and local rules are simple.
Do these 3 things before closing this tab:
1Clear out junk files and repair common Windows errors2Scan for outdated or missing drivers - takes under a minute3Repair Windows errors before they cause bigger problemsBest Value
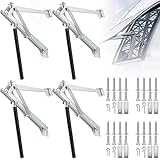
- Package Includes: you will receive 2 pieces of greenhouse automatic vent opener, enough quantity to meet your needs and replacements, and each opener comes with accessories for easy installation
- Reliable Material: these automatic greenhouse window openers are mainly made of aluminium alloy material, reliable and reusable, sturdy and strong, not easy to break or rust, which can serve you for a long time and you can also use them with confidence
- Double Spring Design: our solar heat sensitive roof vent opener adopts double spring design, which has stronger thrust force and more solid; In addition to ordinary areas, it can also be applied in windy mountainous areas, bringing much convenience to you
- Solar Heat Sensitive: the auto greenhouse vent opener will remain open, when the temperature exceeds 25 degrees Celsius, and the opener will close completely, when temperature drops to 15 to 18 degrees Celsius, using solar energy, no batteries or electrical power needed
- Widely Applicable: these greenhouse accessories are practical and useful tools, which can be widely applied for greenhouse windows and greenhouse vents in higher wind situations, maintaining the nice growing temperature and preventing your greenhouse from overheating
Hire a professional, or at least bring one in for part of the work, when the project involves:
- An attached greenhouse
- Concrete slabs, stem walls, frost footings, or structural piers
- Electrical circuits, gas heat, permanent heaters, or new water lines
- Major grading, retaining walls, drainage corrections, or poor soil
- High wind, heavy snow, coastal exposure, or open rural sites
- Large custom glass structures
- Any structure close to setbacks, easements, septic systems, or property lines
There is also a middle-ground approach: DIY the kit assembly and interior layout, but hire out the foundation, electrical, or grading. That often gives homeowners the satisfaction of building while keeping the riskier pieces in professional hands.
Maintenance After the Build
A greenhouse is a small building with a demanding indoor climate. Plan on seasonal maintenance.
- Wash panels at least once or twice a year to maintain light transmission
- Check anchors, bolts, clips, and door hardware after major storms
- Clear snow before it overloads the roof
- Clean vents, louvers, and fan screens
- Inspect sealants, tapes, and polycarbonate edges
- Control algae on floors and benches
- Remove plant debris that can harbor pests or disease
If your greenhouse uses polyethylene film, plan for replacement. If it uses polycarbonate, watch for damaged edges, failed tape, or channels collecting algae. If it uses glass, inspect glazing stops and sealants regularly.
What’s actually slowing this PC down?
Pick the symptom - the matching free tool is one click away.
The Bottom Line
A DIY greenhouse can absolutely transform a backyard, but the best ones are designed like small buildings, not assembled like temporary garden accessories. Start with the site and code check. Choose a realistic size. Build a square, dry, anchored base. Use the right glazing. Vent it properly. Budget for the pieces the kit does not include.
For many homeowners, an 8-by-10-foot polycarbonate greenhouse on a compacted gravel and timber base is the best balance of cost, function, and appearance. Done carefully, it gives you a productive growing space and a backyard feature that looks intentional for years instead of one season.
Frequently Asked Questions
Do I need a permit to build a backyard greenhouse?
Possibly. Many areas regulate greenhouses as accessory structures, especially if they exceed local square-footage thresholds, are attached to the house, include utilities, or sit near setbacks and easements. Always check local building, zoning, utility, and HOA rules before ordering materials.
How much does a DIY greenhouse cost in 2026?
A very small seasonal plastic or PVC greenhouse may cost about $300-$700. A budget 8-by-10 polycarbonate kit commonly runs about $365-$1,170 before upgrades. A more complete backyard greenhouse often lands in the $1,800-$4,000 range once base, anchors, vents, benches, delivery, and accessories are included.
Free tools Windows power users keep installed
One-click scans. No signup required.
What is the best size greenhouse for a backyard?
For many homeowners, 6-by-8, 8-by-10, and 10-by-12 feet are the most practical sizes. An 8-by-10 greenhouse is a strong middle ground because it allows benches and a 24- to 30-inch center aisle without dominating the yard.
What is the best foundation for a DIY greenhouse?
For many small freestanding greenhouses, compacted gravel with a ground-contact treated timber base works well because it drains and is relatively affordable. Concrete slabs, stem walls, piers, or frost footings make sense for larger, attached, heavy, glass, or code-triggered greenhouses.
Is polycarbonate or glass better for a greenhouse?
Polycarbonate is usually better for DIY backyard greenhouses because it is lighter, more impact-resistant, and easier to install than glass. Glass is attractive and long-lasting, but it is heavier, breakable, and requires a stronger, more precise frame.
How do I keep a backyard greenhouse from overheating?
Use roof vents, low side intake vents or louvers, automatic vent openers, shade cloth, and an exhaust fan with a thermostat where needed. In hot climates, prioritize high-low airflow and avoid dark paving that radiates heat around the greenhouse.
Quick Recap
Product prices and availability are accurate as of the date/time indicated and are subject to change. Any price and availability information displayed on Amazon at the time of purchase will apply.

