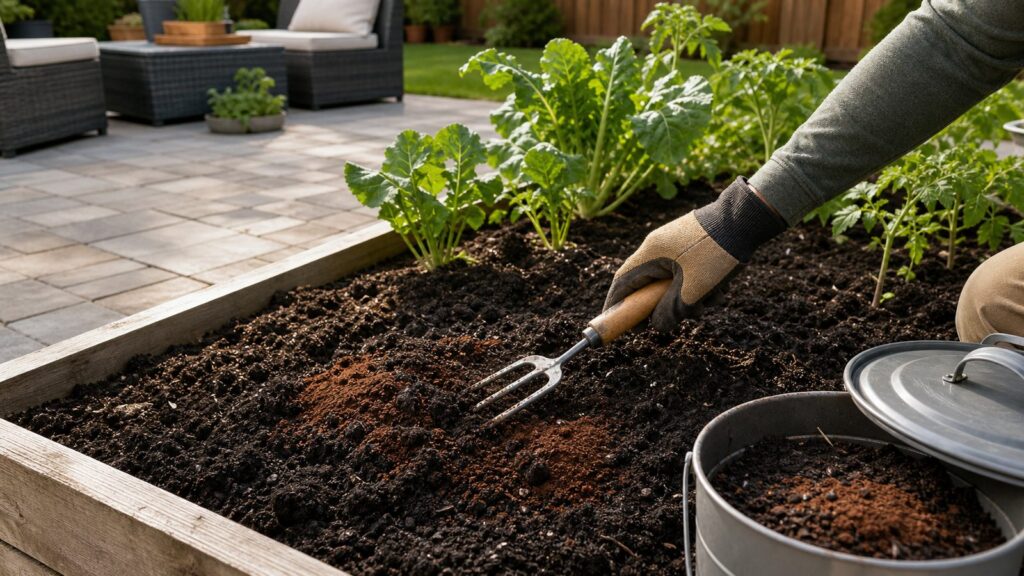
Used coffee grounds can help a garden, but only when you treat them like a measured soil amendment, not a miracle fertilizer. The best use is simple: add spent coffee grounds to compost, balance them with dry brown material, let the pile finish, and use the finished compost to improve soil structure around established plants.
For direct garden use, keep the rate light. A conservative working rate is about 1/2 inch of used coffee grounds mixed into the top 4 inches of established garden soil. Do not pile grounds around stems, do not use them in seed-starting mix, and do not assume they will make soil acidic for blueberries, azaleas, rhododendrons, or hydrangeas. Test the soil first.
On our job sites, we think about soil the same way we think about a building pad: drainage, oxygen, grade, compaction, and the right material in the right layer matter more than a trendy ingredient. Coffee grounds can be useful organic matter. Used wrong, they can crust over, hold water where you do not want it, tie up nitrogen temporarily, and slow young plants down.
As an Amazon Associate I earn from qualifying purchases.
What Coffee Grounds Actually Do for Soil
Spent coffee grounds are mostly an organic-matter input. They can feed soil microbes, contribute to better soil aggregation over time, and help improve the way soil handles air and water. That is useful in garden beds, especially where native soil is heavy, compacted, or low in organic matter.
What they are not is a complete fertilizer. Used coffee grounds typically contain only about 1% to 2% nitrogen, plus small amounts of potassium, phosphorus, calcium, magnesium, and trace micronutrients. That is enough to matter in a compost pile, but it is not enough to replace a balanced fertilizer program for vegetables, turf, ornamentals, or fruiting plants.
#1 Best Overall

- Twin chambers: Two separate chambers allow one side to finish composting while leaving the other side available to add fresh wastes; Constant alternation of the two sides will create an uninterrupted stream of nutritious compost
- 360⁰ Tumbling Design: The rotating design prevents you from digging or mixing the pile by hand; And the deep fins on eight panels make it easier to turn the compost bin
- Excellent Aeration: Air vents can make the air fully circulate and will not cause an explosion due to excessive internal pressure; Deep fins can better break the clumps, which is conducive to the full fermentation of oxygen
- Sturdy & Durable Construction: Constructed of premium metal frame and high-quality pp plastic body, this tumbling composter is corrosion-resistant, weathering-resistant, sturdy, and durable for long-lasting service life
- Garden Gloves Included: The gloves that not only protect your hands from injury, but are also waterproof, making them easy to clean; With 4 durable ABS plastic claws for easy digging, planting and other gardening work
There is also a difference between brewed coffee, fresh unused coffee grounds, and spent coffee grounds. Fresh grounds and brewed coffee are not the same as the used grounds left after brewing. Fresh grounds contain more soluble compounds and can be harsher around plants. Spent grounds have already had much of the soluble material extracted, but they can still contain caffeine and other compounds that may suppress germination or slow tender growth when overused.
The Best Method: Compost Coffee Grounds First
If you want the safest, most predictable result, compost the grounds before they ever touch your planting beds. Finished compost is more stable than raw grounds, easier to spread evenly, and less likely to cause problems with crusting, odor, pests, or seedling damage.
Treat coffee grounds as a green compost ingredient. That means they should be balanced with carbon-rich brown materials such as dry leaves, shredded paper, straw, or small wood chips. A dependable homeowner mix is:
- 3 parts dry leaves
- 1 part fresh grass clippings
- 1 part used coffee grounds
Measure by volume, not weight. A 5-gallon bucket makes this easy: 15 gallons of leaves, 5 gallons of fresh grass clippings, and 5 gallons of coffee grounds. Turn the pile about once a week and keep it damp like a wrung-out sponge. If it smells sour or rotten, it is too wet or too dense. Add dry leaves and turn it. If it is dusty and inactive, add water and mix it again.
Keep coffee grounds at or below about 20% of the total compost pile volume. Higher rates can suppress plant growth, even after composting, because of the concentration of compounds in the grounds. A little helps the biology. Too much turns the pile into a specialty waste stream instead of balanced compost.
How to Apply Coffee Grounds Directly to Garden Soil
Direct application can work around established garden plants, but the rate matters. Spread a thin layer, about 1/2 inch deep, and work it into the top 4 inches of soil. Water the bed afterward so the amended layer settles and microbial activity starts.
Do not leave a thick blanket of coffee grounds on the surface. Grounds are fine-textured. When applied too heavily, they can dry into a dense crust that sheds water instead of absorbing it. That crust also limits oxygen movement into the root zone. For a plant, that is the same kind of problem we avoid around a foundation: water and air moving through the wrong layer at the wrong rate.
Direct Application Rate
For a 4-foot by 8-foot raised bed, the bed area is 32 square feet. A 1/2-inch layer across that whole surface equals about 1.33 cubic feet of coffee grounds. That is a lot of grounds for one small bed, so most homeowners are better off applying less at one time or composting first.
A practical approach is to use a few quarts at a time, spread thinly over several square feet, and mix it into the soil with a hand cultivator or garden fork. Then watch plant response for two to four weeks before repeating.
Where to Keep Grounds Away
Keep raw spent grounds away from seeds, seedlings, and plant crowns. Leave at least 2 to 3 inches of clear space around stems when applying any organic amendment. For seed-starting trays, skip coffee grounds altogether. Seed-starting mix should be light, sterile or clean, fine-textured, and consistent. Coffee grounds can interfere with germination and hold moisture unevenly in small cells.
Rank #2

- ✅Speed Up Composing Process: More advanced models use rotating to bring oxygen to the center of the bin and paddles inside the chamber to help mix and aerate the composting materials when turned. These improvements or modifications are designed for one reason: to speed the composting process.
- ✅How do Compost Tumblers work? Simple. You load them with green and brown waste from your yard and kitchen. When full, you give them time to work, in other words, heat up. Turning a compost pile mixing the organic materials and the organisms it contains with heat-producing oxygen is the traditional method of keeping the process going full steam. By turning the tumbler, the organic materials are mixed and infused with fresh oxygen.
- ✅Easy to Access Finished Compost: Just Slide the door open and take the organic fertilizer out when the compost is ready. When a check reveals the compost is complete —and this can happen in a matter of weeks —the same access that allowed you to fill the tumbler lets you empty it. Now is the time to spread the results.
- ✅Dual-Bin Design: The dual bin design takes a different approach to the continuous-use composted concept, Two bins are set side-by-side into a single rotating chamber. Thickly insulated compartments conserve the heat generating by the decaying matter, and this greatly speeds the process. This design also allows you to add food waste to one chamber while the other is composting.
- ✅Totally Organic and Money-Saving: If you're looking for a fast, convenient way to compost your kitchen throw-outs, grass clippings, and organic yard waste, our outdoor kitchen compost bin is just right for you! The Compact Compost Tumbler quickly recycles it into nutrient-rich compost.
Coffee Grounds, Soil pH, and the Acid-Loving Plant Myth
One of the most common mistakes is using spent coffee grounds to acidify soil. That advice sounds reasonable because coffee tastes acidic, but spent grounds are not a reliable soil-acidifying amendment. Used coffee grounds may be close to neutral or even slightly basic, often around pH 7 to 8. They have not been shown to consistently lower soil pH in a dependable way.
Most garden plants prefer slightly acidic to neutral soil, roughly pH 6.0 to 7.0, but plant needs vary. Blueberries, azaleas, and rhododendrons need more deliberate pH management than coffee grounds can provide. If the real goal is lowering pH, get a soil test and use the recommended amendment, commonly elemental sulfur or another extension-recommended product based on the crop and soil type.
A basic lawn or garden soil test commonly costs about $11 to $30 plus mailing in 2026. Advanced tests for lead, salts, organic matter, or micronutrients cost more. That small upfront cost is usually cheaper than guessing wrong, especially if you are amending multiple beds, planting a new landscape, or trying to correct a struggling lawn.
Best Uses for Coffee Grounds in the Yard
Coffee grounds work best as one ingredient in a broader soil-care plan. Use them where organic matter is helpful, drainage is already acceptable, and plants are established enough to handle normal microbial activity in the soil.
The Tool Desk
Outbyte Driver Updater FREEScan for outdated or missing drivers - takes under a minuteDriver Scan →Outbyte PC Repair FREEClear out junk files and repair common Windows errorsFree Scan →Compost Piles
This is the strongest use. Add grounds with leaves, straw, shredded paper, or other browns. Paper coffee filters can usually go in too, as long as they are plain paper and free of staples, plastic coatings, or synthetic mesh. Keep the pile covered or contained so it does not become a neighborhood nuisance.
Established Vegetable Beds
Use small amounts worked into the soil between crop cycles or around established plants. Do not band thick rows of grounds beside seeds. If you are growing heavy feeders such as tomatoes, peppers, corn, or squash, coffee grounds should be treated as a minor organic input, not the main nutrient source.
Landscape Beds
In shrub and perennial beds, grounds can be mixed into compost or used very lightly under mulch. If applying them near a house, preserve the drainage grade. Soil and mulch should slope away from the foundation, and organic amendments should not create a soggy perched layer against siding, brick ledges, basement walls, or crawl space vents.
Mulch Additive
Coffee grounds alone are poor mulch because they can mat and crust. If you use them on the surface, apply a very thin scattering and cover it with leaves, bark, pine straw, or finished compost. A better surface mulch is still bark, wood chips, leaf mold, straw, or another material with enough structure to allow water and air movement.
Free tools Windows power users keep installed
One-click scans. No signup required.
worm bins
Spent grounds can go into worm bins, but add them gradually with bedding. Worms process food slowly; a useful planning number is that worms eat about 25% of their body weight per day. If you have 1 pound of worms, do not expect them to handle 5 pounds of coffee grounds in a weekend. Add a small amount, wait until the prior food is mostly consumed, and keep the bin from getting wet, sour, or compacted.
How Much Coffee Grounds to Use by Situation
| Use Case | Recommended Amount | Best Practice | What to Avoid |
|---|---|---|---|
| Compost pile | Up to 20% of total pile volume | Balance with dry leaves, straw, shredded paper, or other browns | Making grounds the dominant ingredient |
| Established garden soil | About 1/2 inch worked into top 4 inches | Apply lightly, mix well, water afterward, and observe plant response | Thick surface layers or repeated heavy applications |
| Mulch layer | Thin scattering only | Cover with bark, leaves, pine straw, or finished compost | Using grounds alone as a 1-inch-plus mulch blanket |
| Seed starting | None | Use a clean seed-starting mix instead | Mixing grounds into trays or around new seedlings |
| Worm bin | Small gradual feedings | Add with bedding and wait until food is mostly consumed | Dumping in large wet batches |
Costs: Coffee Grounds vs Compost, Mulch, Soil, and Pro Help
Used coffee grounds are often free from home brewing or a local coffee shop, but free material still has handling costs. You need clean containers, lids, storage space, and a plan to compost or apply the grounds before they smell or attract pests.
For small beds, a lidded 5-gallon bucket is usually enough. Expect to spend about $5 to $15 for a bucket with a lid. Gloves run about $5 to $20, a hand trowel about $5 to $20, a garden fork or shovel about $20 to $60, and a compost thermometer about $15 to $40. A basic pH meter or test kit may cost $10 to $30, but a lab soil test is more reliable for amendment decisions.
| Item | Typical 2026 Cost | When It Makes Sense |
|---|---|---|
| Used coffee grounds | Often free | Compost ingredient or light amendment for established beds |
| Basic soil test | $11 to $30 plus mailing | Before pH correction, fertilizer changes, or new landscape planting |
| compost bin or tumbler | $40 to $250 | Regular household composting with better containment |
| bagged compost | $5 to $12 per 1- to 2-cu.-ft. bag | Small beds, containers, and spot amendments |
| Bulk compost | Roughly $35 to $80 per cu. yd. before delivery | Larger beds or lawn topdressing projects |
| Topsoil | About $10 to $55 per cu. yd. | Grade correction, bed building, and filling low areas |
| Installed mulch | About $77 to $94 per cu. yd. nationally | Finished landscape beds where weed control and moisture management matter |
| Gardener or landscaper | Commonly $33 to $47 per hour | Soil correction, drainage concerns, large beds, or heavy hauling |
For a homeowner with a few raised beds, coffee grounds and a basic compost bin may be enough. For a full-yard soil correction, grounds are a side ingredient. Bulk compost, screened topsoil, drainage work, grading, and a real soil test drive the result.
PC Slower Than It Used to Be?
A free scan shows the junk files, broken settings and background clutter dragging Windows down - then fixes them in one click.Free scan · Windows 10 & 11Outdated Drivers Are Slowing You Down
One free scan finds every outdated or missing driver and matches the right update for your exact hardware.Free scan · exact hardware matchRank #3
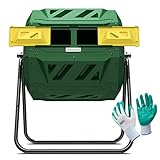
- ✅Speed Up Composing Process: More advanced models use rotating to bring oxygen to the center of the bin and paddles inside the chamber to help mix and aerate the composting materials when turned. These improvements or modifications are designed for one reason: to speed the composting process.
- ✅How do Compost Tumblers work? Simple. You load them with green and brown waste from your yard and kitchen. When full, you give them time to work, in other words, heat up. Turning a compost pile mixing the organic materials and the organisms it contains with heat-producing oxygen is the traditional method of keeping the process going full steam. By turning the tumbler, the organic materials are mixed and infused with fresh oxygen.
- ✅Easy to Access Finished Compost: Just Slide the door open and take the organic fertilizer out when the compost is ready. When a check reveals the compost is complete —and this can happen in a matter of weeks —the same access that allowed you to fill the tumbler lets you empty it. Now is the time to spread the results.
- ✅Dual-Bin Design: The dual bin design takes a different approach to the continuous-use composted concept, Two bins are set side-by-side into a single rotating chamber. Thickly insulated compartments conserve the heat generating by the decaying matter, and this greatly speeds the process. This design also allows you to add food waste to one chamber while the other is composting.
- ✅Totally Organic and Money-Saving: If you're looking for a fast, convenient way to compost your kitchen throw-outs, grass clippings, and organic yard waste, our outdoor kitchen compost bin is just right for you! The Compact Compost Tumbler quickly recycles it into nutrient-rich compost.
Common Mistakes That Damage Plants
Using Grounds as Complete Fertilizer
Coffee grounds do not provide a complete nutrient profile. If leaves are yellowing, fruit production is weak, or turf is thinning, do not assume coffee grounds will solve it. Those symptoms can come from nitrogen deficiency, pH problems, poor drainage, compaction, disease, drought stress, or root damage.
Trying to Acidify Soil Without Testing
Do not use coffee grounds as a shortcut for acid-loving plants. If soil pH is too high for blueberries or azaleas, use a soil test and amend based on the recommendation. Guessing can waste a season and make the correction harder.
Applying Thick Layers
A 1-inch surface layer may already be too much in many beds, especially if it dries and mats. The more conservative direct approach is 1/2 inch mixed into the top 4 inches of soil. When in doubt, compost first.
Putting Grounds Around Seedlings
Young roots are less forgiving. Caffeine and other compounds in grounds can interfere with germination and early growth. Keep grounds out of seed-starting trays and away from newly emerged plants.
Recommended Free Tools
Ignoring Drainage Near New Construction
New homes and recent additions often have disturbed, compacted soil near the foundation. Adding organic matter can help, but only if the grade and drainage are right. Do not build up soil, compost, mulch, or coffee grounds against siding, stucco, weep holes, basement windows, or crawl space vents. Keep exterior drainage moving away from the structure.
Independent reader supportYour contribution helps us test, update, and keep practical guides available for everyone.Safety, Storage, and Local Rules
Used grounds are food waste. Store them like food waste. Use a covered bucket, keep batches small, and add them to compost promptly. A wet bucket of grounds left in the sun can smell, grow mold, and attract pests.
Home compost rules vary by city, county, and homeowners association. Some local codes regulate nuisance odors, rodents, open piles, container placement, and composting near property lines. In dense neighborhoods, a closed bin or tumbler is usually a better choice than an open heap. Avoid meat, dairy, greasy foods, bones, and pet waste in home compost systems.
If you collect grounds from a coffee shop, ask for plain spent grounds only. Avoid trash-contaminated bags with plastic lids, stir sticks, dairy residue, or coated cups. Paper filters are usually fine if they are clean paper without staples or plastic lining.
Do these 3 things before closing this tab:
1Fix the driver behind crashes, sound loss and screen glitches2Repair Windows errors before they cause bigger problems3Scan for outdated or missing drivers - takes under a minuteWhen to DIY and When to Hire a Pro
DIY is a good fit when you are working with a small vegetable bed, flower border, compost bin, or worm bin. If the job is measured in buckets, you can manage it with gloves, a trowel, a fork, and patience. Start with composting, use small amounts, and watch plant response over several weeks.
Rank #4

- Dual Chamber, High Capacity: Our compost bin features a dual chamber with a generous capacity of 43 gallons. Perfect for large families and avid gardeners, you can simultaneously compost in one chamber while adding new organic material to the other, reducing overall composting time.
- Convenient Access: The dual-chamber composter tumbler features a detachable sliding door with a large opening, making it effortless to add waste or remove compost. The compost bin features a secure seal that effectively keeps out mice, insects, and other pests, ensuring a safe and efficient composting process.
- Built to Last: Crafted from high-quality PP materials and supported by sturdy metal components, our compost bin outdoor boasts a robust load-bearing capacity of 110 lbs. They are BPA-free, UV-resistant, and weatherproof, enduring direct sunlight, typhoons, rain, snow, and more.
- Effortless Tumbling: Say goodbye to the hassle of manual stirring. Our tumbling composter's innovative 360° tumble design ensures thorough mixing, faster decomposition, and higher-quality compost output. Simply roll it every few days, and you'll have compost ready in just 4-6 weeks.
- Optimized Airflow: The garden compost tumbler features strategically placed vents that promote proper air circulation and prevent potential issues. Internal grooves effectively break up clumps, ensuring uniform mixing of materials and accelerating the decomposition of organic matter.
Hire a pro when the work is really about soil correction, drainage, grading, or a large landscape installation. If a bed stays soggy after rain, water runs toward the foundation, turf fails across a large area, or you need several cubic yards of compost or topsoil moved, a gardener or landscaper is usually worth the cost. Common 2026 gardener rates run about $33 to $47 per hour, with more specialized planning or soil work reaching about $60 to $88 per hour.
For new construction landscapes, we prefer a soil test before broad amendments. Construction activity often leaves compacted subsoil, buried debris, thin topsoil, and drainage patterns that need correction before organic amendments can do much good. Coffee grounds will not fix poor grade, hardpan compaction, or a downspout dumping water into a bed.
A Practical Coffee Grounds Plan for Homeowners
If you want a simple, low-risk routine, use this sequence:
What’s actually slowing this PC down?
Pick the symptom - the matching free tool is one click away.
- Collect spent coffee grounds in a covered 1- to 5-gallon container.
- Add them to compost within a few days, along with dry leaves or other browns.
- Keep grounds below 20% of the compost pile volume.
- Turn the pile weekly and keep it damp, not soaked.
- Use finished compost around established plants or mix it into beds before planting.
- If applying grounds directly, use no more than about 1/2 inch mixed into the top 4 inches of established soil.
- Keep grounds away from seeds, seedlings, and plant stems.
- Test soil before making pH or fertilizer decisions.
That approach gives you the upside of coffee grounds without asking them to do work they cannot do. They are a useful input, especially when they stay in proportion. Compost them, measure them, and match the amendment to the soil you actually have.
Frequently Asked Questions
Are used coffee grounds actually good for plants?
Yes, in measured amounts. Used coffee grounds can add organic matter and support soil microbial activity, especially when composted first. They should not be used as a stand-alone fertilizer or applied in thick layers.
Can coffee grounds replace fertilizer?
No. Spent coffee grounds usually contain only about 1% to 2% nitrogen plus small amounts of other nutrients. They are a minor amendment, not a complete fertilizer program.
Do coffee grounds make soil more acidic?
Not reliably. Spent coffee grounds are often near neutral and may be slightly basic, around pH 7 to 8. If you need to lower soil pH for blueberries, azaleas, or rhododendrons, get a soil test and use the recommended amendment.
Quick wins for a faster PC:
Clear out junk files and repair common Windows errorsFree Scan →Scan for outdated or missing drivers - takes under a minuteDriver Scan →Repair Windows errors before they cause bigger problemsFix Now →How much coffee grounds should I put in my garden?
For direct use, a conservative rate is about 1/2 inch of used grounds worked into the top 4 inches of established garden soil. In compost, keep coffee grounds at or below about 20% of the total pile volume.
Can I put coffee grounds directly on soil?
You can, but apply them lightly and mix them in. Do not leave a thick surface layer because grounds can crust, repel water, and restrict oxygen. Composting first is usually the safer option.
Are coffee grounds safe for seedlings and seed starting?
No, they are not a good seed-starting ingredient. Coffee grounds can interfere with germination and early root growth, so keep them away from seeds, seedlings, and young transplants.
Quick Recap
Product prices and availability are accurate as of the date/time indicated and are subject to change. Any price and availability information displayed on Amazon at the time of purchase will apply.
What’s actually slowing this PC down?
Pick the symptom - the matching free tool is one click away.

