What’s actually slowing this PC down?
Pick the symptom - the matching free tool is one click away.
Choosing tile adhesive is not a guessing game. For most residential tile work in the United States, the safe baseline is a polymer-modified thinset mortar that meets ANSI A118.4. From there, the right choice depends on tile size, tile material, substrate, water exposure, movement, temperature, and the warranty requirements of the products you are installing.
On our job sites, we do not start with brand preference. We start with risk. A kitchen backsplash with 3 x 6 ceramic subway tile is a different job than a 24 x 48 porcelain bathroom floor, a shower pan, a balcony, or a commercial kitchen. The wrong adhesive may hold for a while, then fail when moisture, movement, freeze-thaw cycles, or poor coverage catch up with it.

As an Amazon Associate I earn from qualifying purchases.
The simple rule is this: match the mortar to the assembly, not just the tile. That means reading the bag or data sheet before buying. Look for the ANSI rating, approved substrates, maximum tile size, wet-area approval, exterior rating, open time, pot life, cure time, trowel size, and warranty language.
Windows Errors? Fix Them Before They Spread
Repair common Windows errors and clear accumulated junk for a smoother, more stable PC - no reinstall needed.Free scan · no reinstallOutdated Drivers Are Slowing You Down
One free scan finds every outdated or missing driver and matches the right update for your exact hardware.Free scan · exact hardware matchStart With the ANSI Rating on the Bag
ANSI classifications are the most useful starting point because they describe what the setting material is designed to do. The Tile Council of North America and ANSI standards are the industry framework behind professional tile assemblies. Current references include ANSI A108/A118/A136.1:2024 for ceramic tile installation materials, and the 2026 TCNA Handbook for Ceramic, Glass, and Stone Tile Installation is listed as current by NBS.
Here are the ratings homeowners and remodelers run into most often:
#1 Best Overall

- HIGH-YIELD POLYMER: Revolutionize your projects with our potent synthetic polymer, an instant adhesive that delivers up to 20 times the yield of traditional cement mix. Ideal for a broad range of applications, including concrete repair and cement crack repair, this bauer-endorsed product ensures efficiency and effectiveness, surpassing conventional solutions and saving time and resources.
- VERSATILITY IN APPLICATION: From driveway crack filler to tile repair, our polymer serves as a universal solution. Whether fixing chips in concrete or laying down tiles, this crack concrete repair adhesive is your go-to. It's great for cementing blocks or repairing steps, walls, and walkways, making every project simpler with its all-encompassing application.
- READY-TO-USE CONVENIENCE: Eliminate the guesswork and errors of traditional cement mix with our ready-to-use polymer. This instant adhesive simplifies concrete and cement crack repair, allowing for immediate application without the hassle of mixing. Ideal for quick and efficient repairs, it ensures the great consistency for both small fixes and major renovations.
- EFFICIENT AND WASTE-REDUCING PACKAGING: Our polymer, a superior repair solution, comes in resealable packaging, ensuring no waste for your next job. This durable, easy-to-transport package means unused concrete crack repair remains viable, promoting sustainability and reducing environmental impact. Choose efficiency with our thoughtfully designed product.
- COMMITMENT TO DIVERSITY: By selecting our Certified Minority Business Enterprise (MBE) product, you choose more than just a high-quality instant adhesive for concrete repair. You support diversity within the industry, contributing to the empowerment of minority businesses. Our polymer, ideal for concrete crack repair and tile repair, exemplifies our dedication to quality and diversity.
| ANSI rating | Common name | Best use | Watch-outs |
|---|---|---|---|
| A118.1 | Unmodified dry-set mortar | Certain membrane systems, some ceramic tile, applications where the manufacturer calls for unmodified mortar | Not the default for dense porcelain unless the system specifically allows it |
| A118.4 | Modified thinset mortar | Most residential ceramic and porcelain floors, walls, backsplashes, and many wet-area applications | Still must match tile size, substrate, and exposure |
| A118.11 | Plywood-approved modified mortar | Tile assemblies approved over exterior-glue plywood | Only use where the full plywood assembly is suitable and movement is controlled |
| A118.15 | Improved modified mortar | Large-format porcelain, exterior work, freeze-thaw exposure, submerged areas, radiant heat, high traffic, demanding installations | Costs more, but often cheap insurance compared with failure |
| A136.1 | Organic premixed mastic | Small interior wall tile in dry or intermittent-wet areas | Not for shower floors, pools, steam showers, exterior tile, or most large-format porcelain |
| A118.3 | Epoxy adhesive or mortar | Chemical resistance, commercial kitchens, laboratories, pools, resin-backed stone, specialty conditions | Expensive, short working time, demanding cleanup |
If you remember only one thing from this section, remember this: A118.4 is the usual starting point for quality residential work, and A118.15 is where we go when the installation has higher consequences or tougher bonding conditions.
Thinset, Mastic, and Epoxy: What They Actually Do
Thinset mortar
Thinset is cement-based mortar mixed from a powder with water or a liquid additive, depending on the product. It cures hard, bonds well, and is the workhorse for floors, showers, porcelain tile, cement board, uncoupling membranes, and many wall installations.
Free tools Windows power users keep installed
One-click scans. No signup required.
Modified thinset contains polymers that improve bond strength, flexibility, and performance. That matters with porcelain because porcelain is dense and low absorption. LATICRETE notes that porcelain tiles are typically 0.5 percent absorption or less, which is why they usually require higher bond strength than standard ceramic wall tile.
Mastic
Mastic is premixed organic adhesive. It is convenient because there is no powder, bucket mixing, slake time, or drill paddle. It can work well for small ceramic wall tile in dry or intermittent-wet locations, such as a simple kitchen backsplash.
That convenience has limits. Manufacturer data sheets commonly restrict Type 1 mastic to smaller tile and interior uses. Some products cap tile size around 12 x 12 inches on walls or 8 x 8 inches on floors. Mastic should not be used for shower floors, steam showers, pools, exterior tile, submerged applications, or over waterproofing membranes unless the data sheet specifically says it is approved. In practice, we treat mastic as a backsplash and small-wall-tile product, not a universal tile adhesive.
Epoxy mortar
Epoxy mortar is a specialty adhesive. It is strong, dense, chemical resistant, and less forgiving to install. It belongs in commercial kitchens, laboratories, pools, food-service areas, some resin-backed stone installations, and other high-performance environments.
Do these 3 things before closing this tab:
1Scan for outdated or missing drivers - takes under a minute2Repair Windows errors before they cause bigger problems3Fix the driver behind crashes, sound loss and screen glitchesThe downside is cost and handling. Epoxy has a shorter working window, requires precise mixing, and cleanup must happen on schedule. A homeowner installing a powder-room floor rarely needs it. A restaurant kitchen or pool waterline may.
Match the Mortar to the Tile
Ceramic wall tile
Small ceramic wall tile is the most forgiving category. For a dry kitchen backsplash, either a quality modified thinset or an approved Type 1 mastic may work. We still prefer modified thinset when the tile is heavy, the wall is imperfect, the backsplash is near frequent heat or moisture, or the tile manufacturer calls for cement mortar.
For bathroom walls outside the shower, use modified thinset when moisture is likely or when tile is larger than the mastic data sheet allows.
Porcelain tile
Porcelain usually needs polymer-modified thinset, minimum ANSI A118.4. Dense porcelain does not absorb much water, so the mortar has to create a reliable bond mechanically and chemically. Cheap unmodified mortar is a common failure point under porcelain floors.
For porcelain floors, we commonly step up to an A118.15 mortar when the tile is large format, the room has radiant heat, the floor sees heavy traffic, or the substrate is less forgiving.
Large-format tile
Large-format tile is commonly defined as any tile with one side 15 inches or longer. That includes 12 x 24, 24 x 24, 24 x 48, and gauged porcelain panels. These tiles need flatter substrates and often a large-and-heavy-tile mortar, sometimes labeled LHT, LFT, or medium-bed mortar.
Large-format mortar supports heavier tile and helps reduce slump. MAPEI describes large-format mortar as polymer-enriched and designed to bond and support large tile. Custom Building Products notes some large-format mortars can be used up to 3/4 inch thick on horizontal surfaces after beat-in.
Do not confuse support with leveling. LHT mortar is not a substitute for floor prep. If the floor has waves, humps, or dips, flatten it first with approved patch or self-leveling underlayment. Trying to correct a bad floor with thick mortar usually leads to lippage, hollow spots, slow curing, and inconsistent coverage.
The Tool Desk
Outbyte PC Repair FREEClear out junk files and repair common Windows errorsFree Scan →Outbyte Driver Updater FREEFix the driver behind crashes, sound loss and screen glitchesFind Drivers →Glass tile and translucent stone
Use white mortar unless the tile manufacturer approves gray. Glass tile often requires a specific glass-tile mortar because bond, color, and cure behavior matter. Translucent stone and light marble can show shadowing or staining from gray mortar.
With natural stone, check whether the stone is moisture sensitive. Some green marble, resin-backed stone, and other specialty materials may require epoxy or a manufacturer-specified setting material.
Match the Mortar to the Substrate
The tile is only one half of the decision. The substrate determines whether the mortar can do its job.
Concrete slab
Concrete is a strong tile substrate when it is clean, sound, flat, and free of bond breakers. Paint, curing compounds, sealers, dust, old adhesive residue, and oil can all interfere with bond. Cracks need evaluation before tile goes down. Some cracks call for a crack-isolation membrane, not just better mortar.
Fresh concrete usually needs cure time before tile installation. Always follow the mortar and membrane manufacturer’s requirements, because some systems allow earlier installation than others.
Cement backer board
Cement backer board is common in bathrooms, but it is not waterproof by itself. It is water tolerant, not a complete waterproofing system. Showers need a properly detailed waterproofing method, such as a surface-applied membrane, sheet membrane, or approved pan system.
For cement board, use the mortar required by the board and tile manufacturer. Tape seams with alkali-resistant mesh tape and embed them as specified.
Waterproof membranes
Membranes change mortar selection because they can slow drying. Some membrane systems require unmodified A118.1 mortar. Others allow or require modified A118.4 or A118.15 mortar. This is where staying inside one manufacturer’s system helps. If the membrane, mortar, drain, sealant, and cure-time instructions come from the same system, warranty conflicts are less likely.
Quick wins for a faster PC:
Scan for outdated or missing drivers - takes under a minuteDriver Scan →Repair Windows errors before they cause bigger problemsFix Now →Fix the driver behind crashes, sound loss and screen glitchesFind Drivers →Plywood
Tile over plywood is possible only in approved assemblies, and the mortar must meet ANSI A118.11. The plywood must be exterior-glue rated, properly fastened, correctly layered, and stiff enough for tile. Movement is the enemy. In many remodels, we prefer an uncoupling membrane or backer board assembly over direct bonding to plywood.
Wet Areas, Exterior Tile, and Freeze-Thaw Conditions
Wet and exterior installations deserve a higher standard because failure is more expensive. Industry references commonly cite minimum mortar contact coverage of 80 percent for interior dry areas and 95 percent for wet, exterior, and large-format installations. That means nearly full mortar contact between tile and substrate, with special attention to corners and edges.
Rank #3

- Textured mortar filler and sealant repairs cracks and holes in exterior or interior concrete and masonry surfaces
- Premium elastomeric latex formula ideal for mortar, concrete, brick, stucco and other similar surfaces
- 100% waterproof and weatherproof sealant is water and rain ready in 24 hours and paint ready in 2 hours
- Sealant with a textured finish blends easily with most mortar surfaces and provides excellent adhesion, flexibility, and durability for a crackproof seal
- Exceeds ASTM C920, Class 25, and ASTM C835
In showers, the adhesive does not replace waterproofing. The waterproof layer must be continuous before tile is installed. The mortar bonds the tile to that approved surface.
For exterior tile, the assembly must manage water, temperature movement, and freeze-thaw stress. Use exterior-rated porcelain or other approved tile, proper slope for drainage, movement joints, and an exterior-rated modified mortar. In many exterior, freeze-thaw, balcony, and patio conditions, an ANSI A118.15 mortar is worth the upgrade.
Outdoor tile also increases cost. RUBI’s 2026 cost guide notes outdoor installations can add about 15 to 20 percent because of weather-rated thinsets and membranes. That is realistic. The setting materials cost more, prep takes longer, and drainage details matter.
Coverage, Trowel Size, and Installation Technique
Good mortar choice can still fail with poor installation. Coverage is not theoretical; it has to be checked while setting tile.
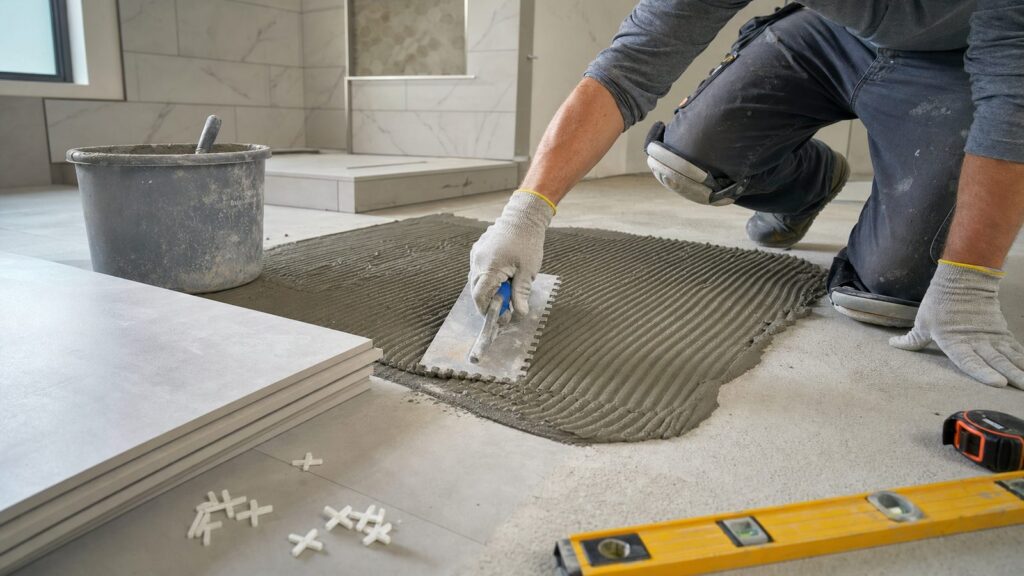
On our jobs, installers key mortar into the substrate with the flat side of the trowel, comb ridges in one direction, set the tile, then move it perpendicular to the ridges to collapse them. We lift sample tiles during installation to verify coverage. For dry interior floors, the target is at least 80 percent contact. For showers, exterior tile, wet areas, and large-format tile, plan for 95 percent coverage.
Trowel size depends on tile size, tile back pattern, substrate flatness, and mortar type. Common starting points are 1/4 x 1/4 inch square-notch for smaller wall tile, 1/4 x 3/8 inch for many floor tiles, and 1/2 x 1/2 inch for many large-format tiles. Those are starting points, not guarantees. The tile you pull up tells the truth.
Back-buttering is often needed with large-format tile, porcelain, stone, and textured tile backs. It fills depressions and improves coverage. It does not mean piling on random extra mortar; it means using the flat side of the trowel to burn a thin coat into the tile back.
Cost: What Tile Adhesive Really Changes
Mortar is a small part of the total tile budget, but it has an outsized effect on failure risk. Homewyse’s May 2026 estimate starts tile floor installation at $16.38 to $20.21 per square foot, with significant variation by zip code, job size, substrate condition, and options. RUBI’s 2026 guide gives a broader $15 to $75 per square foot range for complete tile projects including materials and professional labor.
Home Depot’s service pricing example lists tile material at $2.00 per square foot, setting materials at $1.37 per square foot, and installation at $6.50 per square foot as sample line items. Retail thinset pricing varies, but 50-pound bags of polymer-modified thinset commonly land in the high teens to $30s. Premium large-format, lightweight, rapid-set, white, and glass-tile mortars cost more. Epoxy costs the most because the product is more expensive and the installation is less forgiving.
| Setting material | Typical 2026 cost position | Where it makes sense | Where it does not |
|---|---|---|---|
| Unmodified thinset, A118.1 | Lowest | Specific membrane systems and approved ceramic applications | Default porcelain floors, plywood, high-risk wet or exterior work unless specified |
| Modified thinset, A118.4 | Middle | Most residential ceramic and porcelain tile | Jobs needing higher performance, large panels, exterior stress, or specialty tile |
| Improved modified mortar, A118.15 | Higher | Large-format porcelain, exterior, freeze-thaw, submerged, radiant heat, high traffic | Simple dry ceramic backsplash where standard modified mortar is approved |
| Premixed mastic, A136.1 | Convenient, often higher per usable coverage | Small interior wall tile in approved dry or intermittent-wet areas | Shower floors, pools, steam, exterior, large-format porcelain |
| Epoxy mortar, A118.3 | Highest | Commercial kitchens, laboratories, pools, chemical exposure, specialty stone | Routine residential floors where cement mortar is adequate |
For homeowners, the best value is often not the cheapest bag. A $15 to $30 mortar upgrade is minor compared with demolition, replacement tile, new waterproofing, and labor if the installation fails.
Mortar Choice by Common Project
Kitchen backsplash
For small ceramic or porcelain backsplash tile, modified thinset is a solid choice. Premixed mastic can be acceptable if the tile is small, the area is not continuously wet, and the product data sheet allows the tile size. Use white mortar for glass mosaics, translucent tile, and light stone.
Bathroom floor
Use modified thinset meeting ANSI A118.4 at minimum. For large-format porcelain, radiant heat, or a membrane system, check the manufacturer’s mortar requirement. If the tile is 12 x 24 or larger, expect LHT mortar and stricter floor flatness prep.
Rank #4

- It is easy to use
- It is highly durable
- Manufactured in China
- It is easy to use
- Manufactured in China
Shower walls
Use the mortar required by the waterproofing system and tile manufacturer. Many shower wall installations use modified thinset, but some membrane systems specify unmodified mortar. Premixed mastic is a poor default in showers and is not appropriate for shower floors.
Shower floor
Use cementitious thinset approved for the drain and waterproofing system, with 95 percent coverage as the goal. Small mosaics need proper support without excess mortar squeezing through joints. Avoid mastic.
Recommended Free Tools
Exterior patio or balcony
Use exterior-rated tile, proper slope, drainage planning, movement joints, and high-performance modified mortar. In freeze-thaw climates, consider ANSI A118.15 as the default unless the system specifies otherwise.
Commercial kitchen
Expect higher-performance mortar or epoxy depending on chemical exposure, cleaning methods, grease, heat, and traffic. The setting material, grout, waterproofing, and movement-joint plan should be selected as a system.
Movement Joints and Cure Time
Tile is hard, but buildings move. Wood framing moves with moisture. Concrete shrinks and cracks. Sun-exposed tile expands. Heated floors cycle. Movement joints are part of the assembly, not an optional caulk line added after the fact.
Plan movement joints before setting tile. Follow TCNA EJ171 guidance and manufacturer instructions for perimeter gaps, changes in plane, transitions, and field joints. Do not pack grout tight against tubs, walls, columns, cabinets, or thresholds where movement is expected.
Crashes, No Sound, or Screen Glitches?
Random freezes, missing sound and display glitches usually trace back to one bad driver. Find and replace yours safely.Free scan · under a minutePC Slower Than It Used to Be?
A free scan shows the junk files, broken settings and background clutter dragging Windows down - then fixes them in one click.Free scan · Windows 10 & 11Cure time also matters. Mortar trapped between dense porcelain and waterproof membranes may cure more slowly. Rapid-set mortar can help when schedule matters, but it shortens working time. Do not grout, flood test, open to traffic, or reinstall fixtures until the product data sheet allows it. Many standard mortars need at least 24 hours before grouting under normal conditions, and longer in cool, damp, or low-absorption assemblies.
Independent reader supportYour contribution helps us test, update, and keep practical guides available for everyone.When to DIY vs When to Hire a Pro
A careful DIYer can handle a small backsplash, powder-room floor, or simple laundry-room tile job if the substrate is flat, dry, and structurally sound. The project becomes more demanding when waterproofing, large-format tile, exterior exposure, natural stone, heated floors, diagonal layouts, or old-floor removal enter the picture.
Hire a professional when the job involves a shower pan, steam shower, balcony, exterior tile in a freeze-thaw area, large-format tile over imperfect framing, cracked concrete, commercial use, or expensive stone. Also hire a pro if you need a documented warranty. On higher-value remodels and commercial projects, we document product lot numbers, ANSI ratings, substrate prep, waterproofing steps, flood tests, and photos of coverage checks.
Labor cost also changes with complexity. Herringbone, diagonal, and chevron layouts can add 15 to 25 percent to labor. Porcelain cutting, natural stone handling, shower waterproofing, floor leveling, old tile removal, and small detailed areas all raise cost because they take time and skill.
Safety, Code, and Permit Notes
Tile adhesive is not usually the item an inspector focuses on first, but the assembly still has to meet code and manufacturer requirements. Wet areas need approved backing and waterproofing. The IRC includes requirements for water-resistant materials in wet wall areas, and local amendments may apply.
Permits are more likely when the tile work is part of a bathroom remodel involving plumbing, electrical, structural repairs, heated floors, or shower reconstruction. A backsplash replacement rarely needs a permit. A curbless shower with drain relocation often does.
Best Value
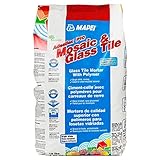
- Nonsag performance
- Great for sheet-mounted mosaics
- Quality-controlled color matching for consistent bright white color
- Mix with Keraply for increased performance and submerged installations.
- Coverage 11 to 24 sq ft
For safety, use eye protection when mixing powder mortar, wear gloves with cement products, and control dust. Cementitious mortar is alkaline and can irritate skin. Use a mixing paddle at the manufacturer’s recommended water ratio, let the mortar slake if required, then remix. Adding extra water after the mortar begins to stiffen weakens the mix unless the data sheet allows remixing.
Common Mistakes to Avoid
The most common mistake is choosing premixed adhesive because it feels easier, then using it in a place it was never designed to serve. Shower floors, exterior patios, steam showers, pools, and large-format porcelain are not mastic jobs.
The second mistake is buying the cheapest thinset without checking the ANSI rating. A bag that works under small ceramic tile may not be right for dense porcelain, plywood, waterproof membranes, or large-format tile.
The third mistake is using mortar to level the floor. Mortar should bond tile. It should not be asked to correct a wavy substrate across a room. Flatten first, then set tile.
The fourth mistake is skipping coverage checks. You cannot see coverage from above. Pull a tile now and then while setting. If ridges are not collapsing, change technique, trowel size, mortar consistency, or substrate prep before the whole floor is installed.
The Practical Selection Checklist
Before buying mortar, answer these questions:
- What is the tile: ceramic, porcelain, glass, mosaic, marble, stone, or resin-backed material?
- What is the size: small format, 12 x 24, 24 x 48, or larger panel?
- Where is it going: dry wall, floor, shower, exterior, pool, commercial kitchen, or radiant heat?
- What is the substrate: concrete, cement board, waterproof membrane, uncoupling membrane, drywall, or plywood?
- What ANSI rating does the tile, membrane, or assembly require?
- Does the data sheet approve the tile size and location?
- Is white mortar needed to protect the finished appearance?
- What cure time is required before grout, traffic, water exposure, or fixtures?
If the answers point in different directions, follow the most restrictive product requirement or call the manufacturer’s technical line. That 10-minute call can prevent a very expensive tear-out.
Recommended Free Tools
Bottom Line
For most residential tile, start with a quality polymer-modified thinset meeting ANSI A118.4. Use A118.15 improved modified mortar for large-format porcelain, exterior exposure, freeze-thaw conditions, submerged or wet areas, radiant heat, high traffic, and other demanding work. Use A118.11 only where the assembly is approved over plywood. Keep mastic limited to small approved interior wall tile. Reserve epoxy for chemical resistance and specialty installations.
The right mortar is the one that fits the tile, substrate, exposure, and warranty. When the project has water, movement, heavy tile, or expensive finishes, the better bag of mortar is usually the cheapest protection on the job.
Frequently Asked Questions
What is the difference between thinset, mastic, and epoxy tile adhesive?
Thinset is cement-based mortar and is the standard choice for most floors, porcelain tile, showers, and wet-area work. Mastic is premixed organic adhesive best limited to small interior wall tile in approved dry or intermittent-wet areas. Epoxy is a specialty adhesive for chemical resistance, pools, commercial kitchens, laboratories, and some specialty stone.
Can I use premixed tile adhesive in a shower?
Do not use premixed mastic in shower floors, steam showers, pools, or submerged areas. Some mastics are approved for limited intermittent-wet wall use, but showers are usually better handled with the mortar required by the waterproofing and tile manufacturer.
What mortar should I use for large-format porcelain tile?
Use a polymer-modified large-and-heavy-tile mortar, often ANSI A118.4 or A118.15 depending on the job. For 12 x 24 tile and larger, substrate flatness and coverage matter as much as the mortar itself.
Do I need modified or unmodified thinset?
Most porcelain and residential floor tile installations use modified thinset meeting ANSI A118.4. Unmodified A118.1 mortar is used when a specific tile or membrane system requires it. Always follow the membrane and tile manufacturer’s instructions.
How much mortar coverage is required under tile?
Industry references commonly cite at least 80 percent mortar contact coverage for interior dry areas and 95 percent for wet areas, exterior tile, and large-format installations. Pull sample tiles during installation to verify coverage.
Can thinset be used to level a floor before tiling?
No. Thinset is for bonding tile, not flattening a bad floor. Use approved patching material or self-leveling underlayment first, then set the tile with the correct mortar.
Do these 3 things before closing this tab:
1Repair Windows errors before they cause bigger problems2Scan for outdated or missing drivers - takes under a minute3Clear out junk files and repair common Windows errorsQuick Recap
Product prices and availability are accurate as of the date/time indicated and are subject to change. Any price and availability information displayed on Amazon at the time of purchase will apply.

