Windows Errors? Fix Them Before They Spread
Repair common Windows errors and clear accumulated junk for a smoother, more stable PC - no reinstall needed.Free scan · no reinstallOutdated Drivers Are Slowing You Down
One free scan finds every outdated or missing driver and matches the right update for your exact hardware.Free scan · exact hardware matchSome links on this page are affiliate links: if you buy through them we may earn a commission, at no extra cost to you.
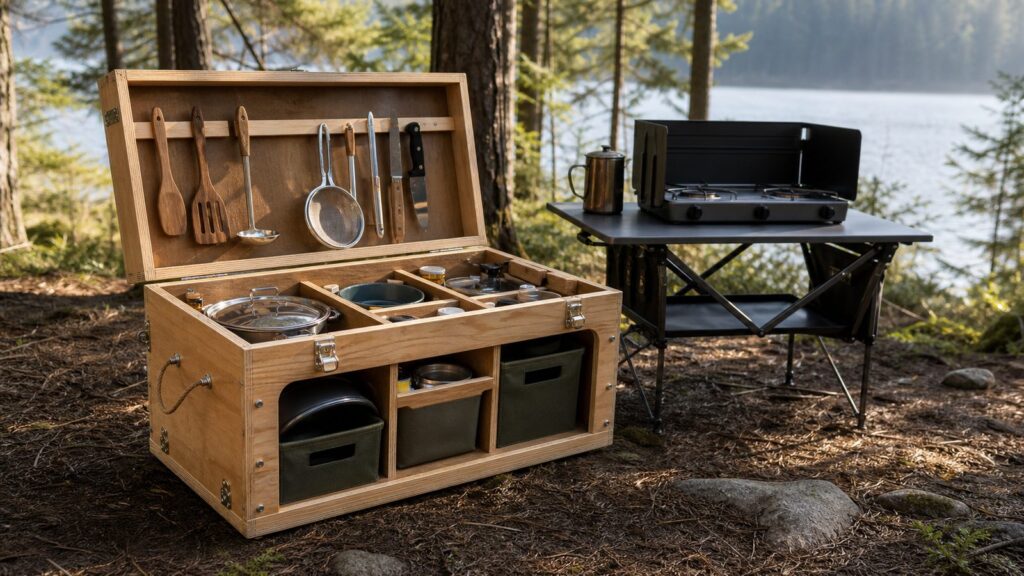
A good camp kitchen woodworking plan is not just a box with shelves. It is a portable cabinet that has to ride in a vehicle, survive vibration, keep cooking tools organized, open into usable prep space, dry out after bad weather, and stay light enough for one or two adults to move safely.
For most car-camping families, the sweet spot is a plywood chuck box about 24 to 36 inches wide, 16 to 24 inches deep, and 16 to 24 inches high. Built from 1/2-inch plywood with reinforced hardware, that size can hold a two-burner camp stove, utensils, cookware, dry goods, dishwashing gear, and a small prep kit without turning into a back injury. Bigger boxes look attractive on paper, but cookware, water, canned food, cast iron, and fuel add weight fast.
As an Amazon Associate I earn from qualifying purchases.
The Tool Desk
Outbyte PC Repair FREERepair Windows errors before they cause bigger problemsFix Now →Outbyte Driver Updater FREEFix the driver behind crashes, sound loss and screen glitchesFind Drivers →On our construction projects, the same rule applies whether we are building a site cabinet, a mudroom locker, or an outdoor kitchen: design around the real load, real clearances, and real use pattern before cutting material. This article gives you a contractor-grade plan for a portable camp kitchen chuck box, plus the safety, sanitation, cost, and permit notes most hobby cut lists leave out.
Start With the Sizing Worksheet
Before buying plywood, write down six measurements and decisions. This takes 20 minutes and prevents most bad builds.
- Number of campers: two people can usually live out of a 24- to 30-inch box; four to six people usually need a 32- to 36-inch box or a separate food tote.
- Trip length: weekend trips need less dry storage than five- to seven-night base camps.
- Stove model: measure the actual stove body, lid height, hose connection, and side clearance requirements from the manual.
- Vehicle opening: measure the narrowest hatch, trunk, or truck-bed opening. Leave at least 1 inch of clearance on each side.
- Target loaded weight: a one-person carry should usually stay under 45 to 55 pounds loaded; a two-person carry should generally stay under 80 to 100 pounds loaded.
- Cooking style: simple breakfasts and coffee need a different layout than cast-iron dinners, dishwashing tubs, spices, oils, and a full utensil kit.
A practical outside dimension for many families is 30 inches wide by 18 inches deep by 20 inches high. That fits many SUVs and truck beds, keeps the plywood spans reasonable, and gives enough face area for a fold-down door that can become a prep shelf. If your stove is larger than average or you want nested wash basins inside, move to 34 or 36 inches wide, but be disciplined about weight.
#1 Best Overall

- Made in America, roto molded, and hand finished. It's the only camp kitchen you'll ever need to buy as it's durable, reliable, and built to be nearly indestructible.
- Lightweight and easy to carry, the molded handles make it easy to carry even when full and won't break or get in the way during storage.
- Compact design and small footprint allows for easy stacking and maximizing space in your vehicle or camper while still providing plenty of storage for all your camp cooking essentials.
- Five storage compartments to organize and protect camp cooking supplies from the elements. There is also a pull out utensil drawer and a utility drawer for items such as spices, sponges, rags, other utensils, etc.
- Military grade quick release latch for easy opening and closing of the fold down work space. The fold down work space can also function as a sink or utility bin for dish washing or extra storage.
Build a mock-up before you cut cabinet-grade material. Cardboard, scrap plywood, or even painter’s tape on the garage floor will show whether your stove, pans, mugs, plates, and bins actually fit. We prototype built-ins for the same reason: drawings lie when the real objects have handles, hoses, knobs, lids, and awkward corners.
Quick wins for a faster PC:
Fix the driver behind crashes, sound loss and screen glitchesFind Drivers →Repair Windows errors before they cause bigger problemsFix Now →Scan for outdated or missing drivers - takes under a minuteDriver Scan →Recommended Dimensions and Layout
The best camp kitchen box is organized by zones, not by decorative compartments. Camping gear changes over time, and fixed dividers can become a problem after one new stove or pot set. A modular interior with removable bins is easier to clean, easier to reconfigure, and more forgiving.
A dependable 30-inch layout
For a general-purpose chuck box, use these outside dimensions:
- Width: 30 inches
- Depth: 18 inches
- Height: 20 inches
- Plywood: 1/2-inch Baltic birch, appleply, marine plywood, or quality exterior-rated plywood
- Back panel: 1/2-inch plywood for stiffness, not thin hardboard
- Fold-down front: full-width door with chains, cable stays, or lid supports
- Interior: two or three removable bins, one utensil tray, one dry-food bay, and one stove bay if your stove stores inside
Inside, divide the cabinet into five work zones: stove and hot-work storage, clean prep tools, utensils, dry food, and dishwashing or wastewater gear. Keep raw meat in a cooler, not loose in the chuck box. Keep trash bags, soap, and dirty scrubbers separated from clean utensils and food-contact surfaces.
One-person vs. two-person boxes
A compact one-person box can be 24 inches wide by 16 inches deep by 16 inches high. It works for solo camping, coffee kits, overland drawers, or a simple stove-and-utensil setup. A two-person lift box can be 32 to 36 inches wide and 18 to 24 inches deep, but it needs stronger handles, better latches, and a realistic loaded-weight test before the first trip.
What’s actually slowing this PC down?
Pick the symptom - the matching free tool is one click away.
If you need more than 36 inches of width, consider two smaller boxes instead of one large cabinet. One box can hold cooking hardware and utensils; the other can hold dry goods, paper products, and dishwashing gear. Two boxes are easier to carry, easier to pack around coolers, and less likely to overload hinges or handles.
Materials, Hardware, and 2026 Cost Range
A basic DIY camp kitchen box can be built in 2026 for roughly $100 to $250 if you use one 4-foot by 8-foot sheet of sanded or cabinet-grade plywood, standard hinges, screws, glue, handles, latches, and an exterior finish. A premium build with Baltic birch or marine plywood, stainless piano hinges, lockable draw latches, folding legs, drawer slides, weather seals, aluminum edge trim, and a laminate or stainless prep surface can run $250 to $600 or more.
Prefab and custom options cost more. Manufactured camp kitchen boxes commonly start around $389, while custom wooden camp kitchen boxes can exceed $1,100 depending on size, hardware, finish, sink features, and counter details. That does not mean DIY is always better. It means the value is in whether the box is built to your gear, your vehicle, and your use pattern.
Lumber pricing was still worth watching in 2026. Trading Economics listed lumber around $615 per 1,000 board feet on July 31, 2026. Gordian reported framing lumber at $916.62 per MBF in April 2026, up 5.11% for Q2 and 4.21% year over year. NAHB reported framing lumber up 1.4% week to week on July 24, 2026, but 0.3% lower than one year earlier. The U.S. Producer Price Index for lumber was 280.114 in June 2026, and softwood lumber was 282.733, updated July 15, 2026. Sheet goods move differently than framing lumber, but the point is the same: price local plywood before locking in a budget.
Free tools Windows power users keep installed
One-click scans. No signup required.
| Build Level | Typical 2026 Cost | Best For | What Drives the Price |
|---|---|---|---|
| Basic DIY chuck box | $100-$250 | Weekend car camping, simple cookware, standard two-burner stove | One sheet of 1/2-inch plywood, zinc hardware, screws, glue, exterior finish |
| Premium DIY camp kitchen | $250-$600+ | Frequent camping, rough roads, wet climates, cleaner work surfaces | Baltic birch or marine plywood, stainless hinges, draw latches, seals, trim, slides, laminate or metal prep surface |
| Prefab camp kitchen box | About $389 and up | Buyers who want a ready-made system and do not need custom sizing | Molded construction, brand hardware, integrated features, shipping |
| Custom wooden camp kitchen | $1,100+ | Overland rigs, trailers, highly specific gear layouts | Custom cabinetry labor, premium finish, sink or counter features, heavy-duty hardware |
| Permanent outdoor kitchen | Thousands to tens of thousands | Backyards, patios, built-in grills, utilities, masonry, roof structures | Permits, gas, water, electrical, drainage, counters, framing, code compliance |
Plywood Thickness and Joinery
Use 1/2-inch plywood for most portable camp kitchen boxes. It gives a good balance of stiffness and weight. Use 3/4-inch plywood only where the design truly needs it, such as narrow structural rails, cleats, or a high-load base. A box made entirely from 3/4-inch plywood may feel solid in the shop, then become miserable once loaded with pans, fuel, food, and water.
A single 4-foot by 8-foot sheet of 1/2-inch plywood is enough for many 30-inch chuck boxes if you plan the cuts carefully. Use a kerf-aware cut list, meaning you account for the saw blade width. A typical table saw or circular saw blade removes about 1/8 inch per cut. Ignore that on a tight layout and your last panel may come up short.
Rank #2
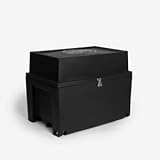
- Made in America, roto molded, and hand finished. It's the only camp kitchen you'll ever need to buy as it's durable, reliable, and built to be nearly indestructible.
- Lightweight and easy to carry, the molded handles make it easy to carry even when full and won't break or get in the way during storage.
- Compact design and small footprint allows for easy stacking and maximizing space in your vehicle or camper while still providing plenty of storage for all your camp cooking essentials.
- Five storage compartments to organize and protect camp cooking supplies from the elements. There is also a pull out utensil drawer and a utility drawer for items such as spices, sponges, rags, other utensils, etc.
- Military grade quick release latch for easy opening and closing of the fold down work space. The fold down work space can also function as a sink or utility bin for dish washing or extra storage.
For joinery, simple works if it is reinforced correctly. Use waterproof wood glue, predrilled screws, and square clamping. Rabbet joints or dadoes are better than butt joints because they resist racking. If you do not have dado capability, use glue blocks or 3/4-inch cleats inside the corners. The box will be lifted, twisted, slid, and bounced in a vehicle; it needs more anti-rack strength than a shop cabinet that never moves.
Do not rely on screws driven into plywood edges for handles, latches, or load-bearing supports. Through-bolt the handles with washers or backing plates. On our job sites, any hardware that carries people, tools, or repeated movement gets backed up mechanically. A camp kitchen deserves the same thinking because transport loads are harsher than normal cabinet use.
Cut List for a 30-Inch Chuck Box
This cut list assumes 1/2-inch plywood and an outside box size of about 30 inches wide, 18 inches deep, and 20 inches high. Adjust the interior shelves around your actual stove, bins, cookware, and vehicle space.
- Top: 30 inches by 18 inches, 1 piece
- Bottom: 30 inches by 18 inches, 1 piece
- Sides: 19 inches by 18 inches, 2 pieces
- Back: 30 inches by 20 inches, 1 piece
- Fold-down front door: 30 inches by 20 inches, 1 piece, trimmed for hinge clearance as needed
- Interior vertical divider: 18 inches deep by 18 to 19 inches high, 1 piece
- Interior shelves: sized to fit bins and cookware, usually 12 to 14 inches wide by 17 inches deep
- Cleats: 3/4-inch by 3/4-inch hardwood or plywood strips for shelf support, door stops, and corner reinforcement
Leave 1/16 to 1/8 inch of clearance around doors and drawers so finish thickness, dust, and slight swelling do not make the box bind. Hardware has its own geometry too. Piano hinges, draw latches, magnetic catches, and folding supports all need measured setbacks. Dry-fit every hinge and latch before final sanding and finishing.
If the fold-down door will act as a work shelf, do not let hinges carry the full working load. Add two rated chains, cables, or lid stays. Set a real load limit. A fold-down plywood door may handle plates, spices, and light prep, but it is not a bench, step, or heavy cast-iron workstation unless it is engineered for that load.
Build Sequence
Plan on one full weekend for a careful build: 3 to 5 hours for layout and cutting, 3 to 5 hours for assembly and hardware fitting, and another day for sanding, sealing, and finish drying. More complex builds with drawer slides, folding legs, laminate, or sink trays can take 20 to 30 hours.
1. Cut and label every panel
Break down the plywood with a track saw, table saw, or circular saw and straightedge. Label each piece immediately. Sand cut edges lightly so splinters do not interfere with assembly. Keep the factory edges for visible front lines where possible.
2. Dry-fit the carcass
Assemble the top, bottom, sides, and back without glue first. Check for square by measuring diagonals. If the diagonals match, the box is square. If they differ by more than 1/8 inch, correct it before fastening. A racked box will make doors, shelves, and latches harder to align.
3. Glue, screw, and reinforce
Use exterior-rated wood glue and predrilled screws. Add cleats or glue blocks inside the corners if the box uses butt joints. Keep screws back from plywood edges to reduce splitting. Wipe squeeze-out before it cures, especially inside compartments that need to be cleaned later.
4. Fit shelves and modular bins
Install shelves around your actual storage bins, not an imaginary set of camp items. Removable plastic bins are useful for utensils, spices, cleaning supplies, and coffee gear. They can be washed separately and pulled out at camp instead of forcing everyone to dig through narrow compartments.
5. Install doors, latches, handles, and supports
Use positive latches so doors cannot open during transport. Magnetic catches are helpful for light control, but they are not a substitute for travel latches. Through-bolt side handles with washers or backing plates. Install lid supports, chains, or cables before relying on any fold-down surface.
Rank #3

- One item includes a 18L camping storage bag, a shoulder strap, a US flag patch and a lemubeane logo hook. Made of 600D nylon, durable and water-resistant, these camping organizers are meant to last for years even for the most rugged users. Five colors to choose from: black, khaki, Army Green, pink & cream.
- Full size: 14.2" x 9.6" x 8.3" (folded size: 14.2" x 9.8" x 4.4"), Volume: 18L. Please note it is not a large‑sized bag. There are many MOLLE trims and slots around the bag for carrying and organizing hand tools, flashlights, camping mugs and bowls. There are two mesh pockets on each side of the bag. The nylon bag itself is a big compartment and it is foldable. You can add the two separating pads to the hook-and-loop lining to create three small compartments as you like, and there is a big zipper mesh pocket on the top of the bag.
- The bottom of our camping bag is made of waterproof fabric to isolate moisture and make the bag easy to clean. When the bag is set up, you can carry it with the two handles on the top or carry it with the breathable shoulder strap. The two short sides and the two dividers are embedded with hard boards to keep solid shape. Each side of the bag is embedded in pearl cotton to protect your items from impacts. There is an area to add the patches you like and we offer a US flag patch & a lemubeane logo.
- Our camping storage bag is perfect for storing camping cookware such as pans, stoves, a gas cylinder, tableware, and other items like clothes, shoes, snacks, books, and so on. You can also leave it in your trunk as a trunk organizer and fold it to save space when you don't need it. It is a versatile storage bag for your camping, hiking, picnic, travelling and daily use.
6. Round over and sand all touch points
Round over exposed edges with a 1/8-inch or 1/4-inch roundover bit, or break the edges carefully with sandpaper. This is not cosmetic only. Camp kitchens are handled with wet hands, cold fingers, and bare forearms. Sharp plywood edges splinter and chip.
Finish, Moisture Control, and Cleanability
Moisture is where many wooden camp kitchens fail. Plywood faces handle weather better than exposed edges. Edges wick water, swell, and eventually delaminate if they are left raw. Seal every edge, screw hole, hinge mortise, and underside surface.
Good finish options include exterior polyurethane, marine spar varnish, penetrating epoxy followed by UV-resistant topcoat, or exterior enamel paint. For a practical field box, a painted exterior and sealed natural interior can work well. Avoid untreated MDF or particleboard. They swell with moisture and do not hold fasteners well under rough transport.
Any food-prep surface should be easy to wipe and should not trap grime in open seams. A removable cutting board is better than treating the plywood lid as a cutting surface. If you want a built-in prep face, consider high-pressure laminate, thin stainless sheet, or a replaceable plastic cutting surface fastened so it can be removed later.
If you add a sink or wash-bin area, isolate it from the plywood structure. Use removable tubs, a sloped tray, or a waterproof insert so water cannot sit against seams. Drill ventilation or drain-dry openings only where they will not invite road dust directly into clean utensil storage. After a trip, unpack the box, leave doors open, and let it dry fully before storage.
Stove, Fire, Food Safety, and Bear-Country Rules
A wooden chuck box is a storage cabinet and prep station. It is not automatically a safe stove stand. Do not assume a propane stove can sit directly on a plywood lid, under a wooden overhang, or inside a partially enclosed box. Follow the stove manufacturer’s clearance instructions for sides, back, overhead space, hose routing, and outdoor-only fuel use.
Our practical recommendation is to store the stove in the box but cook on a separate heat-resistant camp table or a removable platform built for the stove’s required clearances. Keep a fire extinguisher nearby, set the stove on level ground, and keep paper towels, fuel canisters, plastic bins, and dry leaves away from the burner area.
Food safety should be designed into the layout. Use the clean, separate, cook, and chill workflow. Keep raw meat sealed and separate in the cooler. Keep cold foods cold until cooking. Use a food thermometer for safe cooking temperatures instead of judging by color alone. Store clean utensils away from dishwater, trash, and raw-food packaging.
For bear country, a wooden chuck box is not bear-resistant food storage. Many public lands require approved bear-resistant containers, campground lockers, vehicle storage rules, or specific local methods. Treat the chuck box as organization, not wildlife protection. Before traveling, check the rules for the specific park, forest, campground, or wilderness area.
Independent reader supportYour contribution helps us test, update, and keep practical guides available for everyone.Portable Chuck Box vs. Permanent Outdoor Kitchen
A portable camp kitchen usually does not require a building permit because it is movable gear. The moment the project becomes a built-in backyard kitchen with gas, electrical, plumbing, drainage, masonry, roof framing, or fixed appliances, it moves into construction territory. That is where codes, inspections, clearances, and permits matter.
Outdoor kitchens can involve combustible-clearance rules, appliance listing requirements, ventilation, GFCI protection, gas shutoffs, water supply, wastewater handling, structural attachment, and local zoning setbacks. Permit costs vary by jurisdiction, but a realistic national range is about $200 to $2,000 for outdoor kitchen permits. Water or gas line work can run around $500 to $2,500, and full utility packages often add thousands more depending on distance, trenching, finishes, and inspection requirements.
Recommended Free Tools
Rank #4
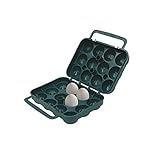
- Strong and durable plastic case protects eggs from breakage
- This egg container is an essential part of your cooking kit
- Cover locks tightly
- Holds 12 eggs
- Fits USDA Large Eggs.Molded handle
The dividing line is simple: if it rides in your SUV and stores in your garage, it is usually a DIY woodworking project. If it is fixed to a patio, tied to utilities, built under a roof, or connected to a grill island, it is a construction project.
When to DIY and When to Hire a Pro
DIY makes sense when you want a portable box, you can safely cut plywood, and you are comfortable fitting hinges, latches, handles, and finish. A basic chuck box is a good intermediate woodworking project. The tolerances are more forgiving than fine furniture, but the box still rewards careful layout and square assembly.
Hire a pro when the kitchen becomes custom cabinetry for a trailer, van, overland rig, or permanent outdoor room. Professional help also makes sense for gas lines, electrical circuits, plumbing, heavy stone counters, built-in grills, roofed cooking structures, masonry bases, and any layout that must pass inspection. A contractor can also solve problems that DIY plans often miss: drainage slope, appliance clearances, noncombustible backing, service access, anchoring, and long-term weather exposure.
For a homeowner deciding between a chuck box and a backyard build, the cost gap is large. A strong portable camp kitchen may cost $250 to $600 in materials. A permanent outdoor kitchen can cost many thousands before premium counters, appliances, or roof structures are added. The right answer depends on how you cook. If you camp six weekends a year, build the box. If you host outside every week and want water, gas, refrigeration, lighting, and shade, plan the built-in correctly from the start.
Do these 3 things before closing this tab:
1Clear out junk files and repair common Windows errors2Scan for outdated or missing drivers - takes under a minute3Repair Windows errors before they cause bigger problemsPre-Trip Load Test and Final Checklist
Do not finish the build and immediately drive it three hours into the woods. Load the box exactly as you plan to use it. Carry it 50 feet. Lift it into the vehicle. Open and close every door. Set up the stove, wash bins, utensils, and prep surface. Then drive around the block and check whether anything shifted.
- Loaded weight is within your planned one-person or two-person limit.
- Handles are through-bolted with washers or backing plates.
- Doors and drawers have positive latches for transport.
- Fold-down surfaces have chains, cables, or supports with a known load limit.
- All exposed plywood edges are sealed.
- Food-contact work surfaces are washable or removable.
- Sink or wash-bin areas cannot trap standing water against plywood seams.
- Stove clearances match the appliance manual.
- Raw food, clean utensils, trash, and dishwashing gear have separate zones.
- Bear-country food storage rules are checked for the specific destination.
The best camp kitchen woodworking plan is not the most complicated one. It is the one that fits your vehicle, keeps the cooking workflow clean, protects the plywood from water, respects stove clearances, and can be lifted safely after it is fully loaded. Build the box around real gear, reinforce the hardware like it will be bounced down a rough road, and leave yourself enough flexibility to change the interior as your camping setup evolves.
Frequently Asked Questions
What is the best plywood thickness for a camp kitchen chuck box?
Use 1/2-inch plywood for most portable chuck boxes because it balances strength and weight. Use 3/4-inch plywood only for high-load rails, cleats, or reinforced surfaces. A full 3/4-inch plywood box can become too heavy once cookware, food, fuel, and water are loaded.
How much does it cost to build a DIY camp kitchen box in 2026?
A basic DIY chuck box usually costs about $100 to $250 in 2026. A premium version with Baltic birch or marine plywood, stainless hardware, drawer slides, weather seals, and upgraded prep surfaces can cost $250 to $600 or more.
What’s actually slowing this PC down?
Pick the symptom - the matching free tool is one click away.
Can I put a propane camp stove on a wooden chuck box?
Only if the stove manufacturer’s manual allows the required clearances and the surface is appropriate for heat. In many cases, the safer setup is to store the stove in the box and cook on a separate heat-resistant camp table or removable platform.
Is a wooden chuck box bear-resistant?
No. A wooden chuck box is useful for organizing food and cooking gear, but it is not bear-resistant storage. In bear country, follow the specific rules for that park, forest, campground, or public land, which may require approved containers, lockers, or other food-storage methods.
Do I need a permit to build a camp kitchen?
A portable camp kitchen chuck box usually does not require a permit because it is movable gear. A permanent backyard outdoor kitchen may require permits when it includes gas, electrical, plumbing, drainage, masonry, fixed appliances, or roofed structures.
What should be included in a camp kitchen woodworking plan cut list?
A useful cut list should include the top, bottom, sides, back, doors, shelves, dividers, cleats, hinge clearances, latch locations, and kerf allowance. It should also be based on your actual stove, bins, cookware, cooler workflow, and vehicle cargo opening.
Quick Recap
Product prices and availability are accurate as of the date/time indicated and are subject to change. Any price and availability information displayed on Amazon at the time of purchase will apply.

