Do these 3 things before closing this tab:
1Fix the driver behind crashes, sound loss and screen glitches2Repair Windows errors before they cause bigger problems3Scan for outdated or missing drivers - takes under a minuteSome links on this page are affiliate links: if you buy through them we may earn a commission, at no extra cost to you.
A good workbench changes how a garage works. A bad one becomes a shelf for paint cans, battery chargers, and half-finished projects. The difference is rarely fancy joinery. It is height, depth, stiffness, clamping access, lighting, storage, power, and enough planning that the bench fits the work you actually do.
For most homeowners, the best starting point is a 6- to 8-foot bench, 24 to 30 inches deep, with a finished height somewhere between 34 and 39 inches. A basic 2×4-and-plywood bench can be built for about $100 to $250 in materials in 2026. A mobile bench with better casters, drawers, a thicker top, and clamping features usually lands around $250 to $700. A built-in workbench and cabinet wall can run from about $1,500 to $7,500 or more depending on cabinetry, electrical work, wall conditions, and finish level.
As an Amazon Associate I earn from qualifying purchases.
Free tools Windows power users keep installed
One-click scans. No signup required.
On our job sites, we treat a workbench like a small construction project. It needs a purpose, a load path, a usable layout, and safe services. Build it that way and it becomes the center of the shop instead of another flat surface covered in clutter.
Start With the Work, Not the Bench
Before buying lumber, write down the top three jobs this bench needs to handle. A bench for home repairs is not the same as a woodworking bench. A cabinet assembly station is not the same as an automotive work surface. The right answer changes with the work.
#1 Best Overall

- A variety of adjustable positions: Our height adjustment ranges from 26.3" to 35", allowing you to use this work bench comfortably when sitting or standing. What's more, no matter who to use, the table can be adjusted to the most suitable height for the user.
- Solid Rubber Wood & Steel Frame: Crafted with rubber wood which is varnish of environmental protection for tabletop, supporting to be used in a long time. Also crafted with steel frame for stability, the work bench holds a high load bearing capacity max 2000 lbs, ideal for projects ranging from gardening to car repair.
- Power Strip with ETL Certification: The portable work table is with 4 AC outlets and 2 USB-A ports on the power strip, which is readily available for simultaneously power electric tools. And the socket has passed ETL certification for its security and durability.
- Double regulation and protection: The bottom of our garage bench is designed with adjustable height wheels, which not only adjusts the balance and allows for a higher level of stability, but also avoids damage to the ground caused by metal directly rubbing against the ground during movement.
- Accessible Installation: Don’t worry about the installation, all accessories, required tools, and detailed installation instructions are included, which to help you to put all the components together in short minute.
For general garage repair, prioritize durability, storage, and easy cleanup. A plywood or butcher-block top, lower shelf, pegboard or slatwall, and plenty of lighting may be enough. For cabinet and woodworking tasks, flatness and clamping matter more. You need vise access, dog holes or T-track, room for glue-ups, and enough weight or anchoring to keep the bench from walking while you plane, sand, rout, or assemble. For mixed-use garages, mobility may matter more than mass, especially if the bench has to move around cars, lawn equipment, or seasonal storage.
A useful planning rule is to design the first 4 feet of the bench around workholding. That is where the vise, clamps, dog holes, T-track, bench dogs, and overhanging edges belong. Then plan storage around what you reach for constantly: drill bits, driver bits, pencils, tape measures, glue, squares, clamps, fasteners, batteries, safety glasses, and hearing protection.
Do not start with a giant top just because the wall is long. A 12-foot bench with poor lighting, no clamping access, and cords stretched across the floor is less useful than a compact 6-foot bench that is laid out correctly.
Choose the Right Height, Depth, and Length
Workbench height is personal, but there are reliable ranges. For general woodworking and garage tasks, 34 to 36 inches works for many adults. Lower benches, roughly 29 to 33 inches, are better when you need body weight over a hand plane, chisel, or stubborn assembly. Taller benches, about 38 to 39 inches, help with detail work, layout, small repairs, carving, electronics, and jobs where bending over gets old fast.
Mock up the height before you commit. Stack plywood on sawhorses, clamp a scrap top at different heights, or set a temporary surface on blocks. Spend 15 minutes pretending to sand, drill, clamp, assemble, and sweep. If your shoulders rise while working, the bench is likely too high. If your lower back complains while marking parts, it may be too low.
Depth is where many garage benches go wrong. A wall bench should usually be 24 to 30 inches deep. Beyond that, the back of the bench becomes hard to reach, especially under upper cabinets. If the bench is accessible from both sides, 36 inches can work, but it needs clear walking room around it. For a one-car or two-car garage, a 24-inch-deep wall bench often gives the best balance of usable work surface and vehicle clearance.
Length depends on the work. Six feet is a practical starter size. Eight feet is better if you break down boards, repair household items, or want a miter saw zone. Ten to twelve feet starts to make sense for cabinet assembly, longer trim, built-in storage, or a continuous run with base cabinets.
| Workbench type | Typical size | Best use | 2026 cost range |
|---|---|---|---|
| Basic garage bench | 6 ft long x 24-30 in deep x 34-36 in high | Repairs, tools, general DIY | $100-$250 materials |
| Mobile shop bench | 4-6 ft long x 28-36 in deep x 34-39 in high | Flexible garage layouts, assembly, sanding | $250-$700 materials |
| Serious woodworking bench | 6-8 ft long x 24-30 in deep x 29-36 in high | Hand tools, clamping, cabinet work | $700-$2,500+ DIY materials |
| Built-in workbench wall | 8-12+ ft long x 24-30 in deep | Garage shop, storage, cabinetry, tool wall | $1,500-$7,500+ installed |
Build the Structure Like It Has a Job to Do
A workbench frame has to resist vertical load and side-to-side racking. The top holds the work. The legs carry the weight. The aprons, stretchers, bracing, and fasteners keep it square. If the bench wiggles when you push on it, it will get worse once a vise, tools, lumber, and drawers are added.
For a basic DIY bench, 2×4 framing is still hard to beat. In 2026, 8-foot 2×4 studs are commonly around $4 each nationally, depending on region and grade. A simple 6-foot bench can be framed with 2×4 legs, upper and lower rails, a plywood top, and a lower shelf. Use construction screws, glue where appropriate, and blocking at corners. Pre-drill near board ends to reduce splitting.
For a stronger bench, double up the front apron, add stretchers low between the legs, and use plywood panels or diagonal bracing to resist racking. If the bench will be mobile, structure matters even more. Casters add leverage. Every time you roll over a crack, slope, or garage threshold, the frame twists. Use heavy-duty locking casters rated for the full combined load: bench, tools, stored materials, and dynamic movement. A 250-pound bench carrying 300 pounds of tools and material should not be sitting on four bargain casters rated exactly 150 pounds each. Leave a safety margin.
For wall benches, fasten into studs or masonry with load-rated fasteners. Drywall anchors are not a substitute for structural attachment. If upper cabinets, French cleats, lumber racks, or heavy tools are going above the bench, map the studs and blocking before final cabinet placement. Heavy storage belongs low whenever possible. That reduces tip-over risk and keeps the wall from doing work it was not designed to do.
Pick a Workbench Top You Can Actually Use
The top is a wear surface, not a museum piece. A minimum 3/4-inch plywood top is common for DIY benches. It is affordable, available, and strong enough for many garage tasks when supported properly. In 2026, 3/4-inch 4×8 sheet goods commonly run about $47 to $80 depending on panel type and local market. For a better top, laminate two layers of 3/4-inch plywood, add MDF as a sacrificial skin, or edge the front with hardwood.
For cabinet work, flatness matters. A hollow-core door can work as a temporary assembly surface, but a permanent bench should be flatter and stiffer. A torsion-box top is a good option when you want a large, flat, lightweight surface. A laminated plywood top is simpler and more forgiving for most homeowners. Butcher block looks good and works well for general tasks, but it is not automatically better for glue, paint, metal work, or heavy abuse.
Add a replaceable sacrificial layer if the bench will see cutting, drilling, glue, stain, paint, or mechanical work. A 1/4-inch hardboard skin, 1/2-inch MDF layer, or replaceable plywood cap lets you work without treating every dent like a failure. Fasten it so it can be changed later. Avoid burying screw heads where saw blades, router bits, or chisels could find them.
The Tool Desk
Outbyte PC Repair FREERepair Windows errors before they cause bigger problemsFix Now →Outbyte Driver Updater FREEFix the driver behind crashes, sound loss and screen glitchesFind Drivers →Rank #2
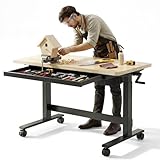
- Adjustable Height, Made for Your Comfort: Easily raise or lower the work surface from 28.27" to 44" with the smooth hand crank. Adjust the height to suit different users, tasks, and working positions—from seated sewing and crafting to standing 3D printer maintenance, painting, and DIY projects. No motor or power outlet required.
- A Workstation for More Than the Garage: Designed for everyday projects at home, this versatile workbench works as a 3D printer table, sewing table, craft table, painting station, hobby desk, or repair workbench. The 47.24" x 23.62" work surface provides ample room for equipment, tools, materials, and project supplies.
- Easy to Move Around Your Home: Four 360° swivel casters let you roll the workbench wherever your project takes you. Two locking casters help keep the table securely in place while working, making it easy to move between a garage, craft room, home office, workshop, or other living spaces.
- Built-In Drawer for Small Essentials: Keep tools, screws, sewing accessories, brushes, craft materials, and other small items organized in the integrated drawer. Store frequently used essentials close at hand while keeping the spacious work surface clear and clutter-free.
- Built with a reinforced steel frame and natural rubberwood work surface, this workbench supports up to 300 lbs of evenly distributed weight and has been tested to 480 lbs (1.6× rated capacity) for added confidence. The sturdy construction provides a stable platform for tools, equipment, crafting materials, and other projects, while the warm wood finish blends easily into both workshop and home environments.
Seal the top, edges, and underside. Plywood and MDF move with humidity, especially in garages. Sealing only the visible face can create uneven moisture movement. A simple polyurethane, hardwax oil, or shop-grade finish on all sides helps the top stay flatter and makes glue and dirt easier to remove.
Plan Clamping, Vises, and Workholding Early
Most workbench regrets show up when the homeowner tries to clamp something. If every edge is flush against a wall, cabinet side, or thick overhang with no clearance, clamping becomes awkward. Leave at least part of the front edge open and accessible. A 2- to 4-inch overhang at the front can make common clamps easier to use, but do not create so much overhang that the top flexes.
A front vise or quick-release woodworking vise should be mounted where your dominant workflow makes sense. Right-handed woodworkers often like the main vise toward the left front corner so the long part of a board can extend to the right across the bench, but the right answer depends on your shop layout. A metal machinist vise is useful for repairs, but it can damage wood parts and interfere with flat assembly. If you do both, mount the metal vise on a removable plate or dedicate one corner to rough work.
Dog holes, holdfasts, and T-track can be useful, but only if they match the work. A grid of 3/4-inch dog holes is common on woodworking benches. T-track can help with jigs and stops, but it also collects dust and glue. For many homeowners, a few dog holes, a front vise, a removable bench hook, and good clamps are more useful than covering the whole top with hardware.
Quick wins for a faster PC:
Clear out junk files and repair common Windows errorsFree Scan →Fix the driver behind crashes, sound loss and screen glitchesFind Drivers →Storage Should Support the Work, Not Swallow It
Good storage keeps the bench clear. Bad storage turns the bench into the only place anything can go. Divide storage into three zones: immediate reach, nearby reach, and bulk storage.
Immediate-reach items belong between eye and chest height or in the top drawer: tape measure, pencils, knife, square, driver bits, safety glasses, hearing protection, glue, and the fasteners used most often. Nearby-reach tools can live in drawers, shelves, base cabinets, or on a French cleat wall. Bulk storage, including extra lumber, large clamps, seasonal tools, paint, and rarely used jigs, should not crowd the main work surface.
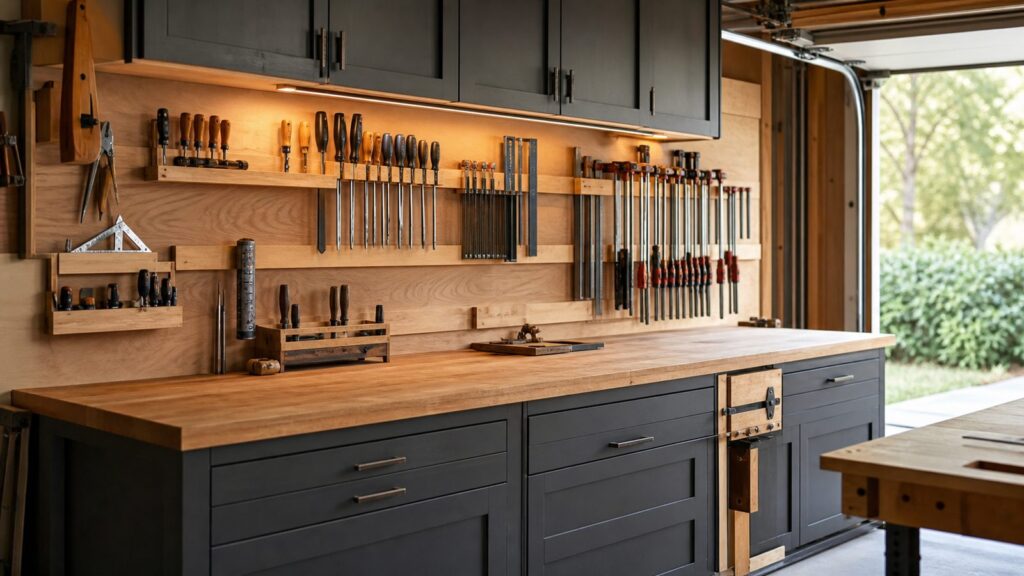
For a garage cabinet-and-workbench wall, we often leave toe space or a recessed base at the lower cabinets. It sounds minor until you stand at the bench for an hour. Without toe space, you lean forward more than necessary. A 3- to 4-inch toe recess can make a built-in bench feel more like a real work station than a row of boxes with a countertop.
French cleats and slatwall are strong choices above a bench, but the heavy items still need respect. Put heavy tools lower. Put daily hand tools at eye-to-chest height. Keep sharp tools protected. Keep battery chargers and electronics away from dust-producing operations whenever possible.
Do Not Treat Power as an Afterthought
Power is one of the biggest differences between a safe, efficient garage shop and a frustrating one. Plan outlet locations around actual tool cords, chargers, dust collection, task lighting, and where you stand. The goal is to avoid extension cords across walking paths and power strips acting as permanent wiring.
Garages generally require GFCI protection for receptacles. Many jurisdictions also have requirements that affect branch circuits, receptacle placement, AFCI protection, lighting, and permitted wiring methods. New circuits, hardwired lighting, and new receptacle locations can require a licensed electrician and a permit. Costs vary widely because the work depends on panel capacity, distance from the electrical panel, wall access, conduit or cable routing, local labor rates, and drywall repair.
As a practical layout, place receptacles above the bench surface, not behind base cabinets. For a serious bench, plan power at both ends and at least one central location. If you use battery tools, dedicate a charging shelf away from sanding dust and finishing fumes. If you use a miter saw, shop vacuum, dust collector, compressor, heater, or larger stationary tool, ask an electrician whether a dedicated circuit is appropriate.
Lighting deserves the same attention. General garage lighting is not enough once upper cabinets, shelves, or your own body cast shadows over the work. Add task lighting under upper cabinets or shelves and aim it at the bench surface, not into your eyes. Bright, even light reduces mistakes when marking, cutting, sanding, and finishing.
Outdated Drivers Are Slowing You Down
One free scan finds every outdated or missing driver and matches the right update for your exact hardware.Free scan · exact hardware matchWindows Errors? Fix Them Before They Spread
Repair common Windows errors and clear accumulated junk for a smoother, more stable PC - no reinstall needed.Free scan · no reinstallControl Dust Before It Controls the Shop
Wood dust is not just a housekeeping problem. Fine dust hangs in the air, settles into chargers and tools, and creates exposure concerns. The best control is collection at the source: a dust port at the saw, sander, router table, or work area connected to a shop vacuum or dust collector. Respirators and masks help, but they should not be the only plan.
If the bench will support sanding, routing, cutting plywood, or cabinet work, plan dust collection before drawers and cabinets are finalized. Decide where the vacuum or dust collector will sit, how the hose will run, where the cord will plug in, and how you will keep hoses from becoming trip hazards. A hose path that looks fine on paper can be miserable if it crosses the front of every drawer.
Rank #3

- Foldable Tabletop with Practical Sizes:Featured with a flexible foldable tabletop design, it folds down to 48"x 24" for ultra-compact storage and expands to 48"x 32" for a spacious working surface—effortlessly balancing ample operational space and space-saving storage, perfect for small garages, basements and limited work areas with variable usage needs.
- Exclusive 2-in-1 Upgraded Design:Equipped with 4 AC power outlets + 2 Type-C fast-charging ports, satisfying simultaneous power needs for drills, grinders, desk lamps, and other devices—eliminating messy extension cords. Integrated tool pegboard below the outlets allows hanging wrenches, screwdrivers, tape measures, and other frequently used tools, addressing the market pain point of "either outlets or pegboards alone" for more efficient tool access during work.
- 9-Level Height Adjustment:27"-37" Adjuestment height fit both standing and sitting work positions (most competitors offer 6 levels). Innovative ergonomic hand-tightened screws enable tool-free height adjustments—no wrenches or professional tools needed, boosting operation efficiency by 50%. With an impressive 2000 lbs weight capacity, it stably supports heavy machinery, hardware tools, and raw materials, handling even the toughest heavy-duty tasks with ease.
- Superior Load-Bearing Capacity:Solid rubberwood tabletop paired with heavy-duty all-metal legs, combined with a redesigned sturdy steel frame. The natural rubberwood surface is scratch-resistant and wear-proof, while the metal legs offer rust and deformation resistance—solving the common issues of wobbly frames and easily damaged tabletops in low-quality workbenches. Built for heavy-duty tasks, it delivers exceptional durability and load-bearing capacity.
- Versatile & Easy to Assemble:Suitable for garage repair, workshop processing, home storage and more, meeting all home and professional needs with multiple size options available. All labeled parts come with illustrated instructions and full mounting hardware—tool-free assembly, no extra accessories needed, ready to use right after setup.
Separate dusty work from battery charging, electronics, and finishing supplies. Do not store oily rags, solvents, stains, and aerosol cans right next to a sanding station. Keep finishing materials in appropriate containers and follow label instructions for storage and disposal. In attached garages, remember that the wall and ceiling between the garage and living space are part of the home’s fire separation strategy. Do not casually cut, notch, penetrate, or remove rated layers without understanding what has to be restored.
Realistic 2026 Workbench Costs
The famous low-cost bench headline rarely includes everything homeowners actually buy. Screws, glue, casters, edging, finish, lighting, clamps, vise hardware, bins, drawer slides, power upgrades, and wall storage add up. That does not mean the project has to be expensive. It means the budget should match the goal.
A basic 2×4-and-plywood workbench usually costs about $100 to $250 in materials. That assumes 2×4 framing, construction screws, one 4×8 sheet of plywood, glue, and a simple lower shelf. It is a good weekend project for a homeowner with a circular saw, drill, level, square, clamps, and basic layout skills.
An upgraded mobile bench usually costs about $250 to $700. The biggest drivers are heavy-duty locking casters, thicker tops, hardwood edging, drawer boxes, drawer slides, vise hardware, dog holes, T-track, leveling feet, and better plywood. A serious woodworking bench can run $700 to $2,500 or more in DIY materials depending on hardwood species, vises, slab thickness, and whether lumber is construction-grade, kiln-dried hardwood, or purchased as a pre-milled top.
Prefab garage workbenches commonly range from about $200 to $1,500 or more, with load rating, top material, storage, and adjustability driving price. Installed workbench and cabinet walls are a different category. A useful garage storage/workbench zone can run about $1,500 to $7,500 or more. Installed garage cabinets are often priced around $505 to $2,156 per cabinet, while custom systems with workbench surfaces, slatwall, tall cabinets, and coordinated storage commonly fall in the $4,000 to $8,500 range.
Labor matters too. Handyman or skilled residential labor is commonly quoted around $45 to $125 per hour nationally in 2026, with higher-cost metros and licensed trades reaching $100 to $150 or more per hour. A simple bench may take 3 to 8 hours. A built-in cabinet/workbench wall can take one to several days, plus design, ordering, electrical work, and finishing.
What’s actually slowing this PC down?
Pick the symptom - the matching free tool is one click away.
When to DIY and When to Hire a Pro
DIY makes sense when the bench is freestanding, the design is simple, the loads are moderate, and no electrical or structural work is involved. A 6-foot 2×4 bench with a plywood top and lower shelf is a good homeowner project. So is adding a sacrificial top, mounting a small vise, building a French cleat panel, or upgrading lighting with plug-in fixtures used according to the manufacturer’s instructions.
Hire a pro when the bench becomes part of the building. That includes wall-mounted cabinets, long built-ins, heavy lumber racks, structural anchoring into masonry, complicated garage slopes, custom drawers, finished cabinet faces, or work surfaces that need to align with existing storage. A carpenter or cabinet installer can keep the run level, strong, and clean. A licensed electrician should handle new circuits, hardwired lighting, added receptacles where required, and panel work.
Permits vary by jurisdiction, but a freestanding bench usually does not require one. Electrical changes often do. Altering fire separation in an attached garage can also trigger code concerns. If the project touches wiring, rated drywall assemblies, gas appliances, HVAC equipment, or structural framing, pause and verify before cutting.
A Practical Zero-to-Hero Build Plan
For most homeowners, the smartest path is phased. Build the core bench first, then add the upgrades that prove they are needed.
Recommended Free Tools
Phase 1: Build the Base Bench
Start with a 6- or 8-foot bench, 24 to 30 inches deep. Use 2×4 framing, a 3/4-inch plywood top, and a lower shelf. Keep the front edge clamp-friendly. Make the frame square, stiff, and level. Seal the top and edges. Expect a weekend of work for a careful DIY build, or 3 to 8 labor hours for a straightforward hired build.
Phase 2: Add Workholding and Lighting
Install the vise, dog holes, T-track, or clamping stops only after you have worked at the bench enough to know where they belong. Add task lighting aimed at the work surface. If upper cabinets or shelves are planned, test for shadows before final mounting.
Rank #4

- All-in-One Tool Organization: Everything within reach. The work bench includes two large pegboards (16.5" x 10.2" each) for hanging your most-used tools and accessories. No more searching—just grab what you need and work efficiently.
- A Variety of Adjustable Positions: GVGBUK height adjustment ranges from 27" to 35", allowing you to use this work bench comfortably when sitting or standing. What's more, no matter who to use, the table can be adjusted to the most suitable height for the user.
- Solid Rubber Wood & Steel Frame: Crafted with rubber wood which is varnish of environmental protection for tabletop, supporting to be used in a long time. Also crafted with steel frame for stability, the work bench holds a high load bearing capacity max 1500 lbs, ideal for projects ranging from gardening to car repair.
- Power Strip with ETL Certification: The portable work table is with 2 AC outlets and 2 USB ports on the power strip, which is readily available for simultaneously power electric tools. And the socket has passed ETL certification for its security and durability.
- Double Regulation and Protection: The bottom of our garage workbench is designed with adjustable height foot pads, which not only adjusts the balance and allows for a higher level of stability, but also avoids damage to the ground caused by direct friction of metal against the ground during movement.
Phase 3: Add Storage and Dust Control
Add drawers, bins, French cleats, slatwall, and cabinets based on actual use. Keep the most-used tools close and heavy items low. Plan dust collection hose paths so they do not block drawers, cords, or walking routes.
Phase 4: Upgrade Power Safely
If cords are stretched, breakers trip, or chargers are scattered around the garage, bring in an electrician to evaluate the circuit layout. A well-placed receptacle or dedicated circuit can be a better upgrade than another cabinet.
PC Slower Than It Used to Be?
A free scan shows the junk files, broken settings and background clutter dragging Windows down - then fixes them in one click.Free scan · Windows 10 & 11Crashes, No Sound, or Screen Glitches?
Random freezes, missing sound and display glitches usually trace back to one bad driver. Find and replace yours safely.Free scan · under a minuteCommon Mistakes That Make a Bench Less Useful
The first mistake is making the bench too deep against a wall. A 36-inch-deep wall bench sounds generous, but the back 8 to 12 inches often becomes dead storage. The second mistake is placing upper cabinets so low that they block lighting, headroom, and long material. The third is skipping clamping access along the front edge.
Another common problem is ignoring the garage floor. Many garage slabs slope toward the overhead door. That is good for drainage but bad for cabinets and rolling benches. Use leveling feet for stationary benches and locking casters for mobile benches. If a built-in cabinet wall crosses a sloped slab, plan shims, bases, and finished toe kicks carefully so the work surface ends up level.
Finally, do not underestimate future clearance. Leave room for a miter saw station, table saw outfeed, dust collector, lumber rack, and handling 4×8 sheet goods if the garage footprint allows it. A bench that blocks every future tool becomes expensive to work around.
The Bottom Line
A workbench becomes useful when it is designed around real work. For most garages, that means 24 to 30 inches deep, 6 to 8 feet long, roughly 34 to 39 inches high, with a stiff frame, replaceable top, clamp-friendly front edge, good task lighting, safe power, and storage that keeps the surface clear.
What’s actually slowing this PC down?
Pick the symptom - the matching free tool is one click away.
If you are building a simple bench, keep it sturdy and spend your money on a better top, lighting, and clamps. If you are building a cabinet-and-workbench wall, plan it like permanent shop infrastructure. The difference shows up every time you reach for a tool, clamp a board, plug in a saw, or finish a project without fighting the space.
Frequently Asked Questions
What is the best height for a garage workbench?
For most general garage and woodworking tasks, 34 to 36 inches works well. Lower benches around 29 to 33 inches help with hand-planing force, while taller benches around 38 to 39 inches are better for detail work, assembly, and users who want less bending.
How much does it cost to build a workbench in 2026?
A basic DIY 2×4-and-plywood bench usually costs about $100 to $250 in materials. An upgraded mobile bench often runs $250 to $700, while a serious woodworking bench can cost $700 to $2,500 or more depending on lumber, hardware, vises, and top material.
Do I need a permit to build a workbench in my garage?
A freestanding workbench usually does not require a permit. Electrical changes, new circuits, hardwired lighting, added receptacles, structural changes, or alterations to fire separation in an attached garage may require permits depending on local code.
Free tools Windows power users keep installed
One-click scans. No signup required.
What is the best material for a workbench top?
A 3/4-inch plywood top is a practical minimum for many DIY benches. Two laminated layers of plywood, an MDF sacrificial skin, hardwood edging, or a butcher-block top can improve stiffness, flatness, and durability. For real shop use, a replaceable top layer is often the smartest upgrade.
Should a workbench be mobile or fixed?
Choose mobile if your garage has to flex around cars, storage, or changing projects. Choose fixed or built-in if you need maximum stiffness, heavy wall storage, a miter station, or cabinet-style organization. Mobile benches need strong bracing and locking casters rated above the total loaded weight.
How deep should a wall-mounted workbench be?
Most wall benches should be 24 to 30 inches deep. Deeper tops are hard to reach across unless the bench is accessible from both sides. If upper cabinets are installed above the bench, staying near 24 inches often keeps the workspace more comfortable.
Quick Recap
Product prices and availability are accurate as of the date/time indicated and are subject to change. Any price and availability information displayed on Amazon at the time of purchase will apply.

