Yes—you can build a higher-capacity backyard smokehouse from ordinary, non-pressure-treated lumber, sheet steel, cooking racks, and a controllable burner. The safest way to approach the project is as an adaptable reference design, not a universally approved blueprint: choose the site and check local building and fire rules before cutting wood, then build in controllable airflow, noncombustible fuel containment, food-safe interior surfaces, and two-temperature monitoring from the beginning.
The construction sequence below follows the University of Connecticut Extension smokehouse design, while the operating and food-safety guidance follows USDA recommendations. The UConn reference uses five tongue-and-groove pine boards per wall, a sloped roof, adjustable vents, shelf supports, and a propane burner with a cast-iron chip pan. Its original project cost was approximately $170, but that historical figure is not a current construction estimate.
Disclosure: Some product references in this guide may eventually be linked through affiliate partnerships. That does not replace checking product specifications, local rules, or the manufacturer’s instructions.
As an Amazon Associate I earn from qualifying purchases.
Do these 3 things before closing this tab:
1Repair Windows errors before they cause bigger problems2Fix the driver behind crashes, sound loss and screen glitches3Clear out junk files and repair common Windows errorsBefore you build: site, permits, and fire safety
A wooden smokehouse can burn if the burner, embers, grease, or fuel system gets out of control. The structure must be supervised throughout every smoking session. Do not place it beneath trees, beside a shed, against a house, near combustible storage, or where smoke will create a nuisance or visibility problem.
Ask your local building department, zoning office, fire district, or other authority having jurisdiction about:
#1 Best Overall

- Smart Display Base with Control: The ThermoMaven G1 wireless meat thermometer features a versatile smart display base that offers real-time temperature readings and allows you to set temperatures directly on the device—no app required. With our user-friendly one-click setup, you can connect the probe, pair it with the base, and start cooking in seconds—no complicated setup needed!
- Reliable Sub-1G Connectivity: Experience stable, long-range monitoring with our advanced Sub-1G technology, allowing you to track your food from up to 3000 feet away (unobstructed) and 700 feet in obstructed areas via the smart base. Enjoy the freedom to relax and socialize without being tied to the grill!
- NIST Certified 6-Sensor Precision: The ThermoMaven G1 digital meat thermometer features 6 sensors (5 internal and 1 external) with NIST-certified accuracy of ±0.5°F and a resolution of 0.01°F. Enjoy the confidence of perfectly cooked meals every time, ensuring your food is never undercooked or overcooked.
- High-Heat Resistance & IPX8 Waterproof: The wireless meat probe withstands the internal meat temperature up to 221°F and the ambient temperature up to 752°F, making it perfect for grilling, roasting, and any culinary adventure. With a superior IPX8 waterproof rating, the ThermoMaven probes are dishwasher-safe for easy cleanup. The smart base is splash-resistant design, kindly wipe clean with a damp cloth—enjoy your meal without the hassle!
- App-Controlled Cooking: Say goodbye to tangled wires! Our Bluetooth meat thermometer monitors your cooking progress via Wi-Fi using the free ThermoMaven App. Set alerts, track temperatures, and achieve perfect results every time from your phone. Compatible with iOS and Android devices, available on the App Store and Google Play!
- Whether a smokehouse requires a building, electrical, gas, or fire permit.
- Required setbacks from houses, accessory buildings, property lines, fences, vegetation, and fuel storage.
- Maximum floor area and height.
- Whether a wood-framed smokehouse needs a concrete foundation, masonry base, or other approved noncombustible support.
- Requirements for the burner, propane cylinder, chimney or vents, fire extinguisher, and fuel containment.
These requirements are not national standards. For example, one St. Louis County residential checklist limits a smokehouse to 25 square feet and 8 feet in height, requires substantial setbacks, and specifies a continuous concrete foundation or approved noncombustible base. In the example’s combustible-construction rules, fuel must be contained in a pit or metal receptacle and a 50-foot separation is cited. Those figures apply to that jurisdiction only; use your own local authority’s current rules.
Photo 1: Photograph the proposed site with nearby buildings, trees, fences, and fuel-storage areas visible. This makes setbacks and clearance decisions easier to review before construction.
Use the UConn design as a reference, not a fixed blueprint
The reference smokehouse is approximately 6 feet high at the front and 5 feet 9 inches at the back, producing a sloped top. Each side is assembled from five 1-by-6-by-8-foot tongue-and-groove pine boards. The rear wall is built similarly. The design is useful for understanding the construction sequence, but your final footprint, framing, base, roof, vents, and burner arrangement must suit your site, capacity needs, and local structural and fire requirements.
Do not copy a dimension simply because it appears in the reference. A larger chamber needs adequate bracing and a burner capable of maintaining the required temperature without placing excessive heat against the walls. A smaller chamber may need fewer shelves and a different heat shield.
Materials and tools
Core materials
- Non-pressure-treated, dry exterior-grade lumber for the walls, door, and framing. The UConn reference used 21 1-by-6-by-8-foot tongue-and-groove pine boards.
- Framing lumber that can be ripped into approximately 1.5-by-1.5-inch strips, plus 2-by-4 lumber for front cross braces and other structural reinforcement.
- Fasteners suitable for outdoor construction, selected for the lumber and local conditions.
- Two 4-inch strap hinges and a positive latch or hasp for the door.
- Ungalvanized sheet steel for the roof, fastened to the top edges with a small clearance gap between the roof and side walls as used in the reference design.
- Expanded-steel or stainless-steel cooking shelves, angle pieces for shelf reinforcement, or appropriately sized food-safe smoker racks.
- Hanging bars and food-safe hooks if you plan to smoke sausage, fish, jerky, or whole cuts vertically.
- Materials for adjustable upper and lower dampers, plus screens that can keep insects and rodents out without blocking the draft.
- A locally approved masonry, concrete, stone, or other noncombustible base.
- A propane burner designed for outdoor cooking, a cast-iron chip pan, hardwood smoking chips or sawdust, and a noncombustible drip-pan arrangement.
- One thermometer for chamber air and one for the food. A wireless meat thermometer can make it easier to monitor one or more probes without opening the door, but no model should be assumed suitable without checking its temperature range and instructions.
- Heat-resistant gloves, eye protection, a suitable fire extinguisher, and a metal container for ash or spent fuel.
Never use pressure-treated lumber where heat or smoke can contact the food or its cooking environment. Do not use galvanized metal, painted metal, unknown salvaged sheet metal, or materials that may release residues when heated. USDA guidance warns against makeshift containers and materials not intended for cooking. The same rule applies to shelves, hooks, drip pans, liners, and fasteners that could contact food or smoke.
Useful tools
Plan on a tape measure, level, carpenter’s square, straightedge, saw, drill and bits, clamps, hammer, chisel or notch-cutting tools, wrenches for the burner hardware, metal snips or a suitable cutting tool for sheet steel, and personal protective equipment. Follow the tool and burner manufacturers’ safety instructions.
What’s actually slowing this PC down?
Pick the symptom - the matching free tool is one click away.
Step 1: Prepare a stable, noncombustible base
Start with a level base that will not shift, settle, or allow the smokehouse to tilt. Masonry, concrete, or another base approved by your local authority is preferable to placing a wooden structure directly on soil. The base must also accommodate the fuel container and protect the surrounding area from heat and embers.
The UConn reference sits on a small stone foundation that leaves space beneath the smokehouse for incoming air. If your base closes that gap, provide low ventilation openings as part of the design. Do not improvise openings after the walls are assembled if doing so would compromise the base or let embers reach combustible material.
Keep the floor and burner area cleanable. A shallow, removable metal drip pan can catch grease, but it must not sit so close to the burner that grease can ignite or airflow is blocked.
Photo 2: Show the level base, its noncombustible surface, and the clearance around the proposed walls before the first panel is installed.
Recommended Free Tools
Rank #2

- Smart Display Base: Unlike other thermometers that require an app to function, the P2’s smart base provides direct target temperature setting and real-time readings display. For advanced features like cooking history and AI-guided cooking, the free ThermoMaven APP (iOS/Andriod) is also available, giving you the best of both worlds.
- Unlimited Range via Wi-Fi: Unlike Bluetooth-only thermometer, the ThermoMaven P2 uses 2.4GHz Wi-Fi to connect the base to your phone for truly unlimited range. Requires a 2.4GHz Wi-Fi network (compatible with most home routers; if your router is dual-band, connect the base to the 2.4GHz band). Monitor your cooking from anywhere in your home or outside.
- 100% Wireless Freedom: Kiss tangled wires goodbye with the ThermoMaven P2. Roam freely with Bluetooth long-range connectivity, linking seamlessly from the base to the probes.
- 6-Sensor Accuracy: Equipped with 6 sensors (5 internal and 1 external), the precision of ThermoMaven P2 meat probe is NIST-certified, delivering ±0.5°F accuracy and 0.01°F resolution. You can confidently ensure your food is never undercooked or overcooked.
- Two Ultra-Thin Probes: Allows you to monitor time and temperature for two different dishes at once. The ultra-thin design preserves the integrity of your proteins and retains their juices, ensuring perfectly cooked meat every time.
Step 2: Build the two side panels
- Lay five tongue-and-groove pine boards on a flat surface for the first side. Orient the boards consistently and check that the joints close fully.
- Measure and mark the sloping top. In the UConn reference, the front is approximately 6 feet high and the rear approximately 5 feet 9 inches.
- Cut the panel ends and dry-fit the assembly before fastening. The outside-edge tongue may need to be removed where the panel meets the framing or another wall.
- Clamp the boards together, check the panel for square, and fasten it to the approximately 1.5-by-1.5-inch framing strips.
- Build the second side to match. Compare the panels face-to-face before moving them to the base.
Keep the interior face free of pressure-treated wood, paint, adhesive residue, and unnecessary coatings. A smokehouse interior does not need to be sealed like a living space; it needs to be structurally sound, reasonably cleanable, and able to move air.
Photo 3: Photograph one side panel flat on the work surface, showing the five boards, the sloped cut, the framing strips, and the removed outside tongue.
Step 3: Stand, frame, and square the side panels
Position the two side panels on the base with the interior width matched to your planned racks and hanging bars. Temporarily brace them so they cannot fall while you measure and fasten.
- Dry-fit the side panels and check that their front and rear edges are parallel.
- Install the rear-edge framing pieces and any bottom or top framing required by your chosen footprint.
- Measure diagonally across the opening in both directions. Adjust until the measurements are equal or close enough for the structure to be square.
- Clamp before fastening. Recheck plumb, level, and the planned door opening after each major connection.
The reference design uses ripped framing pieces approximately 1.5 by 1.5 inches and additional framing along the rear edges. Adapt that framing to the span, wall height, roof weight, wind exposure, and local structural requirements instead of treating it as an engineered specification.
Step 4: Add the rear wall
Assemble the rear wall from five pine boards in the same manner as the side panels. Fit its upper and lower framing pieces between the side framing, then clamp, square, and fasten it.
Before permanently fastening the rear wall, confirm that the sloped top lines up on both sides and that there is enough room for the planned upper vents. A misaligned rear wall can make the roof gap uneven and cause the door opening to twist.
Photo 4: Take a rear three-quarter view showing the five-board back wall, the side framing, the sloped top, and the square of the carcass.
Step 5: Frame the front opening
The front opening must be rigid enough to carry the door hinges and latch without flexing. The UConn design uses 2-by-4 cross braces, with the brace ends notched around the side-panel framing.
Quick wins for a faster PC:
Scan for outdated or missing drivers - takes under a minuteDriver Scan →Clear out junk files and repair common Windows errorsFree Scan →- Measure the opening for the door you intend to build, allowing a small, practical clearance for seasonal wood movement and a latch that can pull the door closed.
- Mark the brace notches so the 2-by-4 members sit securely around the side framing rather than merely touching it.
- Cut and test-fit the braces. Confirm that the opening remains plumb and that the door will not collide with the roof or base.
- Fasten the braces after the opening is square.
Do not make the door opening so tight that a little humidity or heat-related movement prevents the hasp from closing. Conversely, an oversized gap can make temperature and smoke control difficult.
Step 6: Build and hang the door
Use the remaining pine boards for the door, supported on the interior with one-inch boards arranged in a Z pattern as in the reference design. The diagonal brace should resist sagging without interfering with the door jamb, hinges, or latch.
Rank #3

- SMART BASE CONTROL: Set temperatures, monitor progress, and receive alerts directly from the base without needing your phone nearby.
- COOK PERFECT MEAT EVERY TIME: Tracks the true core temperature in real time with the 6-sensor wireless meat probe and know exactly when your steak, chicken, or BBQ reaches the perfect doneness.
- BUILT FOR BBQ & EVERYDAY COOKING : Perfect for grilling, smoking, roasting, oven cooking, and more with waterproof probes designed for everyday use.
- 1000FT RANGE & WIFI BRIDGE: Enjoy up to 1000ft of robust wireless connection between the probe and the smart base. Connect the base to your phone's WiFi for extended, real-time monitoring from anywhere—whether you're relaxing on the patio or prepping in the kitchen. The smart base can also connects to your phone through Bluetooth.
- AI-POWERED GUIDED COOKING: Cook smarter using the ThermoMaven app, which features an AI-powered recipe generator for guided cooking. Set up your cook, track real-time temperature graphs, and receive instant alerts when your food reaches the perfect doneness.
- Lay the door boards together and measure the opening before cutting the final width.
- Fit the interior boards in a Z arrangement and fasten them without leaving protruding points toward the food or operator.
- Install two 4-inch strap hinges into sound framing. Support the door while fastening so its weight does not pull the opening out of square.
- Add a positive latch or hasp. Heat and moisture can cause the door to warp outward during a smoke cycle; the hasp helps limit uncontrolled heat and smoke escape.
The latch is a control and safety component, not an invitation to make the chamber airtight. The burner needs oxygen, smoke must pass across the food, and combustion products and excess heat need a controlled exit.
Photo 5: Show the inside of the door with its Z brace, the two strap hinges, and the closed hasp. Include a second view with the door open so the usable chamber opening is clear.
Step 7: Install the roof without using galvanized metal
Cover the top edges with sheet steel as in the reference design. Leave a small clearance gap between the roof and side walls if that is part of your ventilation plan, and fasten the roof securely against wind uplift.
Do not substitute galvanized roofing simply because it is readily available. UConn specifically recommends avoiding galvanized metal in this design. Separately, any shelf, pan, rack, hook, or liner exposed to food or smoke should be intended for cooking use, corrosion-resistant, and cleaned according to its manufacturer’s instructions.
Roof metal protects the wood from weather; it is not automatically a food-safe liner. Keep the burner and chip pan far enough from the roof and walls that normal operation does not overheat them.
Photo 6: Photograph the roof from above and from inside the chamber, showing the sheet-steel cover, the clearance gap, and the absence of exposed sharp edges.
Free tools Windows power users keep installed
One-click scans. No signup required.
Step 8: Add shelves and hanging supports
The reference layout has eight shelf supports—four on each interior side. The first support is 18 inches above the floor, with subsequent supports 14 inches apart. Those measurements provide a useful starting layout, but adjust them for your food, racks, drip pan, heat source, and airflow.
- Mark matching shelf-support heights on both side walls. Use a level across the chamber so shelves will sit flat.
- Leave enough clearance around every rack for smoke to circulate and for you to load and remove food without touching the walls.
- Reinforce expanded-steel shelves with angle pieces around their perimeter.
- Remove manufacturing oil, dirt, and metal debris before any shelf is used. Clean and season or prepare the rack only as its manufacturer directs.
- Add hanging bars or food-safe hooks above or between shelves if you will hang sausage, fish, strips of meat, or other products. Keep hanging food clear of the roof, walls, burner, and drip pan.
A ready-made stainless-steel smoking rack may be a simpler alternative to cutting expanded metal, but confirm its dimensions, load capacity, corrosion resistance, and food-contact suitability before buying. Racks are implementation aids; they do not solve an undersized chamber or poor airflow.
Photo 7: Show the shelf-support marks, the 18-inch first level, the 14-inch spacing, the reinforced shelf edges, and the hanging-bar clearance.
Step 9: Create controllable bottom-to-top airflow
The smokehouse should draw air from low to high rather than relying on random cracks. In the UConn design, there are two 2-inch holes near the top of each side. Where the base blocks incoming air, two additional 2-inch holes near the bottom of each side can provide make-up air.
Crashes, No Sound, or Screen Glitches?
Random freezes, missing sound and display glitches usually trace back to one bad driver. Find and replace yours safely.Free scan · under a minuteWindows Errors? Fix Them Before They Spread
Repair common Windows errors and clear accumulated junk for a smoother, more stable PC - no reinstall needed.Free scan · no reinstall- Place the upper outlets where rising heat and smoke can leave without being blocked by the roof or nearby structure.
- Add lower inlets if the base does not leave an air path below the walls.
- Fit adjustable covers so the openings can act as dampers. The adjustment must be usable while the smokehouse is operating without placing your hand over a hot surface.
- Add screens where needed to deter pests, but check that they do not become clogged with grease, ash, or soot.
- Test the draft with no food inside. Start with the upper outlet available and enough lower air for the burner to operate correctly.
Do not close every vent to hold smoke inside. A starved burner can produce unstable combustion, while trapped heat and combustion products can make the chamber dangerous. Airflow controls influence temperature, smoke density, burn quality, and drying rate; adjust the fuel first, then make small damper changes while watching both thermometers.
Rank #4

- DUAL-PROBE CONTROL — During bbq monitoring, track two foods separately for different meats, dishes or doneness preferences.
- BLUETOOTH APP VIEWING — Follow bbq monitoring temperature progress from your compatible phone instead of staying beside the cooker.
- PRECISION TRACKING — For bbq monitoring, continuous sensor feedback gives you clearer internal-temperature information while food cooks.
- SMART COOKING ALERTS — Set a target for bbq monitoring in the app and receive a notification as monitored food reaches your selected temperature.
- VERSATILE WIRELESS COOKING — Use the thermometer for bbq monitoring plus BBQ, grill, smoker, oven and everyday meat preparation.
Photo 8: Photograph the upper and lower vents with their damper covers and screens installed. A simple labeled side diagram is useful if the holes are difficult to see in a finished photo.
Step 10: Install the burner, chip pan, and drip pan
The UConn reference uses a liquid-propane single burner beneath or near an old cast-iron pan containing hardwood chips or sawdust. The heat source can be inside the smokehouse or outside with a duct. An external stove-like arrangement may be harder to regulate because it can overcook or overdry food before the chamber reaches the desired smoking condition.
Use only a burner and fuel system designed for outdoor cooking and operated exactly as its manufacturer specifies. Keep the flame, propane connections, chip pan, embers, and grease away from combustible walls. Provide a noncombustible containment area and follow local requirements for the propane cylinder, hose routing, regulator, and fuel storage.
Use known food-smoking wood such as apple, hickory, alder, or maple. A package of hardwood smoking wood chips is preferable to unknown scrap because painted, pressure-treated, glued, stained, or otherwise contaminated wood can introduce unsafe residues. Never burn construction offcuts, pallets, plywood, painted boards, or unidentified wood.
Place a drip pan where it can catch rendered fat without blocking the burner’s air supply or sitting directly in the flame. Empty it before it becomes a grease-fire hazard. Keep a suitable fire extinguisher accessible and never leave the smokehouse unattended.
Photo 9: Show the burner, cast-iron chip pan, drip pan, noncombustible base, fuel line, and clearance from the wooden walls. Photograph the arrangement cold and disconnected from fuel if that is safer.
Step 11: Install two thermometers
USDA recommends two types of temperature monitoring for smoking: one thermometer for the smoker air and another for the food. Mount or position the chamber probe where it measures the air around the food rather than the hot spot immediately above the burner. Insert the food probe into the thickest part of the largest item, avoiding bone and large pockets of fat.
The Tool Desk
Outbyte Driver Updater FREEFix the driver behind crashes, sound loss and screen glitchesFind Drivers →Outbyte PC Repair FREEClear out junk files and repair common Windows errorsFree Scan →A wireless or remote probe can reduce unnecessary door opening. For example, a dual-probe smoker thermometer can monitor chamber air and food temperature at the same time. Treat it as a monitoring tool, not as proof that a particular product has been tested for this build. Use an instant-read thermometer to verify the center of the food before serving.
Independent reader supportYour contribution helps us test, update, and keep practical guides available for everyone.Step 12: Perform a no-food test burn
Run the completed smokehouse without food before the first cook. This is a commissioning test, not a guarantee that the structure is safe under every condition.
- Confirm that the smokehouse is stable, the roof is secure, the door closes and latches, and the vents move freely.
- Inspect the burner, hose, regulator, and connections according to the manufacturer’s instructions. Do not operate a system with a suspected leak.
- Use only the intended wood and a permitted fire starter. Keep the area clear of loose paper, sawdust, leaves, and stored fuel.
- Start with a small controlled heat source. Record chamber temperature at several shelf levels and watch for hot spots.
- Check whether smoke exits through the planned upper outlets rather than through uncontrolled gaps or toward the operator.
- Look for overheating, scorching, roof discoloration, loose fasteners, excessive door movement, grease accumulation, or unstable flame.
- Shut down completely and inspect the base, burner, chip pan, vents, hinges, and surrounding ground before making corrections.
Do not assume that a small flame makes a wooden smokehouse inherently safe. UConn expressly warns that the structure can readily burn and requires supervision throughout operation.
Step 13: Smoke food safely
Smoking flavor and cooking are not the same as preservation. Modern home smoking commonly adds flavor, color, and aroma while food is refrigerated or cooked. Smoke alone should not be described as making meat shelf-stable. Shelf-stable jerky, cured meat, and other preservation projects require a validated process, appropriate curing controls, and stricter handling.
PC Slower Than It Used to Be?
A free scan shows the junk files, broken settings and background clutter dragging Windows down - then fixes them in one click.Free scan · Windows 10 & 11Outdated Drivers Are Slowing You Down
One free scan finds every outdated or missing driver and matches the right update for your exact hardware.Free scan · exact hardware matchUSDA’s general smoker-air guidance for meat and poultry is approximately 225–300°F. By contrast, the UConn smokehouse procedure begins around 120°F and gradually raises the chamber temperature, preferring not to exceed 180°F for its particular smoke-cooking and smoke-drying approach. Those are different operating contexts. A low chamber reading is not proof that food has reached a safe internal temperature, and the UConn preference does not replace USDA final-temperature guidance.
Best Value
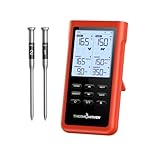
- Ultra-Long Wireless Range:Monitor your food from up to 3000 feet away with Sub-1G wireless technology, which has stronger penetration than bluetooth and delivers signals more stably. Perfect for outdoor BBQs, grilling, or large kitchens, giving you freedom to move without missing a temperature change.
- Easy Setup – No Sign-Up Needed:No Apps, no accounts, and no personal information required. Simply unpack, insert the probes, and start monitoring your food instantly. Perfect for anyone who prefers a straightforward, hassle-free cooking experience, making it an ideal gift for tech-averse dads or beginners.
- User-Friendly Design:The ThermoMaven wireless meat thermometer features a standalone base with a large, easy-to-read LCD display. The intuitive interface ensures that you can quickly set your desired temperature and monitor cooking progress at a glance. Whether you're a novice or a seasoned chef, this thermometer makes cooking perfectly cooked meat a breeze.
- Precision Accuracy with NIST Certification:The meat probe is equipped with six high-precision sensors that are NIST certified, ensuring you receive accurate temperature readings every time. With this level of precision, you can confidently achieve the perfect doneness for your meats, whether you’re grilling steaks, roasting chicken, or smoking ribs.
- Dual Thin Probes for Multi-Tasking:With two thin probes, the digital meat thermometer allows you to monitor multiple cuts of meat simultaneously. This feature is particularly useful for large gatherings where you need to cook different meats to varying temperatures. Enjoy the convenience of cooking multiple dishes without compromising on quality or flavor.
Minimum internal temperatures
| Food | Minimum internal temperature | Additional instruction |
|---|---|---|
| Beef, pork, lamb, or veal steaks, chops, and roasts | 145°F | Rest at least 3 minutes |
| Ground beef, pork, lamb, or veal | 160°F | Check the center |
| Poultry | 165°F | Check the thickest portion |
| Fish and shellfish | 145°F | Verify with a thermometer |
Thaw meat completely before smoking. Marinate it in the refrigerator, do not partially cook it and finish it later unless you are following a validated safe process, and refrigerate leftovers within 2 hours. USDA recommends using refrigerated leftovers within 4 days or freezing them.
For jerky, do not simply hold raw meat at a low drying temperature and assume dehydration will eliminate pathogens. USDA warns that pathogens can survive if raw meat is dehydrated at temperatures too low to provide a safe lethality step. Follow a tested recipe and process from a reliable food-safety authority.
Maintenance and seasonal inspection
- Remove ash, spent chips, food debris, and grease after the smokehouse is fully cool.
- Clean cooking racks, hooks, pans, and drip trays according to their material and manufacturer instructions.
- Inspect the roof for corrosion, loose fasteners, sharp edges, and water entry.
- Check the door for warping and verify that both hinges and the hasp remain firmly attached.
- Clear upper and lower vents and confirm that damper covers still move.
- Inspect screens for grease and pest damage.
- Look for scorching, charring, smoke staining that suggests excessive heat, or gaps developing near the burner.
- Inspect propane components before use and store fuel as required by local rules and the manufacturer.
- Keep the surrounding area free of dry vegetation, leaves, boxes, lumber, and other combustibles.
Do not coat the interior with an unapproved paint, wood preservative, or sealant merely to make cleaning easier. Any interior finish exposed to heat or smoke must be specifically suitable for that use and compatible with food safety.
Troubleshooting the first few cooks
| Problem | Likely causes | Safer correction |
|---|---|---|
| Temperature is too high | Too much fuel, excessive burner output, a pan too close to the food, or a chamber that is too small for the heat source. | Reduce burner output according to its instructions, reduce the wood charge, verify the drip pan and heat shield, and keep monitoring. Do not close every vent to trap heat. |
| Weak draft or little smoke movement | Blocked upper outlet, insufficient lower air, overloaded chip pan, or a roof gap or vent arrangement that does not create a path. | Check the vents and screens, provide the planned make-up air, reduce the chip load, and keep the upper exit available. |
| Smoke is thick, acrid, or excessive | Too much wood, poor combustion, restricted airflow, or unsuitable wood. | Use less known food-smoking wood, restore adequate airflow, and remove painted, treated, glued, or unknown material immediately. |
| Door bows outward | Heat and moisture movement in the boards or a flexible front opening. | Use the hasp, inspect the front bracing and hinges, and reduce uncontrolled heat. Do not force a warped door against a misaligned frame. |
| Food cooks unevenly | Hot spots near the burner, crowded shelves, blocked airflow, or a chamber probe in the wrong location. | Leave space around food, compare temperatures at several shelf levels, rearrange the load, and use a heat shield or revised burner position if needed. |
| Grease begins to smoke heavily or ignite | Drip pan is full, too close to the flame, or exposed to excessive heat. | Shut down safely if possible, follow the burner and fire-safety instructions, and never leave the structure unattended. Redesign the pan and heat separation before cooking again. |
Further reading
For another DIY-focused reference, Smokehouse Handbook includes step-by-step photographs, smoking techniques, safety guidance, and plans and diagrams according to its publisher. Use it for ideas and technique; do not treat it as evidence that the UConn dimensions or your local construction plan are code-compliant.
Sources and scope
The construction sequence is based on University of Connecticut Extension publication EXT195, published in April 2026 and originally published in 2006. The operating and temperature guidance is based on USDA Food Safety and Inspection Service smoking and thermometer guidance. USDA material-safety and handling guidance, EPA’s explanation of smoking as primarily a flavor, color, and aroma process in modern use, and the jurisdiction-specific St. Louis County residential checklist are also reflected above. The supplied research included source identifiers but did not include direct URLs, so no unverified hyperlinks have been added.
Frequently Asked Questions
Can I use pressure-treated lumber to build a smokehouse?
No. Do not use pressure-treated lumber in portions exposed to heat or smoke. Residues could contact food or the cooking environment. Use clean, non-pressure-treated lumber and avoid unapproved interior coatings.
Does smoking meat make it shelf-stable?
No. Smoke adds flavor and may help with color and aroma, but smoke alone does not make modern home-smoked meat shelf-stable. Jerky and cured-meat preservation requires a validated process, suitable curing controls, and safe handling.
Do these 3 things before closing this tab:
1Repair Windows errors before they cause bigger problems2Fix the driver behind crashes, sound loss and screen glitches3Clear out junk files and repair common Windows errorsWhat temperature should a backyard smokehouse run at?
It depends on the process. USDA gives approximately 225–300°F for smoker air when smoking meat and poultry. The UConn reference procedure begins around 120°F and gradually increases while preferring not to exceed 180°F for its specific smoke-cooking and smoke-drying approach. In every case, verify the food’s internal temperature rather than relying only on chamber temperature.
Do I need a permit to build a smokehouse?
Possibly. Setbacks, height limits, floor-area limits, foundations, fuel containment, and fire rules vary by municipality and fire district. Ask the authority having jurisdiction for the proposed site before buying materials.
The Bottom Line
A durable backyard smokehouse is mainly an airflow-and-fire-management project, not just a wooden box with a burner. Build on an approved noncombustible base, keep treated and unsuitable materials out of the hot and food-contact areas, provide adjustable bottom-to-top ventilation, contain the fuel, monitor both chamber and food temperatures, and supervise every cook. The UConn design supplies a useful construction pattern; your local authority and current food-safety guidance determine how it may be used safely at your site.
Quick Recap
Product prices and availability are accurate as of the date/time indicated and are subject to change. Any price and availability information displayed on Amazon at the time of purchase will apply.
Free tools Windows power users keep installed
One-click scans. No signup required.




