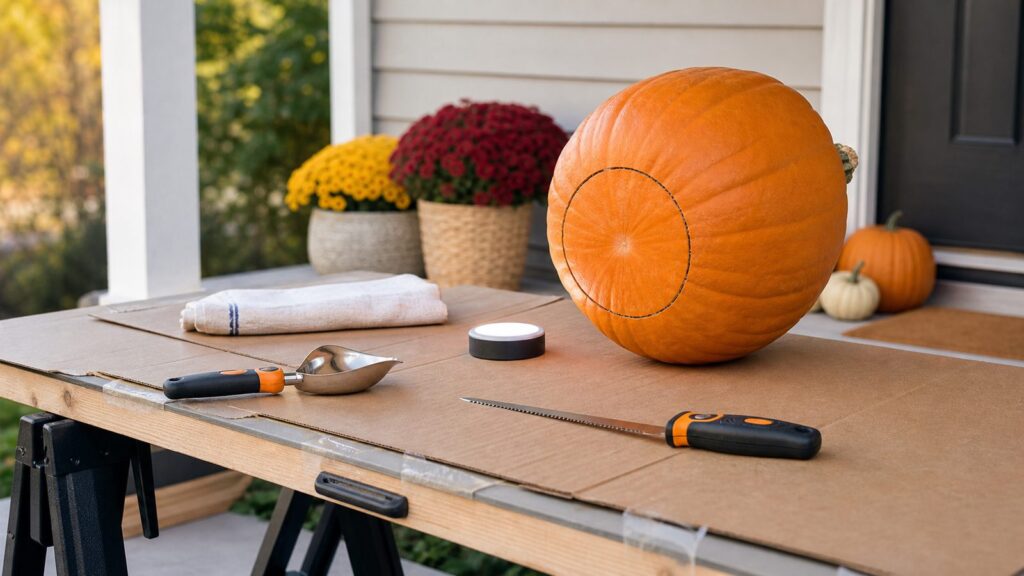
Cutting a pumpkin from the bottom is usually the cleanest way to carve a jack-o’-lantern. Instead of cutting a lid around the stem, you cut a 4- to 6-inch access hole in the base, lift the pumpkin shell off the pulp plug, scrape from below, carve the face, and set the pumpkin over a battery LED. The stem stays intact, the lid cannot fall in, and you do not have to reach down through a narrow top opening to clean or relight it.
On our job sites, the same rules apply whether we are cutting sheathing, trim, or a pumpkin with the kids after work: mark the cut, stabilize the material, keep the blade path clear, protect the finished surface, and clean up before residue becomes a bigger problem. A pumpkin is softer than construction lumber, but the rind is round, damp, and slippery. That combination deserves more care than most people give it.
As an Amazon Associate I earn from qualifying purchases.
For a standard grocery-store carving pumpkin, plan on 20 to 45 minutes from wash-down to final placement. The basic cost is modest: roughly $4 to $8 for a typical flat-rate jack-o’-lantern pumpkin in many U.S. grocery settings, about $12 to $13 for a basic home-improvement-store carving kit, and a few dollars for LED tea lights, puck lights, or glow sticks. Larger pumpkins, specialty colors, farm-experience pricing, and reusable stainless carving tools can push the total higher.
Why Cutting From the Bottom Works Better
The bottom-cut method works because much of the stringy pulp and seed mass is attached near the internal base of the pumpkin. When you cut and remove the bottom plug, a large share of that mess comes with it. You are not scraping blind from the top while trying to avoid breaking the stem or dropping a lid into the pumpkin.
#1 Best Overall
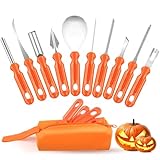
- 👻 Essential for Spooky Halloween Fun--Pumpkin carving remains a beloved Halloween staple, and our premium carving kit streamlines the craft with improved safety and convenience. Ditch risky household knives and craft intricate, eye‑catching Jack‑O'‑Lanterns with total ease.
- 🛠️ Complete 10‑in‑One Professional Carving Set--This all‑round 10‑piece toolkit suits novice crafters and seasoned carvers alike, containing a serrated pulp scooper, double‑sided saw, curved cutting saw, pumpkin drill, V‑groove chisel, arc etching tool and bent carving knife. Paired with a neatly stitched storage pouch fitted with heavy‑duty zippers, it keeps all tools sorted and well‑protected for seasonal reuse.
- ⚙️ Premium Stainless Steel, Exceptional Durability--Each carving implement is forged from sturdy stainless steel via high‑temperature reinforcement craft, delivering sharp cutting performance and outstanding wear resistance. Built to withstand repeated annual use for casual hobbyists and dedicated Halloween enthusiasts.
- ✋ Ergonomic Halloween‑Style Non‑Slip Grips--Boasting festive bright orange PP handles with anti‑slip texture, these tools ensure steady, comfy holding for detailed precision carving. Cut cleanly with minimal force to extend your tools’ service life.
- 🎁 Ideal Family‑Focused Halloween Gift--Spark warm family bonding and creative fun with this practical pumpkin carving kit, an impeccable seasonal gift choice for all ages. Crafted with safety prioritized; adult supervision is required for kids under 13 for secure carving activities.
Keeping the stem intact also helps the pumpkin look better. A strong green or brown stem is part of the visual character of a jack-o’-lantern. When you cut around it, you weaken the top, create a loose cap, and open the pumpkin at the most visible point. A bottom opening hides the access cut against the porch, step, tray, or walkway.
The other major advantage is lighting. With a top-cut pumpkin, you lower a light through the opening, reach around wet pulp, and then replace a lid that may scorch, warp, or fall in. With a bottom-cut pumpkin, you place the LED on the step first and lower the pumpkin over it. That is cleaner, safer, and easier to maintain during Halloween night.
There is a practical airflow and drainage benefit outdoors as well. If the pumpkin sits outside, leaving the bottom plug out can reduce trapped moisture. For indoor display or delicate surfaces, saving and reinstalling the plug may make more sense, especially if the pumpkin will sit on a tray or plate.
Recommended Free Tools
Tools, Materials, and 2026 Cost Range
You do not need a shop full of tools. In fact, oversized kitchen knives are one of the most common mistakes. A large chef’s knife can bind, slip, or force your hand into an awkward position. Small serrated pumpkin saws and controlled strokes are safer for most homeowners.
Use a sturdy table, counter, or workbench with good lighting. Lay down a towel, non-slip mat, scrap cardboard, disposable table cover, or flattened paper grocery bags. If you are working on stone, wood, painted porch boards, or a finished countertop, add a tray or cutting board under the pumpkin. Pumpkin pulp and moisture can stain porous materials if it sits too long.
| Item | Typical 2026 U.S. Cost | What to Look For |
|---|---|---|
| Standard jack-o’-lantern pumpkin | About $4-$8 flat-rate in many grocery settings; regional pricing varies | Flat bottom, firm shell, no soft spots, sturdy stem |
| Basic carving kit | Commonly about $12-$13; budget seasonal kits can be under $5 | Small serrated saw, scoop, poker, pattern tools |
| Reusable stainless or specialty tools | Often about $15-$25 | Better handles, stiffer blades, repeat-year use |
| LED tea lights, puck lights, or glow sticks | A few dollars per pumpkin depending on pack size and features | Battery-operated, cool-running, stable base, timer if desired |
| Surface protection and cleanup supplies | Free to about $15 depending on what you own | Cardboard, tray, drop cloth, gloves, trash bags |
Fresh-market pumpkin prices move around. A discount store may run a seasonal promotion near $4 for a 14- to 18-pound pumpkin, while farm stands may price by size, variety, or the pick-your-own experience. Per-pound prices can also be misleading because produce data may include squash, gourds, and specialty pumpkins rather than only carving pumpkins. For a family carving night, a realistic working budget is $10 to $25 per pumpkin if you are buying the pumpkin, one reusable kit, surface protection, and LED lighting.
Pick the Right Pumpkin Before You Cut
The easiest pumpkin to carve from the bottom is not always the biggest one. Choose a pumpkin that sits flat without rocking. A rolling pumpkin is harder to control, and blade slips usually happen when the workpiece moves unexpectedly.
Quick wins for a faster PC:
Repair Windows errors before they cause bigger problemsFix Now →Scan for outdated or missing drivers - takes under a minuteDriver Scan →Clear out junk files and repair common Windows errorsFree Scan →Look for a firm shell with no bruises, weeping spots, mold, or soft areas around the base. Press lightly around the bottom and sides. If the wall gives under your thumb, that pumpkin is already breaking down. A sturdy stem is a good sign, but do not carry the pumpkin by the stem; it can snap and open a path for decay.
For a porch display, stand back 6 to 10 feet and decide where the face should land. If the pumpkin has one flatter, cleaner face, use that side for the design. If the pumpkin will sit on a visible front step, offset the bottom access hole slightly toward the back. The face remains centered while the access seam stays less noticeable.
Step-by-Step: How to Cut a Pumpkin From the Bottom
1. Wash, Dry, and Set Up the Work Area
Rinse dirt off the pumpkin and dry it fully. Moisture on the rind, your hands, or the tools increases slip risk. Set the pumpkin on a towel or non-slip mat so it cannot roll. Put a bowl nearby for seeds if you plan to roast them and a trash bag or compost pail nearby for stringy pulp.
If children are helping, give them the tracing, scooping, and cleanup jobs. Adults should handle the cutting. Federal Halloween safety guidance consistently puts pumpkin carving in the adult-controlled category, and that matches what we see in real life: most injuries come from forcing a blade through a slick, uneven rind.
What’s actually slowing this PC down?
Pick the symptom - the matching free tool is one click away.
2. Mark a 4- to 6-Inch Bottom Opening
Turn the pumpkin on its side or upside down, whichever gives you better control. For a medium pumpkin, mark a circle or slightly polygonal shape about 4 to 6 inches wide. The opening must be large enough for your hand and scraper. If it is too small, you lose the main benefit of the bottom-cut method.
Do not cut too close to the outside edge of the pumpkin. Leave enough base material so the shell still sits steadily. For a small pumpkin, a 3- to 4-inch hole may be enough. For a large display pumpkin, 6 to 8 inches may be more practical.
Rank #2

- 【10 Professional Pumpkin Carving Kit】 The package includes Pumpkin scooper X 1, Small saw X 2, Pumpkin drill X 1, Etching tool X 1, Double-sided saw X 1, Carving Knife X 1, Small Knife X 1, Carving Tools X 2. The different specifications of craving kits will create interesting Halloween pumpkin designs. Tools can be neatly organized and stored in the sturdy zippered nylon carrying case after use.
- 【High-quality Stainless Steel】 10pcs carving set are made by premium stainless steel, thicker than normal carving tools, will not break. Non-slip handle design, easy to grip plastic handle make carving any pattern a breeze. The durable material ensure the tools can be re-used for many years.
- 【Safe & Easy to Use】 The easy-grip handle, and sharp & sturdy antirust blade of our pumpkin carving kit is designed specifically for carving your own Halloween jack-o-lantern pumpkins. Suitable for adults and children. Children use tools that require adult supervision. Not recommended for children under 7 years old.
- 【Carve Perfect Jack-O-Lanterns】 Our 10 pieces of pumpkin tools have different functions, so they can help you cut and create realistic 3D pumpkin details, such as hair, teeth, nose and eyes, to make the pumpkin character look expressive. Let your pumpkin lantern stand out from the crowd and play happily on this Halloween
- 【Have Fun with Family】 Halloween won’t be completed without carving pumpkins and jack-o'-lanterns! Creating a jack-o-lantern is a fun job, our pumpkin carving kit has 10pcs, can allow you to cooperate with your families and friends at the same time, enjoy the happy Halloween pumpkin carving time.
3. Cut With a Slight Inward Angle
Use a small serrated pumpkin saw or fine-tooth utility-style carving tool. Angle the blade slightly inward toward the center of the pumpkin as you cut. This creates a tapered plug that can seat back in place instead of falling through. Think of it like cutting a beveled access panel rather than a straight cylinder.
Use short, controlled strokes. Keep your non-cutting hand out of the blade path. If the pumpkin starts to move, stop and reset it. Do not muscle through a stuck blade. Back it out, change the angle, and continue.
4. Lift the Pumpkin Off the Plug
Once the cut is complete, lift the pumpkin shell. The bottom plug will usually carry a heavy clump of seeds and stringy pulp with it. Set the plug on newspaper, cardboard, or a tray. If you plan to reinstall it, trim off the pulp and keep the plug intact. If the pumpkin will sit outdoors over an LED, you can remove the plug entirely for easier access, drainage, and airflow.
5. Scrape the Interior Clean
Use a scoop, metal spoon, or pumpkin scraper to remove the remaining stringy material. Pay special attention to the wall behind the future design. For easier carving, scrape that area to about 1 inch thick or slightly less. Do not thin the entire pumpkin aggressively; uneven or over-thinned walls can sag and collapse faster.
Clean walls last longer than wet, stringy walls. Pulp holds moisture, smells as it breaks down, and can attract pests. If you want roasted seeds, separate them from the pulp right away, rinse them, and dry them before seasoning.
6. Transfer and Carve the Design
Set the pumpkin upright and tape or trace your design on the best face. Keep the design realistic for the wall thickness. Large simple shapes are more durable for outdoor display. Fine details work better if you have thinned the design area evenly and are using a small serrated saw rather than a broad knife.
The Tool Desk
Outbyte Driver Updater FREEScan for outdated or missing drivers - takes under a minuteDriver Scan →Outbyte PC Repair FREERepair Windows errors before they cause bigger problemsFix Now →Cut from the center of the design outward when possible. Removing too much structure early can weaken the face while you are still working. For drilled dot patterns, only adults should run the drill. Use moderate speed, stabilize the pumpkin, and avoid forcing a hole saw or bit if it starts to grab.
7. Light It From Below
Test the LED before final placement. Put the battery tea light, puck light, or glow stick on the porch, paver, saucer, or plate first. Then lower the pumpkin over it. This is the main payoff of the bottom-cut method: no reaching through the top, no fighting a lid, and no burned fingers from real flame.
Battery-operated candles and glow sticks are the best choice for jack-o’-lanterns. Fire-safety organizations recommend them because they remove the open flame from a decoration that is often surrounded by dry leaves, costumes, porch decor, and foot traffic. If you insist on a real candle, keep it away from anything combustible, give it clearance, and never place it where children or trick-or-treaters can brush against it.
Top Cut vs. Bottom Cut: Which Is Better?
The traditional top cut still works, but it is not the easiest method for cleaning, lighting, or display maintenance. The bottom cut is more practical for most homeowners, especially if the pumpkin will use an LED light.
| Category | Top-Cut Pumpkin | Bottom-Cut Pumpkin |
|---|---|---|
| Clean-out | Requires reaching down through the top and scraping upward | Base plug often pulls out a large share of pulp and seeds |
| Appearance | Visible lid seam around the stem | Stem stays intact; access seam is hidden at the base |
| Lighting | Light is lowered inside from above | Pumpkin is lowered over the light |
| Fire and burn risk | Higher if using a real candle under a lid | Lower when paired with LED lighting |
| Outdoor drainage | Moisture can collect in the bottom | Open base can drain and breathe better |
| Best use | Traditional look, simple carving, short display | Cleaner carving, porch display, LED maintenance |
If you are carving with kids, hosting a group, or setting several pumpkins along a walkway, the bottom-cut method saves time. You can clean each pumpkin more efficiently, test all the LEDs, and lift the shells on and off for battery changes.
Safety Notes for Tools, Fire, and Walkways
Pumpkin carving is a small seasonal project, but it combines sharp tools, slick surfaces, poor lighting, and excited foot traffic. Treat it with the same discipline you would use for any hand-tool task.
Knife and Tool Safety
Use pumpkin saws or small serrated tools instead of large kitchen knives. Keep blades dry and handles clean. Cut away from your body and keep the other hand clear. Work at a comfortable height; a low coffee table or unstable folding table makes it harder to control the tool.
Rank #3
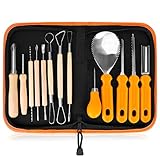
- 13-PIECE ALL-IN-ONE PROFESSIONAL SET: Dominate any pumpkin carving contest with 13 master-grade tools! This heavy-duty kit includes 6 double-sided stainless steel detail sculptors,2 sharp heavy duty stainless steel pumpkin scoop tool with scraper, 2 sturdy tooth saws, 2 precision hole punches, and 1 detail engraving pen. This kit has everything you need.
- PREMIUM STAINLESS STEEL & ERGONOMIC GRIP: Engineered for professional-grade performance year after year. Crafted from solid, high-tensile stainless steel, these tools are built to last without rusting, bending, snapping, or pitting. The ergonomically designed, non-slip handles provide maximum comfort, precision control, and confidence for intricate carving.
- SAFE & MEMORABLE FAMILY CRAFTING: Create unforgettable Halloween traditions with a fun activity the whole family can enjoy! With varying tool sizes and specialized blunt-edge designs for scooping and punching, there’s a perfectly safe task for everyone. Ditch the dangerous kitchen knives and enjoy a safer, smoother crafting experience.
- LUXURY WRISTLET STORAGE BAG INCLUDED: Keep your tools organized, protected, and highly portable. Our premium leather storage case features dedicated slots for each tool and a convenient wristlet strap. Whether you're heading to a neighborhood carving block party or helping with a school DIY project, you can carry your kit completely hands-free.
- 100% Service】We’re dedicated to enhance your carving experience. Our aim: 100% satisfied customers. However, if you’re not happy with your Pumpkin Carving Set, you can return it anytime. We’ll ask no questions.
Children can draw patterns, scoop pulp, sort seeds, and place stickers. Adults should cut. If older teens help, give them the right tool and a stable work surface, then supervise closely. Most carving cuts happen because someone pushes too hard or tries to catch a slipping pumpkin.
Fire Safety
Use battery-operated candles, LED puck lights, or glow sticks whenever possible. They cost only a few dollars per pumpkin and remove most of the fire concern. Real candles can ignite paper decorations, dried corn stalks, leaves, costumes, and porch displays. If a real candle is used, keep the pumpkin away from combustibles and out of paths used by visitors.
Trip and Egress Safety
Do not line pumpkins where people need to step. Keep stairs, railings, thresholds, and walkway edges clear. A good rule is to maintain at least a 36-inch clear walking path to the door. If you place pumpkins on steps, set them to the side rather than in the walking line, and make sure cords are not part of the setup. Battery lighting is better than extension cords for this reason.
From a construction standpoint, the porch is part of the home’s access system. Decorations should not reduce visibility, create trip points, or block the route someone would use in an emergency.
How to Protect Porches, Counters, and Walkways
Pumpkin moisture can stain wood decking, painted porch boards, porous stone, brick, and unsealed concrete. Rotting pumpkins can also attract insects and wildlife. The fix is simple: put a barrier under the pumpkin from day one.
Do these 3 things before closing this tab:
1Scan for outdated or missing drivers - takes under a minute2Repair Windows errors before they cause bigger problems3Fix the driver behind crashes, sound loss and screen glitchesFor outdoor display, use a saucer, plastic tray, scrap paver, piece of cardboard, or thin cutting board. On a front porch, a paver or dark tray looks cleaner than loose newspaper and handles moisture better. On concrete or stone, the barrier reduces the chance of orange staining and soft rot marks. On wood, it prevents wet pulp from sitting directly against the finish.
Indoors, use a plate, rimmed sheet pan, or plastic tray. Do not set a carved pumpkin directly on a wood dining table, stone countertop, carpet, or finished shelf. Condensation and pulp residue can cause stains faster than people expect, especially in warm rooms.
Clean carving surfaces immediately after the pumpkin is finished. Scrape solids into compost or trash, then wipe the surface with warm soapy water. For exterior surfaces, pick up residue before it dries. Dried pumpkin strings are harder to remove from rough concrete, brick joints, and deck board gaps.
How Long a Carved Pumpkin Lasts
A carved pumpkin is temporary. In cool, shaded outdoor conditions, many carved pumpkins look good for roughly 3 to 7 days. In warm sun or a heated interior room, they can soften much faster. If you need it to look sharp for Halloween night, carve close to the event date, ideally within 1 to 3 days.
PC Slower Than It Used to Be?
A free scan shows the junk files, broken settings and background clutter dragging Windows down - then fixes them in one click.Free scan · Windows 10 & 11Crashes, No Sound, or Screen Glitches?
Random freezes, missing sound and display glitches usually trace back to one bad driver. Find and replace yours safely.Free scan · under a minuteDisplay life depends on temperature, sun exposure, pumpkin condition, wall thickness, and how thoroughly you removed the pulp. A pumpkin with soft spots before carving may collapse within a day or two. A firm pumpkin, cleaned well, kept cool, and lit with an LED instead of a candle will usually last longer.
At night, bring the pumpkin into a cooler protected area if you are dealing with warm weather, heavy rain, or direct irrigation spray. Avoid sealing it in a plastic bag while wet; trapped moisture speeds decay.
Independent reader supportYour contribution helps us test, update, and keep practical guides available for everyone.Common Mistakes to Avoid
The biggest mistake is making the access hole too small. A 2-inch opening may look tidy, but it does not give you room to clean. For a medium pumpkin, 4 to 6 inches is the practical range.
The second mistake is cutting straight up and down. A vertical plug can fall inside or fit poorly when replaced. A slight inward bevel gives the plug a shoulder, similar to a lid that seats into its opening.
Free tools Windows power users keep installed
One-click scans. No signup required.
Rank #4

- 【13 Professional Pumpkin Carving Kit】 The package includes 8 x double-sided sculpting tools, 2 x sharp sturdy tooth saws, 1 x heavy duty scooper, 1 x etching tool, 1 x drill. The different specifications of craving kits will create interesting Halloween pumpkin designs. Tools can be neatly organized and stored in the sturdy zippered nylon carrying case after use.
- 【High-quality Stainless Steel】 13pcs carving set are made by premium stainless steel, thicker than normal carving tools, will not break. Non-slip handle design, easy to grip plastic handle make carving any pattern a breeze. The durable material ensure the tools can be re-used for many years.
- 【Safe & Easy to Use】 The easy-grip handle, and sharp & sturdy antirust blade of our pumpkin carving kit is designed specifically for carving your own Halloween jack-o-lantern pumpkins. Suitable for adults and children. Children use tools that require adult supervision. Not recommended for children under 7 years old.
- 【Carve Perfect Jack-O-Lanterns】 Our 13 pieces of pumpkin tools have different functions, so they can help you cut and create realistic 3D pumpkin details, such as hair, teeth, nose and eyes, to make the pumpkin character look expressive. Let your pumpkin lantern stand out from the crowd and play happily on this Halloween
- 【Have Fun with Family】 Halloween won’t be complete without carving pumpkins and jack-o'-lanterns! Creating a jack-o-lantern is a fun job, our pumpkin carving kit has 13pcs, can allow you to cooperate with your families and friends at the same time, enjoy the happy Halloween pumpkin carving time.
Do not leave pulp inside. Stringy material traps moisture and causes odor. Do not thin the walls unevenly. A thin carved face attached to a thick, heavy shell can sag. Do not use a real candle under a low opening with poor ventilation. Do not set a rotting pumpkin directly on a finished porch or porous walkway. And do not forget to test the LED before you lower the pumpkin over it.
Disposal, Composting, and Cleanup
Clean pumpkin scraps can usually go into compost where local rules allow it. Remove candles, batteries, stickers, paint, glitter, toothpicks, and plastic accessories first. Painted, glittered, or heavily decorated pumpkins should usually go in the trash rather than compost.
If the pumpkin has started to rot, bag it before carrying it through the house. Soft pumpkins can split without warning. For outdoor displays, check every day after Halloween. Once the pumpkin sags, leaks, smells, or attracts pests, remove it.
For stained exterior surfaces, start with a mild approach: remove solids, rinse, scrub with warm water and dish soap, then rinse again. Avoid harsh chemicals on natural stone, painted surfaces, or sealed concrete unless you know the finish can handle it. On wood decking, moisture time is the enemy, so the best cleanup is prevention with a tray or paver.
Free tools Windows power users keep installed
One-click scans. No signup required.
When to DIY vs. When to Hire a Pro
For normal jack-o’-lantern carving, this is a DIY project. A homeowner with a $5 to $25 tool setup, a stable table, and LED lighting can handle it safely. The bottom-cut method is especially DIY-friendly because it simplifies cleaning and lighting.
Hiring a pro only makes sense in specific cases: large commercial displays, event installations, branded pumpkins, intricate multi-pumpkin scenes, or properties where decorations must meet formal access and safety requirements. Custom carved pumpkins are a specialty service, not a typical home repair cost. Pricing varies widely based on design complexity, pumpkin size, artist market, and whether setup, lighting, and removal are included.
For homeowner associations, retail storefronts, churches, schools, or public events, the professional value is less about one pumpkin and more about layout: keeping egress clear, managing electrical or battery lighting, protecting finished surfaces, and removing organic material before it becomes a slip, stain, or pest issue.
The Bottom Line
Cutting a pumpkin from the bottom is the cleaner, more practical way to carve. Mark a 4- to 6-inch opening, stabilize the pumpkin, cut with a slight inward angle, pull the pulp-heavy plug out from the base, scrape the design wall to about 1 inch thick, carve with controlled strokes, and lower the finished pumpkin over an LED light.
That method keeps the stem intact, hides the access cut, reduces cleanup, makes battery changes easier, and helps protect your porch or walkway when you use a tray, paver, or other barrier underneath. It is a small seasonal project, but the same jobsite habits apply: stable setup, sharp but controlled tools, clean work surfaces, safe lighting, and a clear path to the front door.
Frequently Asked Questions
Is it better to cut a pumpkin from the top or the bottom?
For most jack-o’-lanterns, the bottom is better. It keeps the stem intact, hides the access seam, pulls out much of the pulp at once, and lets you lower the pumpkin over an LED light.
How big should the bottom hole be when carving a pumpkin?
For a medium pumpkin, make the bottom opening about 4 to 6 inches wide. Small pumpkins may need only 3 to 4 inches, while large display pumpkins may need 6 to 8 inches.
Do you put the bottom piece back on a bottom-cut pumpkin?
You can, especially indoors or on delicate surfaces. Outdoors, many homeowners leave the plug out for easier LED access, drainage, and airflow.
Quick wins for a faster PC:
Repair Windows errors before they cause bigger problemsFix Now →Fix the driver behind crashes, sound loss and screen glitchesFind Drivers →What tools are safest for carving a pumpkin?
Small serrated pumpkin saws and carving kit tools are safer and easier to control than large kitchen knives. Adults should handle cutting; children can trace designs and scoop pulp.
Can you use a real candle in a bottom-cut pumpkin?
A battery LED, puck light, or glow stick is the safer choice. If you use a real candle, keep it away from combustible decorations and out of paths used by children or visitors.
How do you keep a pumpkin from staining a porch or walkway?
Set it on a saucer, plastic tray, scrap cardboard, paver, or plate. Do not leave a carved or rotting pumpkin directly on wood decking, porous stone, or unsealed concrete.
Quick Recap
Product prices and availability are accurate as of the date/time indicated and are subject to change. Any price and availability information displayed on Amazon at the time of purchase will apply.

