Some links on this page are affiliate links: if you buy through them we may earn a commission, at no extra cost to you.
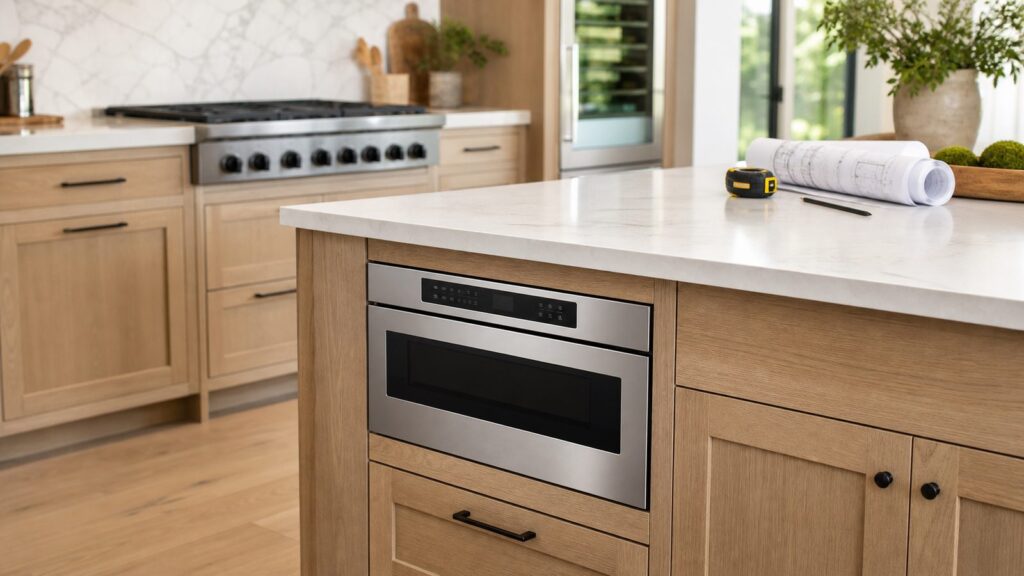
The best microwave for inside a cabinet is usually one of three options: a 24-inch microwave drawer in a base cabinet or island, a countertop microwave with the exact manufacturer-approved trim kit, or a compact countertop microwave placed in a properly ventilated open cabinet niche. For most high-end remodels, the drawer microwave is the cleanest and most ergonomic choice. For budget-conscious remodels, the trim-kit route often gives the best built-in look for less money.
On our kitchen projects, we do not start with the microwave brand. We start with the cabinet location, the user’s height, the available landing space, the electrical route, and the cabinet construction. A microwave that looks good online can become a costly cabinet problem if the cutout depth, face-frame opening, outlet location, or drawer clearance is wrong by even 1/2 inch.
As an Amazon Associate I earn from qualifying purchases.
For 2026 planning, expect appliance-only pricing to run about $100 to $300 for basic countertop microwaves, $250 to $700 for better countertop or trim-kit-ready models, $500 to $1,200 for many built-in microwaves, $900 to $1,700 for many 24-inch drawer microwaves, and $2,000 to $2,500 or more for premium drawer models. Installed costs vary widely. National figures put built-in microwave installation anywhere from a few hundred dollars for simple labor to $2,500 or more when cabinetry, electrical, island wiring, or custom finish work is involved.
Best Cabinet Microwave Options at a Glance
The right choice depends on whether the microwave is going in an island, base cabinet, wall cabinet, open shelf, or above a range. Each location changes the safety, ventilation, electrical, and cabinet requirements.
#1 Best Overall

- Complete the Look of Your Kitchen with a Built-In Trim Kit The Smudge-Proof stainless-steel trim complements your microwave for a stylish built-in look.
- Required For Installation Of Frigidaire Gallery Built-In Microwave A trim kit is required to install the Frigidaire Gallery 2.2 Cu. Ft. Built-In Microwave. It is available in a variety of colors and sizes.
- Includes Hardware For Installation Includes all of the parts and pieces to complete the installation of your built-in microwave, including 1 front frame assembly, 1 exhaust duct, 1 bottom mounting rail and 6 screws.
| Cabinet location | Best microwave type | Typical appliance cost in 2026 | Best for | Main caution |
|---|---|---|---|---|
| Kitchen island | 24-inch microwave drawer | $900-$1,700 common; $2,000+ premium | Clean sightlines, counter-space savings, family kitchens | Electrical rough-in and cabinet depth must be planned early |
| Base cabinet run | 24-inch drawer microwave | $900-$1,700 common | Ergonomic access below counter height | Check adjacent pulls, appliance handles, and walkway clearance |
| Wall cabinet | Built-in microwave or trim-kit model | $500-$1,200 built-in; $250-$700 plus trim kit for many trim-kit-ready models | Users who do not want to bend | A high placement can make hot liquids harder to handle safely |
| Open cabinet shelf | Compact countertop microwave | $100-$300 basic; $250-$700 better models | Lowest-cost remodels and rental-grade updates | Must maintain manufacturer-required ventilation clearances |
| Above range | Over-the-range microwave | Often mid-range, varies by features | Small kitchens with limited cabinet space | Ventilation performance is often weaker than a dedicated range hood |
If we had to pick one default solution for a well-planned remodel, it would be a 24-inch drawer microwave in a base cabinet or island. If the budget is tighter, we usually look at a trim-kit-compatible microwave before cutting a custom opening for a random countertop unit.
Option 1: Microwave Drawers for Base Cabinets and Islands
A microwave drawer is built to install below the counter. Instead of a hinged door swinging out from the front, the drawer slides open so the user can lower food into the cavity from above. Many 24-inch models are about 1.2 cubic feet and roughly 950 to 1,000 watts, which is enough for normal reheating, defrosting, popcorn, beverages, and smaller casserole dishes.
Do these 3 things before closing this tab:
1Clear out junk files and repair common Windows errors2Scan for outdated or missing drivers - takes under a minute3Repair Windows errors before they cause bigger problemsMost drawer microwaves come in 24-inch and 30-inch widths. The 24-inch size is the common remodel choice because it works better with standard cabinet runs and island layouts. The 30-inch size can look balanced under a wide cooktop wall or in a large island, but it takes more cabinet real estate.
Where drawer microwaves work best
Drawer microwaves are strongest in islands, base cabinet runs near the refrigerator, and prep zones where the user has immediate landing space. In practical terms, we want a countertop within one step of the unit. Hot soup, oatmeal, coffee, and melted butter should not have to travel across a walkway.
They are also useful for aging-in-place design. A common kitchen planning target is to keep the microwave roughly 24 to 48 inches from the floor, which keeps it closer to counter height and avoids lifting hot bowls down from above shoulder level. For families with children, placement is a judgment call: lower access is convenient, but controls and hot food may be easier for kids to reach.
Cabinet details that matter
Do not assume every 24-inch microwave drawer fits every 24-inch base cabinet. In face-frame cabinetry, the clear opening between stiles is often narrower than the cabinet’s nominal width. The drawer also needs the correct cutout height, cabinet depth, bottom support, anti-tip blocking, reveal spacing, and room for the power cord.
Recommended Free Tools
On our job sites, we ask for the exact installation manual before final cabinet drawings. A typical planning checklist includes the finished floor height, finished countertop thickness, cabinet box depth, face-frame stile width, rail height, adjacent drawer pull projection, appliance handle projection, and island seating overhang. Those small items decide whether the drawer opens cleanly or rubs against hardware.
Electrical coordination is especially important in islands. If the outlet is forgotten until after flooring and cabinets are installed, the repair can involve fishing wire, opening finished surfaces, or changing the cabinet layout. When the manufacturer allows it, an accessible receptacle in an adjacent cabinet can make future service much easier than trapping the plug blindly behind the appliance.
Option 2: Built-In Microwaves With Trim Kits
A built-in microwave with a trim kit is often the best balance of appearance and cost. The microwave sits in a cabinet opening, and a manufacturer-approved trim kit finishes the face while preserving the airflow path the appliance was designed to use.
The phrase manufacturer-approved matters. A trim kit is not just decoration. It controls air gaps, fastening points, overlap, and sometimes the way heat moves away from the unit. Using a trim kit from a different model, or making a custom face frame too tight, can create overheating problems and service headaches.
Outdated Drivers Are Slowing You Down
One free scan finds every outdated or missing driver and matches the right update for your exact hardware.Free scan · exact hardware matchWindows Errors? Fix Them Before They Spread
Repair common Windows errors and clear accumulated junk for a smoother, more stable PC - no reinstall needed.Free scan · no reinstallRank #2

- Give your microwave a premium, built-in look
- Fits Microwave models MS19M8000AS/AA
For 2026 budgets, many built-in microwaves run about $500 to $1,200. Better countertop models that accept trim kits may run about $250 to $700, plus the cost of the trim kit. That can still land well below a drawer microwave, especially when the cabinet opening is straightforward and electrical is already nearby.
Best locations for trim-kit microwaves
Trim-kit installations work well in tall pantry cabinets, wall oven stacks, appliance walls, and some upper cabinet runs. They are less ideal when the unit ends up too high. If a homeowner has to lift a bowl of hot liquid from eye level or above, the installation may look clean but perform poorly in daily use.
We prefer to place built-in microwaves so the bottom of the unit is near counter height when possible. If the microwave is part of a wall oven stack, the oven and microwave heights should be planned together. A comfortable oven height can push the microwave too high if the stack is not drawn carefully.
Replacement planning
One of the hidden risks with built-ins is future replacement. If the cabinet opening is built around one exact model with no filler strategy, the homeowner may face expensive cabinet work when that model is discontinued. We like to leave a practical path forward: removable fillers, documented cut sheets, accessible fasteners, and enough face-frame flexibility to adapt to a future appliance.
Option 3: Countertop Microwaves in Cabinet Niches
A countertop microwave can go in a cabinet niche only if the manufacturer allows the required ventilation clearances. This is the lowest-cost cabinet microwave solution, but it is also the one homeowners most often get wrong.
A basic countertop microwave may cost $100 to $300. Better compact models may run $250 to $700. The cabinet work can be simple: an open shelf, a reinforced base, a cord pass-through, and an accessible receptacle. But the shelf should not be treated like a sealed box unless the appliance is specifically approved for that installation.
Countertop microwaves shed heat through side, rear, top, or bottom vents depending on the model. If the cabinet sides are tight, the back is closed, and the door closes over the front, heat can build up. That can shorten appliance life and may create a safety issue. We do not install countertop microwaves behind closed cabinet doors unless the manufacturer’s instructions clearly allow that condition.
What a good niche looks like
A good microwave niche has a level, reinforced shelf; clean side reveals; enough air clearance; a cord hole with a bushing or smooth edge; and an outlet that can be reached without dismantling the cabinet. The shelf should be strong enough for the appliance plus loaded dishes. Cabinet-grade plywood or solid blocking is usually better than a thin adjustable shelf held only by small pins.
The Tool Desk
Outbyte PC Repair FREERepair Windows errors before they cause bigger problemsFix Now →Outbyte Driver Updater FREEFix the driver behind crashes, sound loss and screen glitchesFind Drivers →For appearance, we use matching finished panels, scribe, or filler strips to make the opening look intentional. The goal is not to trap the microwave tightly. The goal is to make the necessary air space look planned.
Option 4: Over-the-Range Microwaves
An over-the-range microwave is technically a space-saving cabinet solution, but it is not our first choice for many serious cooking kitchens. It combines a microwave with a range light and exhaust fan, usually mounted under the cabinet above the range.
Rank #3

- What You Will Receive: the package comes with 2 pieces of microwave trim kits and 16 screws, which will only take you a few minutes to install, and they will also make a good match for your stainless microwave, bringing you a lot of convenience
- Hide Unsightly Space: the microwave oven is an everyday household appliance that we use almost every day, but your microwave oven can have very unsightly space when installed underneath your cabinets, so our microwave trim kits can help you solve this problem and give you a beautiful kitchen
- Sturdy to Use: the oven gap filler stainless is made of quality stainless steel material, sturdy and wear resistant, reliable and reusable, anti rust and corrosion resistant, and not easy to deform or break, so you can use it for a long time
- Proper Size: each stainless steel microwave trim kit measures about 15.75 inches/ 40 cm in height, 11 inches/ 27.6 cm in depth, 3 inches/ 7.6 cm in width, nice for a 30" oven in a 36" cabinet or a 36" in a 42" cabinet and is a replacement for the stainless steel microwave trim kit.Please carefully confirm the size before purchase
- Easy to Use: our microwave trim kit is convenient for you to use, you can easily bend them by hand to secure it to your desired position, which will be a practical accessory for your kitchen
The benefit is obvious: it clears the counter and does not consume a base cabinet. The tradeoff is ergonomics and ventilation. The microwave is high, which means users may be lifting hot food down from above the cooking surface. The exhaust performance can also be less effective than a properly sized dedicated range hood, especially for high-BTU gas ranges, frequent frying, or heavy cooking.
We still use over-the-range units in compact kitchens, rental properties, and budget remodels where every cabinet matters. But when a homeowner cooks often and has room for a drawer or built-in elsewhere, we usually recommend separating the microwave from the range ventilation.
2026 Cost Guide: Appliance, Labor, Cabinetry, and Electrical
Microwave installation pricing varies because the word installation can mean very different things. Plugging a countertop microwave into an existing shelf is not the same job as wiring an island, modifying a face-frame cabinet, reinforcing the base, and fitting a drawer microwave flush with custom panels.
| Project scope | Typical 2026 cost range | What is usually included |
|---|---|---|
| Basic countertop microwave | $100-$300 appliance only | Freestanding unit on counter or open shelf |
| Better countertop or trim-kit-ready model | $250-$700 plus trim kit | Microwave selected for a cleaner cabinet installation |
| Built-in microwave appliance | $500-$1,200 | Built-in unit, often used with cabinet opening and trim |
| Common 24-inch drawer microwave | $900-$1,700 | Drawer unit for base cabinet or island |
| Premium drawer microwave | $2,000-$2,500+ | Luxury label, specialty finish, or panel-ready design |
| Simple microwave labor | $100-$400 | Basic installation where power and opening are ready |
| Built-in installation | About $220-$580 for many straightforward installs | Mounting, trim, and basic fit work |
| Broader built-in or drawer installation | About $500-$2,500+ | Can include cabinet modification, electrical, island work, or finish carpentry |
| Extra electrical, cabinetry, or vent work | Often $150-$600+ extra | Outlet relocation, dedicated circuit, cabinet changes, duct changes |
Recent national calculators and cost guides show wide ranges: built-in microwave installation can land around $500 to $2,500, drawer microwave installation around $1,260 to $2,430, and basic labor around $100 to $400 before extra electrical, cabinetry, or vent work. A May 2026 estimating calculator starts around $623 to $1,223 per oven for many install scenarios.
The biggest cost drivers are not usually the screws that hold the appliance in place. They are the changes around the appliance: a new dedicated branch circuit, moving an outlet into an adjacent cabinet, routing power through an island or peninsula, modifying face-frame cabinetry, matching stain or paint, changing ventilation ducts, and correcting an opening built for a discontinued model.
Dimensions and Cabinet Planning Rules
Before ordering cabinets, choose the microwave and get the installation manual. The sales page is not enough. We want the cut sheet that shows the actual cutout width, cutout height, minimum depth, support requirements, clearances, trim overlap, anti-tip blocking, outlet location, and fastening method.
What’s actually slowing this PC down?
Pick the symptom - the matching free tool is one click away.
For a 24-inch drawer microwave, the nominal appliance width does not tell the whole story. The cabinet opening, face-frame clearance, and minimum depth vary by model. In frameless cabinets, the interior access is often more forgiving. In face-frame cabinets, the stiles and rails can steal the exact space the drawer needs to slide, vent, or fasten properly.
Depth is another frequent issue. A base cabinet may be called 24 inches deep, but the finished interior depth, back panel, outlet box, plug, cord bend, and finished front alignment all matter. If the unit requires room behind it and the outlet is mounted in the wrong place, the appliance may sit proud or pinch the cord.
We also check the finished floor. In remodels, flooring may run under the cabinets, stop at the toe kick, or be added later. A drawer microwave set too low can feel awkward. A drawer set too high under a thick countertop can conflict with rails or create uneven reveals.
Electrical, Ventilation, and Code Notes
Most built-in and drawer microwave installations should be treated as fixed appliance installations, not casual plug-in decisions. Many models call for a grounded receptacle on a properly sized circuit, and some kitchens require GFCI and AFCI protection depending on location and local code adoption. Always follow the appliance manual and the local authority having jurisdiction.
Quick wins for a faster PC:
Fix the driver behind crashes, sound loss and screen glitchesFind Drivers →Repair Windows errors before they cause bigger problemsFix Now →Scan for outdated or missing drivers - takes under a minuteDriver Scan →Rank #4

- Stainless Steel 27” Microwave Trim Kit compatible with 2.2 cu. ft. Panasonic Microwave Oven models including NN-SE9**S, NN-SD9**S, NN-SN9**S
- Trim Kit Outer Size - 684mm or 27” (W) x 472mm or 18-9/16” (H) x 20mm or ¾” (D)
- Trim Kit Inner Size – 24-5/8" (W) x 13-7/16" (H)
- Required Cabinet Opening - 648mm or 25-1/2" + 8mm or 5/16” – 0mm (W) x 442mm or 17-3/8" +/- 2mm or 5/64” (H) x minimum 533mm or 21" (D) and minimum 920mm or 36-1/4” from the floor
- Tools Needed for Installation - Measuring tape, pencil, Phillips screwdriver, Ø 2 (5 /64") mm drill
For islands and peninsulas, electrical planning deserves early attention. Modern code requirements around island and peninsula receptacles have changed over time, and local enforcement can vary. The practical construction point is simple: decide where power will enter the island before flooring, cabinets, and finished panels are installed.
Do not use an extension cord for a built-in microwave. Do not pinch the cord behind the appliance. Do not bury a junction or receptacle where it cannot be accessed unless the installation method is specifically allowed. For serviceability, an adjacent-cabinet receptacle is often cleaner when the manual permits it.
Ventilation is model-specific. Drawer microwaves and built-in trim kits are designed with particular airflow paths. Countertop units need the clearances stated by the manufacturer. Over-the-range microwaves may vent outside or recirculate through filters, but duct size, duct route, wall cap, roof cap, and makeup air rules can affect performance and code compliance.
Independent reader supportYour contribution helps us test, update, and keep practical guides available for everyone.Best Choice by Homeowner Priority
Best overall: 24-inch microwave drawer
Choose a 24-inch drawer microwave if you want the cleanest cabinet integration, better sightlines, and comfortable access near counter height. It is the strongest fit for islands and base cabinets. Budget about $900 to $1,700 for many common units, more for premium labels, and more again if electrical or cabinetry must be changed.
Free tools Windows power users keep installed
One-click scans. No signup required.
Best value built-in look: trim-kit microwave
Choose a trim-kit-compatible microwave if you want a polished built-in appearance without drawer-microwave pricing. This is often the best value in wall cabinets, pantry cabinets, and appliance walls. Use only the trim kit approved for the exact model.
Best budget option: open shelf niche
Choose a compact countertop microwave in an open cabinet niche when cost matters most. It can be practical and clean if the shelf is reinforced, the outlet is accessible, and the ventilation clearances are respected. This is not the place for a tightly enclosed cabinet door unless the appliance instructions allow it.
Best small-kitchen compromise: over-the-range microwave
Choose an over-the-range microwave when there is no better location and the kitchen needs to preserve counter and base cabinet space. Be realistic about ventilation. In a high-use kitchen, a dedicated hood often performs better.
When to DIY vs. When to Hire a Pro
A homeowner with good basic skills can often handle placing a countertop microwave on a purpose-built open shelf, provided the outlet already exists, the shelf is strong, and the manufacturer’s clearances are met. Measuring, leveling, adding a cord pass-through, and installing simple filler trim are reasonable DIY work for many people.
Hire a pro when the job involves a drawer microwave, a new circuit, island wiring, cabinet modification, face-frame alteration, flush installation, ductwork, or a wall oven stack. Those details affect safety, code compliance, and the finished cabinet appearance. A 1/4-inch reveal problem around a stainless trim kit can make an expensive kitchen look improvised.
For drawer microwaves, we typically want the cabinetmaker, electrician, and installer coordinated before the cabinet order is released. The cleanest installations happen when the appliance cut sheet is part of the cabinet package from the start.
Best Value
- Convert your 2.2 cu ft. countertop microwave oven to a built-in model with the NN-TK932SS 30” microwave trim kit
Common Mistakes to Avoid
The most expensive mistake is buying the appliance before checking the exact cabinet cutout. The second is assuming that a nominal 24-inch cabinet will accept any 24-inch drawer microwave. Always verify the real clear opening, not just the cabinet label.
Another common mistake is enclosing a countertop microwave without ventilation. If the manual calls for side, rear, or top clearance, the cabinet design needs to provide it. A pretty opening that overheats the appliance is not good craftsmanship.
We also see outlet problems: the receptacle placed directly behind a unit where the plug prevents full insertion, the cord pinched against the cabinet back, or the outlet forgotten completely in an island. Plan the power before the cabinets are built.
Finally, think about replacement. Keep the model documentation with the house records. Avoid overly custom openings with no filler options. Appliances change faster than cabinets, and a smart installation leaves the next owner a workable path.
Our Practical Recommendation
For a full kitchen remodel, the best microwave for inside a cabinet is usually a 24-inch drawer microwave in an island or base cabinet near landing space. It preserves upper-cabinet sightlines, keeps the appliance out of the cooking hood zone, and puts hot food at a safer working height.
For a tighter budget, use a trim-kit-compatible microwave in a properly planned wall or pantry cabinet. It gives a built-in look at a lower appliance cost, but only if the model and trim kit are matched exactly.
Do these 3 things before closing this tab:
1Fix the driver behind crashes, sound loss and screen glitches2Clear out junk files and repair common Windows errors3Scan for outdated or missing drivers - takes under a minuteFor the lowest-cost solution, use a compact countertop microwave in an open shelf niche with real ventilation clearance and a reinforced shelf. Keep it simple, accessible, and serviceable. The best cabinet microwave is not the one with the longest feature list. It is the one that fits the cabinet, the wiring, the user, and the way the kitchen actually works.
Frequently Asked Questions
Can you put a countertop microwave inside a cabinet?
Yes, but only if the manufacturer’s required ventilation clearances are maintained. Do not put a countertop microwave in a tight closed cabinet or behind a closed door unless the manual specifically allows it.
What type of microwave is best for inside a cabinet?
For most remodels, a 24-inch microwave drawer is the best premium option for a base cabinet or island. A built-in or countertop model with an approved trim kit is usually the best value for a wall or pantry cabinet.
How much does it cost to install a built-in or drawer microwave in 2026?
Simple labor may run about $100 to $400, while broader built-in or drawer installations commonly range from about $500 to $2,500 or more when cabinetry, electrical, or island work is included.
Does a built-in microwave need ventilation?
Yes. Built-in microwaves, drawer microwaves, trim kits, and countertop units all have model-specific airflow requirements. Follow the installation manual, because trim openings and air gaps are part of the appliance design.
Can a microwave drawer go in a kitchen island?
Yes. Islands are one of the best locations for microwave drawers, but the cabinet depth, support, finished floor height, outlet location, and adjacent drawer or seating clearances need to be planned before cabinet installation.
What size cabinet do you need for a 24-inch microwave drawer?
A 24-inch drawer microwave does not automatically fit every 24-inch cabinet. You need to verify the exact cutout width, height, depth, face-frame clearance, support, and anti-tip blocking from the manufacturer’s cut sheet.
Quick Recap
Product prices and availability are accurate as of the date/time indicated and are subject to change. Any price and availability information displayed on Amazon at the time of purchase will apply.

