A good graphic equalizer can make a home stereo sound cleaner, fuller, and better matched to the room. The best choice for most homeowners is a 10- to 15-band stereo graphic equalizer with standard RCA connections, quiet circuitry, clear sliders, and enough adjustment to tame bass boom or treble glare without turning setup into a science project. A 31-band EQ can be excellent, but it belongs in systems where someone is willing to measure the room and tune carefully.
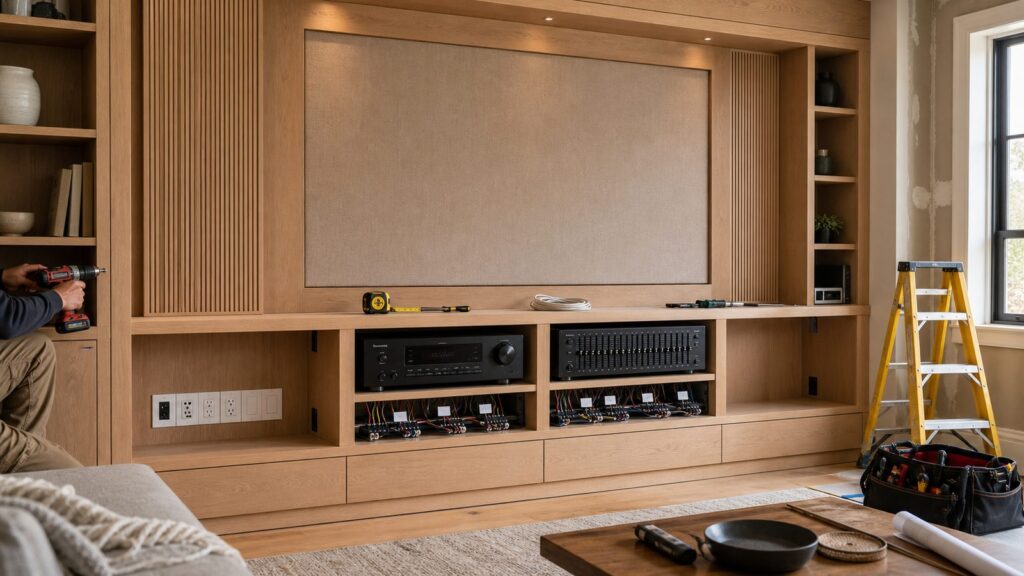
From a construction standpoint, the equalizer is only the final tuning layer. On our remodeling and media-room job sites, the bigger sound problems usually come from speaker placement, reflective rooms, poor wiring paths, closed cabinets with no ventilation, or equipment that was built into millwork before anyone checked cable depth and service access. The EQ helps most after those basics are handled.
As an Amazon Associate I earn from qualifying purchases.
In 2026, standalone graphic equalizers commonly cost about $50 to $150 for budget home or pro-style units, $150 to $500 for better rackmount or used hi-fi models, and $1,500 or more for premium audiophile analog units. A simple plug-in setup may cost nothing beyond short interconnect cables. Concealed wiring, built-ins, equipment closets, acoustic treatment, or a dedicated media room can move the total project into the hundreds or thousands of dollars.
What a Graphic Equalizer Actually Does
A graphic equalizer adjusts fixed frequency bands with sliders. Each slider controls a narrow slice of sound, measured in hertz. Low bands affect bass, middle bands affect voices and guitars, and high bands affect brightness, detail, and hiss. Common home units include 7-band, 9-band, 15-band, and 31-band stereo equalizers.
#1 Best Overall

- 100% Analog 10-Band Equalizer: Based on classic EQ effect pedal frequency band design for professional sound shaping
- Adjustable Gain Range: ±15dB adjustable gain range for each band, suitable for a variety of instruments including guitar and bass
- Precise Tone Control: 11 sliders allow you to shape your tone precisely and quickly with hands-on control
- True Bypass Circuit: Keeps a clean signal path to maintain your original tone when the pedal is disengaged
- Works with 9V center negative regular pedal power supply(not included); Compact dimensions for easy integration into your pedalboard setup
The word “graphic” comes from the visual shape made by the sliders. If the left side is raised, the system has more bass. If the right side is raised, it has more treble. If the center is lowered, vocals and instruments may sound recessed. That visual feedback is why many homeowners still like graphic EQs even though modern receivers often include digital room correction.
For most living rooms, a graphic EQ is used for three jobs: reducing boomy bass, softening harsh high frequencies, and giving older speakers or records a more pleasing tonal balance. It should not be used as a substitute for proper speaker placement, acoustic treatment, or subwoofer integration. If a couch is pushed against the back wall and the speakers are buried in a cabinet, no row of sliders will fully solve that.
Best Type of Graphic Equalizer for Most Home Stereo Systems
The practical sweet spot is a stereo 10- to 15-band graphic equalizer. It gives enough control to shape the system without making every adjustment too narrow. A 7-band EQ is simple and can work for casual listening, but the steps are broad. A 31-band EQ offers precise control, but it can also make the system worse if adjusted by ear without measurement.
What’s actually slowing this PC down?
Pick the symptom - the matching free tool is one click away.
Homeowners often ask whether they should buy the unit with the most sliders. Our answer is usually no. More bands are useful only when the rest of the system and room justify them. If the speakers are not placed correctly, the receiver is short on clean power, or the room is all glass, tile, and drywall, a 31-band unit will not magically create a balanced listening space.
7-Band and 9-Band Equalizers
A 7-band or 9-band EQ is best for simple tone shaping. It is easy to use and usually costs less. Many budget units fall in the $50 to $150 range. This type makes sense for a secondary stereo, garage system, workshop, small den, or a homeowner who wants tactile control without detailed tuning.
10- to 15-Band Equalizers
A 10- to 15-band stereo EQ is the best match for most home stereo owners. It provides meaningful control over bass, midrange, and treble while staying understandable. Used carefully, it can reduce a 60 Hz or 125 Hz bass problem, smooth the vocal range, or soften overly bright speakers. Good new or used units often land around $150 to $500, depending on condition, features, and brand.
31-Band Equalizers
A 31-band EQ is closer to a pro-audio tool. It is useful for problem rooms, rack systems, dedicated media spaces, and users who will tune with a measurement microphone. Each slider affects a tighter frequency range, which is powerful but easy to overdo. Adjacent bands interact with room modes, so casual boosting and cutting can create new problems.
Comparison Table: Which EQ Type Fits Your Room?
| EQ Type | Best Use | Typical 2026 Hardware Cost | Pros | Watchouts |
|---|---|---|---|---|
| 7-band or 9-band stereo EQ | Simple living rooms, casual systems, secondary rooms | $50-$150 | Easy to understand, low cost, quick setup | Broad adjustments; less useful for specific room problems |
| 10- to 15-band stereo EQ | Most home stereo systems | $150-$500 for better new, rackmount, or used hi-fi units | Good balance of control and simplicity | Still requires careful gain and modest slider moves |
| 31-band stereo EQ | Dedicated listening rooms, rack systems, measured tuning | $150-$500+ for many rack units; more for premium gear | Precise frequency control | Easy to over-adjust without a measurement mic |
| Premium audiophile analog EQ | High-end stereo rooms and serious hi-fi systems | About $1,500+ | Better build quality, lower noise, higher-grade controls | Cost only makes sense if the rest of the system is comparable |
| Used vintage EQ | Classic stereo setups and vintage receiver systems | About $75-$1,500+ depending on brand and condition | Period-correct look, tactile controls, strong resale appeal | Scratchy sliders, aging capacitors, failing lamps, worn RCA jacks, added noise floor |
Compatibility Comes Before Brand
The first question is not “Which equalizer is best?” It is “Can your receiver or amplifier actually connect to one?” Older receivers often include a tape-monitor loop, which is one of the easiest ways to add a graphic EQ. Many newer integrated amplifiers and AV receivers do not. Without the right loop or preamp path, the EQ may not affect all sources, or it may not work at all.
Rank #2

- Professional Dual Channel Stereo Graphic Equalizer: Experience top-tier audio quality with this professional-grade dual-channel stereo graphic equalizer, designed to deliver an exceptional audio experience for audiophiles and professionals alike.
- 15-Band Design: Each channel features a 15-band design with an adjustable range of ±12dB per band, allowing for extensive customization to suit your specific audio needs. Adjust gain and decay values from +/-6dB to +/-12dB for precise control.
- Effective Elimination of Low Frequency Noise: Equipped with a LOW-CUT switch, this 15-band graphic equalizer effectively attenuates unwanted sounds such as wind noise, floor rumble, electrical hum, and more, results in crystal-clear, dynamic output with the perfect level of low-end punch.
- Convenient Machine Debugging: Featuring a BYPASS switch, this stereo equalizer simplifies machine debugging. Its standard 1U rack-mount design ensures straightforward installation, making it user-friendly and hassle-free
- Versatile Input & Output Options: The audio control equalizer supports various input and output methods, including XLR balanced and 1/4" TRS unbalanced inputs and outputs. This versatility ensures compatibility with a wide range of audio setups, catering to diverse usage needs.Suitable for live applications, audio installations, and for use in a studio.
Before buying, look at the back of the receiver. You are looking for labels such as Tape Monitor, Tape In, Tape Out, Processor Loop, Pre Out, Main In, or external preamp connections. A traditional EQ sits between the source path and amplifier path. If the receiver has only speaker terminals and HDMI inputs, a standalone analog graphic EQ may not fit neatly into the system.
Common Connection Paths
With a tape-monitor loop, the EQ connects between Tape Out and Tape In using two pairs of RCA interconnects. With pre-out/main-in jacks, the EQ sits between the preamp output and amplifier input. With separates, it can go between the preamp and power amp. With a modern digital system, it may require an external DAC, analog preamp, or different signal-routing plan.
Do not buy an EQ until this path is confirmed. One of the most common mistakes we see is a homeowner buying a good-looking rack unit, then discovering the modern receiver has no usable loop. At that point the options become awkward: change the receiver, add external components, or use the EQ on only one source.
The Tool Desk
Outbyte Driver Updater FREEScan for outdated or missing drivers - takes under a minuteDriver Scan →Outbyte PC Repair FREERepair Windows errors before they cause bigger problemsFix Now →Start With the Room Before Moving Sliders
Speaker placement is free, and it often produces a bigger improvement than new hardware. Start with the main listening seat and the two speakers forming an equilateral triangle. If the speakers are 8 feet apart, the listener should start about 8 feet from each speaker. Then adjust toe-in so the tweeters aim toward the listening area, not randomly across the room.
Pull speakers away from walls when possible. Even 6 to 24 inches can change bass response and vocal clarity. Avoid stuffing bookshelf speakers deep inside cabinetry unless the speaker was designed for that location. Built-ins look clean, but they can create resonance, block rear ports, and trap heat around electronics.
Rooms with large windows, bare floors, stone fireplaces, and high ceilings can sound bright and echo-heavy. Rugs, curtains, upholstered furniture, bookshelves, and acoustic panels can reduce reflections more naturally than aggressive EQ. In a dedicated media room, we prefer to coordinate speaker locations, seating, acoustic surfaces, and wiring before drywall closes. That is much cheaper than cutting finished walls later.
How Much It Costs to Add a Graphic Equalizer in 2026
The equalizer itself is usually not the largest expense. The surrounding conditions drive the real cost: whether the system is already accessible, whether walls need to be opened, whether cable must be concealed, whether cabinets need ventilation, and whether the room needs broader audio work.
Do these 3 things before closing this tab:
1Repair Windows errors before they cause bigger problems2Scan for outdated or missing drivers - takes under a minute3Clear out junk files and repair common Windows errors| Project Scope | Typical 2026 Cost | What Is Included |
|---|---|---|
| DIY plug-in EQ setup | $0-$75 beyond the EQ | Short RCA cables, labels, simple shelf or rack placement |
| Budget standalone EQ | $50-$150 | Basic 7-, 9-, 15-, or 31-band unit, usually consumer or pro-style |
| Better rackmount or used hi-fi EQ | $150-$500 | Improved controls, stronger chassis, better metering, or vintage styling |
| Premium audiophile EQ | $1,500+ | High-end analog circuitry, premium build, low-noise design |
| Basic professional audio setup | $150-$500 | Connection, gain staging, source routing, and simple listening-position tuning |
| Professional surround or home audio installation | About $241-$1,350, with many averages near $794; complex installs often $500-$3,500 | Speaker setup, wiring, mounting, routing, and system configuration depending on scope |
| Larger media-room or home-theater project | $15,000-$30,000+ for advanced custom rooms | Hidden wiring, acoustic planning, cabinetry, premium gear, lighting, and design/build coordination |
In-wall speaker cable commonly costs about $30 to $125 per 100 feet in 2026, depending on gauge, copper quality, conductor count, and rating. A 14 AWG CL2-rated two-conductor cable is a common residential choice for many speaker runs. Longer runs, higher-power systems, and premium installations may call for 12 AWG. Plenum-rated cable costs more and is used where the building conditions require it.
Rank #3

- 10-BAND GRAPHIC EQ — 31.25Hz TO 16kHz FOR GUITAR & BASS: The Band Controller delivers surgical tone-shaping power with ten precisely chosen frequency bands (31.25Hz, 62.5Hz, 125Hz, 250Hz, 500Hz, 1kHz, 2kHz, 4kHz, 8kHz, 16kHz)—covering everything from sub-bass rumble to sparkling treble air. Compatible with 4-string and 5-string bass, 6-string and 7-string guitar, and even synth rigs. Players describe the tone-sculpting power as "an absolute game changer" that can make a Les Paul sound like a Strat—or vice versa.
- INDEPENDENT VOLUME CONTROL & LED-BACKLIT SLIDERS: The dedicated master Volume slider on the right side lets you adjust overall output level independently from your EQ settings—perfect for matching your bypassed signal or adding a clean boost for solos. Each of the 10 frequency sliders features a green LED indicator that lights up when the pedal is engaged, making it easy to see your exact settings on dark stages. Pro tip: For the quietest performance and to eliminate hum, use a regulated, isolated 9V power supply (not included)—many noise issues reported by users are resolved with proper power.
- VERSATILE TONE SCULPTING — FROM SUBTLE TWEAKS TO COMPLETE TRANSFORMATION: Use the Band Controller in your amp's FX loop to augment the built-in tone stack, place it before your overdrive pedals to shape your gain structure, or position it last in your chain as a master tone shaper. Scoop the mids for modern metal, boost the low-end for a fatter clean tone, or tame harsh frequencies from bright pickups. The neutral detent position ensures flat response when all sliders are centered.
- TRUE BYPASS & ROAD-READY R SERIES DESIGN: True bypass switching preserves your guitar's natural tone when the pedal is disengaged—zero tone coloration and zero signal degradation. Encased in a rugged aluminum alloy chassis (125×78.5×48mm, 316g), the Band Controller features the iconic R Series ambient LED lighting with 3 modes (Sync, Always On, or Off) via a recessed switch on the underside—giving your pedalboard a sleek turquoise glow. The sliders are smooth yet firm, holding their position even during transport.
- JOYO QUALITY & AFTER-SALES CONFIDENCE: Backed by JOYO's decade-plus reputation for crafting innovative, budget-friendly gear. Important: Powered by 9V DC adapter only (center negative, not included). Rated current: 30mA—unlike many competing 10-band EQs that require 18V, the Band Controller runs on standard 9V. No battery compartment. For the cleanest sound and to eliminate hum, use a regulated, isolated power supply and avoid daisy-chaining with high-current digital pedals. Should any issues arise—especially unexpected noise or a faulty slider—our dedicated support team is ready to assist through your Amazon order page.
Code, Cable, and Permit Notes Homeowners Should Not Skip
Low-voltage speaker wire feels harmless because it is not a 120-volt branch circuit, but hidden wiring still has rules. For in-wall or in-ceiling speaker runs, use listed cable rated for the location, commonly CL2 or CL3 for residential in-wall use. Do not bury lamp cord, zip cord, temporary speaker wire, or non-rated cable behind drywall.
Speaker wire should be kept separated from power wiring to reduce noise and avoid unsafe workmanship. When low-voltage and line-voltage paths must cross, a 90-degree crossing is preferred. Do not share electrical boxes unless the box and divider are rated for that purpose. Preserve fireblocking when drilling framing members, and seal penetrations where required. If wiring passes through return-air plenums or other special air-handling spaces, cable rating requirements can change.
Permit rules vary by city and county. Some jurisdictions do not require a permit for certain low-voltage audio work in a single-family home; others may require permits when wiring is concealed, when walls are opened, when electrical outlets are added, or when work is part of a larger remodel. The local authority having jurisdiction makes the final call. On our projects, we verify the requirement before walls close, because the expensive mistake is discovering a missed inspection after drywall and paint are finished.
Quick wins for a faster PC:
Scan for outdated or missing drivers - takes under a minuteDriver Scan →Repair Windows errors before they cause bigger problemsFix Now →Built-Ins, Equipment Closets, and Ventilation
A graphic equalizer does not make much heat compared with a receiver or power amplifier, but it often lives in the same cabinet. That cabinet needs planning. Receivers and amplifiers should have open air around them, a path for warm air to escape, and enough shelf depth for cables without hard bends. Many stereo components are 12 to 17 inches deep before cables. Add another 3 to 5 inches for RCA plugs, speaker wire bend radius, HDMI cables, and service access.
Closed millwork is one of the easiest ways to shorten equipment life. If the doors are solid and the back is sealed, heat builds up. We usually plan open backs, vent slots, grille panels, or quiet ventilation fans for equipment bays. If the system includes a rack, leave labeling space and service loops. A beautiful built-in that requires removing a shelf to unplug one RCA cable is not good design.
For remodels or new construction, install conduit or smurf tube from equipment locations to TV and speaker points. During framing, conduit is inexpensive compared with future wall surgery. Add pull strings, label both ends of each cable, and photograph open-wall wiring before insulation and drywall. Those photos are useful years later when someone wants to add a subwoofer, replace a receiver, or troubleshoot a dead channel.
How to Tune a Graphic Equalizer Without Making the System Worse
Start with all sliders at zero, often called unity or flat. Set speaker placement first. Confirm left and right channels are correct. Check that the receiver, source, EQ, and amplifier are not clipping. Then make small changes. A 2 dB or 3 dB adjustment can be audible. Large 8 dB or 12 dB boosts can add distortion, hiss, and speaker stress.
Recommended Free Tools
Use EQ subtractively first. If the bass sounds thick, reduce the likely bass bands instead of boosting treble to compensate. If voices sound harsh, gently reduce the upper midrange rather than cutting everything above it. If the system sounds dull, confirm tweeter height and speaker aim before pushing high-frequency sliders upward.
Rank #4

- For both bass and guitar, covering the common 4-string, 5-string bass and 6-string, 7-string guitars,Independent 10-band EQ that settings from 31.25Hz all the way up to 16kHz
- With independent output volume adjustment on the right side,Low power consumption current supply.All aluminum metal shell, durable and sturdy, lightweight and compact
- True Bypass.Deliver a transparent tone. During transmission, the signal remains fully intact, passing through the effects pedal with no popping, buzzing or electric noise
- 12 dB Boost/Cut Range.Sliders for output level/EQ level control, ±12 dB adjustable gain range for each band
- Equipped with a non slip silicone pad, easy to install, making the effect pedal non shifting and anti slip during performance
Level-match before judging. A louder setting often sounds better at first, even when it is not more accurate. If the EQ has input and output meters, keep levels near unity and watch for overload. If the sound becomes louder after EQ, turn it back down to the previous listening level before deciding whether the change actually improved clarity.
For serious tuning, use a measurement microphone and room-analysis software. This is especially useful with a 31-band EQ. Room modes can create narrow bass peaks, and adjacent EQ bands interact. Tuning by ear from one favorite song can produce a setting that sounds good for that track and wrong for everything else.
Independent reader supportYour contribution helps us test, update, and keep practical guides available for everyone.When to DIY and When to Hire a Pro
DIY is reasonable when the receiver has a clear tape-monitor loop or pre-out/main-in connection, the EQ will sit on an open shelf, no wiring will be hidden in walls, and the homeowner is comfortable reading labels on the back of equipment. A basic plug-in installation usually takes 30 to 90 minutes. Budget for two short stereo RCA cable pairs, labels, and a flashlight. Keep the system powered off while making connections.
Free tools Windows power users keep installed
One-click scans. No signup required.
Hire a pro when the work involves concealed wiring, wall plates, ceiling speakers, built-ins, equipment closets, new outlets, long cable runs, or integration with a surround receiver, projector, distributed audio system, or control system. Professional setup also makes sense when there is hum, buzz, ground-loop noise, or uncertainty about how consumer RCA gear interacts with grounded pro-audio components.
For a simple no-wall-work setup, professional audio help may run about $150 to $500. If the project includes speaker installation, concealed wiring, drywall repair, attic or crawlspace access, and finish work, costs can move into the $500 to $3,500 range. Larger media-room projects with custom cabinetry, lighting, acoustic planning, premium equipment, and hidden infrastructure can reach $15,000 to $30,000 or more.
Common Mistakes to Avoid
The first mistake is buying before checking compatibility. A graphic EQ needs a usable signal path. If the receiver does not have one, the EQ may be the wrong tool for that system.
The second mistake is using extreme slider boosts. Heavy boosting can cause clipping, distortion, hiss, and unnecessary speaker strain. Cutting problem frequencies is usually safer than pushing multiple bands upward.
The third mistake is trying to fix layout problems with electronics. Speakers jammed against walls, subwoofers in bad corners, and seating against a rear wall create acoustic problems that EQ can only partially hide.
Best Value
- MR DJ USA DEQ500 19" Rack Mount Pro Dual 10 Band Stereo Graphic Equalizer EQ
The fourth mistake is hiding non-rated wire behind drywall. In-wall and in-ceiling runs need listed cable suitable for the location. The fifth is forgetting access: no conduit, no pull string, no labels, no photos, and no service loop. That saves a small amount of time during installation and costs much more during the next upgrade.
Our Practical Recommendation
For most homeowners, the best graphic equalizer is a quiet, well-built 10- to 15-band stereo unit that matches the receiver’s connection options and fits the room’s actual needs. Spend first on speaker placement, proper wiring, ventilation, and room conditions. Then use the EQ for final tuning.
If the system is a vintage two-channel stereo with a tape-monitor loop, a clean used hi-fi EQ can be a satisfying upgrade. Inspect it carefully for noisy sliders, worn jacks, dim displays, and hum. If the system is modern and lacks analog loops, confirm the signal path before buying anything. If the room is being remodeled, plan the wiring and equipment layout now, while the walls and cabinetry can still be designed around the system.
A graphic equalizer should make the room easier to listen to, not harder to maintain. The best installations are quiet, accessible, code-aware, and modestly tuned. That combination does more for day-to-day listening than chasing the most sliders or the flashiest display.
Frequently Asked Questions
Do I need a graphic equalizer for my home stereo?
Not always. Start with speaker placement, seating position, and room reflections. A graphic equalizer is useful when the system still needs tonal adjustment after the room and speakers are set correctly.
Is a 15-band or 31-band equalizer better for home stereo?
A 10- to 15-band EQ is better for most homeowners because it is easier to tune. A 31-band EQ is better for problem rooms, rack systems, or users tuning with a measurement microphone.
How much does it cost to add a graphic equalizer in 2026?
Budget EQs commonly cost $50 to $150, better rackmount or used hi-fi units often cost $150 to $500, and premium audiophile EQs can run $1,500 or more. Simple DIY connection may cost $0 to $75 beyond the EQ, while professional setup commonly runs $150 to $500 when no wall work is required.
Outdated Drivers Are Slowing You Down
One free scan finds every outdated or missing driver and matches the right update for your exact hardware.Free scan · exact hardware matchPC Slower Than It Used to Be?
A free scan shows the junk files, broken settings and background clutter dragging Windows down - then fixes them in one click.Free scan · Windows 10 & 11Can I connect a graphic equalizer to a modern receiver?
Only if the receiver has a usable signal path such as a tape-monitor loop, processor loop, pre-out/main-in jacks, or an external preamp/DAC route. Many newer receivers do not make analog EQ connection simple, so check before buying.
Do I need special wire for in-wall speakers?
Yes. In-wall or in-ceiling speaker runs should use listed cable rated for the location, commonly CL2 or CL3 in residential work. Do not bury temporary speaker wire, lamp cord, or non-rated cable behind drywall.
Do I need a permit to run speaker wire inside walls?
Permit rules vary by local jurisdiction. Some areas exempt limited low-voltage audio wiring in single-family homes, while others require permits when wiring is concealed, walls are opened, or electrical work is added. Check with the local authority having jurisdiction before closing walls.
Quick Recap
Product prices and availability are accurate as of the date/time indicated and are subject to change. Any price and availability information displayed on Amazon at the time of purchase will apply.
Free tools Windows power users keep installed
One-click scans. No signup required.

