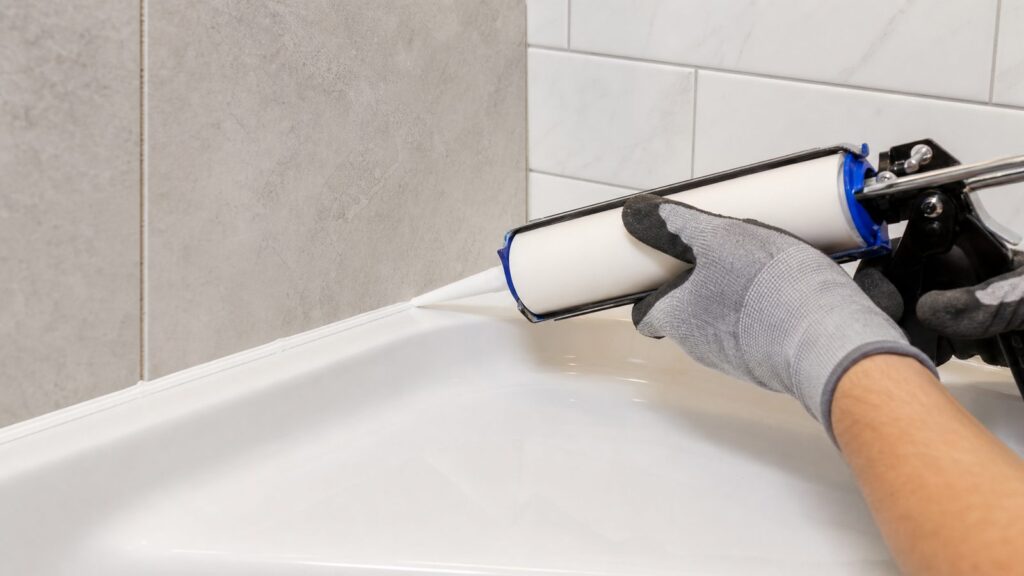
The best caulk to use in a shower is a 100% silicone kitchen-and-bath sealant, preferably mold-resistant, rated for wet areas, and compatible with the surfaces you are sealing. For most shower joints, that means the inside corners, the tub-to-tile joint, the shower pan perimeter, glass enclosure seams, bench edges, niche corners, and plumbing penetrations all get silicone, not painter’s caulk and not grout.
On our bathroom jobs, we treat shower caulk as a maintenance seal, not as the waterproofing system. That distinction matters. A good bead of silicone can keep water out of a joint. It cannot fix a cracked shower pan, loose tile, wet wallboard, a failed membrane, or a shower door track that was installed wrong. If the shower is sound and the joint is properly prepared, good silicone can last about 5 years in normal use. In a high-use bathroom with poor ventilation or harsh cleaners, it can fail sooner.

For a typical homeowner project, expect to spend about $8 to $18 per 10 oz tube for common kitchen-and-bath caulks in 2026. A simple tub or shower perimeter often takes one tube. A larger walk-in shower with vertical corners, a bench, niche, curb, and glass may take two or more. Professional shower or tub recaulking commonly falls around $65 to $300, with many real jobs priced by the service minimum because removal and prep take longer than the actual bead.
The Short Answer: Use 100% Silicone in Wet Shower Joints
If you only remember one rule, make it this: use 100% silicone anywhere the joint gets wet repeatedly. Silicone stays flexible, resists shrinking and cracking, and handles movement better than acrylic latex. That movement is not theoretical. Tubs flex when filled with water and a person steps in. Framed walls move slightly with temperature and humidity. Tile, acrylic pans, glass, metal trim, grout, and framing all expand and contract at different rates.
Do these 3 things before closing this tab:
1Scan for outdated or missing drivers - takes under a minute2Repair Windows errors before they cause bigger problems3Fix the driver behind crashes, sound loss and screen glitches#1 Best Overall
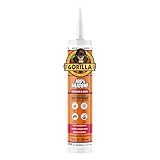
- Kitchen & Bath Ready – Premium white silicone caulk formulated for kitchens and bathrooms, delivering a durable, long-lasting seal in wet, humid environments
- 100% Waterproof Seal – Perfect for showers, tubs, sinks, tile, and backsplashes, keeping water out where it matters most
- 30-Minute Water-Ready – Can be exposed to water in as little as 30 minutes; full cure in 24 hours for reliable results
- Flexible and Durable – High-flex silicone caulk prevents shrinking, cracking, or breaking down; perfect for indoor and outdoor projects
- Long-Lasting Mold-Resistant – Formulated to resist mold and mildew after curing; easy to clean with soap and water
That is why grout belongs in the tile field, but flexible sealant belongs at changes of plane. A change of plane is where one surface meets another at an angle: wall to wall, wall to tub, wall to shower pan, wall to bench, wall to niche, and curb to wall. These joints move, and rigid grout eventually cracks. Once cracked, water can sit in the joint and begin working behind the finish surface.
For showers, look for these words on the tube:
- 100% silicone
- Kitchen and bath
- Waterproof
- Mold-resistant or mildew-resistant
- Rated for showers, tubs, or plumbing fixtures
- Water-ready or cure time clearly listed
Do not rely on the front label alone. Flip the tube over and check the manufacturer instructions for approved surfaces, cure time, cleanup method, and water exposure timing. A premium 100% silicone may cost only $3 to $8 more than a cheaper tube, but the labor to remove failed caulk is the expensive part. We do not save money by putting a weak product in a wet joint.
Silicone, Siliconized Acrylic, and Latex: What Goes Where
Most bad shower caulk jobs start with the wrong material. The confusing part is that many products say bathroom, tub, tile, waterproof, paintable, flexible, or mildew-resistant. Those claims do not all mean the product belongs inside a wet shower enclosure.
Use this comparison as a practical job-site guide:
| Caulk type | Best use | Where not to use it | Typical 2026 material cost |
|---|---|---|---|
| 100% silicone kitchen-and-bath sealant | Wet shower joints, tub-to-tile joints, shower pan perimeter, glass seams, tile corners, plumbing penetrations | Areas that must be painted, unless the product specifically says paintable | About $10-$18 per 10 oz tube for many premium options |
| Neutral-cure 100% silicone | Metal finishes, natural stone, cementitious surfaces, enclosed bathrooms, lower-odor work | Do not use without checking compatibility with the surface and manufacturer label | Often in the premium silicone range, about $10-$18+ per tube |
| Acetoxy-cure 100% silicone | Ceramic tile, glazed tile, porcelain, glass, fiberglass, acrylic fixtures when approved by the label | Some metals, natural stone, and sensitive surfaces; it has a vinegar odor while curing | Commonly about $8-$15 per tube |
| Siliconized acrylic or latex bathroom caulk | Paintable bathroom trim, baseboards, door casing, ceiling lines, dry backsplash edges | Inside wet shower corners, tub-to-wall joints, shower pan joints, glass enclosure seams | Basic products often around $7-$10 per 10 oz tube |
| Painter’s acrylic latex | Dry interior trim before painting | Any wet shower or tub joint | Usually inexpensive, but wrong for shower wet service |
The most common homeowner mistake is choosing siliconized acrylic because it is easier to smooth and clean up. It can look good on day one. In a shower, though, constant water exposure, soap film, cleaning chemicals, and movement can make it soften, shrink, peel, or turn black. We reserve paintable acrylic products for dry bathroom trim, not the shower interior.
Recommended Free Tools
Neutral-Cure vs Acetoxy-Cure Silicone
Silicone also comes in different cure chemistries. Acetoxy-cure silicone is the type many people recognize by the vinegar smell. It can work well on ceramic tile, porcelain, glass, fiberglass, and many acrylic fixtures when the label approves those surfaces. It is common, durable, and widely available.
Neutral-cure silicone is often the more contractor-friendly choice around sensitive materials. It is usually lower odor and less corrosive than acetoxy-cure silicone. We prefer neutral-cure silicone around some metal finishes, natural stone, cementitious materials, and enclosed bathrooms where odor matters. The label still controls the decision. If the tube says not to use it on a surface, do not talk yourself into it.
Where Shower Caulk Belongs
A shower has more caulk joints than many people realize. A quick bead along the tub is not the same as a proper shower seal-up. On tile showers, we look closely at every change of plane and every transition between unlike materials.
Common shower caulk locations include:
- Inside vertical tile corners
- Wall-to-tub joint
- Wall-to-shower-pan joint
- Wall-to-bench and bench-to-face transitions
- Niche inside corners and shelf edges
- Curb-to-wall transitions
- Glass enclosure side rails where the manufacturer calls for sealant
- Escutcheon or trim penetrations around shower valves and tub spouts
- Small approved gaps between acrylic or fiberglass wall panels
There is one caution with glass doors and tracks: do not seal every visible gap just because you can. Some enclosures are designed with weep paths so water can drain back into the shower. If those weep holes or drainage gaps are sealed, water can sit in the frame and leak somewhere worse. We follow the shower-door manufacturer’s installation instructions, especially at the bottom track and side jambs.
PC Slower Than It Used to Be?
A free scan shows the junk files, broken settings and background clutter dragging Windows down - then fixes them in one click.Free scan · Windows 10 & 11Crashes, No Sound, or Screen Glitches?
Random freezes, missing sound and display glitches usually trace back to one bad driver. Find and replace yours safely.Free scan · under a minuteShower Corners: Caulk, Not Grout
For tile work, grout is for the tile field. Flexible sealant is for changes of plane. That includes inside corners and the joint where tile meets a tub or receptor. Grout in these joints may look cleaner for a short time, but it is rigid. When the corner moves, it cracks. When it cracks, water and soap residue collect. When residue collects, mold follows.
For tile showers, a grout-matched 100% silicone is often the cleanest finish. Many tile systems offer matching silicone colors, so the corner can blend with the grout while still moving like a sealant joint should.
Rank #2

- 100% Silicone Caulk Protection: This silicone caulk white provides ultimate waterproof protection, ensuring a reliable seal against water damage. Ideal for areas with consistent exposure, keeping your surfaces safeguarded and pristine under any weather condition.
- Strong and Flexible: Delivers a silicone sealant waterproof white that remains permanently flexible, adapting to surface movements for a lasting, durable hold. Perfect for dynamic environments like bathrooms and kitchens where adaptability and resilience are paramount.
- Quick 30 Minute Water Ready Performance: Experience the convenience of a silicone caulk that becomes water resistant in just 30 minutes, making it perfect for time sensitive projects. No more waiting hours, dependable, quick sealing efficiency with white silicone caulk.
- Shrink and Crack Proof: Experience superior durability with white silicone caulk that withstands temperature fluctuations. Its flexibility guarantees your surfaces stay intact without shrinking or cracking, ensuring consistent protection and a flawless finish over time.
- Low Odor and Safe Indoors: Enjoy stress free application with this silicone sealant featuring a low odor, neutral cure formula. Great for indoor use without overwhelming fumes, enhancing comfort and safety while ensuring effective waterproof clear protection for your spaces.
What Makes Shower Caulk Fail Early
Most failed shower caulk is blamed on the product. On job sites, the bigger problem is usually preparation. Silicone is unforgiving. It will not reliably bond to old cured silicone residue, soap film, mildew, damp grout, dusty tile, or cleaner residue. If the surface is dirty or wet, even expensive caulk can peel in a few months.
The failure pattern tells a story. A bead that peels away cleanly from one side usually had poor adhesion. A bead that splits down the middle may have been too thin, stretched too far, or installed in a joint that needed backer rod. Black staining under a clear bead usually means contamination or trapped moisture was left behind. Repeated failure in the same spot can point to movement, a loose tub, water behind the tile, cracked grout, or a leaking pan.
Quick wins for a faster PC:
Scan for outdated or missing drivers - takes under a minuteDriver Scan →Clear out junk files and repair common Windows errorsFree Scan →Fix the driver behind crashes, sound loss and screen glitchesFind Drivers →Here are the problems we see most often:
- New caulk applied over old caulk
- Silicone residue left on the bonding faces
- Joints caulked while damp
- Cleaner residue left behind after mildew removal
- Painter’s acrylic used inside the shower
- Deep gaps filled entirely with caulk instead of backer rod
- Beads made too thin to flex
- Oversized beads that hold water and look messy
- Shower used before the sealant reached its water-ready time
- Mold-resistant caulk expected to overcome poor ventilation and soap scum
Mold-resistant silicone is useful, but it is not magic. Mold feeds on soap film, body oils, shampoo residue, and damp dust. If the bathroom fan is weak, the shower stays wet for hours, or old contaminated caulk remains under the new bead, mold can return quickly.
How to Choose the Right Color and Finish
Color is not only cosmetic. It affects how clean the joint looks over time. Clear silicone can disappear against glass, but it can also make dark gaps look darker. White silicone usually looks best where white acrylic, fiberglass, or porcelain fixtures meet tile. In tile showers, color-matched silicone often gives the most professional result at corners.
Our usual approach is simple:
- White silicone for white tubs, white shower pans, white surrounds, and many acrylic fixtures.
- Clear or translucent silicone for glass enclosure seams, mixed materials, and places where a white line would look too heavy.
- Grout-matched silicone for tile inside corners, niche edges, benches, and curbs.
- Almond, biscuit, gray, or specialty colors when matching older fixtures or non-white tile work.
For a wide joint, choose color more carefully. A 1/8-inch bead of white silicone can look crisp. A 3/8-inch smear of bright white silicone across dark tile looks like a repair. If the gap is that wide, the better answer may be backer rod, a cleaner bead profile, or correcting the underlying alignment problem.
How Much Shower Caulk You Need
A standard 10.1 oz tube of caulk typically covers about 25 to 55 linear feet, depending on bead size. A small 1/8-inch bead goes much farther than a heavy 3/8-inch bead. Most tub/shower perimeters use one tube. A full walk-in tile shower with vertical corners, bench joints, niche corners, curb transitions, and glass can use two tubes or more.
As a rough estimating guide:
| Shower area | Approximate linear feet | Likely material needed |
|---|---|---|
| Simple tub-to-tile joint only | 10-15 linear feet | One 10 oz tube |
| Tub surround perimeter plus vertical corners | 25-40 linear feet | One tube, sometimes two |
| Standard tile shower with pan and two inside corners | 35-55 linear feet | One to two tubes |
| Walk-in shower with bench, niche, curb, and glass | 60-100+ linear feet | Two or more tubes |
Buy one extra tube if the color match is critical. Dye lots and product availability change. Having the same product on hand also helps if you need to redo a short section during installation.
What Shower Recaulking Costs in 2026
For DIY work, the material cost is modest. A common kitchen-and-bath caulk tube runs about $8 to $18. Basic siliconized acrylic may be around $7 to $10, but that is not the product we want inside wet shower joints. Add a caulk gun, scraper, razor blades, painter’s tape, denatured alcohol or another label-approved final wipe, backer rod for deeper gaps, gloves, and disposal supplies. Many homeowners already have some of that, but a first-time setup can easily add $20 to $50.
Professional shower or tub recaulking in 2026 commonly falls around $65 to $300. National consumer cost guides show bathtub or shower caulking ranges around $105 to $290 and $65 to $300. General caulking benchmarks can run about $2.45 to $5.03 per linear foot, but shower recaulking is often not priced by the foot alone. Removal, cleaning, drying, access, and small-service minimums drive the price.
The main cost drivers are:
- Total linear feet of joint
- Whether old silicone must be cut out completely
- Mold staining and cleaning time
- Failed grout behind the bead
- Joint width and depth
- Number of corners, niches, benches, shelves, and curbs
- Glass enclosure work
- Travel and service minimums
- Local labor rates
- Signs of water damage that need investigation
A clean tub-to-tile bead can be a low-end service. A full walk-in shower with old silicone, stained corners, a bench, niche, curb, and glass can approach or exceed the high end. If caulk removal reveals wet drywall, swollen trim, loose tile, cracked grout, soft subfloor, or a leaking shower pan, the job is no longer just recaulking. It becomes repair or remodel work.
The Tool Desk
Outbyte Driver Updater FREEScan for outdated or missing drivers - takes under a minuteDriver Scan →Outbyte PC Repair FREERepair Windows errors before they cause bigger problemsFix Now →How We Prep a Shower Joint Before Caulking
The best silicone in the store will fail if the joint is not prepared correctly. Our crews spend more time removing, cleaning, and drying than applying the bead. That is the right ratio.
1. Remove the Old Caulk Completely
Cut along both edges of the old bead with a sharp utility knife or caulk removal tool. Pull the bead out in strips where possible. Then scrape the bonding faces carefully. The bonding faces are the two surfaces the new caulk must stick to. Silicone generally does not bond reliably to cured silicone residue, so shiny residue left on tile or tub surfaces is a problem.
Work patiently around acrylic and fiberglass. These surfaces scratch more easily than tile. Use plastic scrapers where needed and keep blades flat. If a chemical caulk remover is used, follow the label and rinse or neutralize as directed. Do not leave remover residue in the joint.
2. Clean Mildew, Soap Film, and Body Oil
After the old caulk is removed, clean the joint. Mildew, soap scum, shampoo residue, and body oils interfere with adhesion. Use a cleaner appropriate for the surface. Rinse thoroughly. Cleaner residue can be just as harmful as dirt.
Free tools Windows power users keep installed
One-click scans. No signup required.
If the old bead was black underneath, slow down. Staining may be surface mildew, but it can also mean moisture has been sitting behind the joint. If the wall feels soft, tile moves, grout is missing, or water keeps appearing after cleaning, stop and investigate before sealing it shut.
3. Let the Joint Dry
Caulking over damp joints is one of the fastest ways to create mold and peeling. After cleaning and rinsing, allow the joint to dry fully. In a humid bathroom, that may mean waiting overnight or using fans and ventilation. The joint should be dry inside the gap, not just dry on the surface.
4. Final Wipe the Bonding Faces
Before caulking, we often wipe the bonding faces with alcohol if it is compatible with the surface and the sealant label. The goal is to remove light residue and leave a clean surface. Do not soak porous stone or use solvents that the manufacturer warns against.
5. Use Backer Rod for Deep Gaps
Deep joints should not be filled solid with caulk. If a gap is deep, use closed-cell backer rod sized slightly larger than the joint so it compresses and stays in place. Backer rod controls depth and helps the sealant form the right shape. A good sealant bead bonds to the two sides of the joint, not the back of the joint. That lets it stretch and move properly.
As a practical rule, many small shower joints end up around 1/8 inch to 1/4 inch wide. If the joint is much wider or deeper, the bead design matters more. A huge blob of silicone is not a professional fix.
Application Tips That Make the Bead Last
Good caulking is controlled and boring. The bead should be even, well bonded, and not larger than needed. A messy bead traps water, collects soap film, and draws attention to the repair.
Rank #4

- 100% Silicone Caulk Protection: This silicone caulk clear provides ultimate waterproof protection, ensuring a reliable seal against water damage. Ideal for areas with consistent exposure, keeping your surfaces safeguarded and pristine under any weather condition.
- Strong and Flexible: Delivers a silicone sealant waterproof clear that remains permanently flexible, adapting to surface movements for a lasting, durable hold. Perfect for dynamic environments like bathrooms and kitchens where adaptability and resilience are paramount.
- Quick 30 Minute Water Ready Performance: Experience the convenience of a silicone caulk that becomes water resistant in just 30 minutes, making it perfect for time sensitive projects. No more waiting hours, dependable, quick sealing efficiency with clear silicone caulk.
- Shrink and Crack Proof: Experience superior durability with clear silicone caulk that withstands temperature fluctuations. Its flexibility guarantees your surfaces stay intact without shrinking or cracking, ensuring consistent protection and a flawless finish over time.
- Low Odor and Safe Indoors: Enjoy stress free application with this silicone sealant featuring a low odor, neutral cure formula. Great for indoor use without overwhelming fumes, enhancing comfort and safety while ensuring effective waterproof clear protection for your spaces.
Cut the nozzle smaller than you think. A 1/8-inch opening is a good starting point for many shower joints. Test the bead on scrap cardboard. Hold the gun at a steady angle and move continuously. The goal is to push sealant into the joint, not lay a rope on top of it.
For homeowners, painter’s tape can help create clean edges. Set the tape lines evenly, apply the bead, tool it once with steady pressure, and pull the tape while the silicone is still wet. Waiting too long can tear the edges. Keep paper towels and the label-approved cleanup material nearby before you start.
What’s actually slowing this PC down?
Pick the symptom - the matching free tool is one click away.
Do not over-tool. Repeatedly smearing silicone thins the bead, spreads residue across the tile, and makes the surface ugly. Tool once or twice, then leave it alone.
Fill the Tub Before Caulking
For a tub-to-wall joint, fill the tub with water before caulking and leave it full through the initial cure period. A filled tub sits lower, closer to its in-use position. If you caulk an empty tub and the tub drops when someone bathes or showers, the bead can stretch and separate early. This small step reduces stress on the joint.
Respect Cure Times
Dry-to-touch and ready-for-water are not the same thing. Some fast-cure silicones advertise water readiness in a few hours under specific conditions. Other products need 24 hours or more before water exposure, and full cure can take longer depending on humidity, temperature, bead size, and ventilation. Follow the tube. If the bathroom is cold, humid, or the bead is thick, give it more time.
Do not clean fresh silicone like latex caulk. Silicone cleanup is different and often requires dry tooling or a solvent approved by the manufacturer. Water can make a mess and interfere with the finish.
When Caulk Is Not the Fix
Caulk is a seal at the surface. It is not a shower pan, waterproof membrane, tile backer, plumbing repair, or structural fix. If water is getting behind the shower, caulk may temporarily hide symptoms while damage continues.
Stop the recaulk project and investigate if you see any of these signs:
- Caulk fails again within a few months
- Black staining returns from behind the bead
- Tile is loose, hollow-sounding, or moving
- Grout is cracked across the field, not just at corners
- The shower pan is cracked or flexing
- The tub moves noticeably when filled or stepped into
- Drywall or trim outside the shower is swollen
- Flooring near the shower feels soft
- Water stains appear on the ceiling below
- There is a musty odor that does not clear after cleaning
Building codes and industry standards treat waterproofing as a system. Shower receptors, pans, membranes, and wall assemblies have to be built to manage water before the finish caulk ever goes on. Tile and grout are not waterproofing by themselves. Caulk helps shed water at vulnerable transitions, but the shower still needs a properly built substrate, pan, drain connection, and waterproofing layer.
When to DIY vs When to Hire a Pro
Recaulking a sound shower is a reasonable DIY project if you have patience and the joint is accessible. The skill is not complicated, but the prep is fussy. Plan on 2 to 4 hours for careful removal and cleaning on a typical tub or small shower, plus drying and cure time. A larger tile shower can take longer.
Best Value

- Indoor/Outdoor 100% Waterproof Seal – Provides a durable, long-lasting seal for both indoor and outdoor use, perfect for showers, sinks, windows, doors, gutters, and vents
- 30-Minute Water-Ready – Fast-curing formula allows water exposure in just 30 minutes, perfect for quick home repairs and DIY projects
- Mold & Mildew Resistant – Protects surfaces from mold and mildew growth; easy to maintain with regular cleaning for lasting performance
- Highly Flexible & Durable – Meets ASTM C-920, Class 35 standards; won’t shrink, crack, or break down over time
- Clean Finish & Long-Lasting Performance – Maintains a professional look without yellowing; made for long-term results
DIY makes sense when:
- The old caulk is simply aged, cracked, or discolored
- The tile, tub, pan, and glass are solid
- No water stains or soft surfaces are present
- You can keep the shower unused during drying and cure
- The joint is narrow and easy to access
- You are comfortable using sharp blades without damaging finishes
Hire a pro when:
- Caulk keeps peeling or turning black quickly
- There is suspected water damage
- The shower pan, curb, bench, or niche may be leaking
- Tile or grout is failing beyond the corner joint
- The joint is very wide, deep, or irregular
- Glass enclosure drainage paths are unclear
- The shower is part of a rental, sale, insurance issue, or larger remodel
From a cost standpoint, DIY materials may be under $50 for many small jobs. Professional recaulking may be $65 to $300 or more, but a good contractor is also looking for the reason the old caulk failed. That inspection mindset is often worth more than the bead itself.
Safety and Permit Notes
Basic recaulking usually does not require a permit. You are maintaining an existing finish seal. Still, use common sense: ventilate the bathroom, wear gloves, protect your eyes when scraping overhead or in corners, and handle razor blades carefully. Silicone and cleaners can have strong fumes, especially in small bathrooms.
A permit question can come up when the scope changes. If you discover wet wallboard, a failed shower pan, damaged subfloor, plumbing leaks, or the need to rebuild a shower receptor, the work may move into plumbing, framing, waterproofing, or remodel territory. Permit rules vary by city and county, but shower pan replacement, drain work, and larger bathroom remodels often need inspection. For rental properties, multifamily buildings, condos, and commercial spaces, the rules can be stricter.
Do not seal over an active leak. If water is coming from behind the escutcheon, under the pan, through a cracked curb, or from a supply or drain connection, caulk is the wrong repair.
Our Practical Recommendation
For most homeowners, the best shower caulk choice is a premium 100% silicone kitchen-and-bath sealant in white, clear, or grout-matched color. Choose neutral-cure silicone when working around sensitive metal finishes, natural stone, cementitious surfaces, or when lower odor matters. Use siliconized acrylic only for paintable dry bathroom trim, not wet shower joints.
The product matters, but the installation matters more. Remove all old caulk. Clean the joint. Rinse away cleaner residue. Let it dry completely. Use backer rod in deep gaps. Apply a controlled bead. Tool it once. Keep the shower dry until the manufacturer says it is water-ready.
A shower is one of the hardest-working assemblies in a house. It sees hot water, soap, movement, humidity, and cleaning chemicals every week. Good silicone gives that assembly a flexible, waterproof surface seal where materials meet. Bad prep turns even the best tube into a short-term patch. If the shower is structurally sound, a careful recaulk can be a clean, inexpensive maintenance project. If the same joint keeps failing, the caulk is telling you to look deeper.
Frequently Asked Questions
What is the best caulk to use in a shower?
Use a 100% silicone kitchen-and-bath sealant rated for wet areas. It stays flexible, resists shrinking and cracking, and handles movement at shower corners, tub joints, pans, and glass better than acrylic caulk.
Is 100% silicone better than acrylic caulk for a shower?
Yes. Acrylic or siliconized acrylic caulk is easier to paint and tool, but it is not as durable in constant wet service. Use it for dry bathroom trim, not inside the shower.
Should shower corners be caulked or grouted?
Shower corners should be caulked with flexible sealant, not grouted. Corners and tub or pan transitions move, and rigid grout often cracks at those changes of plane.
How long should shower caulk dry before using the shower?
Follow the manufacturer label. Some fast-cure silicones are water-ready in a few hours under ideal conditions, while many need 24 hours or more. Thick beads, cool rooms, and high humidity can extend cure time.
Can you put new shower caulk over old caulk?
Do not caulk over old shower caulk. Remove the failed bead completely, clean the bonding faces, rinse away residue, let the joint dry, and then apply new silicone. New silicone does not reliably bond to old cured silicone residue.
Outdated Drivers Are Slowing You Down
One free scan finds every outdated or missing driver and matches the right update for your exact hardware.Free scan · exact hardware matchWindows Errors? Fix Them Before They Spread
Repair common Windows errors and clear accumulated junk for a smoother, more stable PC - no reinstall needed.Free scan · no reinstallWhy does my shower caulk keep turning black or peeling?
Common causes include trapped moisture, soap film, poor ventilation, old contaminated caulk left behind, using acrylic caulk in a wet joint, or an underlying leak. If failure returns within months, inspect for water damage or movement.
Quick Recap
Product prices and availability are accurate as of the date/time indicated and are subject to change. Any price and availability information displayed on Amazon at the time of purchase will apply.