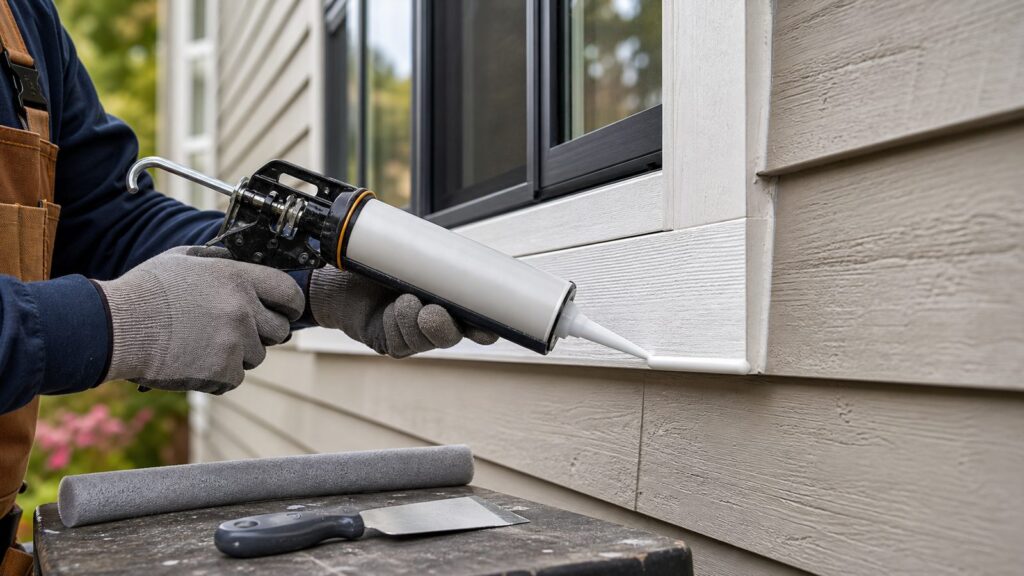
The best caulk for cedar siding is usually a high-quality, paintable, elastomeric exterior sealant. For most painted cedar trim joints, window and door edges, corner boards, and penetrations, we recommend a premium acrylic-latex, acrylic-silicone, or acrylic-urethane sealant rated for exterior siding movement. For higher-movement or more exposed joints, a polyurethane, polysulfide, terpolymer rubber, or modern hybrid sealant may be the better choice if it is compatible with the finish.
That answer comes with one major warning: caulk is not waterproofing by itself. Cedar siding lasts when the wall assembly manages water correctly. That means weather-resistive barrier, flashing, drainage, clearances, sealed end grain, and then caulk only at the joints that actually need sealant. On our job sites, failed cedar caulk is often a symptom, not the original problem.
As an Amazon Associate I earn from qualifying purchases.
If you remember only one rule, make it this: use caulk to seal vulnerable trim and penetration joints, not to glue shut every lap, butt joint, or drainage path in the siding. Cedar needs to dry. Sealing the wrong joint can trap water and shorten the life of the siding.
Best Caulk Types for Cedar Siding
Cedar is not the same as PVC trim, fiber cement, vinyl siding, or painted drywall. It moves with moisture, contains natural extractives, absorbs water through end grain, and often receives either paint or semi-transparent stain. The sealant has to bond to wood, tolerate movement, handle ultraviolet exposure, and work with the finish system.
#1 Best Overall

- Dynaflex Ultra is powered by Weather Max Technology for long-lasting, all weather protection, making it the perfect exterior sealant for windows, door, siding and trim
- All purpose sealant in a proprietary synthetic latex formula dries tack free in 30 minutes, is paint and rain ready in 1 hour
- Creates a 100% waterproof and weatherproof seal that resists the elements
- Premium latex formula seals joints up to 1" wide and creates a tough hydrophobic surface that prevents water absorption and resists dirt pick up for a clean looking surface
- Features superior flexibility and strong multi-material adhesion on a variety of building materials, versatile product for exterior and interior applications
For most homeowners, these are the practical choices:
- Premium paintable acrylic-latex or acrylic-silicone sealant: Good default for painted cedar siding and trim. Easier to tool, easier to paint, lower odor, and widely available.
- Acrylic-urethane or high-performance elastomeric sealant: Better movement capability than basic painter’s caulk. A good choice around trim, windows, doors, and vertical joints on painted cedar.
- Polyurethane sealant: Strong adhesion and good durability for high-exposure joints, but it can be harder to tool, may require specific primers, and must be checked for paint or stain compatibility.
- Hybrid or MS-polymer style exterior sealant: Often performs well in demanding exterior joints and may have better flexibility than basic latex caulk. Check the label for wood, siding, exterior exposure, and paintability.
- Polysulfide or terpolymer rubber sealant: Specialty options for demanding exterior joints where movement and exposure are high. These are less common for small homeowner repairs but can be appropriate in professional work.
For movement-rated joints, look for products meeting ASTM C920. That standard is commonly associated with elastomeric sealants designed to handle joint movement. Many basic acrylic-latex caulks meet ASTM C834, which can be acceptable for lower-movement residential joints, but it is not the same performance category. Some premium acrylic or urethane-acrylic products meet ASTM C920 Class 25, meaning they are designed for plus or minus 25% joint movement when installed correctly.
What We Would Use in Common Cedar Siding Situations
The best product depends less on the brand name and more on the condition of the siding, the finish, and the joint. Here is the decision tree we use in the field.
The Tool Desk
Outbyte Driver Updater FREEScan for outdated or missing drivers - takes under a minuteDriver Scan →Outbyte PC Repair FREERepair Windows errors before they cause bigger problemsFix Now →Painted cedar siding and trim
Use a premium paintable elastomeric acrylic, acrylic-silicone, or acrylic-urethane exterior sealant. This is the best fit for most painted cedar around window trim, door trim, outside corners, vertical trim joints, pipe penetrations, and gaps between dissimilar materials.
Basic painter’s caulk is not enough for most exterior cedar work. It may look fine on day one, but cedar movement, sun exposure, and freeze-thaw cycles can split a weak bead in a season or two. Spend the extra few dollars per tube. In 2026, good exterior tubes commonly run about $5 to $11 per 10.1-ounce tube. Premium examples listed by major home centers include products around $8.48 to $11.48 per tube. That extra material cost is small compared with scraping, recaulking, and repainting failed joints.
Stained or natural cedar
For stained cedar, avoid clear silicone. Use a color-matched exterior siding or wood sealant in a cedar, tan, bronze, or brown tone, then test it in a hidden location before committing to a visible elevation. Semi-transparent stain and sealant do not always blend the way a color chart suggests.
Natural cedar weathers, darkens, and changes tone across sun and shade. A clear bead can become shiny, gray, dirty, or visibly detached. A slightly darker color-matched sealant usually ages better than a clear bead, but compatibility still matters. Test adhesion, appearance, and stain behavior before sealing the front of the house.
Do these 3 things before closing this tab:
1Fix the driver behind crashes, sound loss and screen glitches2Clear out junk files and repair common Windows errors3Scan for outdated or missing drivers - takes under a minuteHigh-movement joints
Where siding meets masonry, large trim assemblies, exposed corner boards, or joints that have already cracked more than once, consider a polyurethane, hybrid, or other ASTM C920-rated exterior sealant. These products are often more expensive and less forgiving to apply, but they can handle movement better than general-purpose caulk.
Recurring cracks are a clue. The fix may not be “more caulk.” The joint may be too wide, too deep, three-sided bonded, missing backer rod, or moving because of framing, trim installation, or moisture cycling. If a joint opens every year, diagnose it before filling it again.
Caulk Types Compared for Cedar Siding
The table below summarizes how we think about the common options. Always confirm the manufacturer’s current label for exterior wood, siding, paintability, cure time, temperature range, and ASTM rating.
| Sealant type | Best use on cedar siding | Paintable? | Typical strength | Main caution |
|---|---|---|---|---|
| Premium acrylic-latex | Painted trim joints, windows, doors, small gaps | Usually yes | Easy to apply and paint | Not ideal for high-movement or wet-service joints |
| Acrylic-silicone | Painted exterior siding and trim joints | Usually yes | Better flexibility than basic latex | Still check movement rating and cure window |
| Acrylic-urethane / elastomeric | Painted cedar joints with moderate movement | Usually yes | Good flexibility and paint performance | Needs proper joint prep and thickness |
| Polyurethane | High-exposure or high-movement joints | Often yes after cure | Strong adhesion and durability | Harder to tool; may need primer; can be messier |
| Hybrid / MS-polymer | Demanding exterior joints, trim, penetrations | Often yes | Good movement and weather resistance | Compatibility varies by product and finish |
| 100% silicone | Generally not recommended for cedar siding | Often no or unreliable | Water resistance on some materials | Poor paintability and poor cedar compatibility |
Do Not Use Pure Silicone or Clear Caulk on Cedar
Pure silicone sounds attractive because homeowners associate it with waterproofing. On cedar siding, it is usually the wrong product. Western Red Cedar guidance warns against pure silicone and clear caulks on cedar because they do not work well and are not recommended.
Crashes, No Sound, or Screen Glitches?
Random freezes, missing sound and display glitches usually trace back to one bad driver. Find and replace yours safely.Free scan · under a minutePC Slower Than It Used to Be?
A free scan shows the junk files, broken settings and background clutter dragging Windows down - then fixes them in one click.Free scan · Windows 10 & 11In the field, the problems are predictable. Silicone can peel from wood, repel paint, create shiny visible lines, and make future repair difficult. Once silicone residue contaminates a cedar joint, many paintable sealants will not bond well until the surface is aggressively cleaned or sanded. That turns a simple maintenance job into a prep problem.
Clear caulk is also a poor bet on cedar. It rarely stays invisible. Dust, tannins, UV exposure, mildew, and surface movement make the bead stand out over time. If the cedar is stained or left natural, use a compatible color-matched exterior sealant and test first.
Where Cedar Siding Should Be Caulked
Good caulking protects vulnerable joints where wind-driven rain can enter and where the joint is designed to be sealed. On cedar siding, we commonly caulk these locations:
- Vertical joints between cedar siding and window trim
- Vertical joints between cedar siding and door trim
- Outside and inside corner board joints where the siding meets trim
- Small gaps around exterior penetrations, such as pipes, vents, electrical boxes, and hose bibs
- Trim-to-trim joints that are exposed to weather and designed to be sealed
- Gaps at dissimilar materials, such as siding-to-masonry transitions, when the joint design calls for sealant
These joints should be clean, dry, sound, and properly sized. Caulk should bridge between two stable surfaces. It should not be smeared over dirt, failing paint, punky wood, mildew, or wet end grain.
Free tools Windows power users keep installed
One-click scans. No signup required.
A proper bead is not just a cosmetic line. It needs enough contact with both sides of the joint to bond, enough thickness to move, and the right shape to stretch. Tooling the bead immediately after application pushes the sealant against both surfaces and shapes the face so water sheds instead of sitting in ridges.
Where Not to Caulk Cedar Siding
This is where many cedar siding repairs go wrong. More caulk does not mean a drier wall. Sometimes it means the wall dries more slowly.
Do not automatically caulk every horizontal lap in cedar clapboard siding. Those laps are part of how the siding sheds water and dries. Sealing them can trap moisture behind the boards, especially if there is no rainscreen gap. It can also create an uneven, messy line that cracks as the boards expand and contract.
Do not automatically caulk every butt joint either. Some butt joints are handled with flashing, joint treatment, or proper installation details rather than face caulk. If the siding was installed with a drainage plane behind it, random caulking can interfere with drying. If the butt joint has exposed end grain, sealing or priming the end grain is often more important than smearing caulk over the face.
Rank #2

- Easy Application and Tooling
- Excellent Adhesion To Many Surfaces
- Paintable. Made in the USA
- Interior / Exterior Use
- Water Clean Up
Do not use caulk instead of flashing. Missing head flashing above a window, bad kick-out flashing at a roof-wall intersection, absent deck ledger flashing, or siding installed too close to roofing cannot be fixed with a tube of sealant. Caulk may hide the entry point for a short time, but water will usually find the path again.
Do not seal weep paths or drainage openings. If a wall assembly was built to drain, those exit points need to remain open. Closing them can cause hidden sheathing damage.
Gap Size, Backer Rod, and Bead Shape
Sealant works best when the joint is designed for it. The common homeowner mistake is filling a deep void with a large mass of caulk. That wastes material and often fails because the sealant shrinks, cures slowly, bonds on three sides, or cannot stretch correctly.
Use these practical sizing rules:
- Hairline to 1/8 inch: Often handled with careful prep and a small tooled bead if the joint should be sealed.
- 1/8 to 1/4 inch: A standard exterior sealant bead can work if the surfaces are clean, dry, and stable.
- Over about 1/4 inch: Use backer rod in many cases so the sealant has the right depth and two-sided adhesion.
- Over 3/8 to 1/2 inch: Stop and evaluate the cause. Large gaps may indicate movement, poor installation, missing trim, rot, or framing issues.
Backer rod is a compressible foam installed behind the sealant. It controls depth, saves material, and helps prevent three-sided adhesion. Two-sided adhesion means the sealant bonds to the two opposing sides of the joint, not the back. That allows the bead to stretch like a flexible bridge instead of tearing from the middle.
Recommended Free Tools
As a general rule, a 10-ounce tube yields roughly 24 linear feet with a 1/4-inch bead. Wider and deeper joints reduce that coverage quickly. A few oversized gaps can double the number of tubes needed on a small repair.
Prep Matters More Than the Label
The best sealant on the shelf will fail if it is applied over a bad surface. Cedar adds a few extra concerns because it contains tannins and natural extractives, and because exposed end grain absorbs water aggressively.
On our cedar repairs, prep usually includes these steps:
- Remove loose or failed caulk where practical. New sealant bonded to failing old sealant inherits the failure.
- Scrape loose paint or stain at the joint edges without damaging sound siding.
- Clean dirt, chalking, mildew, oil, pollen, and sawdust from the joint.
- Let the cedar dry. Do not caulk wet wood or joints that were just washed.
- Prime bare cedar where the finish system calls for it, especially end grain and raw cuts.
- Install backer rod where the gap is too deep or too wide.
- Apply the sealant at the manufacturer’s temperature range and tool it immediately.
- Respect the cure time before painting, staining, or exposing the joint to heavy moisture when possible.
End grain deserves special attention. Cedar end grain can pull in water like a bundle of straws. If a trim joint exposes end grain, caulk alone is not a long-term fix. The end grain should be sealed or primed as part of the repair, then caulked after the surface is ready. This is especially important at window and door trim, corner boards, cut siding ends, and penetrations.
Cedar tannins can also stain adjacent paint or sealant. A stain-blocking primer and manufacturer-approved sealant reduce the risk of brown bleed-through, discoloration, or adhesion problems.
How to Caulk Cedar Siding the Right Way
For a small, appropriate joint, the process is straightforward. The craft is in the restraint: seal what should be sealed, prep it correctly, and leave drainage details alone.
Tools and materials
- Premium exterior sealant rated for wood and siding
- Caulk gun with smooth pressure control
- Backer rod for joints over about 1/4 inch or deep gaps
- Utility knife and scraper
- Stiff brush or vacuum
- Painter’s tape where a sharp line is needed
- Compatible primer for bare cedar or end grain
- Rags and manufacturer-approved cleanup material
- Stable ladder, fall protection as needed, eye protection, and gloves
Application steps
- Confirm the joint should be caulked. Check for flashing, drainage, and visible rot before opening a tube.
- Cut out failed caulk. Remove as much loose material as practical without gouging the cedar.
- Clean and dry the joint. If you wash the wall, allow enough drying time before sealing.
- Prime or seal bare cedar where needed. Follow the primer and sealant cure windows.
- Insert backer rod if the joint is wide or deep. It should fit snugly without being shredded.
- Cut the nozzle to match the joint size. A smaller opening gives better control.
- Apply a continuous bead with steady pressure. Avoid thin, stretched beads.
- Tool the bead immediately so it contacts both sides and sheds water.
- Remove tape before the bead skins over, if tape was used.
- Paint or stain only after the sealant has cured enough for the coating system.
Weather matters. Avoid caulking in direct hot sun when the surface is overheated, during rain, on damp cedar, or when temperatures are outside the product range. Many exterior sealants prefer moderate temperatures and dry conditions. If the bead skins too fast in the sun, tooling and adhesion suffer.
Cost to Caulk Cedar Siding in 2026
For small DIY repairs, material cost is modest. For whole-house cedar siding work, labor, access, prep, old caulk removal, and repainting drive the price.
Quick wins for a faster PC:
Repair Windows errors before they cause bigger problemsFix Now →Scan for outdated or missing drivers - takes under a minuteDriver Scan →Clear out junk files and repair common Windows errorsFree Scan →| Cost item | 2026 typical range | Notes |
|---|---|---|
| DIY exterior sealant tube | $5 to $11 per 10.1-ounce tube | Premium siding products cost more than basic painter’s caulk |
| Coverage per 10-ounce tube | About 24 linear feet at a 1/4-inch bead | Less coverage for wider or deeper gaps |
| Professional exterior caulking | About $250 to $400 per 100 linear feet | Midpoint around $325 per 100 linear feet |
| Home perimeter caulking estimate | $2.45 to $5.03 per linear foot | National estimate before local adjustments |
| General caulking job | Average about $200; typical $50 to $500 | Small jobs cost less; exterior whole-home work can exceed this |
For example, if a home needs 200 linear feet of exterior cedar trim and penetration caulking, professional pricing might land around $500 to $800 using the $250 to $400 per 100 linear feet range. If the same house needs old caulk removal, bare wood priming, ladder work, backer rod, and touch-up painting, the final cost can be higher.
Major cost drivers include linear footage, joint width and depth, old caulk removal, failed paint or stain prep, ladder or scaffold access, number of windows and doors, number of penetrations, backer rod, lead-safe requirements on older homes, local labor rates, and whether painting or staining is included.
Material cost alone can be misleading. A homeowner may spend $60 on tubes and backer rod for a weekend repair. A contractor may charge several hundred dollars because the job includes diagnosis, masking, removal, surface prep, safe ladder setup, compatible materials, cleanup, and warranty risk.
Independent reader supportYour contribution helps us test, update, and keep practical guides available for everyone.When to DIY and When to Hire a Pro
DIY is reasonable when the work is reachable, the joint is clearly appropriate for caulk, the cedar is sound, and the gap is modest. A ground-level trim joint, a small pipe penetration, or a few cracked vertical beads around a window can be a good homeowner project.
What’s actually slowing this PC down?
Pick the symptom - the matching free tool is one click away.
Hire a pro when the work involves second-story access, repeated sealant failure, suspected rot, missing flashing, water stains indoors, soft trim, large gaps, complex roof-wall intersections, or a pre-1978 painted home where lead-safe rules may apply. A small caulking job can become a siding repair quickly once failed paint, wet sheathing, or bad flashing is exposed.
For contractors, documentation matters. Before quoting cedar caulking, we document pre-existing rot, missing flashing, open joints, failed coatings, and lead-paint risk. Otherwise, a homeowner may expect a cosmetic caulk job to solve a water-management problem it was never capable of solving.
If your home was built before 1978 and painted surfaces will be disturbed, lead-safe renovation rules may apply. That can affect scraping, sanding, containment, cleanup, and cost. Do not dry-sand old exterior paint without understanding the risk.
Rank #3

- Interior/exterior use
- 35 year limited warranty
- Water clean-up
- Energy efficient
- Made in the USA
Flashing, Drainage, and Building-Code Reality
Modern exterior wall practice treats caulk as one part of a larger water-management system. The siding sheds most water. Flashing directs water out. The weather-resistive barrier protects the sheathing. Drainage space helps the wall dry. Sealant closes selected joints.
Window and door openings need proper flashing integration. Head flashing should shed water over the exterior face, not direct it behind trim. Roof-wall intersections need kick-out flashing where the roof edge meets a wall. Horizontal trim and projections need details that prevent water from sitting behind cedar. Siding should also maintain proper clearance from roofs, decks, paving, and soil so it does not wick water.
Code requirements vary by jurisdiction, but exterior wall coverings are expected to resist weather and manage water intrusion with approved materials and flashing. A tube of caulk is not a code-compliant substitute for missing flashing. If water is entering behind a window head, at a deck ledger, or at a roof return, the repair needs to address the assembly, not just the visible crack.
Maintenance Schedule for Cedar Siding Caulk
Caulk is a maintenance item. It is not permanent, even when the tube says long-life or high-flex. Cedar moves, coatings age, sunlight breaks down exposed surfaces, and freeze-thaw cycles stress joints.
Inspect cedar siding at least once a year, ideally after winter or the wettest season in your region. Also inspect after major wind-driven rain, hail, exterior repainting, window replacement, or roof work. South and west elevations usually fail faster because they receive more UV and heat cycling. Coastal homes and high-wind exposures may need closer attention.
Free tools Windows power users keep installed
One-click scans. No signup required.
During inspection, look for split beads, gaps at the top edge of trim, sealant pulling away from one side, soft cedar, dark staining below joints, peeling paint near caulk, mildew in joints, and swollen trim. Press lightly with a tool where wood looks suspect. If the cedar is soft, caulking over it will not solve the problem.
Expect spot repairs before a full repaint or restain cycle. A house may not need full siding refinishing for several years, but a few exposed joints may need attention sooner. Catching those small failures early is cheaper than replacing cedar boards or sheathing later.
Common Mistakes That Cause Cedar Caulk Failure
The most common failure we see is using 100% silicone because it sounds waterproof. On cedar, that choice often creates adhesion and paint problems. The second most common failure is applying a decent sealant over a bad surface: wet cedar, chalky paint, dust, mildew, exposed end grain, or old failed caulk.
Other costly mistakes include caulking horizontal lap joints that should drain, sealing butt joints without understanding the siding detail, using caulk to compensate for missing flashing, filling deep gaps without backer rod, applying a thin untooled bead, painting too soon, using interior painter’s caulk outside, and trying to hide natural cedar gaps with clear caulk.
If a joint has failed twice, do not repeat the same repair. Change the diagnosis. Check joint size, movement, substrate condition, water source, backer rod, product rating, primer, and whether the joint should have been flashed instead of caulked.
Bottom Line: The Best Choice for Most Homeowners
For painted cedar siding, the safest default is a premium paintable elastomeric exterior sealant rated for wood, siding, and exterior movement. Acrylic-silicone, acrylic-urethane, and other high-performance paintable sealants are good choices for most trim, window, door, corner, and penetration joints.
For stained or natural cedar, use a compatible color-matched exterior siding or wood sealant, not clear silicone, and test it first. For high-movement or exposed joints, consider a polyurethane, hybrid, polysulfide, or terpolymer rubber sealant if it works with the finish and joint design.
Just as important, do not caulk the wrong places. Cedar siding needs flashing, drainage, sealed end grain, and annual maintenance. The best caulk is the one used in the right joint, over properly prepared cedar, as part of a wall that can shed water and dry out.
Frequently Asked Questions
What is the best caulk for cedar siding?
For most painted cedar siding and trim joints, use a premium paintable elastomeric exterior sealant, such as acrylic-latex, acrylic-silicone, or acrylic-urethane. For high-movement joints, consider a polyurethane, hybrid, polysulfide, or terpolymer rubber sealant rated for exterior wood and siding.
Can you use silicone caulk on cedar siding?
Pure silicone is not recommended for cedar siding. It often does not bond or paint well on cedar, and clear caulk can become highly visible as the cedar weathers. Use a paintable exterior siding sealant or a color-matched product for stained cedar.
Should cedar siding butt joints be caulked?
Not automatically. Some cedar butt joints are meant to drain and dry or should be handled with proper flashing and sealed end grain. Caulking every butt joint can trap moisture. Evaluate the siding detail before sealing.
Do you need backer rod before caulking cedar siding?
Often, yes, when the gap is wider than about 1/4 inch or too deep for a proper bead. Backer rod controls sealant depth, prevents three-sided adhesion, reduces shrinkage, and helps the sealant move correctly.
Recommended Free Tools
How much does it cost to caulk cedar siding in 2026?
DIY tubes commonly cost about $5 to $11 each, with one 10-ounce tube covering roughly 24 linear feet at a 1/4-inch bead. Professional exterior caulking commonly runs about $250 to $400 per 100 linear feet, depending on prep, access, joint size, and local labor.
How often should cedar siding caulk be inspected?
Inspect cedar siding caulk at least once a year and after major storms or freeze-thaw seasons. South and west elevations, coastal homes, and high-UV exposures may need spot repairs sooner than shaded or protected walls.
Quick Recap
Product prices and availability are accurate as of the date/time indicated and are subject to change. Any price and availability information displayed on Amazon at the time of purchase will apply.

