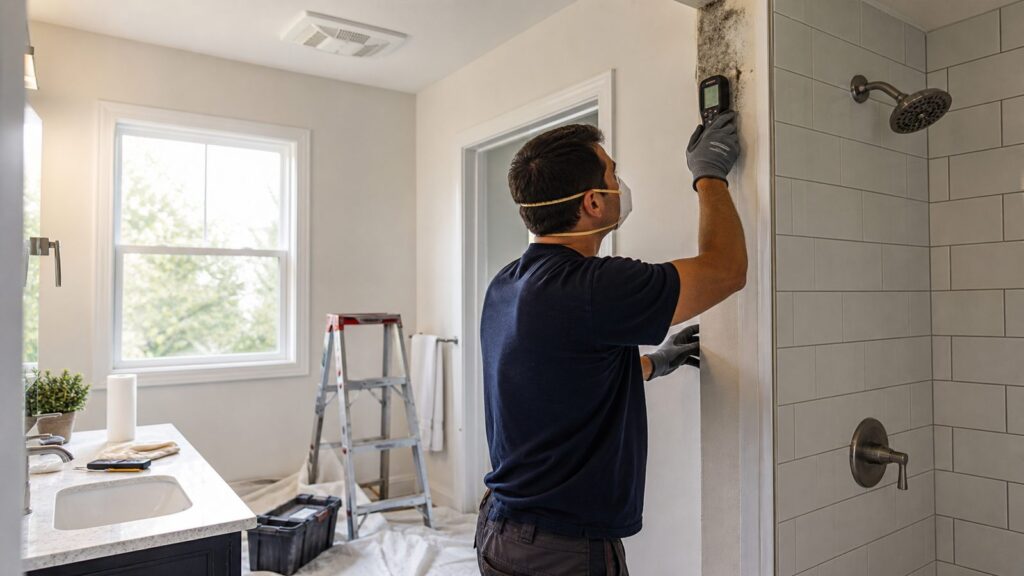
Bathroom mold is not solved by spraying the stain and hoping it disappears. If the surface stays damp, the mold comes back. The reliable fix is simple in concept: remove the visible growth, dry the material, repair the water source, and make sure the bathroom can exhaust humid air outdoors.
For a small patch of surface mold under about 10 square feet, roughly a 3-foot by 3-foot area, many homeowners can clean it themselves with proper protection and ventilation. Once mold is larger than that, keeps returning, smells musty with no visible source, involves drywall or insulation, appears after a plumbing leak, or affects someone with asthma, allergies, immune compromise, pregnancy, infancy, or advanced age, it is time to bring in a qualified mold remediation contractor.
As an Amazon Associate I earn from qualifying purchases.
On our job sites, the most expensive bathroom mold problems usually started as small maintenance issues: a fan duct dumping into an attic, cracked caulk at the tub, a loose toilet supply nut, missing insulation around a duct, or drywall that stayed wet behind a vanity. The mold was the symptom. The moisture was the cause.
Start With the 10-Square-Foot Decision
The first decision is not which cleaner to buy. It is whether the job is small, visible, and on cleanable surfaces, or whether it may involve hidden wet materials.
#1 Best Overall
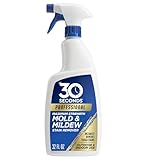
- BRIGHTER RESULTS INSTANTLY: Noticeably brightens indoor and outdoor surfaces, removing black mold and mildew stains as you watch, with no scrubbing or pressure washing required for fast, visible results
- NO SCRUBBING REQUIRED: Avoid the hassle and backbreaking work of scrubbing tough stains; the PRO formula lifts mold and mildew stains on contact so you simply apply, watch and rinse where needed
- 2X STRONGER FORMULA: The PRO formula is 2X stronger than the standard 30 SECONDS Outdoor Cleaner, made for your toughest black mold and mildew stains and messes on both indoor and outdoor surfaces
- OUTDOOR AND INDOOR USE: Use on siding, fences, decks, concrete floors, brick walls, drywall, wood, kitchen surfaces, bathroom tile and grout, bathtub soap scum and showers where mold and mildew can grow
- REMOVES BLACK MOLD STAINS & MORE: Targets stubborn black mold and mildew stains on a wide range of surfaces, giving a brighter, cleaner result indoors and outdoors without scrubbing or pressure washing
A small DIY cleanup is usually reasonable when the mold is limited to nonporous or semi-nonporous bathroom surfaces such as glazed tile, glass, metal, sealed countertops, painted trim in good condition, or a small bead of surface-stained caulk. Keep the working area under about 10 square feet. Wear an N95 respirator, goggles, and gloves. Run the exhaust fan if it vents outdoors, open a window if available, and keep children and pets out of the room.
Do not treat the 10-square-foot rule as a license to ignore context. A 2-square-foot stain on soft drywall under a leaking shower valve is more serious than 8 square feet of mildew on tile grout. Mold growing on porous material can extend below the surface, and wet drywall or insulation often needs removal instead of cleaning.
Quick Bathroom Mold Triage
- Cleanable DIY case: Small surface mold on tile, glass, metal, sealed counters, or intact painted surfaces.
- Repair-first case: Mold around failed caulk, cracked grout, a dripping trap, a toilet leak, or a poorly performing fan.
- Professional remediation case: More than about 10 square feet, recurring growth, musty odor with no visible source, mold inside walls, mold near HVAC, sewage or flood water, or mold on wet porous materials.
- Reconstruction case: Soft drywall, swollen baseboards, delaminated vanity panels, loose tile, wet insulation, or subfloor damage.
Protect Yourself Before You Clean
Bathroom mold cleanup creates dust, droplets, and contaminated wipe-down waste. At minimum, use an N95 respirator, goggles without open side vents, and gloves. For a small bathroom, we also like disposable coveralls or clothes that can be washed immediately after cleanup.
Windows Errors? Fix Them Before They Spread
Repair common Windows errors and clear accumulated junk for a smoother, more stable PC - no reinstall needed.Free scan · no reinstallCrashes, No Sound, or Screen Glitches?
Random freezes, missing sound and display glitches usually trace back to one bad driver. Find and replace yours safely.Free scan · under a minuteNever mix bleach with ammonia, vinegar, drain cleaner, toilet bowl cleaner, or other household chemicals. That can create dangerous fumes. If you use bleach, use it only as directed on the label and keep the room ventilated.
Before cleaning or demolition, take photos. Get wide shots of the room and close shots of the mold, stains, failed caulk, soft drywall, leaking fittings, and fan setup. That documentation can matter for insurance, a landlord, an HOA, a warranty claim, or a contractor estimate.
How to Remove Small Bathroom Mold Safely
For small surface mold, physical removal matters more than the brand name on the bottle. Mold has to be scrubbed or wiped off the surface, not just misted.
- Dry the room first. Run the bath fan, open the door, and use a portable fan or dehumidifier if the room is damp. Do not blow air directly across heavy mold growth.
- Put on PPE. Use an N95 respirator, goggles, and gloves. Bag disposable materials before carrying them through the house.
- Clean with detergent and water. Dish detergent and warm water work well on many hard bathroom surfaces. Scrub grout lines, tile edges, glass, and sealed trim.
- Rinse and wipe dry. Leaving residue and moisture behind gives mold another opportunity.
- Use a disinfectant only when appropriate. Bleach may be useful on some hard, nonporous surfaces, but it is not a magic fix for porous materials and should never be mixed with other cleaners.
- Replace failed caulk. If caulk is cracked, loose, deeply stained, or pulling away, remove and replace it. Cleaning the surface of failed sealant rarely lasts.
- Watch the area for 2 to 4 weeks. If staining or odor returns, the moisture source was not corrected.
DIY cleanup supplies usually run about $25 to $100 for gloves, goggles, N95 respirators, detergent or cleaner, scrub brushes, disposable towels, contractor bags, and replacement caulk. Add more if you buy a humidity sensor switch, moisture meter, or dehumidifier.
What’s actually slowing this PC down?
Pick the symptom - the matching free tool is one click away.
Cleaner Comparison: Detergent, Bleach, Vinegar, and Peroxide
Homeowners often ask what kills mold in a bathroom. The better question is what removes mold safely from the specific material. A cleaner that works on glazed tile may be the wrong answer for wet drywall or deteriorated caulk.
| Cleaner | Best use | Limitations | Safety notes |
|---|---|---|---|
| Dish detergent and water | Routine scrubbing of tile, glass, sealed counters, and painted surfaces in good condition | Does not disinfect by itself, but removes surface growth when used with scrubbing | Low fume risk; still wear gloves and dry the area afterward |
| Bleach solution | Some hard, nonporous surfaces where label directions allow it | Poor choice for many porous materials; can discolor finishes and corrode metals | Never mix with ammonia, vinegar, or other cleaners; ventilate and wear PPE |
| Hydrogen peroxide | Some hard surfaces and stain reduction | Can lighten or damage some finishes; not a substitute for source repair | Test a small area first and follow product directions |
| Vinegar | Light surface cleaning in some homeowner routines | Can damage natural stone, grout sealers, and some finishes; should not be mixed with bleach | Use cautiously around stone tile and metal fixtures |
On construction and remediation-adjacent work, we focus less on miracle cleaners and more on removal, drying, containment, and source control. If a product leaves the drywall wet, damages a finish, or gives a false sense of completion while the wall cavity remains damp, it has not solved the problem.
Find the Moisture Source or the Mold Will Return
EPA guidance puts the central rule plainly: moisture control is mold control. In a bathroom, the moisture source is often one of the following.
Ventilation Problems
A bathroom fan must move enough air and discharge it outdoors. Under IRC-based requirements, bathroom or toilet room local exhaust is commonly 50 CFM intermittent or 20 CFM continuous, and mechanical exhaust air must terminate outdoors, not into an attic, crawlspace, soffit, or wall cavity.
A weak fan can be caused by an undersized unit, a clogged grille, a crushed flex duct, too many duct elbows, a long duct run, a stuck backdraft damper, or a roof or wall cap blocked with lint and debris. In cold spaces, uninsulated ducts can also create condensation that drips back toward the fan or wets the attic.
Run the fan during every shower and long enough afterward to clear humidity. In real homes, a timer switch or humidity-sensing control is more reliable than memory. Many bathrooms need 20 to 30 minutes of fan runtime after bathing, longer if the room has no window, a large shower, or cold exterior walls.
Shower and Tub Leaks
Recurring mold at tub corners often starts with failed caulk. Cut out loose or stained caulk, clean and dry the joint, and recaulk with a quality bathroom sealant. But do not confuse grout and caulk with waterproofing. Tile, grout, and caulk are finish materials. The real waterproofing should be behind the tile or under the shower system.
If tile is loose, grout cracks repeatedly, the wall feels soft, or mold returns quickly after cleaning, there may be moisture behind the tile. That can move the project from cleaning into demolition, waterproofing repair, tile replacement, and sometimes full shower reconstruction.
Plumbing Leaks
Check the toilet supply valve, toilet base, vanity trap, sink supply lines, tub overflow, shower valve wall, and any ceiling below the bathroom. A slow drip inside a vanity can feed mold for months before anyone notices. Look for swollen cabinet bottoms, staining around escutcheons, cupped flooring, and soft baseboard.
Condensation
Mold on ceilings, upper wall corners, exterior walls, or around a cold duct can be a condensation problem. Warm shower air hits a cold surface and leaves moisture behind. Better fan performance, duct insulation, air sealing, and improved room heat can all matter.
What Can Be Cleaned and What Should Be Replaced
Nonporous surfaces can often be cleaned. Porous materials are different. Once mold and moisture get into paper-faced drywall, insulation, ceiling tile, carpet pad, MDF cabinet parts, or the back side of trim, cleaning the surface may leave contamination and moisture inside the assembly.
Replace bathroom caulk when it is cracked, detached, deeply stained, or gummy. Replace drywall when it is soft, swollen, crumbling, visibly moldy through the paper, or wet inside the wall. Replace insulation that has been wet from a leak. Replace vanity components made from particleboard or MDF when they have swollen or delaminated.
Drywall repair after remediation commonly lands around $300 to $850 for many bathroom mold-related repairs, while broader drywall repair ranges can run about $150 to $2,000 depending on access, removal, texture, paint, and wet insulation. If hidden mold has spread behind tile, vanity cabinets, subflooring, or adjacent rooms, costs can climb quickly.
When to DIY vs. When to Hire a Pro
DIY is reasonable for small, visible mold on cleanable bathroom surfaces when no one in the home is medically vulnerable and the moisture source is obvious and fixable. Hire a professional when the situation is larger, hidden, recurring, or tied to water damage.
Rank #2

- KILLS MOLD: EPA-registered formula kills mold and helps control mold and mildew on hard, nonporous surfaces when used as directed
- CLEANS AND DISINFECTS: Ready-to-use disinfectant cleaner provides non-acid cleaning performance while disinfecting treated hard, nonporous surfaces
- INHIBITS MILDEW GROWTH: Helps inhibit the growth of mold and mildew and the odors they cause when applied according to label directions.
- BLEACH-FREE FORMULA: Bleach-free cleaner deodorizes treated surfaces and leaves behind a fresh scent
- READY-TO-USE SPRAY: 32 fl oz trigger bottle is designed for household, commercial and industrial cleaning applications
| Situation | Best next step | Typical 2026 cost |
|---|---|---|
| Small surface mold on tile, glass, or sealed surfaces under 10 sq ft | DIY cleanup with PPE, detergent, scrubbing, drying, and source correction | $25-$100 in supplies |
| Moldy or failed shower caulk | Remove and replace caulk after cleaning and drying the joint | Often DIY supply cost; more if a contractor handles prep and recaulk |
| Small contained bathroom remediation | Professional containment, cleaning, drying, and source guidance | Often $500-$1,000 |
| Mold behind drywall, vanity, tile, or subfloor | Professional remediation plus selective demolition and repair | $1,200-$3,750 common range; $3,000+ possible in bathrooms |
| Major hidden mold with bathroom rebuild | Remediation, plumbing or waterproofing repair, drywall/tile/cabinet reconstruction | Can overlap with remodel ranges of about $6,600-$18,000+ |
Professional mold remediation averages around $2,300 to $2,400 nationally, with common ranges around $1,125 to $3,750 or $1,200 to $3,750 depending on the source and scope. Per-square-foot remediation pricing is commonly $10 to $25 per affected square foot. That is very different from cleaning-only calculators that show around $2.30 to $2.80 per square foot because those figures usually exclude containment, demolition, HEPA filtration, drying, reconstruction, and source repair.
Many states do not license mold professionals, but some do. Florida and Texas regulate mold assessors and remediators, and Illinois registration requirements took effect in 2025. Before hiring, verify state and local requirements, ask for proof of insurance, and ask whether the company follows recognized remediation standards.
The Tool Desk
Outbyte Driver Updater FREEScan for outdated or missing drivers - takes under a minuteDriver Scan →Outbyte PC Repair FREEClear out junk files and repair common Windows errorsFree Scan →What a Professional Bathroom Mold Job Should Include
A good remediation contractor does more than wipe the visible stain. The work should start with moisture investigation. Expect the contractor to inspect adjacent rooms, the ceiling below, the attic above when relevant, the vanity, toilet, tub or shower valve wall, exhaust duct route, and any soft finishes.
Depending on scope, the job may include containment, negative air pressure, HEPA air filtration, removal of mold-damaged porous materials, cleaning of remaining surfaces, drying, moisture verification, and coordination with plumbing, drywall, tile, or finish carpentry repairs. Post-remediation verification may be visual, moisture-based, or performed by a separate assessor depending on the project, local rules, and the level of documentation needed.
Be cautious with bids that promise to “kill all mold” without discussing moisture readings, material removal, containment, or why the bathroom got moldy in the first place. Mold remediation and reconstruction are often separate scopes. One crew may remove damaged material; another may rebuild drywall, waterproofing, tile, trim, and paint.
Bathroom Exhaust Fan Details That Matter
A bathroom fan upgrade is often one of the best mold-prevention investments. Basic consumer-grade bath fans often cost about $50 to $200, with quieter, humidity-sensing, heater, or light-combo units costing more. Replacement-only installation is usually much cheaper than a new ducted install.
Free tools Windows power users keep installed
One-click scans. No signup required.
For a dependable bathroom exhaust setup, look at the full system, not just the fan box. The fan should be properly sized, quiet enough that people will use it, connected to the right duct diameter, routed with limited bends, equipped with a working backdraft damper, insulated through cold spaces, and terminated outdoors through an approved wall or roof cap.
Permits vary by jurisdiction, especially when new wiring, new duct penetrations, roof work, or bathroom remodeling is involved. If the project includes electrical changes, a new roof cap, or major drywall opening, check local permit requirements before work starts.
A Practical Bathroom Mold Inspection Checklist
Use this checklist before and after cleaning. It helps separate a one-time surface issue from a building problem.
- Run the fan and confirm air is moving at the grille.
- Verify the fan duct terminates outdoors, not in the attic, soffit, crawlspace, or wall cavity.
- Check the fan grille, backdraft damper, duct condition, and exterior cap for blockage.
- Look for cracked caulk at tub, shower, and backsplash corners.
- Inspect grout cracks, loose tile, and soft shower walls.
- Check the toilet supply line, shutoff valve, tank bolts, wax ring area, and flooring around the base.
- Inspect the vanity trap, sink supplies, cabinet bottom, and back wall.
- Look at the tub overflow, shower valve trim, and ceiling below the bathroom.
- Check exterior wall corners and ceilings for condensation staining.
- Inspect the attic above the bathroom for wet insulation, fan duct leaks, or roof cap problems.
- Probe baseboards and drywall lightly for softness or swelling.
- Use a hygrometer if the bathroom stays humid; indoor relative humidity should drop promptly after bathing.
How to Keep Bathroom Mold From Coming Back
After cleanup, prevention is mostly routine. Run the fan during showers and for 20 to 30 minutes afterward. Squeegee shower walls and glass. Keep the shower curtain or door open enough to dry. Wash bath mats regularly and avoid leaving wet towels piled on the floor. Repair dripping valves and slow drains quickly.
Quick wins for a faster PC:
Fix the driver behind crashes, sound loss and screen glitchesFind Drivers →Repair Windows errors before they cause bigger problemsFix Now →Scan for outdated or missing drivers - takes under a minuteDriver Scan →Recaulk joints before gaps become water paths. Keep grout maintained, but remember that grout is not the waterproofing system. If a shower repeatedly grows mold at the same corner after proper cleaning and recaulk, investigate the wall or pan assembly instead of repeating the same surface treatment.
Paint can help only after the surface is clean, dry, and sound. Mold-resistant bathroom paint is useful on ceilings and walls, but it will not compensate for a fan that vents into the attic, a leaking shower valve, or wet drywall.
The Bottom Line
You can often remove small bathroom mold yourself when it is limited to hard surfaces and you use proper PPE, detergent, scrubbing, ventilation, and drying. But the real expert move is finding out why the bathroom stayed wet. Fix the fan, repair the leak, replace failed caulk, remove wet porous materials, and verify the area dries.
If the mold covers more than about 10 square feet, returns after cleaning, has a musty hidden source, involves porous building materials, follows a leak, or affects vulnerable occupants, hire a qualified remediation professional. The cleaning bill is only one part of the job. The lasting fix is moisture control plus clean, dry, properly rebuilt materials.
Recommended Free Tools
Frequently Asked Questions
Can I remove bathroom mold myself?
Yes, if it is a small surface area under about 10 square feet on hard, cleanable materials such as tile, glass, metal, or intact painted surfaces. Wear an N95 respirator, goggles, and gloves. Hire a pro for larger areas, recurring mold, hidden mold, wet drywall, sewage or flood contamination, HVAC involvement, or medically vulnerable occupants.
What kills mold in a bathroom?
Physical removal is the key. Detergent and water with scrubbing works well for many hard bathroom surfaces. Bleach can be used on some nonporous surfaces when label directions allow, but it should never be mixed with ammonia, vinegar, or other cleaners. Porous moldy materials often need replacement, not just spraying.
How much does professional bathroom mold remediation cost in 2026?
Small contained bathroom mold jobs often run about $500 to $1,000. Broader professional remediation commonly averages around $2,300 to $2,400 nationally, with many projects ranging from about $1,125 to $3,750 or $1,200 to $3,750. Hidden mold behind tile, drywall, cabinets, or subflooring can exceed $3,000 and may lead to reconstruction costs.
Why does mold keep coming back after I clean it?
Recurring bathroom mold usually means the moisture source was not fixed. Common causes include poor exhaust ventilation, a fan that does not vent outdoors, failed shower caulk, cracked grout, a slow plumbing leak, condensation on cold surfaces, wet drywall, or moisture behind tile.
Do these 3 things before closing this tab:
1Scan for outdated or missing drivers - takes under a minute2Repair Windows errors before they cause bigger problems3Fix the driver behind crashes, sound loss and screen glitchesDoes a bathroom exhaust fan have to vent outside?
Yes. IRC-based code provisions require mechanical exhaust air to discharge outdoors, not into attics, crawlspaces, soffits, or interior spaces. Bathroom exhaust is commonly specified at 50 CFM intermittent or 20 CFM continuous, but the full duct route, termination, damper, and controls matter.
Is black mold in the bathroom always dangerous?
Color is not a reliable mold identification or risk test. Black-looking bathroom mold is not automatically Stachybotrys, and nonblack mold can still be a problem. The practical rule is to remove indoor mold safely and correct the moisture source so it does not return.
Quick Recap
Product prices and availability are accurate as of the date/time indicated and are subject to change. Any price and availability information displayed on Amazon at the time of purchase will apply.

