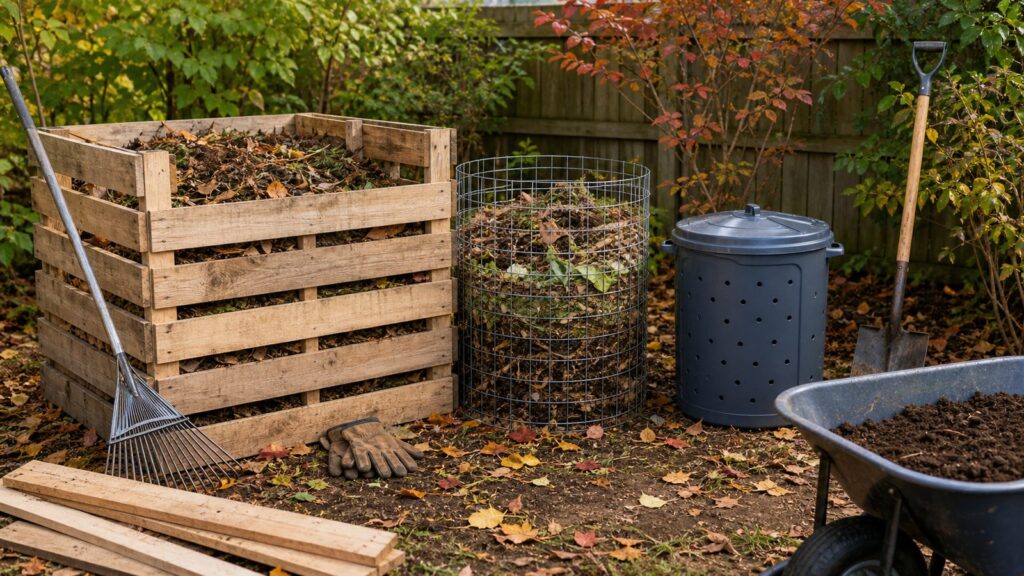
The cheapest compost bin that actually works is usually a wire-mesh ring or a free-pallet bin. You can build either one in a weekend for about $20 to $80 if you already own basic tools. For a small yard or patio, a drilled plastic tote or 32-gallon trash can is cleaner and easier to contain, usually landing around $10 to $70. For the best long-term backyard setup, build a 3 ft. by 3 ft. by 3 ft. wood-and-hardware-cloth bin or a compact three-bin pallet system.
The trick is not just making a box for scraps. A good compost bin needs airflow, drainage, access for turning, pest control, and enough volume to heat up. On our job sites, the same principle applies whether we are framing a wall or building a garden structure: cheap is fine, but flimsy usually costs you twice. A compost bin should survive rain, freeze-thaw cycles, shovel work, and the occasional bump from a wheelbarrow.
This guide compares the best cheap DIY compost bins you can build this weekend, with realistic 2026 US costs, dimensions, tools, and the small construction details that prevent odor, rodents, neighbor complaints, and a half-rotted mess you never want to open.
Quick Comparison: Best Weekend DIY Compost Bins
If you want the short answer, choose by yard size and pest pressure. A wire ring is the fastest. A pallet bin gives you the most volume for the money. A lidded trash can or tote is best where rodents, pets, or tight space are the main concern.
What’s actually slowing this PC down?
Pick the symptom - the matching free tool is one click away.
#1 Best Overall

- Large Capacity: the compost bin has a height of 31.5 inch/80 cm, diameter of 17.7 in/45 cm, 34 gallon large capacity is designed for organizing a large amount of kitchen waste and garden waste, large opening window on the top is convenient for collecting large amounts of materials
- Heavy Duty Felt Material: the garden waste bags is constructed from high-density felt material, it offers high tear resistance and breathability compared to standard plastic bags, ensuring it can hold up season after season without cracking under pressure, the yard leaf holder maintains an upright and open position during filling
- Convenient Design: equipped with sturdy and reinforced handles on both sides, allows two people to easily transport heavy loads of yard waste; the top features a dual-zipper large opening for add waste material easily; two openings at the bottom is convenient for check the fermentation process and take the soil
- Multi-purpose Use and Space-saving: when not in use for composting, this reusable bag conveniently collapses for flat storage, taking up minimal space in your shed. Beyond yard work, it doubles as a heavy-duty storage bag for storing clothes, children’s toys, garage tools, moving, shopping, camping tools and more
| DIY compost bin | Typical 2026 cost | Best for | Approx. build time | Footprint | Pest control |
|---|---|---|---|---|---|
| Wire-mesh ring | $20-$80 | Lowest-cost yard waste composting | 30-60 minutes | 3-4 ft. diameter | Low unless upgraded with 1/4 in. hardware cloth |
| Pallet bin | $0-$60 basic, $30-$100 upgraded | High volume on a tight budget | 2-4 hours | About 40 in. by 48 in. | Medium with lid and wire lining |
| Plastic tote bin | $10-$35 | Small yards, patios, starter composting | 30-90 minutes | 18-27 gal. tote | Medium to high if lidded and vent holes are screened |
| 32-gallon trash-can bin | $30-$70 | Contained kitchen-scrap composting | 1-2 hours | About 24 in. diameter | Good with tight lid and bungee |
| Wood-and-wire box | $50-$150 | Durable, tidy backyard setup | 4-8 hours | 3 ft. by 3 ft. | Good with 1/4 in. hardware cloth |
| Three-bin system | $30-$250 | Serious gardeners and steady yard waste | 1 weekend | 9-12 ft. wide by 3-4 ft. deep | Good if lined and covered |
For most homeowners, the sweet spot is a bin close to 1 cubic yard, or roughly 3 ft. wide by 3 ft. deep by 3 ft. high. That size is large enough to hold heat, small enough to turn with a garden fork, and manageable for a typical backyard. If you only have a patio, accept that a tote or trash can will compost more slowly because it has less volume.
Before You Build: Placement, Size, and Local Rules
Put the bin where you can use it in January, not just where it looks convenient in May. A good compost location is well drained, reachable all year, close enough to a hose for moisture control, and accessible with a wheelbarrow. Avoid placing the bin directly against a wood fence, siding, garage wall, or a neighbor’s property line. Leave working room on at least one side so you can open the front, shovel finished compost, and turn the pile.
Most small backyard compost bins do not require a building permit, but local rules often regulate nuisance conditions. That usually means odor, rodents, insects, drainage, setbacks, bin size, and whether the pile is contained. Some cities require compost piles to be kept in a maintained enclosure. Others care more about whether the pile creates a public health issue. Before building near a property line or in an HOA neighborhood, check your city code and HOA rules for setbacks, enclosure requirements, and visible yard structures.
A practical rule: build as if someone will inspect it after a complaint. Keep the bin contained, covered where food scraps are used, drained so stormwater does not carry material off site, and far enough from neighboring living areas that normal compost activity will not become their problem.
The Tool Desk
Outbyte Driver Updater FREEScan for outdated or missing drivers - takes under a minuteDriver Scan →Outbyte PC Repair FREERepair Windows errors before they cause bigger problemsFix Now →Best Size for a Backyard Compost Bin
A 3 ft. by 3 ft. by 3 ft. bin holds about 27 cubic feet, or 1 cubic yard. That is the common target because compost needs mass to heat up. Smaller bins still work, but they usually process material more slowly. Oversized bins can become hard to turn and may compact at the bottom.
For one or two people with light kitchen scraps, a 32-gallon trash can or 18- to 27-gallon tote can be enough to start. For a family with lawn clippings, fall leaves, and garden cleanup, build at least one cubic-yard bin. For serious gardeners, a three-bin system is the cleanest workflow: one bay for active filling, one bay for cooking, and one bay for curing or finished compost.
Basic Compost Recipe
The working ratio is two to three parts browns to one part greens by volume. Browns include dry leaves, shredded cardboard, straw, wood chips, and small twigs. Greens include vegetable scraps, fruit scraps, coffee grounds, fresh grass clippings, and green garden waste. Every time you add kitchen scraps, cover or bury them under 4 to 8 inches of browns. That one habit solves most odor and pest problems.
Do not add meat, dairy, grease, oily food, pet waste, or diseased plants to a basic backyard compost bin. Those materials attract pests, smell bad, or create health and garden risks that are not worth it for a small home pile.
Build 1: Wire-Mesh Ring Compost Bin
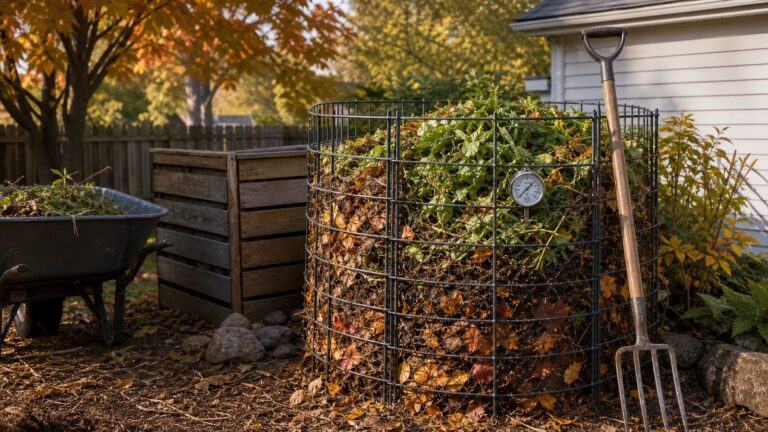
This is the fastest cheap compost bin. It is ideal for leaves, grass clippings, garden cleanup, and homeowners who want function over appearance. If you have leftover fencing, the cost can be nearly free. If you buy new galvanized wire or hardware cloth, expect about $20 to $80 depending on height, gauge, and roll size.
Materials
- 10 to 13 ft. of wire mesh, welded wire, or galvanized hardware cloth
- 3 or 4 metal T-posts, wood stakes, or rebar stakes
- Zip ties, galvanized wire, or hog rings
- Optional: 1/4 in. hardware cloth for rodent-resistant lower section
- Optional: landscape staples for anchoring the bottom edge
Build Steps
- Choose a well-drained spot with a 3 to 4 ft. diameter working area.
- Form the wire into a cylinder and overlap the ends by 6 to 12 inches.
- Fasten the seam with zip ties or galvanized wire every 8 to 12 inches.
- Drive 3 or 4 stakes around the outside and tie the ring to the stakes.
- Anchor the bottom edge with landscape staples if the wire wants to lift.
For leaves and yard waste, this bin is hard to beat. For kitchen scraps, upgrade it. Rodents can squeeze through surprisingly small gaps, so use 1/4 in. galvanized hardware cloth anywhere food scraps might be reachable. A loose wire ring with large openings is not a good food-scrap bin unless you bury scraps deep and keep the pile heavily covered with browns.
Rank #2
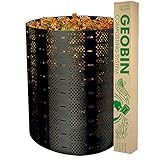
- Large capacity—expandable to 3.75 feet (237 gallon)
- Easy to assemble with closure keys. Easy to move. Easy to reassemble.
- The best value composting bin on the market.
- Excellent ventilation.
The main downside is access. To turn or harvest the pile, you usually unfasten the ring or lift it off. That is not difficult, but it is messier than a bin with a removable front. If you compost heavily, build the ring with a reusable latch at the seam instead of permanent ties.
Build 2: Free-Pallet Compost Bin
A pallet bin is the best volume-per-dollar build. Standard pallets are often about 40 by 48 inches, which puts you close to the ideal compost-bin footprint without much cutting. With free pallets, basic screws, and zip ties, you can build a single bin for $0 to $60. With hinges, posts, hardware cloth, and a latchable lid, a more realistic upgraded cost is $30 to $100.
Recommended Free Tools
Materials
- 3 pallets for a basic open-front bin, or 4 pallets for a front gate
- Exterior screws, 2 1/2 in. to 3 in.
- Heavy-duty zip ties or metal corner brackets
- 2 corner posts or stakes if the pallets are weak
- Optional: 1/4 in. hardware cloth for sides and bottom
- Optional: 2 hinges and a latch for a front gate
- Optional: hinged plywood, metal roofing, or framed hardware-cloth lid
Build Steps
- Stand three pallets in a U shape on level, well-drained ground.
- Fasten the back pallet to the two side pallets with exterior screws or corner brackets.
- Add stakes or posts at the front corners if the structure racks when pushed.
- Attach a fourth pallet as a hinged front gate, or cut it down into removable slats.
- Line large openings with 1/4 in. hardware cloth if you plan to compost food scraps.
- Add a lid or weighted cover in rainy climates or where animals are common.
Pallet selection matters. Use clean, dry pallets with an HT heat-treatment stamp when possible. Avoid painted pallets, oily pallets, chemical-smelling pallets, and pallets of unknown industrial use if the finished compost will go near edible gardens. Also avoid using random treated scrap lumber from demolition piles. Compost is biological material; do not build the container from materials you would not want leaching into garden soil.
The weak point in many pallet bins is the front. A permanently open front makes turning easier but lets material spill out. A fixed fourth pallet contains the pile but makes harvesting miserable. The best weekend compromise is a hinged front pallet with a latch, or three removable horizontal slats screwed to side cleats. When the compost is finished, pull the front open and shovel straight into a wheelbarrow.
Build 3: Drilled Trash-Can Compost Bin
A lidded 32-gallon trash-can compost bin is a smart choice for small yards, rentals, and homeowners worried about appearance. Current 2026 crawl data showed a 32-gallon Rubbermaid Roughneck lidded outdoor bin at $29.97. With a drill bit, bungee cord, and optional hardware-cloth screening, the full build usually lands around $30 to $70.
Materials
- One 32-gallon lidded plastic trash can
- Drill with 1/4 in. to 3/8 in. bit
- Bungee cord or lid clamp
- Optional: 1/4 in. hardware cloth for bottom or vent protection
- Optional: two bricks or pavers for a raised base
Build Steps
- Drill ventilation holes every 4 to 6 inches around the sides.
- Drill drainage holes in the bottom so liquid cannot collect.
- Drill a few holes in the lid if rain cannot enter, or leave the lid solid in wet climates.
- Set the can on pavers, bricks, or a gravel patch for drainage.
- Secure the lid with a bungee cord.
This bin works best when you chop scraps small and balance every green addition with dry browns. Because the container is narrow, it does not turn like an open pile. You can roll it on its side if the lid is secure, or use a compost aerator or garden fork to loosen the contents every week or two.
Free tools Windows power users keep installed
One-click scans. No signup required.
Do not overfill it. Once a trash-can bin gets heavy and wet, turning becomes awkward. Keep the contents slightly damp, like a wrung-out sponge. If it smells sour, add shredded cardboard or dry leaves and increase airflow. If it is dry and dusty, add water in small amounts and mix.
Build 4: Plastic Tote Compost Bin
A plastic tote bin is the cheapest contained option for a patio, balcony-style garden area, or very small yard. Use an 18- to 27-gallon lidded storage tote. Expect to spend $10 to $35 if you already own a drill.
The construction is similar to the trash-can bin, but scale matters. A tote does not have enough volume to heat like a full backyard pile, so it behaves more like a slow, contained compost starter. It is still useful for vegetable scraps, coffee grounds, shredded paper, and small amounts of yard waste.
Materials
- One 18- to 27-gallon storage tote with locking lid
- Drill with 1/4 in. bit
- Shredded cardboard, leaves, or coir for bedding
- Optional: hardware cloth or mesh patches over larger holes
- Optional: shallow tray if used on a patio surface
Build Steps
- Drill side holes every 3 to 5 inches for airflow.
- Drill several bottom holes for drainage.
- Add 3 to 4 inches of browns before adding food scraps.
- Keep the lid latched and cover scraps with browns after every addition.
- Mix weekly with a hand trowel or small garden fork.
Use this bin if your goal is neat containment, not high-volume compost production. It is also a good test run before building a larger outdoor bin. If the tote starts smelling bad, the usual cause is too many greens, too much water, or not enough air. Add dry browns, mix, and leave the lid slightly cracked only if pests are not an issue.
Build 5: Wood-and-Hardware-Cloth Compost Box
This is the best-looking and most durable single-bin build for many homes. It costs more than a pallet bin, typically $50 to $150, but it gives you square sides, a removable front, cleaner lines, and better control over gaps. If rodent resistance matters, this is where 1/4 in. galvanized hardware cloth earns its money. Current 2026 crawl data showed 1/4 in. galvanized hardware cloth examples around $57 to $81 per roll depending on dimensions.
Rank #3

- 【4 Pack Set】: Includes 4 identical black metal compost bins, each with a matching lid. Ideal for setting up multiple composting spots throughout your garden or vegetable patch.
- 【In Ground Compost Bin】: Designed to be partially buried in the soil, creating a contained space for composting while allowing worms to move freely and help loosen the surrounding soil.
- 【Metal Bin with Lid】: Each bin comes with a sturdy metal lid that helps keep rain and pests out while still allowing for airflow. Simple to open for adding organic scraps and easy to clean.
- 【For Organic Refuse】: A practical solution for breaking down kitchen scraps and garden waste directly in your garden. Encourages natural composting and promotes healthier soil.
- 【Wide Application】: Suitable for vegetable gardens, backyards, greenhouses, and raised beds. Helps improve soil condition with minimal effort and no power required.
Recommended Dimensions
Build the inside close to 36 in. wide by 36 in. deep by 36 in. high. Use four corner posts, framed side panels, and removable front boards or a hinged front panel. For lumber, 2×4 framing with 1×6 or 5/4 deck boards works well. Lowe’s current pressure-treated lumber category showed typical pricing around $12 per board, with a wide range by size and grade.
Materials
- Four 4×4 posts or doubled 2×4 corner posts, 36 to 42 in. long
- 2×4 rails for top and bottom framing
- 1×6, 5/4 deck boards, cedar boards, or exterior-rated lumber for slats
- 1/4 in. galvanized hardware cloth for pest-resistant lining
- Exterior screws, 1 5/8 in. and 3 in.
- Staples or washer-head screws for hardware cloth
- Optional: hinges and latch for front access
- Optional: corrugated panel, plywood, or framed lid
Build Steps
- Cut posts to equal length and assemble two side frames with 2×4 rails.
- Attach back rails and slats, keeping small gaps for airflow.
- Line the inside faces with 1/4 in. hardware cloth where pests are a concern.
- Build the front with removable slats or a hinged panel.
- Add a lid if the bin will receive food scraps or sit in heavy rain.
- Set the bin on level soil, gravel, or pavers with drainage below.
Do not make the sides airtight. Compost needs oxygen. A good build uses gaps for airflow but covers larger openings with hardware cloth. If you leave 2 in. gaps between boards and do not line them, you have built an easy-access feeder for rodents. If you close every gap, you have built a damp box. The right balance is open airflow plus small pest-proof openings.
For a cleaner finish, align the front slats in tracks made from vertical 1×2 cleats. Slide the boards out one at a time as the pile drops. That detail adds maybe 30 minutes and a few dollars, but it makes harvesting much easier.
Build 6: Compact Three-Bin Compost System
If you have the space, a three-bin system is the most useful setup. It lets you manage compost in stages instead of constantly mixing fresh scraps into nearly finished material. One bay is active fill, one bay is cooking, and one bay is curing or ready to use. Cost ranges from about $30 to $250 depending on whether you use reclaimed pallets or purchased lumber with lids and hardware cloth.
A practical compact layout is three bays, each about 3 ft. wide by 3 ft. deep by 3 ft. high. Total width is usually 9 to 12 ft. depending on post thickness and divider construction. Build it where a wheelbarrow can approach the front of every bay.
Best Budget Version
Use seven pallets: one for each outside end, two for the back, two as dividers, and two split or hinged for front access. Tie the structure together with exterior screws, corner brackets, and posts where needed. Add hardware cloth only where it matters most: lower side gaps, bottoms, and any bay receiving food scraps.
Best Durable Version
Frame the system from 4×4 posts and 2×4 rails, then use cedar, treated lumber rated for ground-contact exposure where appropriate, or exterior boards for the sides. Add removable front slats for each bay and lids if you compost food scraps. This is a bigger weekend project, but it is still well within reach for a homeowner with a circular saw, drill, level, and helper.
The three-bin system is overkill for occasional vegetable scraps. It is worth it if you regularly collect leaves, mow a lawn, maintain garden beds, or want finished compost on a predictable cycle.
How to Make Any DIY Compost Bin Rodent-Resistant
Rodent resistance comes down to gaps, food exposure, and habit. For bins that receive kitchen scraps, use a lid and floor protection, and keep openings no larger than 1/4 inch. Galvanized 1/4 in. hardware cloth is the standard upgrade because it allows airflow while blocking access. Chicken wire is not the same thing; it keeps loose material in, but it does not reliably exclude small rodents.
Line the bottom if the bin sits directly on soil and pest pressure is high. Extend hardware cloth a few inches up the sides and fasten it securely with staples, washer-head screws, or battens. Overlap seams by at least 6 inches. On a wood bin, sandwich the mesh between framing and slats where possible so it cannot peel away.
Rank #4

- Large Capacity: the compost bin has a height of 31.5 inch/80 cm, diameter of 17.7 in/45 cm, 34 gallon large capacity is designed for organizing a large amount of kitchen waste and garden waste, large opening window on the top is convenient for collecting large amounts of materials
- Heavy Duty Felt Material: the garden waste bags is constructed from high-density felt material, it offers high tear resistance and breathability compared to standard plastic bags, ensuring it can hold up season after season without cracking under pressure, the yard leaf holder maintains an upright and open position during filling
- Convenient Design: equipped with sturdy and reinforced handles on both sides, allows two people to easily transport heavy loads of yard waste; the top features a dual-zipper large opening for add waste material easily; two openings at the bottom is convenient for check the fermentation process and take the soil
- Multi-purpose Use and Space-saving: when not in use for composting, this reusable bag conveniently collapses for flat storage, taking up minimal space in your shed. Beyond yard work, it doubles as a heavy-duty storage bag for storing clothes, children’s toys, garage tools, moving, shopping, camping tools and more
Then manage the pile correctly. Bury fruit and vegetable scraps in the center of the pile under 4 to 8 inches of browns. Keep meat, dairy, grease, oily leftovers, pet waste, and cooked food scraps out of a basic backyard bin. Secure lids with a latch, hook, or bungee. If the pile smells like garbage, the bin design is only part of the issue; the mix needs more browns and more air.
Quick wins for a faster PC:
Fix the driver behind crashes, sound loss and screen glitchesFind Drivers →Repair Windows errors before they cause bigger problemsFix Now →Scan for outdated or missing drivers - takes under a minuteDriver Scan →Tools and Materials Worth Having Before Saturday Morning
Most of these bins can be built with basic homeowner tools. At minimum, plan for a drill/driver, drill bits, tape measure, work gloves, safety glasses, tin snips for wire, and a shovel or garden fork. For wood bins, add a circular saw or miter saw, speed square, level, and exterior-rated screws.
Use exterior screws instead of drywall screws. Drywall screws are brittle and not made for outdoor wet-dry cycling. For wire work, wear gloves; cut hardware cloth leaves sharp edges. Fold cut edges inward or cover them with a wood batten where hands will reach into the bin.
For bases, you do not need a concrete slab. Compost benefits from soil contact and drainage. If the site is muddy, set the bin on compacted gravel, pavers with gaps, or a raised edge that keeps wood from sitting in standing water. Avoid creating a watertight floor unless you have a drainage plan. Trapped liquid leads to odor.
Maintenance Schedule: Keep It Working After the Weekend
A compost bin is simple, but it is not zero-maintenance. The difference between finished compost and a smelly pile is usually a few minutes a week.
Do these 3 things before closing this tab:
1Fix the driver behind crashes, sound loss and screen glitches2Clear out junk files and repair common Windows errors3Scan for outdated or missing drivers - takes under a minute| Task | How often | What to do |
|---|---|---|
| Add browns | Every time food scraps go in | Cover scraps with 4-8 in. of leaves, shredded cardboard, straw, or dry plant material. |
| Check moisture | Weekly | Material should feel like a wrung-out sponge. Add water if dry; add browns if soggy. |
| Turn or aerate | Every 1-3 weeks for faster compost | Use a fork, aerator, or roll a secure trash-can bin to add oxygen. |
| Inspect for pests | Weekly | Check lids, gaps, bottom edges, and exposed food scraps. |
| Harvest compost | Usually 3-4 months or longer | Use when dark, crumbly, earthy-smelling, and no longer recognizable as scraps. |
A properly managed home compost pile can be ready in about three to four months, though colder weather, small bins, large material, and low turning frequency can stretch that timeline. Chop thick stems, break down cardboard, and mix fresh grass clippings with browns so they do not mat into a wet layer.
Common Mistakes That Make Cheap Bins Expensive
The most common mistake is building for day one instead of month six. A bin that looks fine empty can bow out when packed with wet leaves. Pallets that stand upright on their own may rack once you start turning material with a fork. Lightweight plastic can crack if it is dragged full across cold ground. Reinforce corners, plan access, and leave room to work.
Another mistake is making the bin too small. A tiny container is easy to hide, but it will not heat well. If you have the yard space, aim for the 3 ft. cube. If you do not, use a tote or trash can and accept a slower process.
Do not skip the removable front. Fixed sides look strong, but they make finished compost hard to remove. On our crews, access is part of the build, not an afterthought. If a shovel cannot reach the bottom without fighting the structure, the design needs a better opening.
Outdated Drivers Are Slowing You Down
One free scan finds every outdated or missing driver and matches the right update for your exact hardware.Free scan · exact hardware matchPC Slower Than It Used to Be?
A free scan shows the junk files, broken settings and background clutter dragging Windows down - then fixes them in one click.Free scan · Windows 10 & 11Finally, do not use questionable salvaged materials. Free pallets are useful, but painted, stained, oily, or chemical-exposed wood does not belong around compost for vegetable beds. The same goes for treated demolition scraps with unknown history. Saving $20 on material is not worth contaminating soil you plan to garden in.
Best Value

- Twin chambers: Two separate chambers allow one side to finish composting while leaving the other side available to add fresh wastes; Constant alternation of the two sides will create an uninterrupted stream of nutritious compost
- 360⁰ Tumbling Design: The rotating design prevents you from digging or mixing the pile by hand; And the deep fins on eight panels make it easier to turn the compost bin
- Excellent Aeration: Air vents can make the air fully circulate and will not cause an explosion due to excessive internal pressure; Deep fins can better break the clumps, which is conducive to the full fermentation of oxygen
- Sturdy & Durable Construction: Constructed of premium metal frame and high-quality pp plastic body, this tumbling composter is corrosion-resistant, weathering-resistant, sturdy, and durable for long-lasting service life
- Garden Gloves Included: The gloves that not only protect your hands from injury, but are also waterproof, making them easy to clean; With 4 durable ABS plastic claws for easy digging, planting and other gardening work
When to DIY vs. When to Hire a Pro
Most homeowners can DIY a basic compost bin. A wire ring, tote, trash can, or single pallet bin is squarely in weekend-project territory. If you can use a drill, cut wire safely, and level a small footprint, there is no reason to hire out a simple bin.
Consider hiring a pro or adding it to a larger landscape project when the compost area needs grading, drainage correction, retaining walls, fencing integration, concrete or paver work, or a built-in enclosure that must match existing outdoor structures. Also bring in help if the bin will be part of a high-visibility HOA yard, a commercial garden, a community compost area, or a larger system handling steady landscape debris.
The threshold is not the composting itself. It is the site work. If water already pools where you want the bin, fix drainage first. If the only available location is near a property line, outdoor living space, or fence, build a cleaner, tighter, lidded enclosure and confirm local requirements before you start.
Free tools Windows power users keep installed
One-click scans. No signup required.
Best Cheap Compost Bin for Most Homeowners
For the lowest cost, build a wire-mesh ring for leaves and yard waste. For the best all-around budget bin, build a pallet bin with a removable or hinged front. For small yards and pest-sensitive areas, use a lidded 32-gallon trash can with drilled ventilation and drainage. For the best long-term setup, build a 3 ft. by 3 ft. by 3 ft. wood-and-hardware-cloth box with a lid and removable front slats.
If you are unsure, start with the simplest contained option: a lidded trash-can bin. It is inexpensive, tidy, and easy to move. If you like the process and need more volume, upgrade to a pallet or wood bin later. The best compost bin is the one you will actually feed, turn, and harvest without dreading the mess.
Frequently Asked Questions
What is the cheapest DIY compost bin I can build this weekend?
A wire-mesh ring is usually the cheapest, often $20 to $80, and nearly free if you have leftover fencing. For more volume, a free-pallet bin can cost $0 to $60 for a basic build.
Do I need a permit to build a backyard compost bin?
Most small residential compost bins do not need a building permit, but city or HOA rules may regulate placement, odor, pests, drainage, setbacks, and bin size. Check local rules before building near a property line.
Quick wins for a faster PC:
Scan for outdated or missing drivers - takes under a minuteDriver Scan →Repair Windows errors before they cause bigger problemsFix Now →How big should a home compost bin be?
The ideal backyard compost bin is about 3 ft. by 3 ft. by 3 ft., or roughly 1 cubic yard. That size is large enough to heat up but still manageable to turn and empty.
How do I make a DIY compost bin rodent-proof?
Use a tight lid, secure the bottom, and cover openings larger than 1/4 inch with galvanized hardware cloth. Bury food scraps under 4 to 8 inches of browns and avoid meat, dairy, grease, and oily foods.
Are pallets safe to use for a compost bin?
Clean heat-treated pallets are generally the better choice. Avoid painted, oily, stained, chemical-smelling, or unknown industrial pallets, especially if the compost will be used around edible plants.
How long does homemade compost take to finish?
A well-managed backyard pile can produce finished compost in about three to four months. Small bins, cold weather, low moisture, large material, or infrequent turning can make it take longer.
Recommended Free Tools
Quick Recap
Product prices and availability are accurate as of the date/time indicated and are subject to change. Any price and availability information displayed on Amazon at the time of purchase will apply.