The Tool Desk
Outbyte PC Repair FREERepair Windows errors before they cause bigger problemsFix Now →Outbyte Driver Updater FREEFix the driver behind crashes, sound loss and screen glitchesFind Drivers →A good DIY drip irrigation system is not just tubing with holes in it. The reliable systems we see on job sites are planned around water pressure, available flow, plant groups, soil type, filtration, backflow protection, and maintenance access. Get those pieces right, and drip irrigation can water raised beds, vegetable rows, containers, shrub borders, and foundation plantings with less waste and less daily work.
The main advantage is simple: drip irrigation applies water slowly at or near the root zone instead of spraying it into the air. That means less loss to wind and evaporation, less runoff, and less wet foliage. The EPA reports that U.S. homes use nearly 8 billion gallons of water outdoors each day, mostly for landscape irrigation, and as much as 50% of that can be wasted through overwatering, evaporation, wind, runoff, and inefficient systems. A properly designed drip system is one of the most practical ways to cut that waste.
For many homeowners, a small DIY drip system costs about $50 to $250 after you include the kit, timer, filter, pressure regulator, fittings, stakes, and repair parts. Professional drip installation in 2026 commonly runs about $1.70 to $4.80 per square foot, with a national average near $3.25 per square foot. The difference between a cheap system and a dependable one usually comes down to planning before anyone punches the first hole in the tubing.
Start With a Site Audit Before Buying Parts
Walk the area with a tape measure, not a shopping cart. Sketch the beds, rows, containers, hose bibbs, slopes, sunny areas, shaded areas, and hardscape crossings. Mark plant types and approximate spacing. A 4-by-8-foot raised vegetable bed, a 40-foot shrub border, and a row of containers can all use drip irrigation, but they should not necessarily run from the same line or on the same schedule.
Free tools Windows power users keep installed
One-click scans. No signup required.
#1 Best Overall

- Great value: includes 6 Tees, 6 Couplings and 6 Elbows,6 End Cap Plugs, 24 pieces drip irrigation parts in total
- These 17mm irrigation fittings work with most of 1/2" Drip irrigation tubing (17mm .560-.600" ID), compatible with many types of Rainbird,Orbit,Dig and Toro half inch tubing
- Made with environmentally-friendly and chemical-resistant materials, it is sturdy and will last for a long time
- Easy to install without glue, tools, or clamps. Barbed ends grab tubing for a secure leak-proof connection. Tips: Heated end of hose to help it slide on fitting
- Ideal for Use with garden greenhouse, flower bed, patio and agricultural watering applications
On our job sites, we start with six questions. What is the water source? What is the static pressure? How many gallons per minute are available? What soil type are we watering? Are there local watering restrictions? What happens if the system leaks while nobody is home?
You can check flow with a 5-gallon bucket and a stopwatch. Open the hose bibb fully and time how long it takes to fill the bucket. If it fills in 30 seconds, the source is delivering about 10 gallons per minute. If it takes 60 seconds, you have about 5 gallons per minute. Do the test from the actual spigot you plan to use, with the same hose if the hose will remain part of the setup.
Pressure matters just as much. Many drip components are built for low pressure, commonly around 15 to 30 psi depending on the product. A typical house hose bibb may deliver much more than that. Excessive pressure can blow fittings apart, mist through emitters, or create uneven watering. Low pressure can leave the far end of the line dry. Use a hose-thread pressure gauge for a quick reading, then select a pressure regulator that matches the dripline or emitter manufacturer’s rating.
Hydrozone the Garden Instead of Watering Everything the Same
Hydrozoning means grouping plants with similar water needs into the same irrigation zone. This is where many DIY systems fail. Tomatoes, lavender, boxwoods, young trees, and hanging baskets should not all be forced into one runtime just because they are near the same hose bibb.
Vegetable beds usually benefit from consistent moisture near the root zone. Drip tape or inline dripline often works better there than dozens of individual point emitters. For straight rows, 1/4-inch dripline or drip tape with emitters spaced 6, 9, or 12 inches apart is common. For raised beds, many homeowners use 1/2-inch mainline around the bed and 1/4-inch feeder lines or inline tubing through each row.
Shrubs and foundation plantings are different. A small shrub may need one or two emitters, while a larger established shrub may need several emitters spaced around the root zone. Trees need watering over a wider area as they mature, not just at the trunk. Containers dry faster than in-ground beds and often need shorter, more frequent irrigation. Sloped beds may need pressure-compensating emitters and cycle-and-soak scheduling so water has time to soak in instead of moving downhill.
If you are tying drip into an existing irrigation controller, make separate drip zones wherever possible. Running drip irrigation on the same schedule as spray heads is usually a mistake. Sprinklers apply water quickly. Drip applies it slowly. The drip zone may need 30 to 90 minutes depending on emitter flow, soil type, weather, and plant needs, while a spray zone may run for a much shorter period.
What a Complete DIY Drip System Includes
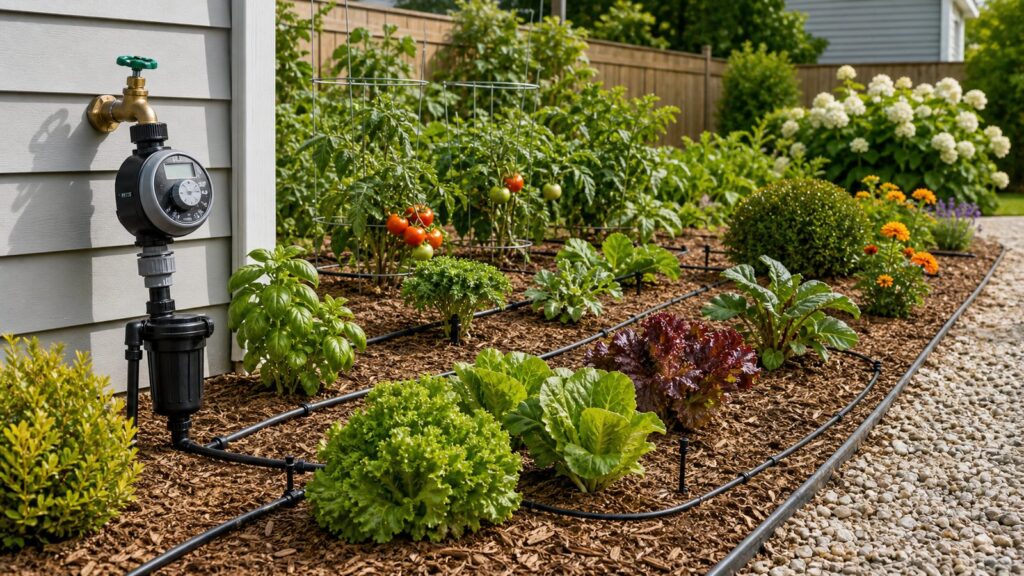
A complete faucet-connected drip system usually needs more than a kit. The basic head assembly for many hose-bib systems is backflow protection, timer or controller, filter, pressure regulator, and adapter to mainline tubing. Some manufacturers specify a different order for certain timers or regulators, so follow the instructions for the parts you buy.
What’s actually slowing this PC down?
Pick the symptom - the matching free tool is one click away.
Backflow protection is not optional. Any irrigation system connected to potable water needs protection so contaminated water cannot be siphoned back into the drinking water supply. Requirements vary by local code and water authority, and some areas require specific devices or annual testing. Even a small hose-bib drip system should use a proper vacuum breaker or backflow preventer rated for the connection.
Rank #2

- Quick Connect Design: Newly Upgraded Quick Connect Irrigation System Say Goodbye to Complicated Settings! Our upgraded 4-way connectors, tees, and nozzles can now be easily connected directly to 1/4 "irrigation pipes. No more trouble with heating or softening - just plug and play!
- A brand new drip irrigation kit: ABAKUKU drip irrigation system, equipped with multiple components to meet all your garden watering needs. Including basic components such as 197 foot 1/4 inch irrigation pipe, 33 foot 1/2 inch irrigation pipe, 1/2 inch locking barbed tee connector, drip emitter flow, vortex emitter, blue mist nozzle, quick connect tee, faucet connector, etc.
- Multifunctional Applicability: Whether it is a small home garden or a large plantation, this drip irrigation system can provide even moisture distribution and is suitable for a variety of plants such as vegetables, flowers, fruit trees, etc., ensuring the healthy growth of plants.
- Four kinds of irrigation systems: the irrigation device includes four kinds of drip emitters, which can adjust different irrigation modes, such as micro drop, spray, watering, etc. A precise watering system can solve the watering problem of plants in different locations, and the amount of water sprayed can be adjusted separately according to the settings and needs.
- Easy to install and use: The set contains all the necessary components, and is easy to install without professional tools. Users can freely adjust the location of the drip irrigation tubes according to the garden layout to meet the irrigation needs of different plants.
Filtration is also not optional if you want the system to last. Small emitter openings clog from sediment, mineral buildup, algae, and debris. This is especially true on well water, rain barrels, older hose bibbs, and any system where the tubing gets opened for seasonal changes. Use a filter sized for irrigation service, commonly a screen or disc filter, and install it where you can remove and clean it.
The rest of the system is straightforward: 1/2-inch or 5/8-inch mainline tubing, 1/4-inch feeder tubing, tees, elbows, couplings, goof plugs, stakes, end caps or flush valves, a tubing punch, emitters or inline dripline, and repair couplers. Buy extra fittings. On a real installation, the final layout almost always changes slightly after you see how the tubing wants to sit in the bed.
2026 Drip Irrigation Cost Guide
DIY drip irrigation can be inexpensive for small areas, but the full cost is higher than the price printed on a starter kit. A $35 kit may still need a timer, filter, pressure regulator, extra tubing, stakes, end caps, and repair parts. For a small raised-bed or container project, plan on $50 to $250 total in most cases.
Do these 3 things before closing this tab:
1Fix the driver behind crashes, sound loss and screen glitches2Clear out junk files and repair common Windows errors3Scan for outdated or missing drivers - takes under a minute| Project Type | Typical 2026 Cost | Best Fit |
|---|---|---|
| Basic DIY kit | $25-$100 | Small raised beds, patio containers, simple vegetable rows |
| Complete small DIY setup | $50-$250 | Homeowner-installed system with timer, filter, regulator, tubing, fittings, and stakes |
| Above-ground professional drip | $0.85-$2.85 per sq. ft. | Accessible beds, shrubs, vegetable gardens, mulched landscapes |
| Subsurface drip | $2-$5 per sq. ft. | Buried systems, cleaner appearance, more demanding layout and repairs |
| Sprinkler-to-drip conversion | $300-$1,200 per zone | Existing irrigation systems converted for beds or planting zones |
| Foundation drip line | $1.50-$4.75 per linear ft. | Dry or clay-soil regions where steadier soil moisture is useful |
| Traditional sprinkler system comparison | $1,637-$3,594 typical; about $2,549 average | Quarter-acre lawn irrigation projects and full-yard spray systems |
The biggest cost drivers are irrigated square footage, number of zones, water pressure, available flow, plant density, above-ground versus buried tubing, slope, soil type, controller choice, trenching, hardscape crossings, local labor rates, and whether the system connects to potable water or an existing irrigation main.
Ongoing costs are modest but real. Expect replacement emitters and fittings, filter cleaning or replacement, timer batteries, seasonal repairs, winterization in freeze climates, and possible annual backflow testing if required by the local water authority.
How to Design the Layout
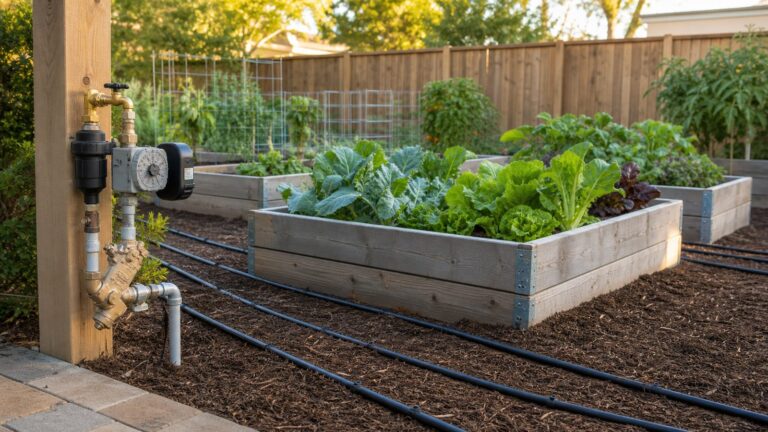
Start with the water source and work outward. Keep the head assembly accessible. Do not bury a filter, pressure regulator, hose timer, or backflow device where it cannot be inspected. Run 1/2-inch mainline tubing along the edge of beds, then branch with 1/4-inch tubing or inline dripline to reach plants.
For vegetable rows, drip tape or inline dripline is usually cleaner than point emitters. Place lines close enough that the wetting patterns overlap at root depth. In sandy soil, water moves downward quickly and spreads less sideways, so lines may need closer spacing. In clay soil, water spreads more slowly and can puddle if applied too fast. Loam is more forgiving, but still needs testing.
Recommended Free Tools
For shrubs, place emitters near the outer root zone rather than tight against the stem. For larger plants, use multiple lower-flow emitters instead of one high-flow outlet. This spreads water more evenly and reduces runoff. On slopes or long runs, pressure-compensating emitters help keep output more consistent from the first plant to the last.
Keep tubing runs within manufacturer limits. Every emitter, length of dripline, fitting, and elevation change adds friction loss. If the far end is weak during testing, split the system into two zones, shorten the run, increase the mainline size, or reduce the number of emitters on that zone.
Rank #3

- Connects 1/2" Dip tubing to any 3/4" male pipe threaded faucet or garden hose
- Multi-function kit helps ensure proper operation of your Drip irrigation system
- Includes backflow preventer, 25 PSI pressure regulator and 150 mesh filter
- Compression fitting provides a leak-proof seal to 1/2" Drip tubing
- Constructed of highly durable UV and chemical-resistant materials to assure long life
Step-by-Step Installation
1. Assemble the Head Unit
At the hose bibb or irrigation stub-out, install the required backflow protection, timer or controller, filter, pressure regulator, and tubing adapter. Hand-tighten hose-thread parts, then check for leaks under pressure. Use parts rated for outdoor irrigation use, not indoor plumbing shortcuts.
2. Lay Out the Mainline
Unroll the mainline tubing in the sun for 20 to 30 minutes so it relaxes. Route it along bed edges or behind plantings where it can be covered with mulch but still accessed. Stake it every few feet and at turns. Avoid sharp kinks, mower edges, and places where people step regularly.
3. Add Laterals and Emitters
Use a tubing punch to make clean holes in the mainline. Insert barbed fittings firmly. Run 1/4-inch tubing to individual plants or install inline dripline along rows. Cap or plug unused holes with goof plugs. Add manual valves to bed laterals if you want to shut off one area for maintenance or seasonal planting changes.
4. Add Flush Points
Install removable end caps or flush valves at the ends of lines. This is a small detail that saves time later. Before installing emitters at final positions, flush the lines to push out plastic shavings, soil, and debris. Flush again after repairs or seasonal startup.
5. Test the Wetting Pattern
Do not judge the system by the surface alone. Run it for 30 to 60 minutes, then dig several small inspection holes near plants and at the far end of the line. You want water reaching the active root zone. If the surface looks damp but the root zone is dry, run longer or adjust emitter placement. If water is puddling, reduce flow, split the runtime into cycles, or improve spacing.
Controllers, Timers, and Smart Scheduling
A simple battery hose timer is enough for many raised beds and containers. Look for one with multiple start times, manual run, rain delay, and a durable outdoor housing. Replace batteries at the start of the season, not after the plants wilt.
For permanent systems, a WaterSense labeled weather-based irrigation controller is worth considering. These controllers adjust irrigation schedules using weather and site conditions instead of a fixed clock schedule. Federal efficiency guidance summarizes the WaterSense performance requirement as 10% or less excess irrigation per zone and 5% or less average excess across six zones.
A smart controller does not fix a poor layout. If vegetables, shrubs, containers, and trees are all on one zone, even the best controller can only choose one runtime. Good scheduling depends on good zone design, correct emitter placement, pressure regulation, and periodic field checks.
Permits, Backflow, and Safety Notes
Local rules matter. Some municipalities allow simple hose-bib drip systems without a permit but still require backflow protection. Others regulate permanent irrigation connections, underground piping, dedicated meters, reclaimed water, and backflow testing. Before connecting to potable water, check your city or water district requirements.
Rank #4

- Flexible 50ft 1/2" drip irrigation tubing that bends around raised beds, greenhouse staging, and irregular garden layouts without kinking or cracking. At 0.47" ID / 0.65" OD it is compatible with all standard quick-connect irrigation system fittings for fast tool-free assembly. High-quality durable construction supports above-ground and underground installation — ideal mainline for any garden drip irrigation system or vegetable garden watering system.
- Make gardening less of a chore - Easy to assemble and use, the Carpathen drip tubing 1/2 inch will feed your plants immediately. Just cut your 1/2 inch tubing to the desired length and use it as a supply drip line irrigation for your garden irrigation system. Save your time and let the drip irrigation tubing 1/2 inch water your raised garden beds, window boxes, garden rows, orchards, ground cover, or other landscaped areas.
- Create your garden watering system with high-quality drip irrigation parts easier than ever. The 1/2 tubing can serve as the main drip irrigation 1/2 inch tubing for your drip irrigation kit and water your plants efficiently. Branch out with the 1/4 irrigation tubing and connect it to the drip irrigation emitters. Your DIY home irrigation system enhances plant growth, making garden care more enjoyable. Get ready to enjoy a thriving garden – all thanks to our easy-to-use 1/2 inch irrigation tubing
- Spend less, get more - The Carpathen 1/2 inch poly tubing is UV resistant and designed for underground irrigation or above-ground installation. This 1/2 poly tubing will last year-round on any weather. Season after season the drip irrigation system 1/2 inch tubing will keep your plants hydrated with minimal waste from evaporation. The flexibility of the black tubing enables it to perfectly fit tight planting areas with curves or switchbacks. Choose to cut down your water bills!
- Your garden's best friend – we trust our irrigation system parts so much that if your 1/2 inch irrigation tube ever hiccups, we've got you covered. No cost, no fuss, just our fantastic customer service. With every 1/2 drip tubing, we're not just delivering a tool but an unwavering commitment to you. Your garden deserves nothing but the best, and so do you. Let's nurture your garden and your trust, one drip at a time.
Backflow prevention protects the drinking water supply from fertilizer, soil microbes, stagnant water, and other contaminants that can enter irrigation tubing. The device type depends on the hazard level, system design, and local code. A hose-thread vacuum breaker may be suitable for some hose-bib setups, while more complex irrigation systems may require a pressure vacuum breaker, double-check assembly, or reduced pressure zone assembly installed to local standards.
Do not connect a DIY drip system to chemical injectors, rain barrels, wells, or reclaimed water without understanding the backflow and filtration requirements. Those systems can work, but they need more careful design. When in doubt, have a licensed irrigation contractor or plumber review the connection point.
Independent reader supportYour contribution helps us test, update, and keep practical guides available for everyone.When to DIY and When to Hire a Pro
DIY is a good fit for raised beds, vegetable rows, patio containers, foundation plantings, shrub borders, and small ornamental beds. If the project is above ground, near a hose bibb, and easy to inspect, a careful homeowner can usually build a dependable system in a weekend.
Hire a pro when the system covers a large landscape, requires multiple zones, crosses hardscape, ties into an existing irrigation main, has very low or very high pressure, uses reclaimed water, involves steep slopes, or requires code-specific backflow work. Professional design also makes sense when plant material is expensive. Saving a few hundred dollars on irrigation is not a win if it stresses thousands of dollars in new landscaping.
For sprinkler-to-drip conversions, expect more judgment. A conversion can cost about $300 to $1,200 per zone, depending on valve compatibility, filtration, pressure regulation, plant density, and the condition of existing pipe. Some conversions are simple. Others reveal old valves, mixed pipe sizes, poor zoning, or pressure problems that need correction before drip will perform well.
Troubleshooting Common Drip Problems
If the far end of the line is dry, the zone may be overloaded. Check for closed valves, clogged filters, kinked tubing, too many emitters, or excessive run length. Flush the line and test again. If flow is still weak, split the zone or reduce demand.
If fittings blow apart, pressure is usually too high or the fitting was not fully seated. Confirm the regulator rating and make sure it is installed in the correct location. Many drip systems need 15 to 30 psi, not full household pressure.
If emitters clog, clean the filter, flush the lines, and replace blocked emitters. Mineral buildup may require product-specific cleaning steps. Well water and rain-barrel systems often need more frequent filter maintenance.
If you see puddling, the application rate is too high for the soil or slope. Use lower-flow emitters, add more emitters around larger plants, shorten each cycle, or run multiple shorter cycles with soak time between them.
Quick wins for a faster PC:
Clear out junk files and repair common Windows errorsFree Scan →Fix the driver behind crashes, sound loss and screen glitchesFind Drivers →Repair Windows errors before they cause bigger problemsFix Now →Best Value

- Convenient usage: Using this set of tubing fittings, you can save time and energy, also can obtain everything you need at one time; With this set of essential components, you can start drip irrigation system installation and build a drip system with no maintenance
- Compatibility: these barbed fittings with sizes of 16 mm or 17 mm are coordinated with half inch drip tubing whose inside diameter is from 0.560 to 0.600; Compatible with many types as well as 1/2 inch blank tubing or drip lines, suitable for garden greenhouse, flower bed, patio and lawn
- Easy to Use: these 16 mm or 17 mm tubing fittings drip are effortless to install do not require any additional tools, which provide a helpful solution for indoor appliances and outdoor garden use, offer lasting watertight connection for your hose system
- Quality material: Irrigation parts kit featuring with good strength and rigidity, elasticity and wear resistance, these drip fittings are made of durable POM, which are resistant to sun exposure and can serve you for a long time
- What you get: 9 pieces tees, 9 pieces couplings, 9 pieces elbows, 9 pieces end cap plugs; A total of 36 pieces to meet your long-term needs
If the timer does not open, check batteries, programming, screen filters, water pressure, and whether the valve is installed in the correct flow direction. For hose timers, protect the unit from impacts and remove it before hard freezes.
Seasonal Maintenance Calendar
In spring, inspect the head assembly, replace timer batteries, clean the filter, reconnect lines, flush every zone, and run a full test. Walk the system while it is operating. Look for popped fittings, cracked tubing, missing emitters, and dry spots.
In summer, audit moisture at root depth every few weeks, especially during heat waves. Mulch ornamental beds with 2 to 3 inches of mulch to reduce evaporation and protect tubing from sunlight. Keep emitters serviceable and avoid burying parts that need inspection unless they are designed for subsurface use.
In fall, check for plant growth that has moved emitters away from the active root zone. Remove or cap lines for annual vegetable beds as needed. In freeze climates, winterize according to the system design. Hose-bib systems should be disconnected, drained, and stored where freezing will not crack timers, filters, or regulators.
Outdated Drivers Are Slowing You Down
One free scan finds every outdated or missing driver and matches the right update for your exact hardware.Free scan · exact hardware matchPC Slower Than It Used to Be?
A free scan shows the junk files, broken settings and background clutter dragging Windows down - then fixes them in one click.Free scan · Windows 10 & 11The Bottom Line
A drip irrigation system is efficient only when it is designed as a system. The right tubing matters, but so do pressure, flow, filtration, backflow protection, hydrozoning, emitter spacing, controller settings, and seasonal maintenance. For a small garden, $50 to $250 and a careful weekend can produce a practical upgrade. For larger landscapes, multi-zone systems, buried drip, or code-sensitive connections, professional design is often the better value.
The goal is not to hide hoses. The goal is to deliver the right amount of water to the right root zone at the right pace, with enough access to maintain the system when seasons, plants, and weather change.
Frequently Asked Questions
How much does a DIY drip irrigation system cost in 2026?
A basic DIY kit commonly costs $25-$100, but a complete small setup usually lands around $50-$250 after adding a timer, filter, pressure regulator, fittings, stakes, and repair parts.
Does a drip irrigation system need a backflow preventer?
Yes. Any irrigation system connected to potable water needs backflow protection. The exact device depends on local code, the water source, and whether the system is temporary or permanent.
What pressure should a drip irrigation system use?
Many drip components are designed for low pressure, commonly around 15-30 psi. Always match the pressure regulator to the tubing or emitter manufacturer’s specifications.
Can I connect drip irrigation to a garden hose?
Yes, many small DIY systems connect to a hose bibb. Use the proper head assembly, including backflow protection, a timer if desired, a filter, a pressure regulator, and an adapter to drip tubing.
How long should I run drip irrigation for a vegetable garden?
Many vegetable beds need longer, slower watering than sprinklers, often 30-90 minutes depending on soil, emitter flow, weather, and crop stage. Test by digging small inspection holes to confirm moisture reaches root depth.
Should drip irrigation tubing be buried or covered with mulch?
In ornamental beds, cover above-ground tubing with 2-3 inches of mulch to reduce sun exposure and evaporation. Do not bury filters, regulators, emitters, or fittings that need inspection unless the products are rated for subsurface use.
Quick Recap
Product prices and availability are accurate as of the date/time indicated and are subject to change. Any price and availability information displayed on Amazon at the time of purchase will apply.