Recommended Free Tools
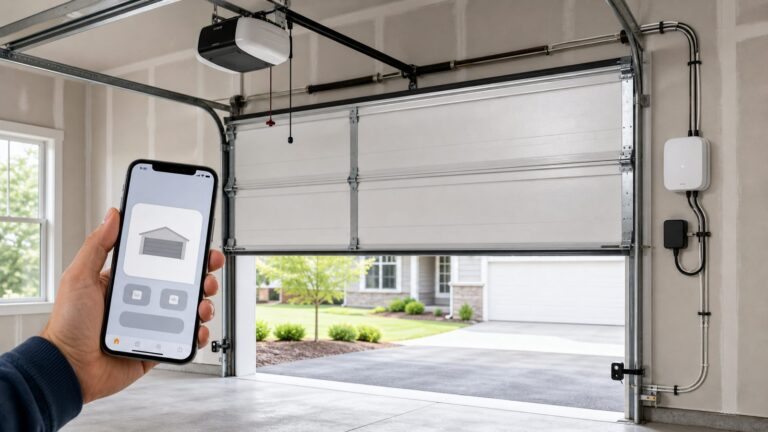
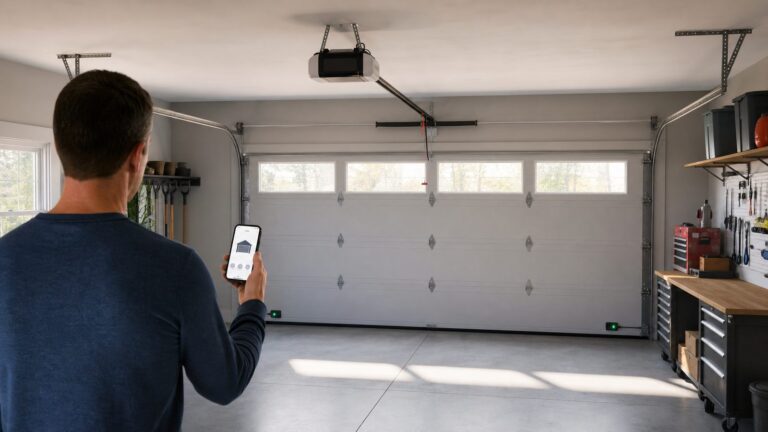
Most Linear garage door opener problems can be narrowed down in 10 to 20 minutes if you work in the right order. Start with power, then controls, then safety sensors, then the door itself, then travel and force settings. Do not start by turning force screws or replacing the opener. On our job sites, the “bad opener” is often a tripped GFCI, a dirty photo eye, a loose low-voltage wire, a locked door, or a spring problem the opener was never designed to overcome.
This guide covers common Linear models and accessories homeowners search for, including LDO33, LDO50, LDCO841, LDCO850, LDCO852, Delta-3 remotes, and MegaCode remotes and keypads. The exact button names and LED blink patterns vary by model, so keep the model number from the opener head handy and match final programming steps to the manual for that unit.
The safety rule is simple: if the door is heavy by hand, has damaged springs or cables, will not reverse during a safety test, smells burnt, or repeatedly trips a breaker or GFCI, stop troubleshooting and call a qualified garage door or electrical pro. A garage door opener is a motor and control system. It is not a structural repair tool, a spring tensioning tool, or a bypass for entrapment protection.
Start With the Fast Symptom Map
Use the symptom to choose your first test. This saves time and keeps you from changing settings that were not the problem.
Outdated Drivers Are Slowing You Down
One free scan finds every outdated or missing driver and matches the right update for your exact hardware.Free scan · exact hardware matchWindows Errors? Fix Them Before They Spread
Repair common Windows errors and clear accumulated junk for a smoother, more stable PC - no reinstall needed.Free scan · no reinstall| Symptom | Most likely causes | First homeowner checks |
|---|---|---|
| No lights, no sound, no movement | Outlet, breaker, GFCI, cord, transformer, logic board | Test the outlet, reset GFCI, check breaker, inspect plug and cord |
| Opens but will not close | Photo eyes, sensor wiring, obstruction, close limit, force setting | Clean and align sensors, check red/green LEDs, inspect low-voltage wire |
| Closes only while holding wall button | Safety beam circuit fault | Treat as sensor alignment, obstruction, or wiring trouble until proven otherwise |
| Remote dead but wall button works | Battery, lock/vacation mode, programming, RF interference | Replace battery, unlock wall station, reprogram, check LED bulbs |
| Door reverses at floor | Close limit set too far, binding door, excessive close force resistance | Check door path and balance before adjusting limits |
| Motor hums but door does not move | Locked door, disconnected trolley, broken spring, stripped gear, capacitor or motor fault | Verify trolley connection and manually test door balance with door closed |
Do these checks with the garage door closed whenever possible. If the door is open or partly open and a spring or cable is broken, pulling the emergency release can let the full door weight drop. A typical sectional garage door can weigh 130 to 300 pounds, and larger insulated wood or steel doors can weigh more.
#1 Best Overall

- Compatible with Linear Devices: Designed for Linear MegaCode-enabled openers and receivers, this remote supports models such as LINEAR LD033, LD050, LS050, LC075, LDCO800, LSO50, and LSO50-2T garage door openers, as well as MDR, MDR-U, MDR-2, MDRG, MDRM, MGR, MGR-2, and SMDRG receivers. (Note: Not compatible with dip switch garage door openers.)
- Safe & Reliable: With 318MHz MegaCode technology, this remote generates a unique code with each use to block code-grabbing devices. Its strong interference resistance ensures stable, reliable communication for secure and seamless operation
- Long Distance Remote: CreaCity garage door opener remote works within 160 feet from the garage door opener for “no waiting” roll-in access
- Multichannel: 3 button design allows control of up to 3 garage door openers or gate operators at once, which eliminating the trouble of carrying multiple remote
- Comes in a pack of two: We prepared two garage door opener remotes for you so that you can still get "no waiting" roll-in access even if you lose one; You can also give one of the remotes to your family, when you take away the remote from home and your family is going to enter the garage, another remote will give them a hand
Check Power Before You Touch the Opener Settings
If the opener is silent, has no courtesy light, and no LED activity, start at the receptacle. Most modern garage outlets are GFCI protected either at the outlet itself, another upstream outlet, or the breaker. Plug a lamp, phone charger, or small tool into the same receptacle. If that device does not work, reset the nearest GFCI and check the panel breaker.
Do not assume the receptacle above the opener is fine because other garage outlets work. Garages often have several receptacles on one protected circuit, and the reset button may be on a different wall, near a workbench, in the basement, or at the electrical panel. If the opener runs for a second and then trips the GFCI again, unplug it and leave it unplugged. Repeated tripping can point to a failing opener component, damaged cord, moisture, or a wiring issue that deserves electrical diagnosis.
Power checklist
- Confirm the opener is plugged in fully at the ceiling receptacle.
- Test the receptacle with another device for at least 10 seconds.
- Reset the GFCI and breaker once. If it trips again, stop.
- Inspect the opener cord for cuts, crushed insulation, burn marks, or loose strain relief.
- Look for burnt electrical smell from the motor head or visible scorching on the logic board area.
Current electrical practice commonly places garage receptacles on GFCI protection. Some projects also require permits or inspections when a new ceiling receptacle is added for an opener. If the fix requires new wiring, a new outlet, or breaker work, that is not a garage door adjustment. Bring in a licensed electrician.
What’s actually slowing this PC down?
Pick the symptom - the matching free tool is one click away.
Separate Opener Trouble From Door Hardware Trouble
This is the check homeowners skip most often. With the door fully closed, pull the emergency release cord to disconnect the trolley from the opener carriage. Then lift the door by hand. A balanced sectional door should move smoothly, feel manageable, and stay roughly halfway open without drifting hard up or down.
If the door feels like dead weight, will not stay halfway open, scrapes the track, jerks, drops, or needs two adults to lift it, the opener is not the root problem. Springs carry the door weight. The opener only guides a properly balanced door through the travel. Turning up force to drag a bad door is how motors burn up, gears strip, brackets bend, and safety reversal becomes unreliable.
Stop DIY work if you see these door problems
- Broken torsion spring above the door or separated extension spring along the horizontal track.
- Frayed lift cable, cable off the drum, or loose bottom bracket.
- Door crooked in the opening by more than about 1 inch.
- Bent track, cracked hinge, broken roller stem, or damaged top bracket.
- Door falls, rises by itself, or will not stay near halfway open.
Spring, cable, and bottom bracket repairs are professional work. Those parts are under stored tension even when the opener is unplugged. A service call for door hardware may feel unrelated to the opener, but it is often the repair that prevents a second opener failure.
Linear Safety Sensor Troubleshooting
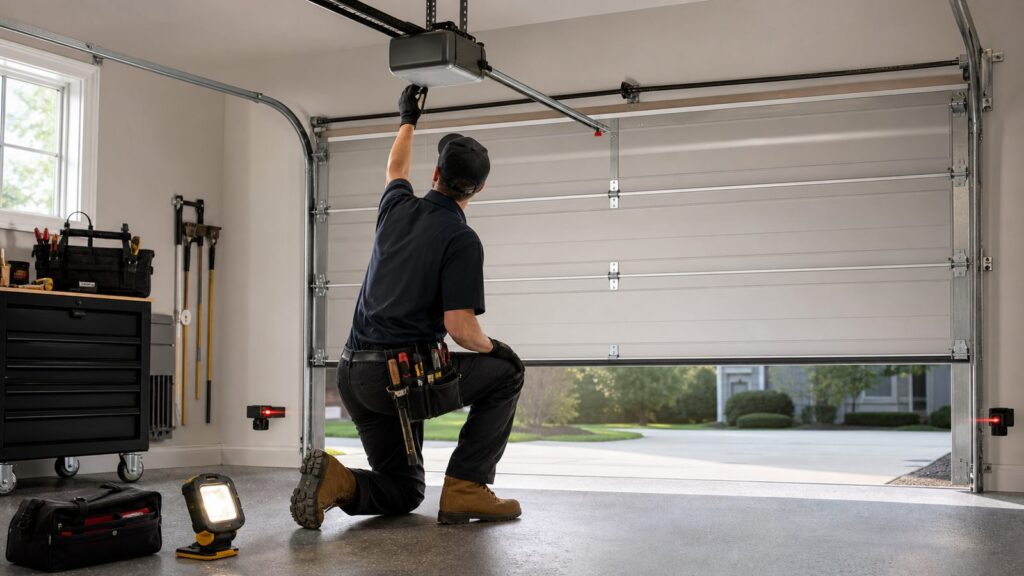
Linear manuals point homeowners to the safety beams when the opener will not close. On common Linear systems, the sending sensor shows a green power light, and the receiving sensor shows a red light when the beam is aligned and clear. A steady red receiver light is the clue you want. If the red light is off, flickering, or only appears when you wiggle the bracket, look for obstruction, alignment, dirt, sun glare, or wiring damage.
The Tool Desk
Outbyte PC Repair FREERepair Windows errors before they cause bigger problemsFix Now →Outbyte Driver Updater FREEFix the driver behind crashes, sound loss and screen glitchesFind Drivers →The classic symptom is a door that opens normally but refuses to close from the remote or keypad. It may start down, reverse, and flash the opener light. It may also close only while you hold constant pressure on the wall station. That constant-pressure behavior is not a workaround to rely on. It is a diagnostic clue that the opener is not satisfied with the photo-eye circuit.
Rank #2

- 【Wide Compatibility】Compatible with Linear Garage Door Opener Remote MCT-11 DNT00090 MCT-3 DNT00089 ACT-31B ACP00879 MCT-1.【Not support dip switch opener !】
- 【Compatible List】Compatible with LD033, LD050, LS050, LC075, LDCO800, LSO50, and LSO50-2T Linear Garage Door Opener.Compatible with Linear MegaCode Receiver: MDR, MDR-U, MDR-2, MDRG, MDRM, MGR, MGR-2, and SMDRG.
- 【Easy Programming】 Finish Quick Programming In Seconds. Press The Learn Button On Your Garage Door Opener, Then Operate The Remote Control. Tool-Free Design Without Professional Installation.
- 【Reliable Performance】 Equipped With High-Performance Third-Generation Smart Chip For Stable Signal Transmission. All Remotes Pass 100,000+ Durability Tests.
- 【Rolling Code Security】 Dynamic Rolling Code Generates Unique Passwords With Every Click. Block Code Interception And Keep Your Property Safe All The Time. .
How to clean and align Linear photo eyes
- Move boxes, trash cans, tools, bikes, and stored lumber out of the beam path. Sensors are usually mounted near the floor, commonly around 4 to 6 inches above the garage slab.
- Wipe both lenses with a clean soft cloth. Do not use abrasive pads.
- Check that both brackets are tight and aimed directly at each other across the door opening.
- Look for the green light at the sender and a steady red light at the receiver.
- Loosen the wing nut or bracket screw slightly, adjust until the receiver light stays solid, then retighten.
- Trace the small low-voltage wires back to the motor head. Look for loose terminals, broken insulation, staples through wire, corrosion, or wire pulled loose by stored items.
Sensor wiring is low voltage, but careless repairs still cause trouble. Match terminals according to the opener manual. Do not twist wires together randomly, reverse connections blindly, or bury a damaged splice behind storage. A Linear-compatible safety sensor kit commonly costs about $30 to $80 for the part. Professional alignment or simple wiring repair often lands in the $75 to $150 minor-service range, depending on local dispatch fees.
Run the Safety Tests After Any Sensor or Limit Work
Federal safety rules and UL 325 guidance exist because a closing garage door can trap a person, child, pet, or object. Residential openers use built-in force reversal plus an external entrapment-protection device such as photo eyes or an edge sensor. Openers also need a manual release.
After any sensor adjustment, limit adjustment, force adjustment, rail repair, or door hardware service, run two checks. First, close the door and interrupt the photo beam with a long object while the door is moving down. The door should reverse. Second, place a flat 2×4 on the floor under the center of the door and close the door. When the door contacts the board, it should reverse.
If the door does not reverse, do not keep using it. Do not bypass the sensors “just for tonight.” A bypass creates an entrapment hazard and can put the opener outside the safety behavior it was designed to provide. The correct repair may be as simple as sensors and adjustment, but the standard is non-negotiable: the door must reverse reliably.
Remote, Keypad, and Wall Station Problems
If the wall station works but the handheld remote does not, the opener motor is probably not your first suspect. Start with the cheapest items. Remote batteries usually cost under $10. Compatible Linear or MegaCode remotes are commonly about $25 to $60, and wireless keypads often run about $35 to $70.
Remote works poorly or only up close
Replace the battery before reprogramming. Then stand inside the garage within sight of the opener and test. If range is still weak, look for radio-frequency interference. We see this after homeowners install certain LED bulbs in the opener light sockets. Remove the bulbs temporarily and test the remote again. If range improves, use garage-door-opener-rated bulbs.
Also check the opener antenna wire. It should hang downward from the motor head, not be wrapped around the rail, tucked above the cover, or buried against metal shelving. Metal storage racks, foil-faced insulation, and nearby electrical devices can reduce range. Move obvious interference sources before replacing circuit boards.
Quick wins for a faster PC:
Fix the driver behind crashes, sound loss and screen glitchesFind Drivers →Repair Windows errors before they cause bigger problemsFix Now →Wall button works oddly
Many wall stations have a lock or vacation mode that disables remote commands while still allowing the wall control to operate. If the remote and keypad suddenly stopped working but the wall station opens and closes the door, check for a lock indicator or press-and-hold lock function according to the model instructions.
Rank #3

- 【Compatible Model】Compatible with Linear Garage Door Opener Remote MCT-3 DNT00089 ACT-31B ACP00879 MCT-11 DNT00090 MCT-1.【Not support dip switch opener !】
- 【Compatible List】Compatible with Linear LD033, LD050, LS050, LC075, LDCO800, LSO50, and LSO50-2T Garage Door Opener. Compatible with Linear MegaCode Receiver: MDR, MDR-U, MDR-2, MDRG, MDRM, MGR, MGR-2, and SMDRG.
- 【3-Button Controls 3 Garage Doors & Industrial-Grade Chip】 Featuring Three Independent Buttons To Operate Up To Three Separate Garage Doors, This Garage Door Opener Remote Is Built With An Industrial-Grade Chip That Delivers Reliable Performance In Extreme Heat And Sub-Zero Cold.
- 【Advanced Security Protection】With Megacode Rolling Code Technology That Generates A New Encrypted Signal Every Time, This Garage Door Opener Remote Effectively Blocks Code Grabbing Attempts For Enhanced Security.
- 【Easy Pairing With Auto-Seek Technology】Designed For Quick And Hassle-Free Pairing With Your Garage Door Opener Motor, This Garage Door Opener Remote Gets You Up And Running In Seconds.
If the wall station is dead but remotes work, inspect the two low-voltage control wires at the wall button and opener terminals. Wall buttons are inexpensive, usually around $15 to $40, but damaged wire in the wall or stapled wire along framing can take longer to locate.
Reprogramming a Linear remote
Programming steps vary by opener and remote family, so use the opener model number and remote type. In general, Linear/MegaCode programming involves pressing the learn button on the opener, then pressing the desired remote button within the learn window. Do not erase all codes unless you mean to reprogram every remote, keypad, and vehicle button attached to the opener.
If you recently bought the home, clearing old codes can be a good security step. Plan 10 to 20 minutes and gather every remote, keypad PIN, and vehicle HomeLink-style transmitter before you start.
Free tools Windows power users keep installed
One-click scans. No signup required.
Travel Limits, Force Settings, and Door Reversal
Travel limits tell the opener where fully open and fully closed are. Force settings tell the opener how much resistance is acceptable before it stops or reverses. These are not tuning knobs for a bad door. Check door balance first, then adjust settings only if the door moves smoothly by hand.
If the door hits the floor and reverses, the close limit may be set too far. The opener thinks it has not finished closing, keeps pushing, senses resistance, and reverses. If the door stops short of the floor, the close travel may be set too short or the opener may be seeing resistance from binding track, rollers, weather seal, or a tight bottom seal frozen to the slab.
Before adjusting limits
- Confirm the trolley is connected and the opener arm is not bent.
- Check that the manual slide lock on the door is open.
- Look for a bolt, broom handle, storage bin, or ice blocking the door path.
- Inspect rollers and hinges for obvious binding.
- Manually lift the door after disconnecting the opener.
Make small adjustments and test after each change. If the opener has digital buttons, count presses carefully. If it has adjustment screws, turn in small increments, often a quarter turn at a time. After adjustment, run the photo-eye interruption test and the 2×4 reversal test.
Sounds, Hums, and Mechanical Clues
A humming Linear opener that does not move the door needs careful sorting. First, make sure the door is not manually locked and the trolley is connected. Then disconnect the trolley with the door closed and test the opener without the door attached. If the motor runs and the trolley moves along the rail, the door hardware is the likely load problem. If the motor hums but the sprocket or belt does not move, you may be dealing with a capacitor, motor, gear, sprocket, or internal drive issue.
Chain-drive units can rattle when the chain is loose or the rail hardware is worn. Belt-drive units tend to be quieter, so grinding or popping deserves attention. DC smart openers can show fault codes through LEDs or lights. Count the blink pattern and match it to the exact manual. Generic blink-code lists are risky because model families do not always use the same fault language.
Rank #4

- 【Compatible Models】Compatible with Linear Garage Door Opener Remote MCT-3 DNT00089 ACT-31B ACP00879 MCT-11 DNT00090.【Not support dip switch opener】
- 【Compatible List】Compatible with LD033, LD050, LS050, LC075, LDCO800, LSO50, and LSO50-2T Linear Garage Door Opener.Compatible with Linear Mega Code Receivers: MDR, MDR-U, MDR-2, MDRG, MDRM, MGR, MGR-2, and SMDRG.
- 【3-Button Controls 3 Garage Doors & Industrial-Grade Chip】 Featuring Three Independent Buttons To Operate Up To Three Separate Garage Doors, This Garage Door Opener Remote Is Built With An Industrial-Grade Chip That Delivers Reliable Performance In Extreme Heat And Sub-Zero Cold.
- 【Advanced Security Protection】With Megacode Rolling Code Technology That Generates A New Encrypted Signal Every Time, This Garage Door Opener Remote Effectively Blocks Code Grabbing Attempts For Enhanced Security.
- 【Easy Pairing With Auto-Seek Technology】Designed For Quick And Hassle-Free Pairing With Your Garage Door Opener Motor, This Garage Door Opener Remote Gets You Up And Running In Seconds.
DIY gear and sprocket kits can cost $20 to $50 where applicable, but that does not include diagnosis or labor. Logic boards often cost $80 to $180 before labor. Once a board, motor, rail, and service labor enter the conversation on an older opener, replacement may be the better value.
Repair Cost Versus Replacement Cost in 2026
For 2026, typical garage door opener repair averages cluster around $150 to $350 nationally. Minor service such as sensor alignment, simple wiring repair, or remote programming often runs $75 to $150. Motor or major component repair can reach about $250 to $500. Broader garage door repair pricing is commonly quoted from about $153 to $578, with an average near $318, depending on the failed part, door size, door weight, labor rate, and emergency timing.
| Repair or part | Typical 2026 cost | Best fit |
|---|---|---|
| Remote battery | Under $10 | Remote dead, weak range, keypad intermittent |
| Linear/MegaCode remote | $25-$60 | Lost or failed handheld transmitter |
| Wireless keypad | $35-$70 | Failed keypad, worn buttons, new exterior access |
| Safety sensor kit | $30-$80 part only | Failed or damaged photo eyes |
| Wall button | $15-$40 part only | Dead or unreliable wall control |
| Minor professional service | $75-$150 | Sensor alignment, programming, simple wire repair |
| Average opener repair | $150-$350 | Most standard diagnosis and repair calls |
| Major opener component | $250-$500 | Motor, board, drive, or more involved service |
| Opener replacement installed | $300-$950+ | Old opener, unavailable parts, repeated failures, smart upgrade |
Replacement makes sense when the opener is old, noisy, missing modern features you actually want, has unavailable boards, or has repeated safety failures. A smart belt-drive opener with battery backup is often estimated around $700 to $800 installed, while premium quotes can exceed $1,000 in higher-cost markets or where electrical or structural work is needed. Rail length, ceiling height, door weight, battery backup needs, and whether a new ceiling receptacle is required all affect the final price.
When to DIY and When to Hire a Pro
Good DIY fixes are low-risk, visible, and reversible. Replacing batteries, cleaning sensors, aligning photo eyes, checking lock mode, moving interference sources, testing the outlet, and reprogramming a remote are reasonable homeowner tasks. Plan 15 to 45 minutes for most of those checks and keep a step ladder, flashlight, small screwdriver, soft cloth, and fresh batteries nearby.
Hire a pro when the repair involves stored spring tension, door weight, damaged wiring, failed safety reversal, internal electronics, or repeated power faults. A technician should also handle jobs where the door is out of square, the track is bent, the opener rail is pulling loose from framing, or the header bracket has moved. The opener mount and header bracket need solid framing support, not drywall anchors or improvised blocking.
Call for service immediately if:
- The door will not reverse when the beam is blocked or when it contacts a 2×4.
- The opener closes with blocked or bypassed photo eyes.
- The garage door is hard to lift by hand.
- You see a broken spring, frayed cable, loose bottom bracket, or crooked door.
- The opener smells burnt, smokes, sparks, or trips a breaker or GFCI more than once.
- The motor runs but the door drops, jerks, or moves unevenly.
Before calling, document the model number, serial or manufacture date if visible, symptoms, LED behavior, remote behavior, wall station behavior, and what you already tested. Take a 20-second video of the failure from a safe position. That information can shorten diagnosis and reduce guesswork on parts.
Safety, Code, and Permit Notes
Residential garage door openers are safety-regulated equipment. Federal rules and industry standards require entrapment protection because the opener controls a heavy moving door. For openers manufactured or imported after January 1, 1991, reversing systems became part of the safety landscape, with external entrapment protection added in the early 1990s. Modern residential operators use more than one protection method, typically inherent reversal plus photo eyes or an edge sensor.
For a homeowner, the practical takeaway is straightforward: do not bypass photo eyes, do not increase force to overpower a bad door, and do not keep using an opener that fails reversal testing. If a contractor suggests defeating safety sensors to make an opener work, that is not a repair.
Best Value
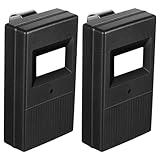
- Package Content: you will receive 2 pieces of door openers compatible with Linear Delta 3 310 MHZ built in 9V battery, including instructions and keychain, which can meet your usage needs and you can operate them well
- Compatible Models: the garage door remote control is not universal, only compatible with Linear Delta 3 DTA DTD DTC DNT00002A 310MHZ remote control with 8 position DIP switch; Please pay attention to the information before purchasing
- Programming Instructions: the garage door remote is compatible with Linear Delta 3, runs at 310 MHZ, with clear instructions and easy programming; The direction of the DIP switch is easily confused, if your remote does not work on the first shot, please try reversing all DIP switches; Make sure the garage door opener is fully closed before starting remote programming
- Safe and Reliable: the radio frequency technology and strong security encryption design ensure that the garage door opener has a better working range, 310 MHZ frequency and rolling code technology protect your access and connection, thereby significantly reducing radio interference; The encryption avoids Intrusion, long time and stable working results provide you with the security of your garage property, allowing you to buy with confidence
- Wide Range of Portability: the included sunshade clip is easy to carry and can be put into handbags, pockets and more, and can be placed on the lenses in the car without taking up much space; The keychain remote control with strong signal transmission has a wide coverage, is convenient and flexible
Permits vary by city and scope. Swapping a plug-in opener on an existing approved receptacle is different from adding a new ceiling outlet, extending a circuit, modifying framing, or replacing structural door hardware. For electrical work in a garage, expect GFCI requirements and local inspection rules to matter. When in doubt, ask your local building department before the work starts, not after drywall or ceiling storage hides the change.
A Practical Linear Troubleshooting Sequence
Here is the order we use because it isolates the cheap, common failures before the expensive ones.
- Confirm the door is unlocked and the opening is clear.
- Check power at the opener outlet, GFCI, and breaker.
- Test the wall station, remote, keypad, and vehicle transmitter separately.
- If remotes fail but the wall station works, replace batteries, check lock mode, remove suspect LED bulbs, and reprogram only after those checks.
- If the door opens but will not close, inspect the Linear photo eyes. Look for green power at the sender and steady red at the receiver.
- Inspect sensor wiring at the motor head, brackets, and staples.
- With the door closed, disconnect the trolley and test door balance by hand.
- Only after the door passes the manual test, adjust close travel or force in small steps according to the exact model manual.
- Count opener LED or light blink patterns and match them to the model documentation.
- Run photo-eye and 2×4 reversal tests before returning the opener to normal use.
If the opener passes the control and safety checks but still struggles under load, the door may need hardware service. If the door passes manual balance but the opener hums, smells hot, loses memory, or shows board-related faults, price the repair against replacement. For many older Linear openers, stacking labor into an obsolete board or motor is less defensible than installing a current opener with available parts, quieter operation, and better everyday features.
The best troubleshooting is not just getting the door moving once. It is knowing why it failed, confirming the safety systems still work, and avoiding a repair that hides a heavier problem in the door. That is the difference between a quick fix and a callback.
Frequently Asked Questions
Why does my Linear garage door opener open but not close?
The most common cause is a safety sensor problem: blocked beam, dirty lens, misalignment, loose low-voltage wire, or failed photo eye. On many Linear systems, look for a green light at the sending sensor and a steady red light at the receiving sensor.
Why does my Linear garage door close only when I hold the wall button?
Treat that as a safety-beam circuit problem until proven otherwise. Constant-pressure closing usually means the opener is not receiving a clear signal from the photo eyes, so remote and keypad close commands should not work normally.
How do I reset or reprogram a Linear garage door opener remote?
Replace the remote battery first. Then use the learn button process for your exact Linear opener and remote family. Avoid erasing all codes unless you are ready to reprogram every remote, keypad, and vehicle transmitter.
Do these 3 things before closing this tab:
1Repair Windows errors before they cause bigger problems2Fix the driver behind crashes, sound loss and screen glitches3Clear out junk files and repair common Windows errorsHow much does Linear garage door opener repair cost in 2026?
Minor service often runs $75 to $150. Typical opener repair averages cluster around $150 to $350, while major motor or control repairs can reach about $250 to $500. Full opener replacement commonly ranges from about $300 to $950 or more installed.
Can I bypass Linear garage door safety sensors temporarily?
No. Bypassing photo eyes creates an entrapment hazard and can violate the safety behavior required for residential openers. If the door will not close because of the sensors, repair the sensor alignment, wiring, or parts before normal use.
When should I replace a Linear opener instead of repairing it?
Replacement is usually more practical when the opener is old, parts are unavailable, safety failures repeat, the logic board or motor is expensive, or the repair estimate approaches the cost of a modern installed opener.
Quick Recap
Product prices and availability are accurate as of the date/time indicated and are subject to change. Any price and availability information displayed on Amazon at the time of purchase will apply.