What’s actually slowing this PC down?
Pick the symptom - the matching free tool is one click away.
A ceiling fan is one of those fixtures that tells on a house quickly. The blades collect dust on top where you do not see it, the leading edges pick up a gray line, kitchen fans collect sticky grease, and the motor housing can trap lint around the vents. The right way to clean one is simple: turn it off, let it stop completely, capture the loose dust dry, wipe the blades with the lightest damp cleaning needed, dry the surfaces, clean the housing and light kit, then run the fan and check for wobble or noise.
On our job sites, we treat ceiling fan cleaning as more than cosmetic work. Dust buildup can reduce airflow, throw a blade set slightly out of balance, and hide small problems like loose blade-arm screws, a cracked bracket, a humming motor, or a fan box that was never rated for a moving load. Most homeowners can clean a standard 8- or 9-foot ceiling fan in 20 to 45 minutes with supplies they already own. High ceilings, greasy buildup, ornate light kits, and any electrical or mounting concern are where the job changes.
The main rule is this: keep liquid out of the motor, switch housing, pull-chain openings, light sockets, wall controls, and remote receivers. Put cleaner on the cloth, not on the fan. A dry microfiber pass first prevents mud-like streaks and keeps most of the dust contained.
Tools and Supplies You Need
For a typical bedroom or living room fan, you do not need specialty chemicals. A clean microfiber cloth, an old pillowcase, and a stable step ladder will handle most jobs. If the fan is higher than you can reach comfortably with both feet planted, use an extension duster or hire a cleaner with the right equipment.
A practical kit looks like this:
- One old pillowcase or microfiber sleeve for blade dust capture
- Two to four microfiber cloths: one dry, one damp, one rinse cloth, and one drying cloth
- Mild dish soap for greasy kitchen residue
- A small bucket or bowl of warm water
- Safety glasses, especially for overhead work
- A stable step ladder sized so you do not stand on the top cap
- Optional compressed air for short bursts at motor-housing vents
- Optional screwdriver for accessible blade-arm screws
DIY supply cost is usually $0 to $35 if you already own a safe ladder. Microfiber cloths run about $5 to $15, an extendable duster is commonly $10 to $30, compressed air is about $5 to $10 per can, and basic safety glasses are roughly $5 to $15. Mild dish soap is usually already in the kitchen.
#1 Best Overall

- 【Upgraded Sturdy 5 PCS Feather Duster Kit】: Tiumso dusters for cleaning include a bendable microfiber duster head, a chenille duster head, a crevice brush, a cobweb duster, and a telescoping pole. Perfect for furniture, corners of high ceilings, ceiling fans, blinds, windows, webers, cars, bookshelves, sofa etc. With its lightweight feature, easy for both adults and children to use.
- 【1.4 ft to 8.3 ft Extendable Duster】: The stainless steel feather dusters for cleaning won't rotate and can reach up to 100 inches, makes it a perfect household supply for curtains, walls, chandeliers, and drapes without climbing ladders dangerously. Microfiber's electrostatic effect has a stronger adsorption for dusting, which can help you effectively clean the dust on the surface.
- 【Flexible, Washable & Detachable Dusters】: The ceiling fan duster is so flexible that it can be bent to any angle, cleaning all kinds of dead corner and hard-to-reach areas. The long cobweb duster with extension pole is built-in with flexible materials, making the ceiling fan cleaner easy to clean and reusable. Just slide the head off the dust wand and hand wash with warm water.
- 【Scratch-Resistant Hat and Hanging Hole】: Maintain the integrity of your ceilings and walls. Our unique scratch-resistant soft rubber tip provides complete confidence with cleaning the ceiling. The base of the extending rod has a hanging hole for easy storage. Keep your house tidy and organized all day with the dusting wand.
- 【Dusting Tools You’ll Need from Floor to High Ceiling】: This ceiling duster kit contains everything you need to clean your home or office from floor to ceiling in one convenient package. Whether you are a professional cleaner or a homeowner, you will be impressed by the long duster for high ceilings in this cleaning tools.
Before You Start: Safety Comes First
Turn the fan off at the wall switch and wait until the blades stop completely. If the fan has a remote, set the remote aside where nobody can bump it. For basic dusting, many homeowners clean with the wall switch off. If you are removing glass shades, working near sockets, or dealing with a fan that has flickering lights or any electrical oddity, shut power off at the breaker before you touch the light kit.
Ladder setup matters more than most people think. Place the ladder on a flat, dry surface. Keep your belt buckle between the ladder rails, move the ladder instead of reaching, and never stand on a bed, rolling chair, countertop, or bucket. For vaulted ceilings and two-story spaces, use a high-reach duster from the floor or hire a pro. Overreaching from a ladder to save five minutes is how small cleaning jobs become injury calls.
Do not use the fan blade as a handhold. Fan blades and blade arms are not grab bars. Pulling down on a blade can bend the bracket, loosen the mounting hardware, or create wobble that was not there before.
The Tool Desk
Outbyte Driver Updater FREEFix the driver behind crashes, sound loss and screen glitchesFind Drivers →Outbyte PC Repair FREEClear out junk files and repair common Windows errorsFree Scan →The Best Cleaning Sequence for a Ceiling Fan
Clean the fan before you clean floors, furniture, or bedding. Dust will fall even when you use the pillowcase method. In a bedroom, either cover the bedding or clean the fan right before changing the sheets. In a living room, move small items off tables and upholstery directly under the fan.
1. Capture Heavy Dust Dry
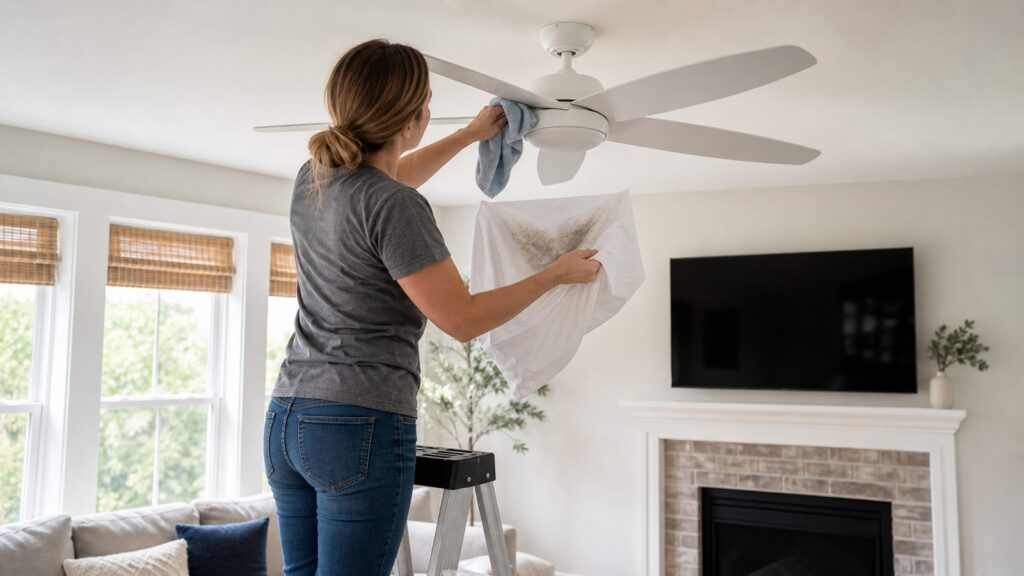
Slide an old pillowcase over one blade like a sleeve. Hold the blade steady near the bracket with one hand, then gently pull the pillowcase back toward the blade tip. The dust drops into the pillowcase instead of drifting across the room. Repeat for every blade.
If you prefer microfiber, use a dry microfiber duster or sleeve and work from the motor side toward the blade tip. Dry capture is the key. Wetting heavy dust first turns it into gray paste, which streaks painted blades and can work into wood grain, cane, veneer, and blade edges.
2. Wipe Both Sides of Each Blade
After the dry pass, wipe the top and bottom of each blade with a lightly damp cloth. For routine dust, plain water is enough. The cloth should be damp, not dripping. Support the blade with your free hand near the blade arm so you are not flexing it while wiping.
Pay attention to the leading edge of each blade. That edge cuts through the air and often holds the dirtiest line of buildup. Also wipe the blade tip and the underside, even if it looks clean from the floor.
Rank #2

- 3-Piece duster kit:This set includes a 14 ft extra-thick aluminum telescopic pole, 1 x cobweb duster, 1 x microfiber feather duster, 1 x fan duster. If your home has high ceilings, floor-to-ceiling windows, or other difficult-to-clean areas, our cleaning duster kit is the ultimate answer for a tidy home environment.
- Threaded Pole Connection: our duster has an extra long extendable pole from 34 inches to 170 inches/14 feet(Not included the height of duster head and human), According to the length you need, they can help you safe clean everywhere you want, avoid ladder to climb anymore. which can be easily cleaned up to 20ft
- Comfortable to Grip: Ergonomic design, plastic material at the end of the handle, non-slip, more comfortable to grip with suspensible design
- Washable Duster: Our duster is easy to disassemble and wash. Just remove the duster head from the pole, hand washing, then hang it in a ventilated place for next use.
- Farewell to spider webs and dust:You can use it to clean high ceilings/glass, exterior walls, fans, air conditioning vents, lampshades, household appliances, molds, walls, shutters, cars, picture frames, bookshelves, sofas, etc
3. Dry the Blades Immediately
Follow with a dry microfiber cloth. This prevents streaks, protects wood and MDF blade edges, and keeps moisture from sitting around screw heads or decorative trim. Painted, veneered, cane, and faux-wood blades all last longer when you use less water and dry them promptly.
4. Dust the Motor Housing, Canopy, and Downrod
Use a dry cloth or duster on the motor housing, canopy at the ceiling, downrod, and blade brackets. For vents, use a dry brush, microfiber edge, or short bursts of compressed air. If you use compressed air, keep the can upright and avoid long blasts that can blow moisture or debris into openings.
Do not spray cleaner into motor vents. Do not flood the switch housing. Do not soak pull chains, reverse switches, speed controls, or remote receiver openings. These are electrical components, and cleaning them is a dry-detail task unless the manufacturer gives a specific service procedure.
Quick wins for a faster PC:
Fix the driver behind crashes, sound loss and screen glitchesFind Drivers →Clear out junk files and repair common Windows errorsFree Scan →5. Clean the Light Kit and Glass Shades
If your fan has a light kit, let bulbs cool first. Turn power off, then remove glass shades carefully. Take a photo before disassembly if the fixture has several screws, clips, washers, or decorative caps. Put small screws in a cup so they do not disappear.
Wash glass shades separately in warm soapy water, rinse, and dry fully before reinstalling. Wipe bulbs with a dry cloth only when cool. Keep water away from sockets. If you see darkened insulation, heat damage, cracking socket material, or a burnt smell, stop and call an electrician.
How to Clean Greasy Kitchen Ceiling Fans
Kitchen ceiling fans need a different approach because the dust is usually mixed with cooking oils. Dry dusting still comes first, but you will likely need mild detergent for the second pass.
Mix a few drops of dish soap into warm water. Dip a microfiber cloth, wring it until it is only lightly damp, and wipe one blade at a time. Follow with a clean damp rinse cloth, then dry immediately. If the fan is above or near a cooking area, expect to repeat the soap pass on the leading edge and the blade top.
Do these 3 things before closing this tab:
1Clear out junk files and repair common Windows errors2Fix the driver behind crashes, sound loss and screen glitches3Repair Windows errors before they cause bigger problemsAvoid aggressive degreasers unless you know they are compatible with the blade finish and metal plating. Strong cleaners can dull painted blades, stain unfinished wood edges, damage decorative metal coatings, or leave residue that attracts more dust. Bleach, ammonia, abrasive powders, and soaking-wet sponges do not belong on a ceiling fan.
Rank #3

- What's Included: Includes 1 washable, reusable microfiber duster head and 4 detachable pole sections that assemble into 1 extension pole. The modular design lets you add or remove sections for different cleaning heights around the home.
- Adjustable 13–48 Inch Extension Pole: The ceiling fan cleaner features a 4-section detachable pole that can be assembled and adjusted from 13 to 48 inches. Easily customize the length for cleaning furniture, shelves, ceiling fans, and other high or low areas around your home.
- Soft Microfiber & Lightweight Handle: Made with soft microfiber, the duster head provides a larger cleaning surface and effectively attracts dust while helping protect surfaces from scratches. The lightweight aluminum alloy pole with PP connectors is comfortable to handle during extended cleaning.
- Thorough Cleaning for Multiple Areas: The fan cleaning brush features a center opening that fits around fan blades to clean both sides more efficiently. The microfiber duster is also suitable for ceilings, walls, blinds, light fixtures, high shelves, furniture, and other hard-to-reach areas.
- Easy to Clean & Store: The reusable duster heads can be hand washed after use and air dried for repeated cleaning. A hanging hole at the end of the handle makes the duster easy to hang and store, helping save space while keeping it ready for your next cleaning task.
What Not to Spray or Soak
The safest cleaning habit is simple: spray the cloth, never the fan. Direct spray can run into seams, sockets, switches, chain openings, motor vents, and remote-control housings. A ceiling fan is a moving electrical fixture, not a washable appliance.
Be especially careful around these areas:
- Motor housing vents
- Pull-chain openings
- Reverse switches
- Wall-control receiver modules
- Light sockets
- Bulb bases
- Blade edges made from MDF, veneer, cane, or painted composite
- Decorative metal plating on brackets and housings
If moisture gets into the wrong place, leave the fan off and let it dry thoroughly before restoring power. If there is tripping, buzzing, flickering, heat, or a burnt odor afterward, do not troubleshoot it by repeatedly turning the fan on. That is no longer a cleaning task.
Post-Clean Check: Wobble, Noise, and Airflow
After the blades, housing, and light kit are clean and dry, restore power and run the fan on low, medium, and high. Watch the blade plane from a safe distance. Listen for scraping, clicking, humming, or a new vibration.
Crashes, No Sound, or Screen Glitches?
Random freezes, missing sound and display glitches usually trace back to one bad driver. Find and replace yours safely.Free scan · under a minuteWindows Errors? Fix Them Before They Spread
Repair common Windows errors and clear accumulated junk for a smoother, more stable PC - no reinstall needed.Free scan · no reinstallA fan that wobbles after cleaning may have one of several simple issues. A blade may have been bumped. A blade-arm screw may have loosened. Dust may have been removed unevenly from one blade but not another. A glass shade may not be seated evenly. Turn the fan off, wait for full stop, and inspect the accessible screws at the blade arms and brackets.
You can tighten accessible blade-arm screws by hand with the fan off. Use normal hand pressure and stop when the screw is snug. Do not overtighten into soft blade material, because stripped screw holes can make the wobble worse. If a blade is warped, cracked, or sagging compared with the others, cleaning will not fix the balance problem.
How Often to Clean a Ceiling Fan
For most homes, light dusting every 2 to 4 weeks during heavy use keeps buildup from becoming a bigger job. A deeper clean every 3 to 6 months is a good maintenance rhythm. Bedrooms, nurseries, home offices, and living rooms usually fall into that schedule.
Some fans need attention more often. Kitchen fans collect oily dust. Porch fans deal with pollen, humidity, and outdoor grit. Homes with pets, arid climates, open windows, remodeling dust, or high ceilings may need more frequent dusting. If you see a gray ridge along the leading edge of the blade, the fan is overdue.
Use cleaning as a seasonal maintenance trigger. In summer, ceiling fans should typically run counterclockwise to create a cooling breeze. In winter, many fans are set clockwise on low to gently redistribute warm air without creating a draft. While you are there, replace remote batteries, check that the wall control works smoothly, and confirm the pull chain or reverse switch moves cleanly.
Rank #4

- 【Multipurpose Household Cleaning Tool】MNWHUC ceiling fan cleaner duster could be used to clean ceiling fan, baseboard, blinds, moldings, knick-knacks, car interiors, etc easily. Effortlessly dust cobwebs, spiderwebs, dirt and hard-to-reach corners.
- 【6 FT/72" Long Handle】This ceiling fan cleaner handle is 6Ft/72" Long Handle. 5-section detachable pole can be adjusted as needed.Great for hard to reach spaces.Great for hard to reach spaces.
- 【Wall Cleaning Mop for Walls with Long Handle】Use a microfiber mop (orange-colored) to remove stains without harming surfaces. Excellent for cleaning washable wallpaper, baseboards, woodwork, doors, wall coverings, and baseboards.
- 【4-in-1 Household Cleaning Tool】Extended handle with fan cleaner, dusting duster head, crevice duster head and cobweb cleaning head. Can be used to clean a variety of areas.
- 【360° Flexible Duster】The duster can be bent into various angles and you could also screw onto the telescoping pole. Cleaning all kinds of hard-to-reach angles.
Ceiling Fan Cleaning Cost in 2026
Ceiling fan cleaning is usually not priced as a major standalone service. In 2026, it is most often included in a standard or deep house-cleaning visit, added as a high-dusting detail, or priced by the hour when access is difficult.
| Cleaning option | Typical 2026 US cost | Best fit |
|---|---|---|
| DIY cleaning | $0-$35 in supplies if you own a ladder | Standard 8- to 9-foot ceilings, light dust, simple light kits |
| Ceiling-fan add-on | About $47-$114 where priced separately | One or more fans added to a cleaning visit |
| Standard house cleaning | Commonly $100-$300 per visit | Routine whole-home cleaning; reachable fans may or may not be included |
| Deep house cleaning | Often around $190-$265 nationally | High dusting, light fixtures, neglected rooms, move-in or move-out cleaning |
| Hourly cleaning labor | Roughly $25-$75 per cleaner-hour | Multiple fans, high ceilings, heavy dust, greasy kitchens, detailed fixtures |
Cost drivers are straightforward: ceiling height, number of fans, blade size, dry dust versus greasy buildup, fragile finishes, ornate housings, attached glass globes, whether ladder work is required, and local labor rates. A cleaner can wipe a simple reachable fan quickly. A 14-foot great-room fan with a light kit and thick dust takes more setup, more care, and more time.
Before hiring, ask whether ceiling fans are included, how high they clean without an added fee, whether light globes are included, and whether they carry ladders or extension tools. Some recurring cleaning packages include only reachable dusting. Deep-clean packages are more likely to include ceiling fans, light fixtures, and high dusting.
Free tools Windows power users keep installed
One-click scans. No signup required.
When to DIY vs. When to Hire a Pro
DIY is a good choice when the fan is reachable from a stable ladder, the buildup is ordinary dust, the fan is not wobbling severely, and you are not opening electrical parts. Most homeowners can clean one fan in under an hour with minimal cost.
Hire a professional cleaner when you have several fans, high ceilings, heavy dust, greasy kitchen buildup, fragile decorative fixtures, or a move-in/move-out cleaning deadline. Paying for a cleaner also makes sense when the fan is above stairs, a tall foyer, or furniture that cannot be moved safely.
Hire an electrician or qualified contractor when cleaning reveals a mechanical or electrical problem. That includes severe wobble, a loose canopy, a fan that moves at the ceiling box, exposed wiring, flickering lights, repeated breaker trips, a warm or burnt smell, damaged sockets, cracked brackets, or a fan that hums heavily and will not run correctly. A ceiling fan needs a fan-rated outlet box and proper support because it creates vibration and dynamic load. A regular light-fixture box is not automatically acceptable for a fan.
Permit and licensing rules vary by jurisdiction. Replacing a fan, changing wiring, installing a new fan-rated box, or adding a new ceiling fan location may require a licensed electrician and permit in some cities or states. Cleaning does not normally require a permit. Electrical repair and installation are a different category.
Common Mistakes That Make the Job Harder
The biggest mistake is spraying cleaner directly onto the fan. The second is using too much water. Both create avoidable risk and often leave worse streaks than you started with.
Best Value
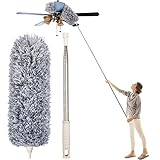
- 👍DUSTERS FOR CLEAN EFFECTIVELY - There won’t be trouble any more when you need to clean the high ceiling fan, our microfiber duster cleaner with new design stainless steel extension pole, does not rust, rotary thread reinforcement clamping, not easy to shake.
- 👍DUSTER BRUSH WITH EXTENSION POLE - Our duster brush with 30'' to 100'' extendable handle, No more dangerously balancing on stools trying to reach high areas. This microfiber feather duster is the best way to clean blinds, lighting fixtures, ceiling fans, framed pictures.
- 👍BENDABLE & WASHABLE DUSTER - Microfiber duster is bendable any angle for dusting around the corner and tricky spots,it’s easy to cleaning hard to reach spots.And it’s easy to wash---Just wash it with water or mild detergent.
- 👍MICROFIBER DUSTER FEATURE - Silicone cap on the top protects your furniture from exposed metal, using fiber splitting technology can effectively absorb dust without raising annoying dust!
- 👍NEWLITON YOUR CHOICE - Wet or dry use better time saving this lightweight cleaning tool duster can be both wet or dry use for maximum versatility. The extra long telescoping pole can reach up to 100'' .A better time saving tool can be easily used by men, Women, or kids as well.A better time saving tool can be easily used by men, Women, or kids as well.
Other common mistakes include cleaning only the underside of the blades, ignoring the motor housing and canopy, leaning on blades for balance, using harsh chemicals on delicate finishes, reinstalling damp glass shades, and skipping the post-clean run test. A clean fan should be cleaner, quieter, and more stable than it was before. If it is not, look for a loose screw, uneven shade, bent blade arm, or a problem that needs professional attention.
The Bottom Line
A good ceiling fan cleaning is a controlled top-down process: dry capture first, light damp detail second, dry immediately, keep liquid away from electrical openings, clean the light kit separately, and test the fan afterward. Done that way, the job is inexpensive, tidy, and useful as preventive maintenance.
For a normal-height fan, expect 20 to 45 minutes and little to no supply cost. For high ceilings, greasy buildup, multiple fans, or fixtures that already wobble or flicker, the better value is often a professional cleaner or electrician. Cleaning should leave the fan moving air smoothly. If it exposes a loose mount, electrical smell, damaged parts, or severe wobble, stop treating it like housekeeping and treat it like a construction or electrical issue.
Frequently Asked Questions
How often should you clean a ceiling fan?
Lightly dust active ceiling fans every 2 to 4 weeks and deep clean them every 3 to 6 months. Kitchens, porches, homes with pets, dusty climates, and high-use rooms may need more frequent cleaning.
What is the best way to clean ceiling fan blades without dust falling everywhere?
Use the pillowcase method. Slide an old pillowcase over each blade, hold the blade steady near the bracket, and pull the pillowcase toward the tip so the dust stays inside. Then wipe with a lightly damp cloth and dry the blade.
Can you spray cleaner or water on a ceiling fan motor?
No. Spray cleaner onto a cloth, not onto the fan. Keep moisture away from motor vents, pull chains, switches, sockets, and remote receivers. Routine motor housing cleaning should be mostly dry.
How do you clean greasy kitchen ceiling fan blades?
Dry dust first, then wipe with a microfiber cloth lightly dampened with warm water and a few drops of dish soap. Follow with a clean damp rinse cloth and dry immediately. Avoid soaking blade edges or using harsh degreasers unless the finish allows it.
Recommended Free Tools
How much does professional ceiling fan cleaning cost in 2026?
Ceiling fan cleaning is usually part of a house cleaning visit. Standard house cleaning commonly runs $100 to $300 per visit, deep cleaning often runs about $190 to $265, and hourly cleaning labor is commonly $25 to $75 per cleaner-hour. Where priced separately, ceiling fan cleaning may be listed around $47 to $114.
When does a ceiling fan problem require an electrician instead of cleaning?
Call an electrician if the fan has severe wobble, a loose ceiling box or canopy, exposed wiring, flickering lights, tripping breakers, damaged sockets, humming with poor operation, or a warm or burnt smell. Cleaning does not fix mounting or wiring problems.
Quick Recap
Product prices and availability are accurate as of the date/time indicated and are subject to change. Any price and availability information displayed on Amazon at the time of purchase will apply.