Compost succeeds or fails before it ever looks like soil. The most useful way to understand the process is in four practical stages: setup and mixing, active heating, cooling, and curing. Each stage has a job. If you skip one, the pile may smell, attract pests, stall out, spread weeds, or damage the lawn and beds you meant to improve.
On construction and landscape-related jobs, we treat composting like any other small site system. The material needs a proper footprint, drainage, access, airflow, moisture control, and a place to stage finished product. A backyard pile does not need to be complicated, but it does need to be managed. A 3 ft. by 3 ft. by 3 ft. pile, a $15 to $40 compost thermometer, a reserve of dry browns, and a little discipline will outperform a random corner full of food scraps almost every time.
This guide breaks down the four compost stages in homeowner terms, with real numbers for temperature, moisture, pile size, timing, costs, and use rates.
Stage 1: Setup and Feedstock Mixing
The first stage is not biological magic. It is material preparation. Compost needs carbon, nitrogen, water, oxygen, and enough mass to hold heat. If those pieces are wrong, the pile never reaches the active stage.
Quick wins for a faster PC:
Fix the driver behind crashes, sound loss and screen glitchesFind Drivers →Clear out junk files and repair common Windows errorsFree Scan →Scan for outdated or missing drivers - takes under a minuteDriver Scan →#1 Best Overall
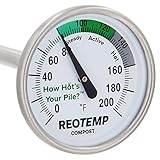
- Perfect for the Beginner Composter - Free PDF Digital Compost Guide Included - Expert instructions on how to get started composting and managing your compost pile for the most efficient compost production.
- Reotemp - Accurate and durable thermometers since 1965
- Quality Construction - 20 inch length, 1/4" diameter stem, stainless steel construction, hermetically sealed to prevent fogging
- Read at a Glance Dial Developed by Compost Experts - 3 temperature zones that indicate compost activity, understand your pile with our compost guide
- 100% Compostable Packaging - Printed with soy-based ink, zero waste, no plastic, no Styrofoam, shred the box to use in your compost pile as a brown
A simple starting mix is about 3 parts browns to 1 part greens by volume. Browns are carbon-rich materials such as dry leaves, straw, shredded cardboard, wood chips, sawdust in modest amounts, and dried plant stems. Greens are nitrogen-rich materials such as fresh grass clippings, vegetable scraps, coffee grounds, and fresh garden trimmings. That 3:1 volume rule is a homeowner-friendly way to get near the classic 30:1 carbon-to-nitrogen target.
For hot composting, build enough volume at once. A common practical minimum is roughly 3 ft. wide, 3 ft. deep, and 3 ft. tall, which is about 1 cubic yard of loose material. Smaller bins and tumblers can still compost, but they often behave more like warm or cold systems and may not reliably hit sanitation temperatures.
What the mix should feel like
Moisture should usually land around 40% to 60%. In the yard, use the squeeze test. Grab a handful from the middle of the pile. It should feel like a wrung-out sponge. If it falls apart dusty and dry, add water while turning. If water streams out or the pile smells sour, it is too wet and needs dry browns plus air.
Particle size matters too. Whole branches, intact corn stalks, and thick stems slow the pile down. Chop woody material into pieces 1 to 3 inches long when possible. Shredded leaves break down faster than matted whole leaves. Cardboard should be torn or shredded and free of glossy coatings, tape, and plastic.
PC Slower Than It Used to Be?
A free scan shows the junk files, broken settings and background clutter dragging Windows down - then fixes them in one click.Free scan · Windows 10 & 11Outdated Drivers Are Slowing You Down
One free scan finds every outdated or missing driver and matches the right update for your exact hardware.Free scan · exact hardware matchLayering helps, but mixing does the work
Layering browns and greens is a useful way to stage material as you build the pile, but composting accelerates when those materials are mixed. Microbes need contact between carbon, nitrogen, water, and oxygen. A beautiful stack of separate layers can still go anaerobic or stall.
We recommend keeping a brown-material reserve next to the bin. A lidded trash can of dry leaves, shredded cardboard, straw, or wood chips solves many common problems. Every time food scraps go in, bury them near the center and cap them with 4 to 6 inches of browns. That one habit reduces flies, odors, and animal interest.
Stage 2: Active Heating
The active heating stage is where compost looks alive. Bacteria rapidly break down fresh material and release heat. In a well-built pile, the center often climbs into the thermophilic range, roughly 131 degrees F to 160 degrees F. That heat is useful because it speeds decomposition and can reduce weed seeds and pathogens when sustained long enough.
Commercial and regulated composting standards often reference 131 degrees F or higher for defined time periods. Aerated static and in-vessel systems commonly use at least 3 days. Windrow systems commonly use at least 15 days with at least 5 turns. A backyard pile may not reliably meet those standards because the pile is smaller, less uniform, and harder to monitor. That is why home compost should be handled with common sense, especially if it contains diseased plants, weeds gone to seed, or questionable feedstocks.
Free tools Windows power users keep installed
One-click scans. No signup required.
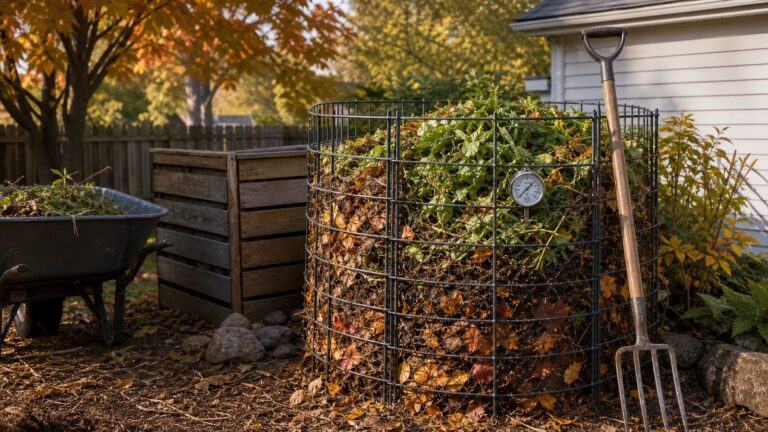
Check the center of the pile every few days with a 16 to 20 inch compost thermometer. If the pile reaches 131 to 150 degrees F, it is working. If it climbs above about 160 degrees F, turn it and add browns if the mix is wet or dense. Temperatures that run too hot can reduce beneficial biology and create dry pockets.
If the pile does not heat
A pile that never warms usually has one or more of four problems: it is too small, too dry, too low in nitrogen, or too compacted. The fix depends on what you see and smell.
- Too small: Add material until the pile is close to 3 ft. by 3 ft. by 3 ft.
- Too dry: Add water while turning until the material passes the squeeze test.
- Too many browns: Add greens such as fresh grass clippings, coffee grounds, or vegetable scraps.
- Too compacted: Turn the pile and blend in bulky browns such as wood chips, coarse leaves, or straw.
Batching helps. Instead of tossing in one banana peel every day and expecting a hot pile, collect enough material to build a batch. Once it is built, let it heat. Start a second pile, second bay, or second tumbler chamber for new scraps.
Turning schedule
For fast backyard compost, turn the pile when the temperature starts falling after a heating peak, often every 4 to 10 days during active decomposition. Turning adds oxygen and moves outer material into the hot center. For slower compost, turning every few weeks can still work, but the timeline stretches.
Recommended Free Tools
Rank #2
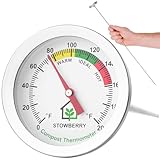
- COMPOST THERMOMETER FOR ACCURATE TEMPERATURE MONITORING: Easily track compost temperature levels with this 20 Inch stainless steel probe that reaches deep into piles for precise core readings
- STAINLESS STEEL LONG PROBE DESIGN: Durable 20 Inch corrosion-resistant composting probe for garden bins, tumblers, and large compost heaps
- EASY TO READ 2 INCH DIAL: Clear analogue dial with F readings and compost activity zones (Steady, Active, Hot) for fast and accurate interpretation
- GARDEN AND BACKYARD COMPOSTING USE: Boost decomposition by monitoring heat and adjusting conditions for optimal organic breakdown and soil enrichment
- NO BATTERIES REQUIRED WEATHER RESISTANT: Bimetal design compost thermometer works without power and withstands outdoor use in all seasons
A hot, managed pile can produce usable compost in roughly 6 to 12 weeks plus curing time. A cold, low-maintenance pile may take 6 to 18 months. Neither approach is wrong. The right one depends on your space, tolerance for handling material, and how quickly you need finished compost.
Stage 3: Cooling and Secondary Decomposition
The cooling stage begins when the easy food is mostly consumed. The pile temperature drops closer to ambient outdoor conditions even after turning. This does not mean the compost is finished. It means the fast bacterial phase is slowing and the tougher materials are taking their turn.
During cooling, fungi and actinomycetes continue breaking down woody fibers, stems, and other resistant material. You may see gray-white threads or a faint earthy smell. That is generally normal. What you do not want is a rotten, sour, ammonia-heavy, or sewage-like odor. Those smells point to too much moisture, too little oxygen, or too much nitrogen-rich material.
At this stage, reduce disturbance. Turn only as needed to correct wet, matted, or smelly pockets. Keep the pile damp, not soaked. If rain is saturating the pile, use a breathable cover, tarp, or lid that sheds water while still allowing air to move. Do not seal wet compost in plastic without ventilation.
What cooling compost looks like
Cooling compost usually has fewer recognizable food scraps, a darker color, and a crumbly texture. Twigs, wood chips, eggshell fragments, avocado pits, and corn cobs may still be visible. Those can be screened out later and tossed into the next batch.
The most common homeowner mistake is using compost right here because it looks close enough. Unfinished compost can tie up nitrogen, heat again after placement, carry salts or organic acids, smell bad, or stress young plants. Around new sod, seedlings, vegetable beds, and high-value landscape plants, that risk is not worth it.
Stage 4: Curing and Maturation
Curing is the finishing stage. The compost is separated from new feedstock and allowed to stabilize. For many home piles, curing takes several weeks to several months. The more sensitive the use, the more conservative you should be.
Finished compost should smell earthy, not sour or sharp. It should be dark and crumbly. It should not contain recognizable food scraps. It should not reheat strongly after turning. If you turn a pile, wet it lightly, and the center jumps back into the hot range, it is still active and needs more time.
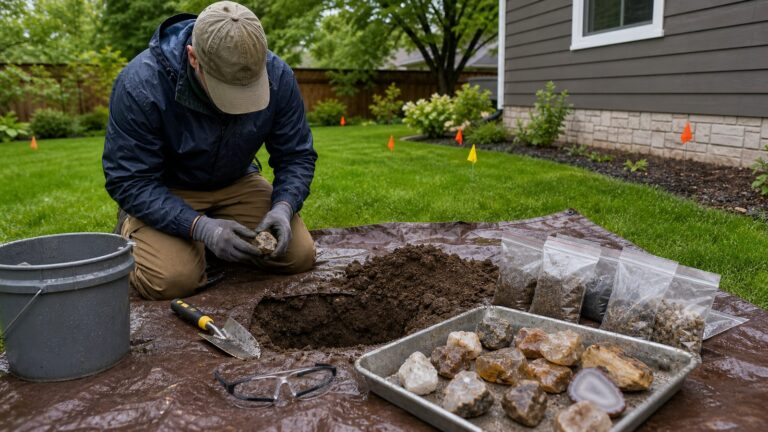
A simple seed test is useful before using compost in seed beds, raised beds, or lawn repair. Fill one small container with the compost and another with a known potting mix. Plant fast-germinating seeds such as radish, lettuce, or cress. If germination is poor or seedlings look stunted in the compost sample, keep curing or dilute it heavily with soil before use.
How to store curing compost
Use a separate bay, bin, tarp-covered pile, or breathable storage tote with drainage. Keep it damp enough that it does not turn hydrophobic, but do not let it sit in standing water. If you screen compost, a 1/2 inch screen works for general bed use. For lawn topdressing, a finer 1/4 inch screen is easier to rake into turf without leaving woody chunks on the surface.
Curing is also when you decide where the compost belongs. Finished compost is a soil amendment, not a complete growing medium. It improves organic matter, soil structure, and moisture-holding capacity, but most plants still need mineral soil, drainage, and balanced fertility.
Compost Costs in 2026: DIY, Bins, Tumblers, Bagged, and Bulk
The cheapest compost is not always the best value. A free open pile may work if you have room, dry browns, and tolerant neighbors. A tumbler may make sense for a small yard but will not produce enough material for major bed building. Bulk compost is usually the practical choice for topdressing a lawn, amending several beds, or supporting a new landscape installation.
The Tool Desk
Outbyte Driver Updater FREEScan for outdated or missing drivers - takes under a minuteDriver Scan →Outbyte PC Repair FREERepair Windows errors before they cause bigger problemsFix Now →Rank #3

- DURABLE CONSTRUCTION: Solid 20 inch (508 mm) 0.2 inch (5mm) diameter stem; reinforced welded bolt between dial and stem for long-lasting operation and conditions; high quality 304 stainless steel
- CLEAR ACCURATE DIAL: Easy to read 2 inch wide dial with color-coded temperature ranges; 40 - 180 Fahrenheit range and -17.77 - 82.22 Celsius in 2 degree increments for accurate readings
- HIGH QUALITY LENS: High-quality and lightweight PC-coated lens, hermetically sealed to avoid fogging and moisture; IP55 water-resistant rating
- COMPOSTING INSTRUCTIONS: Included to get you started
- LIFETIME WARRENTY, 100% MONEY BACK GARDENER SATISFACTION GUARANTEE: We are here 7 days a week, to answer all your questions
| Option | Typical 2026 Cost | Best Use | Watchouts |
|---|---|---|---|
| DIY open pile | $0 to $50 | Yard waste, leaves, low-cost soil improvement | Needs space, airflow, browns, and nuisance control |
| Stationary outdoor bin | $40 to $200 | Contained backyard composting | Smaller bins may not heat well |
| Dual-chamber tumbler | $65 to $250; some 42-gal. models list near $199 | Small yards, food scraps, easier turning | Limited volume; may not sustain sanitation temperatures |
| Countertop scrap pail | $20 to $50 | Collecting kitchen scraps before outdoor composting | Not a composting system by itself |
| Electric kitchen dehydrator | $180 to $500+ | Drying and grinding scraps indoors | Usually does not make fully cured garden compost |
| Worm composting kit | $100 to $175 | Food scraps, apartments, small households | Temperature-sensitive; not for large yard waste volume |
| Bokashi bucket | $45 to $100 plus bran refills | Fermenting kitchen scraps | Material still needs burial or secondary composting |
| Bagged compost | Often around $7 to $8+ per cu. ft. in many retail examples | Small beds, containers, spot repairs | Texture, maturity, and woody content vary |
| Bulk compost | Common examples around $38 to $70+ per cu. yd., plus delivery where applicable | Lawn topdressing, larger beds, landscape projects | Ask about feedstocks, maturity, screen size, salts, and testing |
One cubic yard equals 27 cubic feet. For a 1/4 inch lawn topdressing, 1 cubic yard covers about 1,296 square feet. A 5,000 square foot lawn would need roughly 3.9 cubic yards for that light application. That is where bagged compost becomes expensive and labor-heavy. At $7 per cubic foot, 108 cubic feet of bagged compost would cost about $756 before tax and delivery. Bulk compost at $50 per cubic yard would put the material cost near $200 for the same volume, though delivery and minimum order charges can change the final number.
For beds, the rate depends on soil condition. A common renovation approach is 1 to 2 inches of compost incorporated into the top 6 to 8 inches of soil. For an existing perennial bed, a lighter surface dressing is usually safer than repeated heavy applications.
Where to Put a Compost System on Your Property
Location is a construction detail, not an afterthought. The right spot makes compost easy to use and less likely to create complaints.
Choose a level, well-drained area with wheelbarrow access. Keep it close enough to the garden that finished compost gets used, but far enough from doors, patios, and property lines to avoid odor and pest concerns. Access to a hose matters because dry piles stall. Shade can help retain moisture in hot climates, but deep shade under trees may add roots and make turning awkward.
A three-bin layout is ideal if you have room. One bay holds fresh material, one bay is actively composting or cooling, and one bay cures. Each bay around 3 ft. by 3 ft. by 3 ft. gives enough mass for hot composting while staying manageable with a fork. Use rot-resistant lumber, concrete block, wire panels, or purpose-built bins. Avoid treated wood if you are concerned about direct contact with compost used in vegetable beds.
Drainage matters. Do not place a pile where runoff can carry leachate toward a storm drain, ditch, pond, creek, neighbor’s yard, or foundation. On our job sites, staging areas are chosen so water has a controlled path. Home compost deserves the same thought. A compacted low spot that stays wet will push the pile anaerobic and create odor.
Safety, Nuisance, and Permit Notes
Most backyard composting does not need a formal permit, but local rules vary. Cities, counties, HOAs, and state environmental agencies may regulate pile size, setbacks, food scraps, odors, vectors, stormwater discharge, and commercial-scale activity. Rules become more serious when composting expands beyond normal residential yard waste, accepts off-site material, includes animal products, or operates as part of a business.
For a typical homeowner, the practical rule is simple: keep the system clean, contained, drained, and neighbor-conscious. Do not compost meat, dairy, fats, oils, pet waste, cat litter, diseased plants, treated wood, glossy paper, plastic, metal, or synthetic materials in a normal backyard pile. Some advanced systems can process more difficult feedstocks, but those are not casual homeowner projects.
Keep food scraps buried in the center of the pile and covered with browns. Use rodent-resistant bins if pests are common in your area. If your HOA requires screened outdoor storage, place the bin behind fencing or landscape screening while preserving access and airflow.
Wear gloves when handling compost, wash hands afterward, and avoid breathing dust from dry finished material. If you are immunocompromised or have respiratory concerns, use extra caution around moldy organic matter and dusty amendments.
How to Use Finished Compost Without Hurting the Lawn or Garden
Compost is beneficial, but more is not always better. Overapplication can contribute to nutrient runoff, excess phosphorus, soluble salt issues, or smothered turf. The goal is to improve the soil, not bury it.
For lawns, use a light topdressing, often about 1/4 inch. Mow first, core aerate if the soil is compacted, spread screened compost evenly, and rake it so grass blades remain exposed. Do not leave piles or mats on the turf. For low spots, use a soil-based leveling mix rather than straight compost, because compost continues to break down and settle.
What’s actually slowing this PC down?
Pick the symptom - the matching free tool is one click away.
Rank #4

- 24" Stem Length, Rugged All Stainless Steel Construction
- 5/16" Diameter Heavy Duty Stem
- Free Digital Compost Guide Included - Expert instructions on how to get started composting and managing your compost pile for the most efficient compost production.
- 2.5" Hermetically Sealed Dial (Won't Fog Up)
- Read at a Glance Dial: Fahrenheit with 3 Temperature Zones that Indicate Compost Activity - Steady, Active and Hot
For vegetable and ornamental beds, incorporate 1 to 2 inches into the upper 6 to 8 inches of soil when establishing or renovating beds. For annual maintenance, a thinner surface dressing is often enough. Around trees and shrubs, keep compost and mulch away from trunks and crowns. A 2 to 3 inch mulch layer can sit over compost, but do not build mulch volcanoes.
For containers, do not use straight compost as potting mix. It can hold too much water, shrink as it decomposes, and lack the aeration container roots need. Blend it with a proper potting medium or use a finished product designed for containers.
Independent reader supportYour contribution helps us test, update, and keep practical guides available for everyone.When to DIY vs. When to Hire a Pro
DIY composting makes sense when your goal is steady household waste reduction and modest soil improvement. If you have a small garden, regular leaves, grass clippings, kitchen scraps, and space for a bin, a $40 to $200 stationary bin or a $65 to $250 tumbler can pay for itself over time. Add a $15 to $40 thermometer and a $20 to $70 turning fork or compost aerator, and you have enough equipment to manage the process well.
Hire a pro or buy bulk compost when the job is larger than the household waste stream. Lawn topdressing, new sod preparation, raised bed installation, drainage correction, grading, and full landscape renovation usually need more material, better equipment, and a cleaner workflow. A 5,000 square foot lawn topdressed at 1/4 inch needs nearly 4 cubic yards of compost. Moving, spreading, and raking that volume by hand is real work.
Do these 3 things before closing this tab:
1Repair Windows errors before they cause bigger problems2Fix the driver behind crashes, sound loss and screen glitches3Clear out junk files and repair common Windows errorsA professional crew can also evaluate whether compost is the right fix. Poor turf may be caused by compaction, shade, bad grading, low fertility, irrigation problems, disease, or the wrong grass variety. Compost helps soil structure, but it will not correct a drainage failure or a lawn that sits under standing water after every storm.
When buying bulk compost, ask direct questions: What are the feedstocks? Is it screened, and to what size? Is it mature and stable? What are the pH and soluble salts? Has it been tested for pathogens, heavy metals, and weed-seed control? Does the supplier participate in recognized compost testing programs such as USCC STA? A reputable supplier should be able to answer without guessing.
The Practical Compost Timeline
A well-managed hot pile can move through active decomposition in 6 to 12 weeks, then cure for another 4 to 12 weeks or longer depending on use. A slow backyard pile may take 6 to 18 months. Tumblers often process small batches faster than a neglected cold pile, but limited volume can restrict heat retention.
Here is a realistic homeowner sequence:
- Week 0: Build a 3 ft. by 3 ft. by 3 ft. batch with about 3 parts browns to 1 part greens. Wet to wrung-out sponge moisture.
- Week 1: Check center temperature every few days. If it stays cold, adjust moisture, greens, oxygen, or volume.
- Weeks 2 to 6: Turn when temperature drops after a heating peak. Keep food scraps buried and maintain moisture.
- Weeks 6 to 12: Expect cooling. Let tougher material continue breaking down. Screen oversized pieces if needed.
- Weeks 10 to 24: Cure separately until the compost smells earthy, does not reheat strongly, and performs well in a seed test.
The exact timeline depends on season, feedstocks, particle size, pile volume, turning frequency, and moisture. Summer piles move faster than winter piles. Shredded leaves move faster than whole leaves. A balanced batch moves faster than a pile that receives random scraps every day.
Quick wins for a faster PC:
Repair Windows errors before they cause bigger problemsFix Now →Fix the driver behind crashes, sound loss and screen glitchesFind Drivers →Common Compost Problems and Fixes
Ammonia smell: The pile has too much nitrogen or not enough carbon. Add dry leaves, shredded cardboard, straw, or wood chips and turn thoroughly.
Rotten or sour smell: The pile is too wet or oxygen-starved. Turn it, add coarse browns, and improve drainage.
Flies: Food scraps are exposed. Bury scraps in the center and cap with 4 to 6 inches of browns.
Animals: Remove meat, dairy, fats, and cooked oily foods. Use a rodent-resistant bin and keep fresh scraps covered.
Best Value
- Perfect for the Beginner Composter - Free Digital Compost Guide Included - Expert instructions on how to get started composting and managing your compost pile for the most efficient compost production.
- Reotemp - Accurate and durable thermometers since 1965, soilbuilder member of the US Composting Council
- Quality Construction - 16 inch length, 1/4" diameter stem, stainless steel construction, hermetically sealed to prevent fogging
- Read at a Glance Dial Developed by Compost Experts - 3 temperature Zones that indicate compost activity, understand your pile with our compost guide
- 100% Compostable Packaging - Printed with soy-based ink, zero waste, no plastic, no Styrofoam, shred the box to use in your compost pile as a brown
Pile is dry and unchanged: Add water while turning. Dry browns need moisture before microbes can use them.
Pile is hot but not breaking down evenly: Particle sizes may be too large or the pile may not be mixed. Chop coarse material and turn outer material into the center.
Finished compost has chunks: Screen it. Return oversized woody pieces to the next batch as starter material.
Bottom Line
The four stages of compost are setup, active heating, cooling, and curing. Setup controls whether the pile can work. Heating does the fast breakdown. Cooling handles tougher material. Curing makes the compost stable enough to use around lawns, beds, and new plantings.
Do these 3 things before closing this tab:
1Fix the driver behind crashes, sound loss and screen glitches2Clear out junk files and repair common Windows errors3Scan for outdated or missing drivers - takes under a minuteFor homeowners, the winning formula is practical: build enough volume, balance browns and greens, keep moisture near wrung-out sponge level, track temperature, manage odors before they become complaints, and give the finished material time to cure. Treated that way, compost becomes a dependable soil amendment instead of a backyard experiment.
Frequently Asked Questions
What are the 4 stages of composting?
The four practical stages are setup and feedstock mixing, active heating, cooling and secondary decomposition, and curing or maturation. Each stage affects whether the finished compost is stable and safe to use.
How hot should a compost pile get?
A well-built hot compost pile often reaches about 131 to 160 degrees F in the center. If it never warms, it may be too small, dry, compacted, or low in nitrogen. If it exceeds about 160 degrees F, turn it and add browns if needed.
How long does compost take to finish?
A managed hot pile may produce usable compost in about 6 to 12 weeks plus 4 to 12 weeks of curing. A slower cold pile can take 6 to 18 months depending on material, moisture, season, and turning.
The Tool Desk
Outbyte PC Repair FREEClear out junk files and repair common Windows errorsFree Scan →Outbyte Driver Updater FREEFix the driver behind crashes, sound loss and screen glitchesFind Drivers →Can I use compost before it is fully cured?
It is risky around seedlings, new sod, vegetable beds, and valuable landscape plants. Unfinished compost can reheat, tie up nitrogen, smell bad, or inhibit germination. Cure it until it smells earthy and no longer heats strongly after turning.
How much compost should I put on a lawn?
For lawn topdressing, use a light layer, often about 1/4 inch. One cubic yard covers about 1,296 square feet at that depth. Rake it in so the grass blades remain exposed.
Is a compost tumbler better than a pile?
A tumbler is cleaner and easier to turn, especially in small yards, but its limited volume may not hold heat like a 3 ft. by 3 ft. by 3 ft. pile. Tumblers are useful for scraps and small batches, not major landscape volume.
Quick Recap
Product prices and availability are accurate as of the date/time indicated and are subject to change. Any price and availability information displayed on Amazon at the time of purchase will apply.