What’s actually slowing this PC down?
Pick the symptom - the matching free tool is one click away.
Mixing wood tones can make a home feel layered, custom, and collected. Done poorly, it can make a room look like every piece was bought in a different decade by accident. The difference usually comes down to six decisions: choose the dominant fixed wood first, match undertones, use clear contrast, repeat each major tone, vary grain and sheen intentionally, and use non-wood materials to separate tones that do not naturally belong together.
On our job sites, we look at wood tones differently than a furniture showroom does. A coffee table can be swapped in an afternoon. Hardwood floors, stair treads, kitchen cabinets, built-ins, beams, doors, and stained trim can affect the budget by thousands of dollars. Before picking a new stain, island finish, or dining table, you need to know which woods are fixed, which can be refinished, and which are inexpensive enough to replace.
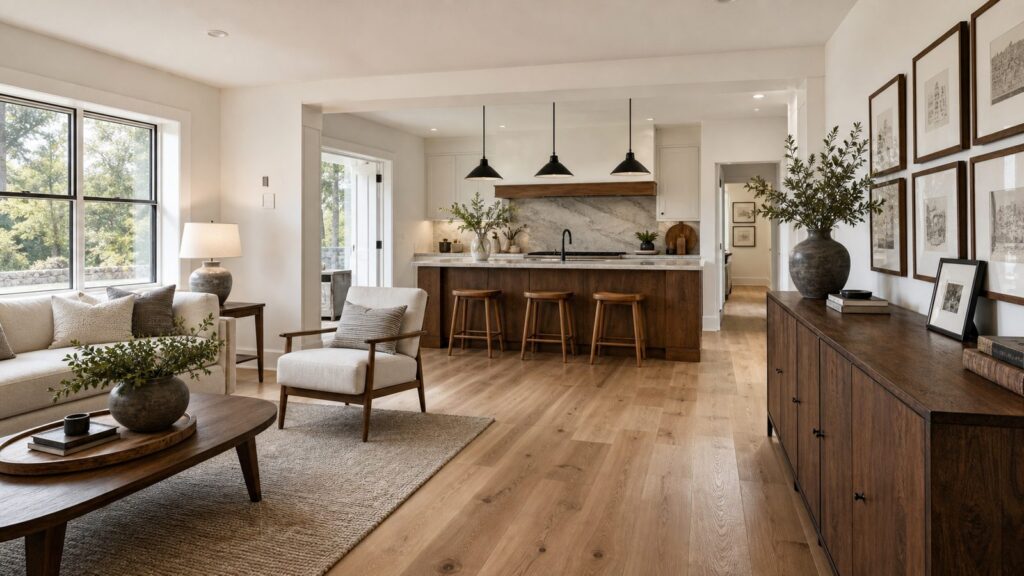
A good mixed-wood palette usually has three tones: a dominant tone, a supporting tone, and an accent tone. For example, white oak floors may be dominant, walnut stools may support the kitchen island, and black-stained picture frames or a dark sideboard may act as the accent. That is enough variety for most homes without making the space feel busy.
1. Start With the Fixed Wood, Not the Furniture
The first rule is practical: identify the wood surfaces that are hardest and most expensive to change. In most homes, the dominant wood tone is already set by one of these elements:
Quick wins for a faster PC:
Clear out junk files and repair common Windows errorsFree Scan →Scan for outdated or missing drivers - takes under a minuteDriver Scan →#1 Best Overall

- Deck Stain and Sealer with Superior UV Protection - Formulated with zinc nano-particle technology that acts as a sunscreen for your wood, protecting against harmful UV rays.
- Wood Sealer Outdoor Waterproof Stain - Creates a water repellent barrier that prevents water damage and extends the life of your wood surfaces. Enjoy lasting protection against the elements.
- Beautiful Outdoor Wood Stain Colors - Enhance the natural beauty of your deck, fence or siding with a stunning semi-transparent finish that highlights the grain and texture. Available in 6 colors.
- Easy to Use - Whether you're staining a deck, fence, siding, or any other exterior wood stain project, DEFY Extreme is easy to apply with a brush, pump-up sprayer, or airless sprayer.
- Soap and Water Cleanup - This water-based wood deck stain and sealer is 250 VOC compliant, making it better for you, your family, and the environment.
- Hardwood or engineered wood flooring
- Stair treads, handrails, and newel posts
- Kitchen or bathroom cabinetry
- Built-ins, mantels, ceiling beams, and wall paneling
- Interior doors, stained casing, baseboards, and crown molding
Before you buy furniture or approve a stain sample, make a simple fixed-element audit. Walk the home and list every visible wood surface. Label each one as fixed, refinishable, replaceable, or easy decor. Floors and stairs are usually fixed or refinishable. Cabinets may be refinishable, refaceable, paintable, or replaceable depending on their condition. Furniture, shelves, stools, frames, and lamps are easy decor.
In an open floor plan, do this from the entry, kitchen, dining table, sofa, and main hallway. If the kitchen island, floor, stair rail, dining table, and living-room built-ins appear in the same view, they need to coordinate as one palette. Room-by-room decisions are where mixed woods often go wrong.
Use a Three-Tone Framework
A three-tone framework keeps the decision from getting vague. Choose one dominant tone, one supporting tone, and one accent tone. A common remodel layout might look like this:
- Dominant: natural white oak flooring throughout the first floor
- Supporting: medium walnut island, stools, or open shelves
- Accent: black-stained handrail, picture frames, or media cabinet
The dominant tone should usually cover the most visual square footage. That is often the floor, but in a kitchen it might be cabinets. In a great room with heavy beams or a paneled fireplace wall, the beams or built-ins may lead the palette.
2. Match Undertones Before You Match Color
Homeowners often try to match wood by darkness: light, medium, or dark. That helps, but undertone matters more. Two woods can both be medium brown and still clash if one has a red-orange cast and the other has a gray, ashy cast.
Warm woods often show yellow, orange, red, honey, or amber notes. Many oak, cherry, maple, pine, and walnut finishes fall into this family, depending on stain and age. Cool woods often show gray, blue, charcoal, or weathered notes, such as gray-washed oak, ash, driftwood finishes, and many espresso stains with a cooler base.
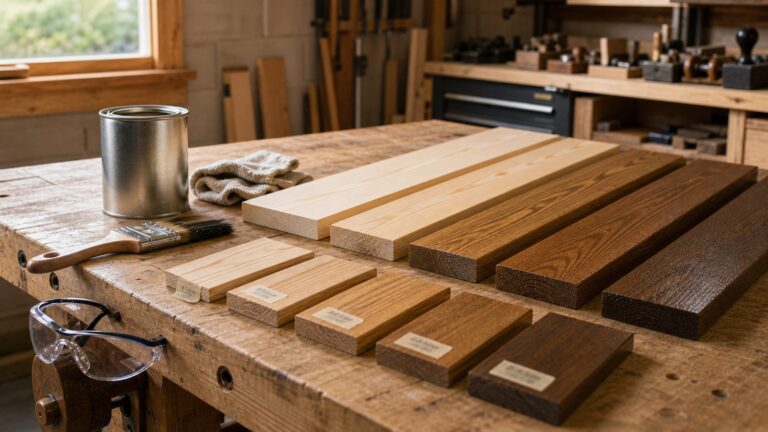
The easiest field test is to hold samples against a plain white sheet of paper in natural light. The white background makes the undertone easier to see. Then look again under the actual bulbs in the room. Wood color changes dramatically between morning light, afternoon light, and evening artificial light. A stain that looks soft brown at noon can turn orange under 2700K warm bulbs or look muddy under cooler LEDs.
Warm With Warm, Cool With Cool
You do not need identical woods. You need related undertones. Warm white oak floors can work with walnut stools, honey-toned beams, or a cherry antique if the supporting pieces repeat and the room has enough contrast. Cool gray oak floors work better with charcoal, black-stained, pale ash, or cooler neutral woods than with orange pine or red cherry.
When undertones conflict, add a bridge piece. Reclaimed wood, stone with both warm and cool veining, a patterned rug, mixed-metal lighting, or a countertop with blended movement can help connect woods that would otherwise fight each other. This is especially useful in remodels where one element, such as an existing stair rail or built-in, is staying for budget reasons.
3. Use Real Contrast Instead of Near-Matches
The most common mistake is using two woods that are almost the same color but not quite. A medium brown floor beside a slightly different medium brown dining table often looks accidental. A lighter floor with a clearly darker table usually looks intentional.
Think in light, medium, and dark. If the floor is medium oak, consider a darker walnut table or a lighter maple sideboard rather than another mid-brown piece. If cabinets are dark walnut, a pale oak floor or painted trim can keep the room from feeling heavy. If the floor is very light, a few dark wood accents can add structure.
As a rule of thumb, if two samples look like they were supposed to match but failed, separate them. That can mean going lighter, darker, painted, or adding a rug between them. This is why rugs matter so much on wood floors. They create visual breathing room between floor color and furniture legs, especially when both are medium brown.
Rank #2

- RICH INCLUSIONS: This wooden filler set comprises 12 unique colors of resin repair fillers, offering a hassle-free solution for repairing wood furniture stains and scratches. Please note that the wooden furniture repair kit serves as a touch-up set, helping to blend colors to minimize the visibility of scratches or scuffs. It can also be used to repair small dents or cracks. After application, dry the area with a hair dryer and allow it to air dry for 2-3 days (away from water).
- DIVERSE RANGE OF COLORS: The set includes 12 unique colors—white, black, oak, padauk, black walnut, yellow sandalwood, teak, grey, ivory, amber yellow, original wood, and wood white. You can easily match the colors as needed, eliminating concerns about finding the right color to match your furniture.
- EASY APPLICATION & LONG-LASTING REPAIRS: Clear instructions are provided to alleviate any concerns about application difficulties. No additional glue, pens, markers, wax, paint, or crayons are needed. Simply squeeze the repair filler into the affected area and use the tail scraper to smooth the surface. Our furniture repair kit boasts high-quality materials that effortlessly and securely blend with the furniture's surface, drying quickly and providing long-lasting repairs.
- IDEAL FOR WOOD SCRATCH REPAIR: This kit is perfect for addressing scratches on wooden veneers, desks, wooden floors, cabinets, tables, beds, doors, and more. It effectively rectifies various damages such as debris, cracks, dents, holes, pet marks, and wear. With this kit, you can repair your furniture on your own without the need for professional assistance, saving you both time and money, and revitalizing your furniture.
- HELPFUL TIPS & 100% SATISFACTION GUARANTEE: If you find the color too dark, please avoid applying excessive force and instead gently apply and wipe off. It's best to test color mixtures in less visible areas to alleviate concerns about suitability. We promise to provide you with 100% satisfactory service. If you encounter any dissatisfaction with our products, please feel free to contact us.
Good Contrast Still Needs Repetition
Contrast works when it repeats. A single walnut coffee table on a light oak floor can look random. A walnut coffee table, walnut frames, and walnut open shelves look planned. The same rule applies in kitchens. A walnut island makes more sense when walnut appears again in stools, floating shelves, a range hood detail, or a nearby built-in.
For one room, repeat each major wood tone at least twice. For an open plan, repeat each tone across the visible zone. That does not mean every piece has to match. It means the eye can find a reason for the tone to exist.
4. Pay Attention to Grain, Not Just Stain
Wood grain has scale and movement. Oak, hickory, and ash can have strong grain. Maple, birch, and some walnut cuts can read calmer. If every wood in the room has heavy grain, the space can feel visually noisy even when the colors technically coordinate.
On finish selections, we look at both color and grain scale. A wire-brushed white oak floor has texture and movement. Pairing it with a highly figured hickory cabinet may be too much unless the rest of the room is very restrained. A calmer walnut island or painted perimeter cabinets may support the floor better.
Recommended Free Tools
The same idea applies to trim and doors. Stained baseboards, casing, doors, floors, and furniture all compete if they have strong grain and different undertones. In many remodels, painting trim and doors is the cleanest way to let the floor or cabinets become the wood feature.
Control Sheen
Sheen is a hidden mismatch. A glossy cherry table beside matte white oak floors can look off even if the undertones are workable. Modern interiors usually tolerate mixed woods better when finish sheen is restrained: matte, satin, or low-sheen polyurethane, hardwax oil, or factory finish.
For remodel decisions, put sheen on the specification sheet. Do not just say “natural oak” or “medium walnut.” Specify species, stain or finish color, sheen level, and sample approval. For floors, ask for in-place stain samples on the actual floor whenever possible. Sample sticks are useful, but existing wood species, age, sanding depth, previous finish, and repairs can change the final color.
5. Use Rugs, Paint, Stone, Metal, and Textiles as Buffers
Not every wood tone has to touch another wood tone. In fact, most successful mixed-wood rooms use buffer materials. Rugs, painted trim, stone countertops, tile backsplashes, metal lighting, upholstery, and drapery all create separation.
PC Slower Than It Used to Be?
A free scan shows the junk files, broken settings and background clutter dragging Windows down - then fixes them in one click.Free scan · Windows 10 & 11Crashes, No Sound, or Screen Glitches?
Random freezes, missing sound and display glitches usually trace back to one bad driver. Find and replace yours safely.Free scan · under a minuteIn a living room with medium oak floors and a medium walnut coffee table, a 9-by-12 rug can solve the “almost matched” problem immediately. In a kitchen with wood floors and a wood island, the countertop and backsplash should act as the transition. In a dining room with stained floors and an antique table, upholstered chairs can soften the contrast better than more wood.
Paint is one of the most cost-effective tools. If a home has orange-toned floors, red-toned cabinets, and dark stained trim, trying to coordinate every wood may be expensive and visually heavy. Painting trim, casing, or built-ins can reduce the number of competing wood tones without replacing major components.
Kitchen Rule: Pick One Wood Hero
In kitchens, choose one wood feature to lead: floor, perimeter cabinets, island, hood, or open shelving. If the floor is the hero, keep cabinets calmer. If the island is the hero, repeat that tone in stools or shelves. If perimeter cabinets are stained wood, think carefully before adding another stained island. The countertop, backsplash, hardware, and lighting should bridge the two tones.
For example, white oak floors, painted perimeter cabinets, and a walnut island can work well because each material has a clear role. White oak floors, honey oak cabinets, a cherry island, and red-brown stools usually feel less controlled unless the palette is intentionally traditional and the tones are repeated throughout the space.
Do these 3 things before closing this tab:
1Repair Windows errors before they cause bigger problems2Scan for outdated or missing drivers - takes under a minute3Clear out junk files and repair common Windows errors6. Build a sample board Before You Commit
A single wood sample is not enough. For any remodel involving floors, cabinets, trim, tile, counters, or paint, build a sample board with all major materials together. Include wood flooring, cabinet finish, wall paint, trim paint or stain, countertop, backsplash tile, grout, hardware metal, fabric, and any large rug sample.
Rank #3

- SOLID WOOD STAIN COLOR: Delivers a matte, opaque finish that hides imperfections and refreshes wood surfaces for decks, fences, and outdoor furniture with a modern look
- WOOD STAIN SAMPLE PACK: Includes a variety of wood stain samples to help you choose the color for your project for testing on exterior wood surfaces before full application
- DURABLE WEATHER PROTECTION: Formulated to resist peeling, cracking, and blistering. Maintains vibrant color and shields wood from harsh weather for long-lasting beauty and protection
- MULTIPLE COLOR OPTIONS: Explore a wide assortment of wood stain colors to match your style. Easily customize and enhance your outdoor spaces with this wood stain variety pack
- EASY WATER-BASED CLEANUP: This water-based wood stain cleans up easily with soap and water. No need for harsh solvents, making application and cleanup simple and convenient
View the board in the actual room for at least 24 to 48 hours. Check it in morning, afternoon, and evening light. If the room uses LED bulbs, confirm the color temperature. Many homes use 2700K to 3000K bulbs for warm residential spaces. Cooler bulbs can make gray and ash tones more pronounced, while warmer bulbs can pull yellow and orange out of oak, pine, and maple.
For floors, ask the contractor to place stain samples in an inconspicuous area of the actual floor after sanding. A 12-by-12-inch test patch is more useful than a small fan deck. If several rooms are being refinished, sample in more than one location because sun exposure, repairs, and wood age can vary.
Cost Guide: Decorate, Refinish, Reface, Replace, or Paint
Mixed wood problems do not all deserve the same solution. Sometimes the answer is a rug and two repeated accent pieces. Sometimes the floor stain is wrong for the whole house. The right fix depends on cost, disruption, and how permanent the mismatched element is.
| Project option | Typical 2026 US cost | Best for | Typical timeline |
|---|---|---|---|
| Decorate around existing wood | $200 to $2,500 for rugs, stools, frames, shelves, lighting, or textiles | Minor mismatches, rental-friendly updates, open-plan balancing | 1 day to 2 weeks |
| Refinish hardwood floors | Commonly $3 to $8 per sq. ft.; some 2026 calculators start around $6.49 to $7.92 per sq. ft. | Good floors with outdated stain, orangeing, scratches, or poor sheen | 3 to 7 days for many homes, plus cure time depending on finish |
| Install new hardwood flooring | Broadly $6 to $25 per sq. ft. installed; some national calculators show $13.19 to $16.72 per sq. ft. starting ranges | Damaged floors, layout changes, major remodels, species changes | 3 days to 2+ weeks depending on demo, subfloor, stairs, and finish |
| Install engineered hardwood | Often $8 to $18 per sq. ft. installed, with premium products higher | Slab foundations, moisture-sensitive areas, wide-plank looks, remodel efficiency | 2 days to 1+ week depending on prep and transitions |
| Install or replace interior trim | Often $4 to $12 per linear ft. installed; complex profiles and older homes can run higher | Reducing stained-wood clutter, updating casing/base, correcting dated trim | 1 to 5 days for selected rooms |
| Refinish cabinets | Often $1,500 to $7,000+ depending on kitchen size, finish, doors, and repairs | Solid cabinets with outdated color but good layout and boxes | 4 to 10 days for many kitchens |
| Reface cabinets | Often $5,000 to $15,000+ depending on material, door count, and layout | Good cabinet boxes where new doors, drawer fronts, and veneers solve the look | 3 to 7 days after materials arrive |
| Hire interior design help | Commonly $100 to $250+ per hour, or flat packages from several hundred to several thousand dollars | Whole-house palettes, high-visibility kitchens, open plans, finish schedules | 1 week to several months depending on scope |
These numbers are planning ranges, not bids. Regional labor, floor condition, stair work, demolition, subfloor preparation, moisture mitigation, dust-control systems, material grade, and access can move the price significantly. Older homes with detailed trim, built-ins, and stairs often price higher than clean square-foot averages suggest.
When to DIY and When to Hire a Pro
DIY is reasonable when the fix is decorative and reversible. You can usually handle rugs, accent tables, picture frames, shelves, lamps, stools, curtains, and small sample boards yourself. You can also test a palette by moving existing pieces around the house before buying anything new.
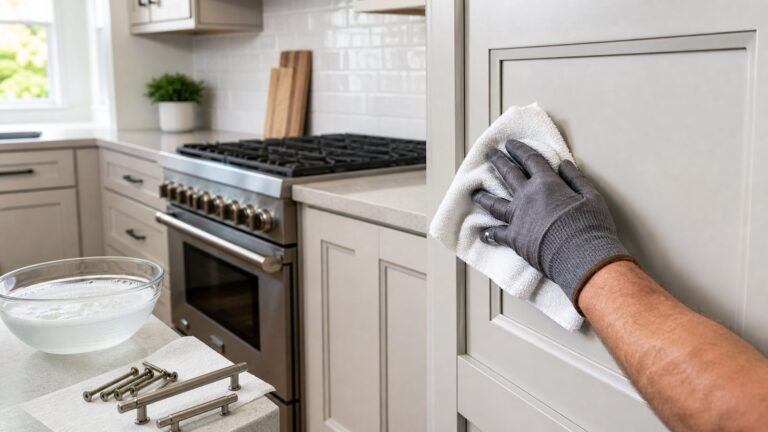
Painting a small furniture piece can be a good DIY project. Painting built-ins, stair parts, doors, or large trim packages requires more preparation than most homeowners expect. Proper cleaning, sanding, caulking, priming, spraying or brushing technique, and cure time determine whether the finish looks professional after six months.
Hire a pro when the work affects expensive fixed elements: floor refinishing, new hardwood installation, stair staining, cabinet refinishing, cabinet refacing, structural beams, built-ins, or large trim packages. Floor refinishing in particular is unforgiving. Uneven sanding, stain lap marks, poor dust control, wrong finish chemistry, or rushed cure times can leave visible problems across hundreds or thousands of square feet.
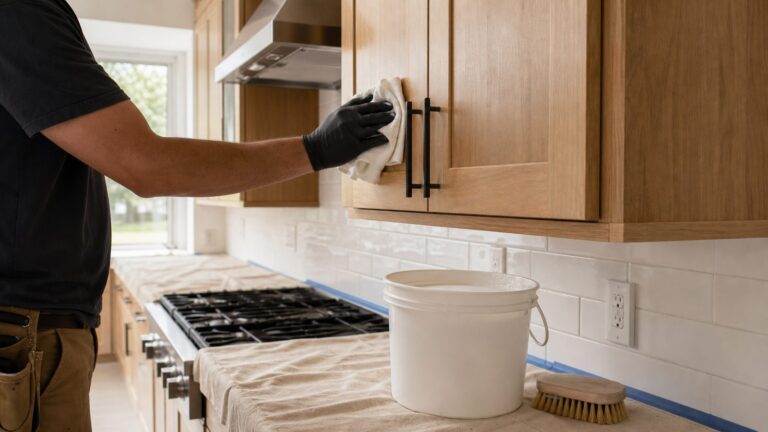
For cabinet refinishing, hire a professional if the kitchen is large, the finish is failing, the doors need repair, or you want a smooth sprayed finish. A professional cabinet finish should include degreasing, sanding, adhesion primer where needed, controlled spraying or high-quality brush and roller work, and enough cure time before heavy use.
Independent reader supportYour contribution helps us test, update, and keep practical guides available for everyone.Safety, Permits, and Construction Details Homeowners Miss
Changing wood tones can trigger construction issues that design articles rarely cover. If your home was built before 1978, painted trim, doors, cabinets, or built-ins may involve lead-based paint. Renovation, repair, and painting work that disturbs painted surfaces in pre-1978 housing may require lead-safe practices by an EPA-certified contractor. Do not sand old painted trim or cabinets casually.
Permits are usually not required for furniture, rugs, or simple cosmetic decorating. They may be required when a remodel changes walls, stairs, structural elements, electrical, plumbing, egress, or fire-rated assemblies. Local rules vary, so check your city or county before work begins. Interior finish materials also have code considerations, including flame-spread requirements in some locations and occupancies. Most ordinary residential wood trim and flooring products are handled through standard product approvals and manufacturer specs, but unusual wall or ceiling applications deserve a code check.
Moisture matters for new wood flooring. Solid and engineered products need proper acclimation and installation conditions based on manufacturer instructions. Crews should check subfloor flatness, moisture content, transitions, expansion gaps, and HVAC conditions. A beautiful wood-tone plan will not matter if the floor cups, gaps, or fails because the substrate was not ready.
Free tools Windows power users keep installed
One-click scans. No signup required.
Finish chemistry matters too. Oil-based finishes, water-based finishes, hardwax oils, factory finishes, and stains age differently. Some amber over time. Some stay clearer. Some are easier to spot repair. If you are trying to keep white oak pale, for example, ask about water-based finishes or systems designed to reduce ambering. If you want depth and warmth, an oil-based look may be appropriate, but understand how it will change.
A Practical Decision Tree for Fixing Bad Wood Mixes
When a room feels mismatched, do not start by replacing the most expensive item. Work through the problem in this order:
Rank #4

- Woodrich Brand has been trusted by professional contractors and discerning DIY enthusiasts for over 20 years
- Each sample kit contains one, 2oz sample of each color
- Colors included are Signature Brown, Western Cedar, Amaretto, Brown Sugar, and Warm Honey Gold
- Order a wood stain sample kit today to see the colors on your own wood
- Ideal for use on new construction including cedar, pressure treated pine, and other common deck, fence, and siding materials
- Decorate around it: Add a rug, repeat the accent tone, change upholstery, add black or metal elements, or introduce a bridge material.
- Refinish it: If the wood is good but the color or sheen is wrong, refinishing may preserve quality while changing the palette.
- Reface it: For cabinets with solid boxes but dated fronts, refacing can change the room without a full cabinet replacement.
- Paint or cover it: Trim, built-ins, and some cabinets can be painted when too many stained woods compete.
- Replace it: Reserve replacement for damaged materials, poor layouts, failed finishes, or elements that cannot be made to work any other way.
This order protects the budget. A $900 rug and repeated walnut accents may solve what first looked like a flooring problem. On the other hand, if the entire first floor has an orange finish that conflicts with a planned kitchen remodel, refinishing before cabinets go in may be the smarter sequence.
Best Remodeling Sequence for Mixed Wood Tones
Sequence matters. If you are remodeling more than one element, decide the fixed palette before installation starts. A clean sequence usually looks like this:
The Tool Desk
Outbyte PC Repair FREERepair Windows errors before they cause bigger problemsFix Now →Outbyte Driver Updater FREEScan for outdated or missing drivers - takes under a minuteDriver Scan →- Audit existing floors, stairs, trim, doors, cabinets, beams, and built-ins.
- Choose what stays, what gets refinished, what gets painted, and what gets replaced.
- Build a full sample board with wood, paint, tile, stone, metal, and fabric.
- Approve floor stain or flooring product before cabinet color is final.
- Coordinate cabinet finish, countertops, backsplash, and hardware together.
- Finalize trim paint or stain after flooring and cabinet tones are confirmed.
- Use furniture, rugs, lighting, and decor to repeat and balance the palette.
If floors are being refinished, do them before final cabinet installation when possible, or protect new cabinetry carefully if the schedule requires floors later. If new hardwood is being installed, coordinate transitions at tile, carpet, stairs, exterior doors, and existing rooms before materials are ordered. Plank width, species, grade, and finish all affect how the wood tone reads.
Final Rule: Make It Look Intentional
Mixed wood tones do not need to match. They need a reason. A room with natural oak floors, walnut shelves, painted trim, black hardware, and a patterned rug can feel built-in and deliberate. A room with five unrelated mid-brown woods, different sheens, and no repeated tones usually feels accidental.
Start with the most permanent wood in the house. Match undertones before colors. Choose real contrast instead of near-matches. Repeat every important tone. Balance strong grain with calmer surfaces. Use rugs, paint, stone, metal, and textiles to give the woods room to breathe. That approach works whether you are choosing a coffee table or planning a full first-floor remodel.
Frequently Asked Questions
How many wood tones can you mix in one room?
Most rooms work best with three: a dominant tone, a supporting tone, and an accent tone. You can use more in a collected or traditional interior, but each major tone should repeat at least twice so it looks intentional.
Should wood furniture match hardwood floors?
No. Furniture usually looks better when it contrasts with the floor instead of almost matching it. If the floor is medium brown, try a lighter or darker furniture tone and use a rug to separate the surfaces.
Can warm and cool wood tones work together?
They can, but they need help. Use a bridge material such as a patterned rug, stone with warm and cool veining, black accents, mixed-metal lighting, or reclaimed wood. If the undertones are strongly opposed, painting one element may be cleaner.
What is the cheapest way to fix mismatched wood tones?
Start with reversible changes: rugs, repeated accent pieces, upholstery, lighting, frames, and painted decor. Many rooms can be improved for a few hundred to a few thousand dollars before considering floor refinishing or cabinet work.
Is it better to refinish or replace hardwood floors?
Refinish if the floor is structurally sound and has enough wear layer left to sand. Replacement makes more sense when boards are badly damaged, the layout is changing, moisture issues exist, or you need a different species, plank width, or installation system.
Do these 3 things before closing this tab:
1Scan for outdated or missing drivers - takes under a minute2Clear out junk files and repair common Windows errors3Fix the driver behind crashes, sound loss and screen glitchesDo I need a permit to change wood tones in my home?
Decorating, furniture changes, and many cosmetic finishes usually do not need permits. Permits may be required if the work affects walls, stairs, structure, electrical, plumbing, egress, or fire-rated assemblies. Pre-1978 painted surfaces may also require lead-safe work practices.
Quick Recap
Product prices and availability are accurate as of the date/time indicated and are subject to change. Any price and availability information displayed on Amazon at the time of purchase will apply.