To warm soil for better plant growth, start by measuring the soil temperature at planting depth for several mornings, then use the right method for the job: clear plastic for fastest pre-warming, black plastic for warming plus weed control, raised beds for long-term drainage and spring warm-up, and row covers or low tunnels to protect the air around young plants. Most warm-season vegetables should not be rushed into cold ground. Tomatoes generally prefer soil around 65°F to 70°F, while many warm-season crops need at least about 60°F. Melons are commonly transplanted when soil is 65°F or warmer.
On our job sites, we treat soil warming the same way we treat drainage, grading, and exterior construction details: measure first, fix the base, then install the cover or structure so it actually performs. A sheet of plastic thrown over rough, saturated ground is not a system. A smooth, damp, well-drained bed with tight plastic contact and controlled ventilation is.
This guide focuses on practical homeowner-scale methods that work for vegetable beds, raised beds, small landscape beds, and early-season planting areas. It also covers where the project crosses from garden DIY into construction, electrical, drainage, or permitting territory.
Start With Soil Temperature, Not the Calendar
Air temperature can fool you. A string of 65°F afternoons does not mean the root zone is ready. Soil lags behind the weather, especially in clay, shaded beds, low spots, and areas that stay wet after rain.
What’s actually slowing this PC down?
Pick the symptom - the matching free tool is one click away.
#1 Best Overall
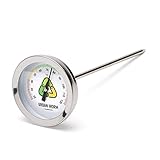
- Easy-to-read green, yellow, and red tick marks for easy monitoring
- 5-inch stainless steel stem penetrates soil and worm compost to the perfect depth.
- Worms are happiest between 55F and 90F. This thermometer lets you know when to cool them off or to move them to a warmer place
Use a soil thermometer and check at the actual planting depth. For direct-seeded crops, that may be 1 to 2 inches deep. For transplants, check closer to the root ball depth, often 3 to 6 inches. Take readings in the morning before the day’s sun warms the surface. Record the temperature for 3 to 4 mornings, not just once.
Basic home garden soil thermometers and combination soil meters commonly run about $12 to $25 in 2026. Longer-stem compost or agricultural thermometers can run $60 or more, and digital multifunction meters may be $75 to $100 or higher depending on probe length, waterproofing, and added readings such as pH, moisture, or light.
Useful Soil Temperature Targets
For many warm-season vegetables, about 60°F is a practical minimum soil temperature. Tomatoes prefer roughly 65°F to 70°F. Melons are commonly transplanted at 65°F or warmer. Most plants have their best root growth somewhere around 60°F to 80°F, but crop-specific thresholds matter.
Do not warm every bed automatically. Lettuce, peas, spinach, kale, and other cool-season crops can be delayed or stressed if the soil is overheated. Soil warming is most useful when you are trying to establish warm-season crops earlier, dry out a cold bed, improve spring performance in raised beds, or get a short-season garden moving.
Prepare the Bed Before You Try to Warm It
The best warming method will underperform if the bed is compacted, lumpy, saturated, or shaded. Before installing plastic, row cover, or a tunnel, prepare the soil like a builder prepares a base.
Loosen compacted soil to the practical working depth for the bed, usually 8 to 12 inches for vegetable production. Remove large rocks and debris. Shape the bed so the surface is smooth and slightly crowned or sloped enough to shed excess water. If the soil is bone dry, water lightly before covering. Damp soil conducts heat better than dry soil. Saturated soil, however, warms slowly and should be corrected with drainage, grading, or bed elevation before you chase more heat.
Plastic performs best when it is tight to finished soil. Air pockets reduce heat transfer. In windy areas, bury the edges 3 to 6 inches deep or hold them down with boards, landscape staples, sandbags, or soil. Loose plastic flapping in the wind is not just messy; it is less effective and more likely to tear.
Best Ways to Warm Soil in Spring
Different materials solve different problems. Clear plastic warms fastest but lets light through, which can encourage weeds. Black plastic warms less aggressively but suppresses weeds and works well as mulch during the crop season. Raised beds are a structural solution. Row covers and low tunnels mainly protect air temperature around plants, though they work well with pre-warmed soil.
Free tools Windows power users keep installed
One-click scans. No signup required.
| Method | Best Use | Typical 2026 Cost | Timeframe | Watchouts |
|---|---|---|---|---|
| Clear 6-mil plastic | Fast pre-warming before planting | About $43 for a 10 ft. x 25 ft. roll | Several sunny days to 2+ weeks | Can encourage weeds; remove or cut carefully before planting |
| black plastic mulch | Warming plus weed suppression | About $16 for 10 ft. x 25 ft. 3.5-mil; about $40 for 10 ft. x 50 ft. 6-mil | Install 1 to 2 weeks before planting | Needs tight soil contact and drip irrigation underneath |
| Raised bed | Long-term drainage and faster spring warm-up | About $55 to $160 for common galvanized kits | Permanent seasonal benefit | Needs stable base, drainage, enough soil volume |
| Floating row cover | Protecting transplants and reducing frost injury | About $13 to $33 for common homeowner sizes | Use after planting as needed | Vent during heat; heavier fabric blocks more light |
| Low tunnel | Early planting with air protection | About $30 to $150 for a small DIY tunnel | Days to weeks of protection | Wind anchoring and ventilation are critical |
| Soil heating cable | Controlled seed beds or specialty greenhouse setups | Roughly $30 to $100+ | As controlled by thermostat | Outdoor/wet-location electrical safety matters |
Clear Plastic: Fastest Short-Term Warming
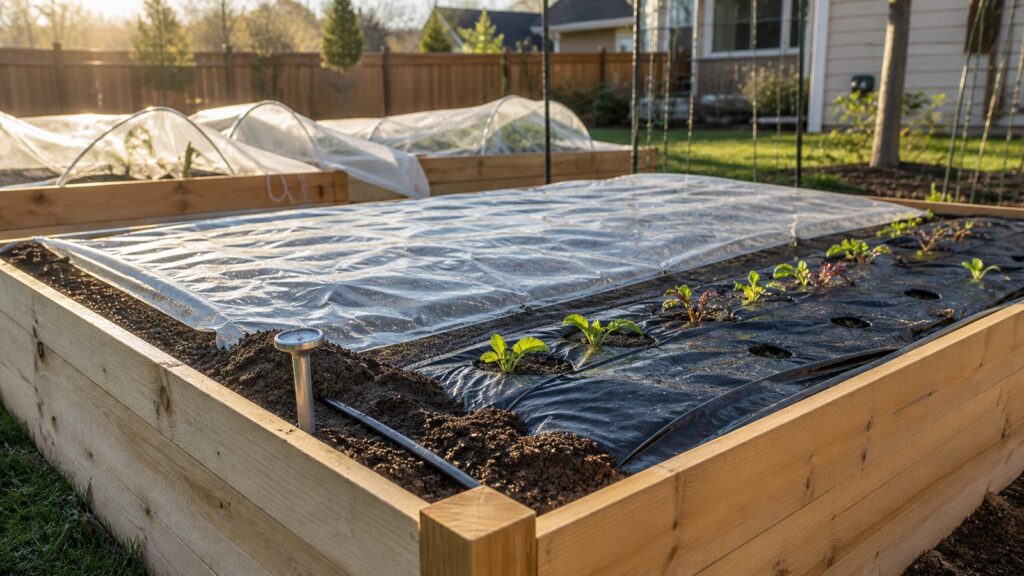
Clear polyethylene is the fastest common method for pre-warming sunny garden soil. Extension guidance reports that clear plastic can raise soil temperature about 10°F to 15°F over a few sunny days under the right conditions. That does not mean every bed gets that result. Shade, wind, wet soil, cloudy weather, soil texture, and poor plastic contact can all reduce performance.
For a typical home bed, use clear 4- to 6-mil plastic. A 10 ft. x 25 ft. 6-mil roll is commonly around $43 at major U.S. retailers in 2026. Install it over a prepared, damp, smooth bed 1 to 2 weeks before planting. In cool coastal, northern, or high-elevation gardens, give it more lead time and consider combining it with a low tunnel.
Because clear plastic lets light through, weeds may germinate under it. That can be acceptable if you are using it only for short-term pre-warming and then removing it before planting. If you plan to leave a mulch in place for the season, black plastic is usually the more practical choice.
Rank #2
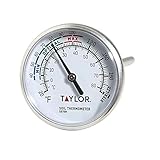
- PRECISE SOIL TEMPERATURE READINGS: Measures soil temperatures from 20 degrees F to 180 degrees F (0 degrees C to 80 degrees C) with a large, easy-to-read analog dial face - no batteries or digital screens needed for reliable results every time
- BUILT-IN PLANTING GUIDANCE: Dial face features clearly marked min, max, and optimal temperature zones so you know exactly when conditions are right for seed germination and planting - takes the guesswork out of your garden schedule
- READS BELOW THE SURFACE: The 4-inch stainless steel stem inserts at least 2 inches into the soil for accurate subsurface temperature measurements; ideal for vegetable gardens, raised beds, greenhouses, and container plantings
- HEAVY-DUTY STAINLESS STEEL CONSTRUCTION: Built with durable stainless steel materials designed to withstand repeated outdoor use in soil, moisture, and varying weather conditions - a long-lasting tool for serious gardeners and growers
- VERSATILE MONITORING WITH STEM CLIP INCLUDED: Leave the thermometer in one location to track daily temperature trends or move it quickly between multiple garden beds and containers; includes a stem clip for easy attachment to planters and pots
Black Plastic: Good Warming With Weed Control
Black plastic mulch usually warms soil less than clear plastic, but it suppresses weeds and can remain in place around warm-season crops. University extension guidance commonly reports about a 5°F soil temperature increase when black plastic is installed 1 to 2 weeks before planting. In vegetable production, plastic mulch can move first harvest earlier by about 7 to 14 days depending on weather and crop.
For homeowner use, black plastic pricing in 2026 commonly runs about $16 for a 10 ft. x 25 ft. 3.5-mil roll, about $40 for a 10 ft. x 50 ft. 6-mil roll, and about $80 for a 10 ft. x 100 ft. 6-mil roll. Cost varies with thickness, UV resistance, perforation, agricultural grade, and roll size.
Install drip line before laying black plastic. This is one of the details homeowners often miss. Once the plastic is tight and planted, you do not want to cut large watering gaps that defeat weed control and reduce warming performance. Lay the drip tubing down the row, test it, then install the plastic tight over the bed. Cut small X-shaped planting holes just large enough for each transplant.
Raised Beds: The Structural Fix
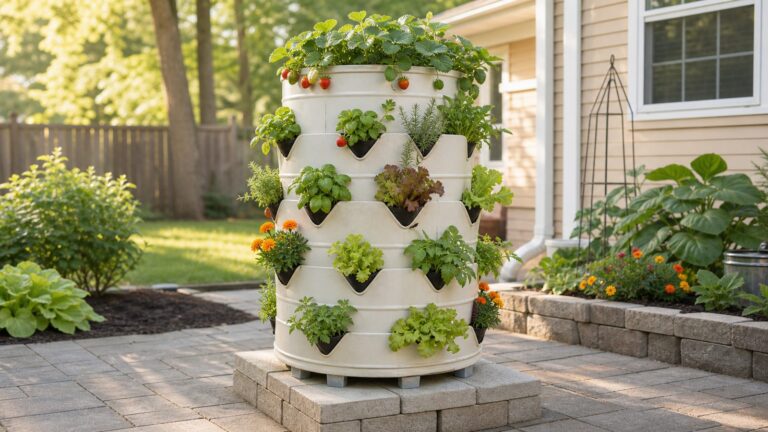
Raised beds warm faster than in-ground beds because they drain better, expose more soil surface to air and sun, and keep roots out of cold, saturated spring ground. If your garden sits in heavy clay, a low spot, or a shaded side yard that stays wet, raised beds may do more for plant performance than any sheet of plastic.
Common galvanized steel raised bed kits run about $55 to $160 in 2026 for homeowner sizes such as 8 ft. x 2 ft., 8 ft. x 4 ft., or deeper 8 ft. x 4 ft. x 2 ft. units. Lumber-built beds vary widely depending on wood species, board thickness, fasteners, height, and local pricing.
The Tool Desk
Outbyte PC Repair FREEClear out junk files and repair common Windows errorsFree Scan →Outbyte Driver Updater FREEScan for outdated or missing drivers - takes under a minuteDriver Scan →For vegetables, 10 to 12 inches of soil depth is useful for many crops, while deeper beds around 18 to 24 inches give better root volume, drainage control, and working height. Keep bed width around 3 to 4 feet if you need access from both sides. Wider beds are harder to maintain without stepping into the soil, which causes compaction.
From a construction standpoint, the base matters. Place raised beds on level, stable ground with a path for excess water to leave the area. Do not trap water against siding, fences, retaining walls, or foundations. If the bed is near a structure, consider splash, runoff direction, and long-term access for repairs.
Row Covers, Low Tunnels, Cloches, and Cold Frames
Row covers and low tunnels are often described as soil-warming tools, but their main job is different: they warm and protect the air around plants and reduce frost injury. They are strongest when combined with pre-warmed soil or plastic mulch.
Floating row cover commonly costs about $13 to $33 for homeowner sizes such as 10 ft. x 10 ft. to 10 ft. x 100 ft. Heavier frost blankets cost more and provide more freeze protection, but they transmit less light. Lighter fabric transmits more light but gives less cold protection.
A small DIY low tunnel usually runs about $30 to $150 for hoops, clips, fabric or plastic cover, and anchors such as sandbags, ground staples, or boards. The price depends on tunnel length, hoop material, cover weight, wind exposure, and whether the components are reusable.
Ventilation is not optional. Covered beds can overheat quickly on sunny days. For tomatoes, do not let covers hold temperatures above about 90°F for more than 2 to 3 consecutive days. Open ends, lift sides, or remove covers when heat builds. A cover that saves plants from cold in the morning can stress them by midafternoon.
How to Warm Soil Step by Step
For a typical 4 ft. x 8 ft. vegetable bed, this is the sequence we would trust.
First, clear the bed and loosen the soil 8 to 12 inches deep. Break up clods, remove debris, and shape the surface smooth. If the bed is compacted or puddles after rain, fix that before covering. Add compost or amendments based on soil needs, not guesswork, and blend them before warming.
Rank #3

- 【4 in 1 function】This is a 4-in-1 multifunctional soil tester.Our soil tester fastly to measure soil moisture, pH, temperature and sunlight to help you take better care of flowers and plants.You can know when you need to water your soil by measuring moisture and pH & Temperature value of the soil and sunlight level of plants with it.
- 【Large Screen & Backlight LCD Display】The Soil Tester uses a large LCD screen and white backlight to conveniently display and read digital parameter in day or dark.Use AAA1.5V * 4 batteries (not included),it will alert when the battery is low.
- 【Quick Accurate measurement】The latest probe detection technology in 2026 can quickly and accurately measure the pH, moisture and temperature in the soil,with the light intensity of the light sensor analysis on the instrument, it can allow you to know when to water, to control the pH and temperature acidity, and determine whether the plants have enough light to better cultivate the plants more scientifically.
- 【Easy to use】Just simply plug the probe into the soil about 4 inches(10cm) , wait 10 seconds to read intuitive data,and you will get an accurate and precise reading immediately.(This soil tester cannot be used directly to test any liquid. When measuring the soil, if the soil is too dry, do not insert it into dry and hard soil. Before testing, please water the soil test area and wait for 10 minutes, otherwise the testing machine will be damaged.)When testing soil pH and moisture, you need to read data from at least 5 locations in the soil. The average value of all the data will be the final soil pH and moisture.
- 【More convenient to read】The screen content adopts visual content design, which helps you read the data through specific values and easy to understand graphics, so that even novice growers can easily understand your soil conditions. The 45° rotating head design allows you to bend your head 0°-45°, allowing you to easily view the screen content without bending over.
Second, check moisture. The soil should be damp, not saturated. If it is dusty dry, water lightly and give it time to settle. If it is wet enough to smear or clump heavily, wait or improve drainage.
Third, install the warming material. For fastest pre-warming, use clear plastic and anchor every edge. For weed suppression and in-season use, lay drip line and install black plastic tight to the soil. For transplants, cut small planting openings only where needed.
Fourth, measure soil temperature every morning for 3 to 4 days at planting depth. Do not rely on the plastic being warm to the touch. The root zone is what matters.
Fifth, plant when the crop threshold is met and the forecast is reasonable. Soil warming does not cancel a hard freeze. If cold nights remain likely, combine warmed soil with row cover, cloches, or a low tunnel.
Recommended Free Tools
Finally, manage heat after planting. Vent covers, remove clear plastic if it was only for pre-warming, and switch to an appropriate mulch strategy as the season changes.
Regional Timing and Climate Differences
Soil warming is not equally useful everywhere. Northern gardens, cool coastal areas, mountain valleys, and high-elevation sites benefit most because spring soil stays cold longer. In these climates, pre-warming for 1 to 3 weeks can make a noticeable difference, especially for tomatoes, peppers, cucumbers, squash, and melons.
In hot southern climates, soil warming may only be useful briefly in late winter or very early spring. Once daytime heat arrives, the goal often changes from warming soil to moderating heat and conserving moisture. Organic mulch, shade management, and irrigation become more important than plastic heat gain.
Urban yards can vary sharply from one side of the property to another. A south-facing bed near masonry may warm much faster than a shaded bed near a fence. A raised bed on well-drained soil may be ready a week or two before an in-ground clay bed. Measure each planting zone rather than assuming one reading represents the whole property.
Do these 3 things before closing this tab:
1Clear out junk files and repair common Windows errors2Fix the driver behind crashes, sound loss and screen glitches3Repair Windows errors before they cause bigger problemsMulch: Helpful, But Usually Not for Early Warming
Organic mulch is excellent for garden health, moisture conservation, erosion control, and temperature moderation. It is not the main tool for spring soil warming. Applied too early or too thickly, straw, leaves, bark, or compost mulch can insulate cold soil and slow warm-up.
Use organic mulch after the soil has reached the temperature your crop needs. Around warm-season vegetables, wait until the soil is reliably warm and plants are established. Then apply a moderate layer, often 2 to 3 inches depending on material, while keeping mulch pulled back from stems. Around landscape plants, mulch should not be piled against trunks or crowns.
Rank #4
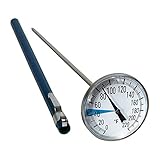
- PRACTICAL SOLUTION - While other Soil Thermometers can’t tell the correct temperature, fogs up, and get broken easily, our soil thermometer has high precision performance, high-visibility, and is designed to last
- REMARKABLE PLANTING RESULTS - For both, Indoor & Outdoor potting and gardening. Your plants will be healthy because now you can easily monitor the temperature in compost heaps and soil
- HIGH QUALITY DESIGN - Rugged stainless steel components, 1.5” glass-covered dial display, 5’’ long stem is more accurate and easier to read than digital garden thermometers.
- TIME-SAVING & COST EFFECTIVE! - Do you have problems finding out when is the best time to start planting your seedlings and young plants? We did too, this is why we’ve created this premium compost and soil thermometer. Not only it saves you a lot of money, no more fragile and slow growing plants, it also saves your time. Add this great tool to your garden supply list
- WE STAND FOR HIGH QUALITY AND PROVIDE 100% SATISFACTION GUARANTEE - If at any point you are not satisfied with any of our products, simply write us a message and we will refund your purchase or send you a replacement within 24 hours.
If your main goal is faster spring soil temperature, plastic or bed design is usually the better tool. If your goal is moisture control and summer root protection, organic mulch becomes more valuable.
Electrical Soil Heating Cables and Safety
Soil heating cables can work for greenhouse benches, seed-starting beds, and controlled specialty setups. They are not the first tool we recommend for ordinary outdoor garden beds. A homeowner-grade soil heating cable with thermostat commonly costs roughly $30 to $100 or more in 2026 depending on length, wattage, thermostat quality, outdoor suitability, and listing or certification.
Quick wins for a faster PC:
Repair Windows errors before they cause bigger problemsFix Now →Scan for outdated or missing drivers - takes under a minuteDriver Scan →Clear out junk files and repair common Windows errorsFree Scan →Any permanent or semi-permanent outdoor electrical setup deserves caution. Outdoor receptacles and outlets in wet or damp locations must be protected appropriately, and current electrical standards include GFCI requirements for outdoor outlets. Use equipment listed for the environment, keep connections out of standing water, and do not bury or modify cords in ways the manufacturer does not allow.
If the plan requires a new outdoor receptacle, buried wiring, a greenhouse circuit, hardwired controls, or anything beyond plugging a listed device into a properly protected outlet, bring in a licensed electrician. The cost of doing that correctly is cheaper than repairing a shock hazard, failed installation, or code problem later.
Independent reader supportYour contribution helps us test, update, and keep practical guides available for everyone.Permits, Drainage, and Construction Details Homeowners Miss
Most lightweight seasonal garden covers, floating row covers, and simple raised beds do not require a permit in many areas, but local rules control. Permanent structures, retaining walls, significant grading, drainage discharge, electrical work, and greenhouse-like installations can trigger requirements.
Retaining walls are a common dividing line. Some cities allow short landscape walls without permits, while taller walls, surcharge loads, slopes, or walls supporting structures can require engineering and permits. If a raised planting area functions like a retaining wall, treat it like one. Height, soil pressure, drainage stone, geotextile fabric, weep paths, and setbacks matter.
Windows Errors? Fix Them Before They Spread
Repair common Windows errors and clear accumulated junk for a smoother, more stable PC - no reinstall needed.Free scan · no reinstallOutdated Drivers Are Slowing You Down
One free scan finds every outdated or missing driver and matches the right update for your exact hardware.Free scan · exact hardware matchDrainage is another issue. Do not direct runoff onto a neighbor’s property, against a foundation, over a sidewalk where it can create hazards, or into areas that already pond. Raised beds should drain into a stable landscape area, not create erosion channels. On our projects, we look at where water goes before we build the bed, not after the first storm exposes the mistake.
For permanent beds near patios, fences, utilities, or foundations, confirm setbacks and utility locations. Call 811 before digging where utilities may be present. A garden bed is small construction, but it still lives in the same yard as gas, electric, irrigation, drainage, and communication lines.
When to DIY vs. When to Hire a Pro
DIY is reasonable when you are warming a small vegetable bed with clear plastic, black plastic mulch, row cover, or a simple low tunnel. A homeowner can usually handle a 4 ft. x 8 ft. or 4 ft. x 12 ft. bed with basic tools, a soil thermometer, plastic sheeting, drip tubing, hoops, clips, and anchors. Expect material costs from about $25 for a simple thermometer-and-plastic setup to $150 or more for a more complete low tunnel with reusable components.
Hiring a pro makes sense when the issue is not just temperature. If the garden area needs grading, drainage correction, retaining, permanent raised beds, irrigation zoning, outdoor electrical work, or integration with patios and walkways, the project benefits from construction planning. Poor drainage under a raised bed can rot wood, stain hardscape, undermine edges, or keep the bed colder than expected. Bad electrical work outdoors is a safety issue, not a gardening inconvenience.
Do these 3 things before closing this tab:
1Clear out junk files and repair common Windows errors2Fix the driver behind crashes, sound loss and screen glitches3Repair Windows errors before they cause bigger problemsProfessional installation or design is usually priced by materials plus labor, access, grading and drainage prep, bed size, soil volume, disposal or hauling needs, irrigation, and whether licensed electrical work is involved. A small raised-bed upgrade is one level of work. A terraced garden with retaining, drainage pipe, permanent irrigation, and power is a construction project.
Best Value
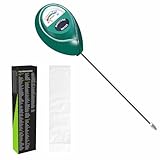
- Trusted Since 2015: Become one of the many plant lovers who rely on the proven accuracy of XLUX. Established in 2015, our soil moisture meter has earned over 60,000+ verified ratings for its consistent performance. While many many newer brands come and go, we provide the long-term reliability and quality that American households have trusted for over a decade.
- Take the guesswork out of watering: While your eyes and fingers can only determine the moisture level of the soil surface, the XLUX meter tells you exactly what’s happening deep inside your pot or garden. Our high-sensitivity probe reaches the root zone where it matters most, requiring no batteries or charging—simply insert for an immediate, real-time reading to help your plants stay healthy and vibrant.
- Clear & Easy-to-Read Display: Perfect for beginners and expert gardeners alike. The large, color-coded dial features 10 distinct scales (Dry-Moist-Wet), making it incredibly simple to know exactly when to water. From lush Monsteras to tall Fiddle Leaf Figs, you’ll get the clarity you need at a single glance, ensuring every plant gets the precise care it deserves.
- Slim Single-Probe: Protects Delicate Roots: Protect your plants' health. Unlike bulky dual-probe testers or thick-diameter sensors that can tear and stress sensitive root systems, our sleek, slim-needle design slides smoothly into various soil types. It delivers reliable moisture data with minimal soil displacement, keeping your plants’ delicate roots safe and undisturbed while you monitor their hydration.
- Pristine Condition & Essential Care: To ensure you receive a factory-fresh instrument, each XLUX meter includes a custom anti-abrasion protective sleeve. This inner liner prevents micro-scratches during transit, maintaining the integrity of the 304 stainless steel probe. Usage Tips: 1. Soil Use Only (no liquids). 2. Temporary Test: Insert, read, and remove within 5 minutes. 3. Maintenance: Always wipe the probe clean and store it in its protective sleeve after use.
Common Mistakes That Keep Soil Cold
The first mistake is planting by the calendar. A tomato planted into 52°F soil will not reward you just because the last frost date passed. It may sit, stress, yellow, or become more vulnerable to disease while a later planting in warmer soil catches up.
The second mistake is covering wet soil. Moist soil conducts heat well, but saturated soil warms slowly. If the bed is waterlogged, fix drainage or wait. Plastic over saturated ground can trap the problem.
The third mistake is loose plastic. Black plastic mulch needs firm contact with the bed surface. Clear plastic also works better when edges are sealed and the sheet is not lifted by wind.
Quick wins for a faster PC:
Repair Windows errors before they cause bigger problemsFix Now →Fix the driver behind crashes, sound loss and screen glitchesFind Drivers →The fourth mistake is confusing frost protection with soil warming. Row cover can protect leaves and reduce frost injury, but it does not automatically mean the root zone is ready for warm-season crops. Use both tools when needed: warm the soil first, then protect the plant.
The fifth mistake is leaving covers closed during warm weather. Low tunnels and cold frames can overheat quickly. Vent them before plant stress begins.
Bottom Line
The most reliable way to warm soil is simple: measure the root zone, prepare a well-drained bed, choose the right cover, and manage heat after planting. Clear plastic is the fastest short-term pre-warming tool. Black plastic is better when you also need weed suppression and season-long mulch. Raised beds solve the deeper problem in cold, wet ground. Row covers and low tunnels protect the plant environment, especially after the soil has already been warmed.
For a small garden bed, this is a manageable DIY project. For drainage, retaining, permanent power, or built-in raised-bed systems, treat it like construction. The plants will only perform as well as the base you build for them.
Frequently Asked Questions
What is the fastest way to warm garden soil in spring?
Clear plastic over a smooth, damp, sunny bed is usually the fastest simple method. Install it 1 to 2 weeks before planting, anchor the edges tightly, and measure soil temperature at planting depth before planting.
Is clear or black plastic better for warming soil?
Clear plastic warms soil faster and can raise temperatures more over a few sunny days, but it can encourage weeds. Black plastic warms less, often around 5°F when installed ahead of planting, but suppresses weeds and can stay in place as mulch.
Do raised garden beds warm up faster than in-ground beds?
Yes. Raised beds usually warm faster because they drain better, expose more soil surface to sun and air, and avoid cold saturated spring soil. They are especially useful in clay, low, or wet garden areas.
Can mulch help warm soil?
Organic mulch usually moderates soil temperature rather than warming it quickly. If applied too early or too thickly in spring, it can keep soil cold. Use it after the soil has warmed and plants are established.
Are soil heating cables safe outdoors?
They can be safe only when listed for the intended location, used with proper GFCI-protected outdoor power, and installed exactly as directed. New outlets, buried wiring, or hardwired controls should be handled by a licensed electrician.
When should I hire a pro instead of warming soil myself?
DIY is fine for plastic mulch, row covers, and small low tunnels. Hire a pro when the project involves drainage correction, grading, retaining walls, permanent raised beds, irrigation changes, or outdoor electrical work.
Quick Recap
Product prices and availability are accurate as of the date/time indicated and are subject to change. Any price and availability information displayed on Amazon at the time of purchase will apply.