Do these 3 things before closing this tab:
1Fix the driver behind crashes, sound loss and screen glitches2Repair Windows errors before they cause bigger problems3Scan for outdated or missing drivers - takes under a minuteIf you want the short answer: for most window casings, use a durable waterborne acrylic or urethane-alkyd enamel in satin or semi-gloss. Satin is the better default for most modern interiors because it has a lower sheen and hides small imperfections. Semi-gloss is better for kitchens, bathrooms, rental properties, kids’ rooms, and any window trim that gets touched, wiped, or exposed to condensation.
For exterior window trim, the safest default is a high-quality 100% acrylic exterior paint in satin or semi-gloss over properly primed material. Avoid flat paint on exterior trim. It holds dirt, does not clean as well, and usually does not stand up as long on edges, sills, and profiles.
One terminology point matters before you buy anything. Homeowners often say window casement when they mean window casing. A true casement window is the hinged sash assembly that opens outward or inward. Casing is the trim around the window. This article focuses on the casing and trim finish, though some of the same paint and prep principles apply to the sash and frame.
Best Default Finish by Situation
On our job sites, we do not choose trim finish by sheen alone. We start with four questions: is the trim indoors or outdoors, what material is it, how much moisture will it see, and does the homeowner want a painted or natural wood look? A finish that works well on primed poplar in a dry bedroom may fail quickly on MDF at a bathroom sill or on exterior wood with unsealed end grain.
#1 Best Overall

- 2 Inch Angled Paint Brush for Precision Cutting-In – Designed for clean, sharp lines around trim, baseboards, ceilings, corners, and detailed edge work. The perfect size for control and coverage.
- Value 3-Pack for Pros & DIY Projects – Includes three professional 2-inch angled sash brushes — ideal for contractors, remodelers, and homeowners tackling multiple rooms or repeat paint jobs.
- Smooth Results on Walls, Trim & Cabinets – Great for interior wall painting, cabinet edges, furniture projects, and trim work where a smooth finish and crisp control matter most.
- Works with Latex Paint, Oil-Based Paint & Stains – Premium synthetic filaments hold more paint, reduce streaks, and provide a clean finish with latex paints, oil coatings, and wood stains.
- Works with Latex Paint, Oil-Based Paint & Stains – Premium synthetic filaments hold more paint, reduce streaks, and provide a clean finish with latex paints, oil coatings, and wood stains.
| Location or Material | Best Finish | Use This When | Avoid |
|---|---|---|---|
| Interior paint-grade casing | Satin or semi-gloss enamel | Most painted window trim in living rooms, bedrooms, halls, and offices | Flat wall paint on trim |
| Kitchens, baths, laundry rooms | Semi-gloss washable enamel | Trim needs frequent wiping or sees moisture and fingerprints | MDF near wet sills or persistent condensation |
| Older imperfect trim | Satin enamel | You want durability without highlighting every dent and sanding mark | High gloss unless the prep is excellent |
| Stain-grade wood | Stain plus clear topcoat | The casing is quality hardwood or attractive softwood with consistent grain | Mixed species, heavy filler, rough sanding, poor miters |
| Exterior wood trim | Primer plus 100% acrylic satin or semi-gloss exterior paint | Most exterior wood window casing and brickmold | Unprimed cut ends, flat paint, cheap caulk |
| Cellular PVC trim | Factory white or manufacturer-approved vinyl-safe paint | You want low rot risk and crisp painted-looking exterior trim | Dark non-approved colors that can cause heat distortion |
| Fiber-cement trim | Approved primer and exterior acrylic paint | Durable exterior trim where manufacturer clearances and fasteners are followed | Ignoring cut-edge, clearance, or caulking instructions |
The common mistake is treating finish as decoration only. Around windows, finish is part appearance, part cleanability, and part water management. Paint cannot compensate for poor flashing, bad caulk joints, trapped drainage, unsealed end grain, or condensation that runs onto a sill every morning.
Satin vs Semi-Gloss for Interior Window Casings
Satin and semi-gloss are the two practical choices for most interior window casings. Both are tougher and more washable than wall paint. The difference is how much light they reflect and how much surface quality they reveal.
Use Satin When You Want a Cleaner, More Current Look
Satin enamel has a soft luster. It reads finished and durable without making every piece of trim shout. For most living rooms, bedrooms, dining rooms, offices, and hallways, satin is the finish we recommend first. It is especially helpful when the existing casing has minor dents, old brush marks, open grain, or imperfect repairs.
Satin does not mean delicate. A good waterborne enamel in satin can handle normal dusting and periodic cleaning. It simply has less glare than semi-gloss. If the walls are matte or eggshell, satin trim gives a clean contrast without the older high-shine look some homeowners dislike.
Use Semi-Gloss When Cleaning Matters More
Semi-gloss is the workhorse for high-use trim. It is easier to wipe, more moisture resistant, and gives sharper definition to casing profiles. We specify it often in kitchens, bathrooms, laundry rooms, mudrooms, rental units, and homes with children or pets.
The tradeoff is that semi-gloss highlights prep quality. Sanding scratches, lumpy caulk, nail holes, brush ridges, and patched dents are easier to see. If the casing is new, smooth, and properly installed, semi-gloss can look crisp. If the casing is 70 years old and has been painted eight times, satin usually looks better unless the budget includes serious prep.
What About High Gloss, Eggshell, or Flat?
High gloss can be beautiful on premium trim, but it demands excellent surface prep and controlled application. It is not forgiving. On typical production trim, it often looks too shiny and exposes every defect.
Eggshell is acceptable in some low-use rooms, but it is usually a wall finish, not our first choice for casing. Flat paint should stay off window casings. It collects hand oils and dust, burnishes when cleaned, and performs poorly where people open and close blinds, wipe condensation, or clean glass.
Paint, Stain, or Clear Finish?
Paint is the best answer for most window casings because it is durable, forgiving, and easier to touch up. Stain is best when the wood itself is worth showing. Clear finish belongs on attractive wood that has been selected, sanded, and installed with stain-grade expectations from the beginning.
Paint Is Best for Most Homes
Paint hides finger-jointed stock, filler, caulked miters, minor repairs, and mixed materials. That matters because most casing installed in modern homes is paint-grade. Primed finger-jointed pine, poplar, MDF, and composite profiles are meant to be painted, not stained.
For interior painted casing, we usually want a trim enamel, not leftover wall paint. Waterborne acrylic and urethane-alkyd enamels level better, cure harder, and resist blocking better than standard wall coatings. For a typical room, plan on one primer coat where needed and two finish coats. Recoating windows in an occupied home often takes 1 to 3 working days depending on dry time, masking, repairs, and the number of windows.
Stain Is Best for Real Stain-Grade Wood
Stain can look excellent on oak, maple, cherry, walnut, mahogany, clear pine, cedar, or redwood when the carpentry is clean and the species is consistent. It is less forgiving than paint. Stain exposes poor miters, sanding scratches, glue marks, wood filler, finger joints, mineral streaks, and mismatched boards.
Recommended Free Tools
For stain-grade interiors, decide on the full finishing system before installation: wood species, sanding sequence, conditioner if needed, stain color, sealer, and topcoat sheen. We like approving stain on offcuts from the actual trim package, not on a random sample board from a store. Pine and maple can blotch. Red oak takes stain differently than white oak. Poplar can look uneven. These details matter.
Rank #2
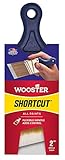
- Flexible purple Shergrip handle that measurers only 2 Inches long that adds maneuverability in tight spaces
- White nylon and gold polyester blend for all paints
- Brass-plated steel ferrule
- Package designed to peg hook brush by the handle and illustrate proper holding position
- Q3211 counter display carton has a full-color 9 Inch x 7 Inch sign
Stained window casing also needs a clear protective coat. Common options include waterborne polyurethane, oil-modified polyurethane, conversion varnish in shop settings, or other professional clear systems. Satin clear coats usually look more natural than gloss and show less dust and handling wear.
Clear Finish Without Stain
A clear finish can be the right call when the wood already has the color and grain you want. Clear-coated white oak, walnut, or fir can look warm and architectural. It still requires stain-grade carpentry. If the trim has exposed fastener patches, mismatched grain, or heavy caulk lines, paint will usually produce a better finished result.
Interior Trim Materials and the Finish They Need
The substrate controls the finish choice more than homeowners expect. Two trim boards can look identical after primer, but they do not behave the same around moisture, fasteners, sanding, and seasonal movement.
Quick wins for a faster PC:
Clear out junk files and repair common Windows errorsFree Scan →Scan for outdated or missing drivers - takes under a minuteDriver Scan →MDF Window Casing
MDF is smooth, affordable, and paints well indoors. Material-only pricing commonly runs about $1 to $3.50 per linear foot for interior trim. It is a reasonable choice for painted casing in dry rooms where the sill area is not exposed to standing water or recurring condensation.
Do not use MDF for exterior trim. Be cautious with MDF at bathroom windows, basement windows, laundry areas, and wet sills. Once MDF wicks moisture, it swells, mushrooms at edges, and does not repair like solid wood. Even a good enamel cannot make MDF a wet-location material.
Finger-Jointed Pine and Poplar
Primed finger-jointed pine and poplar are common paint-grade choices for interior casing. They machine cleanly, hold profiles well, and are more tolerant of small moisture events than MDF. They still need proper primer, caulk, nail filling, sanding, and enamel.
For most painted interiors, this is the practical middle ground: better durability than MDF in risky areas, less cost than stain-grade hardwood, and a clean painted result.
What’s actually slowing this PC down?
Pick the symptom - the matching free tool is one click away.
Hardwood and Clear Softwood
Wood trim material costs vary widely, but interior wood trim commonly falls around $1 to $10 per linear foot before labor, depending on species and profile. Stain-grade material costs more because the visible face matters. The installer also has less room to hide cuts and joints.
If you want stained window casings, specify stain-grade from the start. Do not assume a paint-grade package can be stripped, stained, and made to look like furniture. Sometimes it can be improved; often it cannot be made uniform without replacing pieces.
Exterior Window Trim: Finish Is Water Management
Exterior window trim lives in a harsher environment than siding because it has edges, corners, joints, fasteners, sills, and horizontal surfaces. The paint film matters, but the assembly behind it matters more. A premium coating over an unflashed or water-trapping detail is still a short-lived job.
For exterior wood window casing, we use primer plus 100% acrylic exterior paint in satin or semi-gloss. Satin is a good default when you want a lower sheen. Semi-gloss is useful for a sharper, more traditional trim contrast and easier cleaning. Flat exterior paint is a poor trim choice because it holds dirt and is harder to wash.
The Tool Desk
Outbyte Driver Updater FREEFix the driver behind crashes, sound loss and screen glitchesFind Drivers →Outbyte PC Repair FREEClear out junk files and repair common Windows errorsFree Scan →Prime All Sides and Cut Ends
Exterior wood fails first at the places homeowners do not see: backs, bottom cuts, end grain, miters, and joints. When possible, trim should be back-primed before installation, with all cut ends sealed before the board goes up. End grain can absorb water quickly. A coat only on the visible face is not a complete exterior trim finish.
Finishing before installation also gives cleaner profiles. On replacement work, we often prime or first-coat boards on sawhorses, install them, then fill fasteners, caulk specified joints, and apply final coats in place. That sequence protects more surface area and reduces lap marks on detailed profiles.
Rank #3

- COMPLETE 5-PIECE BRUSH SET FOR EVERY PAINTING TASK — Includes 1 Inch Flat, 1.5 Inch Angle, 2 Inch Flat, 2 Inch Angle Stubby, and 2.5 Inch Angle brush giving you every size professional painters use daily. Get all 5 for less than the price of a single brush from hardware store brands — professional grade performance at a fraction of the cost. Perfect for walls, trim, cabinets, doors, furniture, and detailed cutting-in work on any project.
- ZERO BRISTLE LOSS — GUARANTEED BY PRECISION ADHESIVE BONDING — Every bristle is locked in place with precision-set adhesive that keeps them in the brush — not in your paint job. The coated steel ferrule provides structural support while the adhesive bond ensures clean performance on every stroke. Premium SRT synthetic filaments load more paint and release it evenly for a smooth streak-free finish on walls, ceilings, and trim. Works with latex, oil-based paint, primer, sealer, and wood stain.
- INCLUDES THE ANGLE STUBBY MOST SETS LEAVE OUT — Professional painters know the 2 Inch Angle Stubby is the go-to brush for tight cabinet interiors, window sashes, inside corners, and detailed trim where standard angle brushes are too long. Combined with the 1.5 and 2.5 inch angle sash brushes you have precision cutting-in covered at every scale — baseboards, crown molding, door casings, and ceiling lines.
- FLAT BRUSHES FOR BROAD SMOOTH COVERAGE ON ANY SURFACE — The 1 and 2 inch flat brushes deliver even coverage on walls, furniture, shelving, doors, fences, decks, and wood surfaces. Ideal for applying primers, stains, varnishes, polyurethane, and specialty coatings. Solid wood handles provide all-day comfort and control for both professional contractors and weekend DIY homeowners tackling interior or exterior painting projects.
- TRUSTED BY PROFESSIONAL PAINTERS AND CONTRACTORS NATIONWIDE — Pro Grade delivers professional-grade results at a price that makes sense for crews who go through brushes on every job. Ideal for property managers, remodeling contractors, apartment turnover crews, maintenance teams, and commercial painting operations. Backed by thousands of verified reviews from working painters. Washable and reusable for multiple projects.
Do Not Caulk Drainage Paths
Window trim has to shed water. Exterior wall covering rules and manufacturer details generally require flashing integration, shingle-lapped water-resistive barriers, sill slope, and drainage where water is expected to escape. Caulk is not a substitute for flashing.
A common failure is caulking every visible gap because it looks neat on day one. That can trap water behind trim and accelerate hidden rot. We caulk joints that are meant to be sealed and leave drainage paths open where the assembly requires them. The right detail depends on the window, cladding, trim material, and local code requirements.
Exterior Caulk Quality Matters
Use a high-quality exterior sealant compatible with the trim and paint system. Low-grade painter’s caulk can crack, shrink, and pull away under sun exposure and seasonal movement. For exterior window trim, joint movement is real. The caulk bead needs proper width, adhesion, and tooling. Painting over bad caulk does not make the joint durable.
PVC, Fiber Cement, and Composite Exterior Trim
Exterior trim does not have to be wood. PVC, fiber cement, and engineered composites can be good choices around windows, especially in wet climates or on elevations with heavy sun and wind-driven rain. Each material has its own finishing rules.
Cellular PVC Trim
Cellular PVC trim is popular because it does not rot like wood. Many PVC trim products do not need paint for protection if the factory white appearance is acceptable. If you paint PVC, follow the manufacturer’s instructions on approved coatings, light reflectance value, and vinyl-safe colors.
Dark non-approved colors can absorb heat and distort PVC. That is not a paint-brand problem; it is a heat and movement problem. PVC also expands and contracts more than wood, so it needs correct fasteners, adhesives, and expansion gaps. Paint will not solve movement-related joint gaps.
Free tools Windows power users keep installed
One-click scans. No signup required.
Exterior vinyl or PVC trim material-only pricing can range widely, roughly $2 to $30 per linear foot depending on product type, size, and profile. Basic plastic trim may be less, often around $0.80 to $15 per linear foot, but the right product for exterior window trim should be selected for exposure, fastening, and finish compatibility.
Fiber-Cement Trim
Fiber-cement trim can be durable around windows when installed correctly. It must be fastened, cut, cleared from adjacent surfaces, flashed, caulked, and painted according to manufacturer instructions. Cut edges and clearances are not minor details. If the installer ignores them, the finish can fail prematurely.
Fiber-cement material-only costs for exterior trim commonly run about $0.70 to $5.50 per linear foot. Installed cost depends heavily on access, cutting, dust control, profile, and whether existing trim or siding must be disturbed.
Engineered Wood and Composite Trim
Engineered exterior trim products can perform well, but the warranty depends on following the printed installation instructions. Some require specific clearances from roofing, decks, masonry, or grade. Some require factory-primed faces to be painted within a certain time. Treat the instructions as part of the specification, not a suggestion.
Prep Determines How Long the Finish Lasts
Most trim painting problems are prep problems. The paint gets blamed because it is the visible failure, but the real cause is often grime, gloss, moisture, silicone contamination, failed caulk, bare wood, or old coatings that were never properly bonded.
Interior Prep Sequence
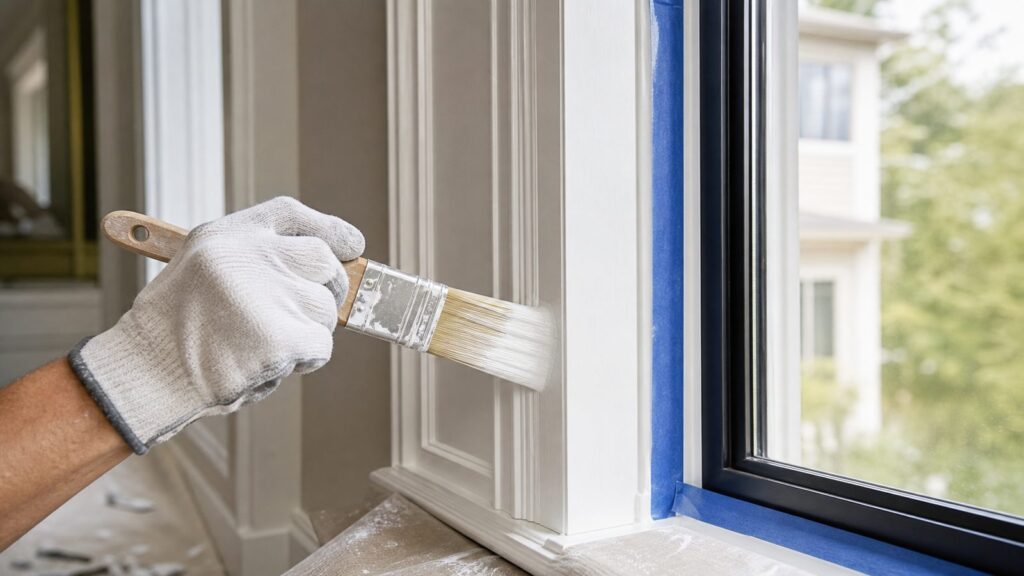
For interior painted window casings, a professional prep sequence usually looks like this: protect floors and glass, clean the trim, remove loose caulk, scrape failing paint, sand glossy surfaces, fill nail holes and dents, spot-prime bare areas, caulk paintable joints, sand again where needed, then apply two finish coats.
If old trim was painted with oil-based paint, modern waterborne enamel can still work, but the surface needs scuff sanding and the right bonding primer. Painting waterborne enamel directly over glossy old oil paint is a classic way to get peeling or easy scratching.
Rank #4

- Made in United States
Exterior Prep Sequence
Exterior prep is more involved. Expect scraping, sanding, washing, dry time, rot repair, fastener correction, caulk removal, spot priming, and sometimes partial trim replacement. Bare wood should be primed before topcoat. Failed caulk should be removed and replaced, not buried under more paint.
PC Slower Than It Used to Be?
A free scan shows the junk files, broken settings and background clutter dragging Windows down - then fixes them in one click.Free scan · Windows 10 & 11Outdated Drivers Are Slowing You Down
One free scan finds every outdated or missing driver and matches the right update for your exact hardware.Free scan · exact hardware matchWeather matters. Exterior coatings need the right temperature range, dry substrate, and enough cure time before rain, dew, or freezing conditions. A rushed exterior paint job in poor weather can fail even with good materials.
Condensation Is Not a Paint Problem
Bathroom and kitchen windows often show peeling paint at the sill or lower casing. Sometimes the wrong paint was used. More often, water is repeatedly condensing on glass, running onto the trim, and soaking joints. A washable enamel helps, but persistent condensation points to ventilation, humidity, window performance, or air leakage.
For these rooms, we typically choose semi-gloss enamel, avoid MDF at wet areas, seal vulnerable joints carefully, and encourage the homeowner to address humidity. If water sits on the sill every morning, no finish is maintenance-free.
What Window Casing Finishes Cost in 2026
Finish cost depends less on the gallon of paint and more on labor. The number of windows, trim profile, paint condition, access height, masking, repairs, and lead-safe requirements can swing the price dramatically.
| Scope | 2026 Typical Cost | What Changes the Price |
|---|---|---|
| Paint existing window trim | About $2.59 to $5.40 per linear foot as a national basic range; common market ranges are $1 to $4 per linear foot or $45 to $150 per window frame | Prep, masking, number of coats, height, repairs, occupied-home protection |
| Install interior window casing | About $10.01 to $15.34 per linear foot nationally; many projects run $350 to $1,600 per window, with an average around $900 | Material, profile complexity, extension jambs, stool and apron details, stain-grade work |
| Install exterior trim | About $6.29 to $11.10 per linear foot nationally; exterior trim projects commonly run $500 to $9,000 total, averaging around $1,800 | Second-story access, rot repair, siding disturbance, flashing, trim material, paint system |
| Stain or refinish trim | About $300 to $1,500 for a 1,500-square-foot home trim scope; stain commonly costs $20 to $120 per gallon | Matching existing stain, stripping, sanding, species, topcoat system |
For a single normal-size window, painting casing is often a small material cost but a meaningful labor cost. Masking glass, protecting walls, sanding profiles, filling nail holes, and cutting clean lines can take longer than brushing the paint itself.
New casing installation is more expensive because the finish is only one part of the job. The carpenter may need to correct jamb depth, install extension jambs, set stool and apron pieces, make miter or butt joints, fasten without splitting, caulk, fill, sand, and paint. Stain-grade trim costs more because the wood selection and joint quality must be better.
Independent reader supportYour contribution helps us test, update, and keep practical guides available for everyone.When to DIY and When to Hire a Pro
Painting interior window casing can be a good DIY project if the trim is in sound condition, the home is not a lead-paint concern, and you are willing to spend time on prep. Exterior trim replacement, stain matching, rot repair, and pre-1978 paint disturbance are usually better handled by a qualified contractor.
Good DIY Candidates
DIY can make sense when the casing is indoors, already painted, firmly attached, free of rot or swelling, and only needs cleaning, light sanding, spot priming, and two coats. A typical DIY window may require 2 to 4 hours of hands-on work spread across a day or two because primer and paint need dry time.
Use painter’s tape where needed, but do not rely on tape to fix poor brush control. Remove hardware or blinds when possible. Sand glossy trim with a fine sanding sponge, vacuum dust, wipe clean, then use a bonding primer if the existing coating is slick or questionable.
Hire a Pro When the Risk Is Higher
Hire a professional when exterior trim is failing, wood is soft, caulk joints are open, siding or flashing must be disturbed, windows are on the second story, or the trim is stain-grade. Also hire a pro for complex profiles, historical trim, dark PVC repainting, or any job where a mistake could trap water in the wall.
Stain matching is another strong pro candidate. Matching aged trim is not just picking a stain color. It may involve sanding depth, wood species, dye, pigment stain, glaze, toner, and topcoat sheen. A small mismatch on one casing can stand out for years.
Lead Paint, Permits, and Code Notes
If your home was built before 1978, assume lead paint may be present until testing proves otherwise. Federal EPA Renovation, Repair and Painting rules apply to contractors disturbing painted surfaces in many pre-1978 homes, child care facilities, and schools. Lead-safe work practices can add time and cost because the work area must be contained, dust must be controlled, and cleanup must be handled correctly.
The Tool Desk
Outbyte Driver Updater FREEFix the driver behind crashes, sound loss and screen glitchesFind Drivers →Outbyte PC Repair FREEClear out junk files and repair common Windows errorsFree Scan →Best Value
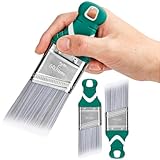
- 【What You Get】3pcs 2-Inch short handle angle paint brush, featuring synthetic bristles, stainless steel ferrule, and rubber grip with hanging hole. Use with all paints, easy to clean, simply rinse to remove paint and air dry for reuse. Size: 6.5"L x 2"W x 0.6"H, weigh 70 grams each.
- 【Premium Synthetic Bristles】Made of resilient, shed-free filaments that hold paint well and deliver smooth finishes without paint spills or brush streaks. Effortlessly achieve professional results on both large interior surfaces and intricate details.
- 【Clean, Crisp Edge Lines】Angled touch up paint brush can smoothly apply paint along edges and corners, easily creating sharp, clean lines. Synthetic bristles brush is suitable for all paints and stains, water- and oil-based paints, latex, gloss, varnishes, primers, enamel, etc.
- 【Rubber Short Handle】Short grip offers more precise control and enhanced flexibility in confined and tight spaces. Non-slip rubber ensures the least hand fatigue for comfy painting experience. Built to last, it’s a reliable choice for all your painting jobs.
- 【Versatile Use】Perfect trim brushes for painting walls and ceiling junctions, corners, edges, window frames, baseboard, furniture, moldings and more. Ideal paintbrush for home interior painting projects, touchups, furniture refinishing and trim work. A worthwhile investment for DIY enthusiasts and professionals.
Homeowners doing work on their own homes should still take lead dust seriously. Sanding old window trim can create fine dust in exactly the places children touch: sills, stools, and lower casing. Do not dry-sand unknown old paint casually. Testing is inexpensive compared with contaminating a room.
Permits are usually not required for simple interior repainting or replacing like-for-like interior casing, but exterior work can cross into permit territory if it involves window replacement, structural repairs, siding removal, water-resistive barrier work, or changes affecting energy-code compliance. Energy requirements can apply when windows are replaced, and tools such as REScheck are commonly used for documenting residential energy-code compliance. Local rules control, so check with the building department before exterior window replacement or major wall work.
Common Finish Mistakes Around Window Casings
The most common mistake is choosing sheen by looks only. Flat or eggshell paint may look calm on day one, but window trim gets touched, cleaned, and exposed to sun. High gloss has the opposite problem: it may be durable, but it shows every flaw unless the trim is prepared to a high standard.
Another common failure is painting over contamination. Glossy old oil paint, silicone residue, grime, wax, and failed caulk all interfere with adhesion. If a coating cannot bond, the finish system is already compromised before the first coat dries.
On exterior trim, the worst mistakes involve water. Do not skip end-grain sealing. Do not caulk drainage gaps. Do not use interior caulk outside. Do not assume paint will rescue rotten trim. If wood is soft, punky, or holding moisture, replacement or repair comes before finish.
Material mismatch is also expensive. MDF does not belong outside or at wet sills. Paint-grade mixed species should not be stained with expectations of a uniform high-end result. PVC should not be painted a dark color unless the manufacturer allows that color and coating system. Fiber cement should not be installed without following clearance, fastener, cut-edge, and caulking requirements.
Our Practical Recommendation
For a typical homeowner asking what finish to use on window casings, our recommendation is straightforward. Use satin enamel for most interior painted window trim. Upgrade to semi-gloss enamel where cleaning, moisture resistance, or sharper contrast matters. Use stain only when the casing is true stain-grade wood and you are willing to pay for better carpentry and finishing. Use 100% acrylic satin or semi-gloss exterior paint for exterior wood or fiber-cement trim, with proper primer and water-management details. Leave cellular PVC factory white unless you choose a manufacturer-approved vinyl-safe paint color.
The finish should match the material and the exposure. A good casing finish is not just the last coat you see. It is the full system: substrate, sanding, primer, caulk, flashing, coating, dry time, and maintenance. Get those pieces right, and window casings can look sharp and hold up for years. Skip them, and even expensive paint can fail early.
What’s actually slowing this PC down?
Pick the symptom - the matching free tool is one click away.
Frequently Asked Questions
Should window casings be satin or semi-gloss?
Satin is the best default for most interior window casings because it looks current and hides small flaws. Semi-gloss is better for kitchens, bathrooms, rental homes, kids’ rooms, and trim that needs frequent wiping.
Is paint or stain better for window trim?
Paint is better for most window trim because it is durable, forgiving, and works on paint-grade materials like MDF, finger-jointed pine, and poplar. Stain is best only for true stain-grade wood with consistent grain and clean carpentry.
Can I use MDF for window casings?
MDF is acceptable for painted interior casing in dry rooms. Avoid it at wet sills, bathroom windows with condensation, basement windows, exterior trim, or any location where the board may wick water.
What finish should I use on exterior window trim?
Use a high-quality 100% acrylic exterior paint in satin or semi-gloss over properly primed wood or approved fiber-cement trim. Do not use flat paint on exterior trim, and make sure flashing, caulk joints, and drainage details are correct.
Recommended Free Tools
Do I need to prime window trim before painting?
Yes, primer is needed on bare wood, patched areas, stained trim being converted to paint, glossy old coatings, and many factory-primed or questionable surfaces. Exterior wood should be primed on all sides and cut ends whenever possible.
Can PVC window trim be painted dark colors?
Only if the PVC trim manufacturer approves the color and coating system. Dark non-approved colors can absorb heat and cause PVC trim to distort, especially on sunny elevations.
Quick Recap
Product prices and availability are accurate as of the date/time indicated and are subject to change. Any price and availability information displayed on Amazon at the time of purchase will apply.