The Tool Desk
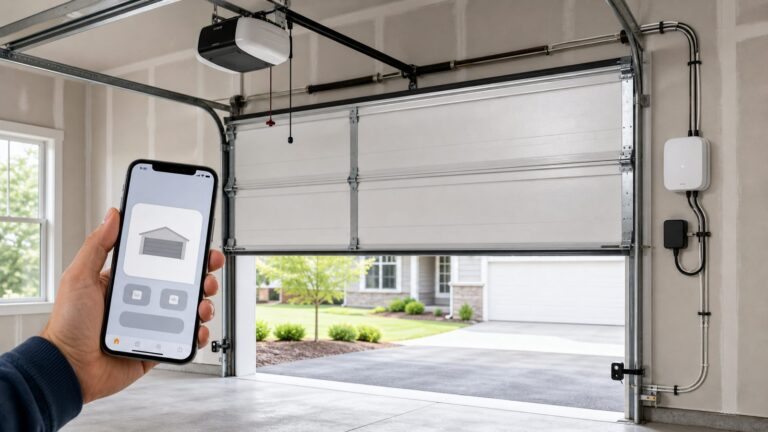
Outbyte Driver Updater FREEScan for outdated or missing drivers - takes under a minuteDriver Scan →Outbyte PC Repair FREEClear out junk files and repair common Windows errorsFree Scan →For most US homeowners, the best way to add HomeKit support to a garage door is to install a compatible retrofit controller on the existing opener. That is the practical answer if the opener is less than about 10 to 15 years old, the door moves smoothly, the photo-eye safety sensors work, and the garage has reliable 2.4 GHz Wi-Fi near the motor head.
A full garage door opener replacement only makes sense when the opener is noisy, failing, missing modern safety features, incompatible with common smart controllers, or attached to a door that already needs mechanical work. On our job sites, we treat the smart-home part as the last step, not the first. A connected garage door is still a large moving door with springs, tracks, rollers, sensors, wiring, and a motor. If those basics are wrong, HomeKit will not fix them.
In 2026 pricing, a DIY HomeKit retrofit usually lands around $40 to $130 for the controller, plus $0 to $30 for adapters, clips, extra wire, or a small raceway. A professional smart-controller installation commonly runs $125 to $300 in labor when the existing opener is compatible and working. Replacing the opener is a different budget: national installed costs commonly fall around $300 to $900, with basic smart chain-drive units starting near $189 for hardware and better belt-drive, battery-backup, camera, or wall-mount models running roughly $269 to $649 before labor.
Start With the Right Decision: Retrofit, Replace, or Repair First
Before buying a HomeKit device, make this decision in order: repair the door if it is unsafe, replace the opener if it is worn out or noncompliant, or retrofit a controller if the system is mechanically sound.
#1 Best Overall

- Compatibility Note: This smart garage door remote (MSG150HK) is designed specifically for the vast majority of Chamberlain, Lift-Master, and Craftsman brand openers (𝗡𝗼𝘁 𝘄𝗼𝗿𝗸𝘀 𝘄𝗶𝘁𝗵 𝗼𝘁𝗵𝗲𝗿 𝗯𝗿𝗮𝗻𝗱𝘀). Work with openers using Security+ 1.0 and Security+ 2.0 protocols (Not Security+ 3.0/Green/White learn button ). For other opener brands, please check out our universal smart garage door remote (MSG100HK) for a smooth smart upgrade.
- Remote Control: Use the Meross app to open or close your garage while cooking, at work, or on vacation. Let in family, guests, or couriers even when you're not home.Ideal for busy parents, frequent travelers, or anyone tired of hiding a spare key. No monthly fee or any other subscription fee!
- Voice Control: Open or close your garage while carrying groceries or handling kids. Just say "Hey Siri, close the garage" or "Alexa, open the garage door" — no phone needed. Compatible with Apple HomeKit, CarPlay, Alexa, Google Assistant, and SmartThings.
- Enhanced Security: Check open/close history in the app. Get alerts when the door is left open too long, left open overnight, or every time it opens or closes. You can also set the door to close automatically after a certain amount of time, or schedule a specific closing time. You’ll never have to wonder again if you forgot to close the garage door.
- Easy to Install: Installation is much easier than you may think. 𝐍𝐎 𝐧𝐞𝐞𝐝 𝐭𝐨 𝐢𝐧𝐬𝐭𝐚𝐥𝐥 𝐚𝐝𝐝𝐢𝐭𝐢𝐨𝐧𝐚𝐥 𝐚𝐝𝐚𝐩𝐭𝐞𝐫 𝐨𝐫 𝐰𝐢𝐫𝐞𝐝 𝐝𝐨𝐨𝐫 𝐬𝐞𝐧𝐬𝐨𝐫𝐬(𝐕𝐬. 𝐚𝐥𝐥 𝐩𝐞𝐞𝐫𝐬). Ideal for renters who can't modify equipment or homeowners who want a quick DIY upgrade. Note: 2.4GHz WiFi network support only
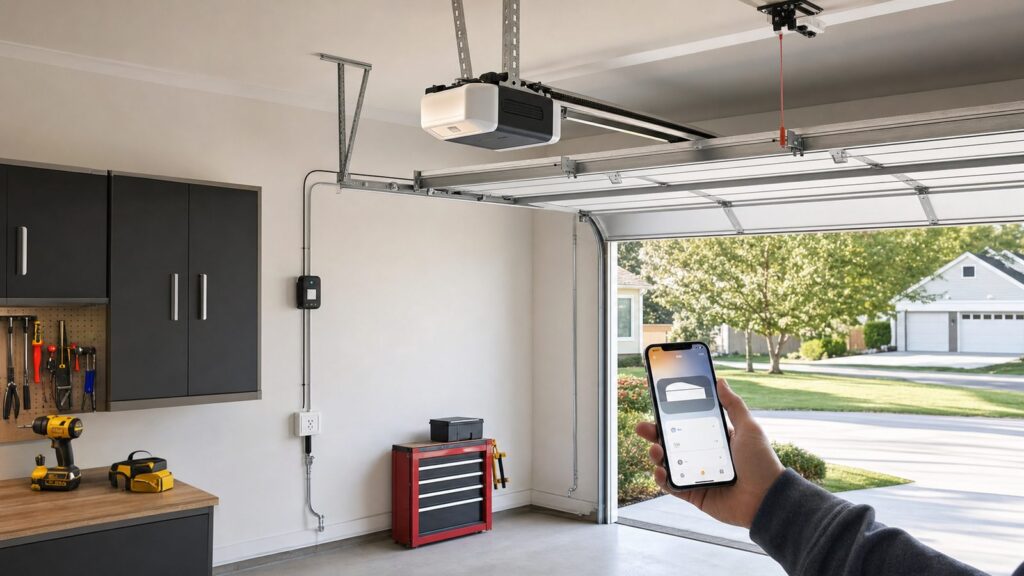
A retrofit controller is the right path when the opener reliably opens and closes from the wall button and remotes, the door stays balanced when disconnected from the opener, the photo eyes are present and aligned, and there is an outlet near the opener. Most retrofit kits connect to the same low-voltage wall-button terminals on the opener and use a separate wired or wireless position sensor to tell HomeKit whether the door is open or closed.
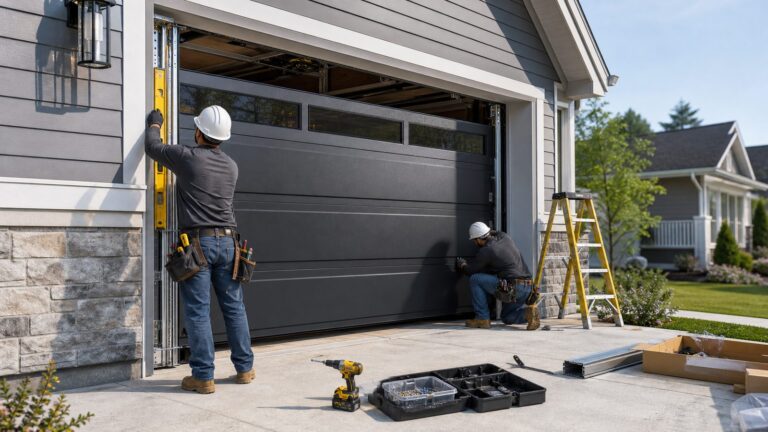
Replacement is smarter when the opener reverses randomly, grinds, hums, overheats, lacks working safety sensors, has damaged wiring, or is paired with a door that binds in the track. If the door is heavy at the opener arm, drops when released, or will not stay halfway open during a balance check, call a garage door technician before adding automation. Springs and high-tension hardware are not a smart-home project.
Repair comes first when the opener is fine but the door is not. Worn rollers, bent tracks, weak springs, loose brackets, and misaligned photo eyes all create unreliable smart operation. A HomeKit controller can send a close command, but it cannot make an unsafe door safe.
The Best HomeKit Garage Door Options in 2026
The best product depends on how much you value native Apple Home support, local control, auto-opening behavior, multi-door coverage, and how comfortable you are with wiring or bridges.
Best Low-Cost Native HomeKit Retrofit: Meross MSG100 or MSG200
Meross is the budget-friendly path for many homeowners who want the garage door to appear directly in the Apple Home app. The HomeKit-compatible MSG100 is commonly listed around $49.99, and the multi-door MSG200 line can make sense when you have more than one overhead door. Expect a typical DIY install time of 45 to 90 minutes on a compatible opener.
The Meross controller usually wires into the opener’s wall-button terminals and uses a magnetic door sensor. That sensor placement matters. We prefer mounting the sensor where it is protected from impact, vibration, and stored items, with the wire clipped neatly along framing or trim. In a finished garage, low-voltage cable should be routed in a clean raceway or along existing trim, never left dangling across the ceiling or near moving hardware.
The main caution is compatibility. Some Chamberlain and LiftMaster Security+ 2.0 openers need an accessory adapter or a different approach. Check the opener model number and learn-button color before ordering.
Best Polished Homeowner Option: Tailwind iQ3
Tailwind iQ3 costs more, but it is a strong fit for homeowners who care about reliable auto-open behavior, multi-platform support, and fewer workaround headaches. Current direct pricing has the Tailwind iQ3 2.0 around $89.99 and the iQ3 2.1 around $99.99.
Recommended Free Tools
Tailwind’s best use case is a household that wants the garage to open automatically based on vehicle arrival, not just a phone’s vague location. That distinction matters. We are cautious with any automation that opens a garage door solely from weak presence signals. A vehicle-aware setup is more deliberate and usually easier to trust.
For homeowners who want Apple Home control but also have Android users, Alexa, Google Home, or multiple vehicles in the household, Tailwind is often the cleaner long-term choice.
Best for Gates, Cameras, and Multi-Door Layouts: iSmartGate Lite or Pro
iSmartGate fits homes where the garage is not a simple one-door setup. It can be a good choice for multi-door garages, gate control, and camera-oriented installations. Depending on the Lite or Pro kit, sensor count, door count, and camera bundle, homeowners should expect this category to land roughly in the $100 to $200-plus range.
We would look at iSmartGate when a homeowner wants more than basic open-close control. For example, a detached garage with two doors, a driveway gate, and a camera requirement may justify the extra cost. It is less compelling if all you need is one standard sectional garage door showing up in Apple Home.
Rank #2

- Works with Most Models: The smart garage door opener(MSG100HK) is work with 200 brands and over 1600 models. Compatible with openers using Security+ 1.0 and Security+ 2.0 protocols (does not support Security+ 3.0 ). If your garage door requires an extra adapter, please contact us. We'll ship the adapter to you at no additional cost.
- Voice Control: You can control your devices hands-free, just give voice commands to turn on/off the connected devices. Compatible with Apple HomeKit, Siri, Amazon Alexa, Google Assistant, and CarPlay. Please scroll down and check the "Product guides and documents - User Manual" for more product information
- Remote Control: You can turn the garage door on/off from anywhere with internet access via the Meross app. To let in your family, guests, or couriers through the garage door while you are cooking or not at home. No monthly fee or any other subscription fee! Note: 2.4GHz WiFi network support only
- More Precise and Stable: It comes with a high-sensitivity wired sensor that monitors the status of the garage door more accurately and the signal stays stable. And you can check the garage door open/ close operation records through the app. Stay alert by different notification modes such as garage door open/ close status, overtime notification, and overnight notification to remind you to close the garage door
- Easy to Install: Installation is much easier than you may think. Please refer to our installation guide and video tutorial and make sure your WiFi strength is acceptable near your garage door. If you meet any issue about meross garage opener remote, simply contact meross support team
Best Advanced Local-Control Path: ratgdo or Konnected-Style Boards
For many Chamberlain and LiftMaster Security+ 2.0 openers, ratgdo and similar Konnected-style boards can expose richer local control and status than a basic dry-contact controller. This is the enthusiast or pro-integrator lane. It can be excellent, but it is not the simplest native HomeKit recommendation.
In most cases, these boards are used through Home Assistant and then bridged into Apple Home through HomeKit Bridge. That gives advanced users more local control over door status, opener lights, obstruction events, and other data. It also adds another system to maintain. We recommend this path for homeowners who already run Home Assistant, or for clients using a low-voltage integrator who can document and support it.
Comparison Table: Which HomeKit Garage Door Path Fits?
| Option | Typical Hardware Cost | Best For | Watchouts |
|---|---|---|---|
| Meross HomeKit controller | About $40-$80 for many single-door setups | Lowest-cost native Apple Home control | Check opener compatibility and possible adapter needs |
| Tailwind iQ3 | About $89.99-$99.99 | Vehicle-based auto-open, mixed-platform homes | Costs more than basic retrofit kits |
| iSmartGate Lite/Pro | Commonly $100-$200+ | Multi-door, gate, and camera-oriented installs | Can be more system than a single garage needs |
| ratgdo/Konnected-style board | Low-cost board plus accessories | Advanced local control, Home Assistant homes | Usually not simple native HomeKit; requires bridge knowledge |
| New smart opener | About $300-$900 installed | Old, noisy, failing, or unsafe opener | Higher cost, possible electrical or door repairs first |
Do Not Rely on Chamberlain myQ Home Bridge as a New Plan
Do not assume myQ means HomeKit. Chamberlain’s myQ Home Bridge used to be the direct path for some Apple Home users, but Chamberlain says both myQ and HomeKit functionality for that bridge are no longer supported as of June 15, 2024. That makes it a poor new recommendation for a 2026 homeowner.
If you already own one, your existing setup may behave differently depending on your installation, network, and account history. But for a new project, we would not design around discontinued support. Choose a current native HomeKit retrofit controller, a supported local-control board through Home Assistant, or replace the opener if the existing hardware is at the end of its service life.
What’s actually slowing this PC down?
Pick the symptom - the matching free tool is one click away.
What Apple HomeKit Actually Adds
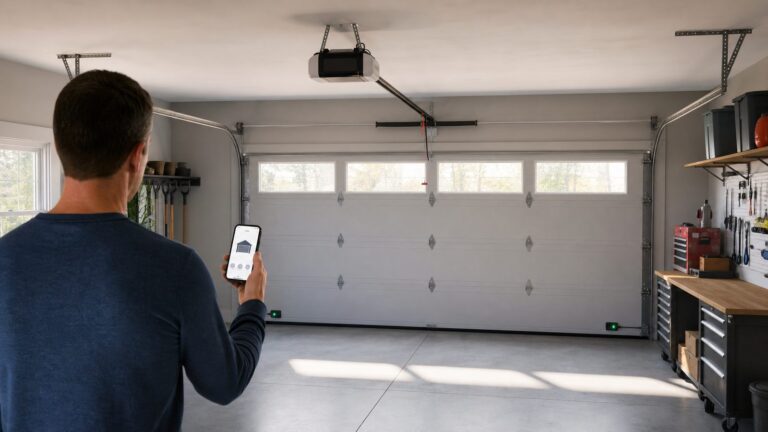
HomeKit support gives you more than a phone button. A properly configured garage door can show open or closed status in the Apple Home app, send alerts, participate in automations, and appear in activity history when supported by the home setup.
For remote control and notifications, plan on having a HomePod or Apple TV set up as a home hub. Without a hub, local control may still work when you are on the same network, but the garage door is much less useful as a remote access point. In practical terms, if a homeowner asks for HomeKit garage control, we verify the Apple home hub before we close out the project.
Name the device clearly. Use “Garage Door” or “North Garage Door,” not a vague device name like “Opener 1.” Put it in the correct Apple Home room. Add only named household members who need access. Do not share one Apple ID across the family. Use two-factor Apple account security. A garage door is often the largest moving access point into the house, so treat digital access like a real key.
Pre-Install Checklist Before You Buy Anything
Take 15 minutes to collect the details before ordering a controller. This prevents most compatibility and nuisance problems.
First, find the opener model number. It is usually on the motor head under the light cover or on a side label. Photograph the label, the wall-button terminals, the learn button, and the photo eyes. Note the learn-button color if you have a Chamberlain, LiftMaster, or Craftsman opener.
Second, test the wall button. Most retrofit controllers simulate that button. If the wall button is intermittent, fix that wiring first.
Third, check the safety sensors. Photo eyes are commonly mounted near the bottom of the track, often around 4 to 6 inches above the floor. They should face each other cleanly, stay lit according to the manufacturer’s indicator pattern, and reverse the door when the beam is interrupted during closing. Do not move them higher to avoid a nuisance problem. Fix the alignment, wiring, bracket, or obstruction.
Fourth, check the door balance. With the door closed, pull the emergency release only if you understand the procedure and the door is not damaged. Lift the door by hand. A balanced residential sectional door should move smoothly and stay near the halfway point without slamming down. If it feels unusually heavy, stop and call a pro.
Free tools Windows power users keep installed
One-click scans. No signup required.
Rank #3

- Voice control: Garage Door Opener is compatible with Apple HomeKit, Apple Watch, Siri. Control your smart Opener through voice commands, easily turn on/off (E.g. "Hey Siri, open Garage Door ")
- HomeKit remote control: To enable the HomeKit remote control, you need to use a IOS device,and set these Apple devices as Homekit bridges and connect them to your home WiFi network. and there is no distance limit. Suitable for any 2.4GHz or dual-band WiFi router. No hub is required.
- Remote Monitoring: You can open or close the door by the APP. You can check the garage door open or closed state in real time. You can authorize multiple people to access your garage.
- WIDE COMPATIBILITY: You can only use one controller per garage door opener. Compatible with most general garage door openers.
- Timer: You can set schedules to open and close your garage door.
Fifth, test Wi-Fi at the opener. Many controllers need 2.4 GHz Wi-Fi, and garages are common dead zones because of exterior walls, fire-rated drywall, appliances, metal doors, and distance from the router. A signal that works on a phone near the kitchen may fail at the ceiling-mounted opener. If the signal is weak, budget for a better access point or mesh node before blaming the smart controller.
Cost Breakdown: DIY, Pro Retrofit, or Full Replacement
| Project Type | Typical 2026 Cost | Typical Time | What Is Included |
|---|---|---|---|
| DIY HomeKit retrofit | $40-$130 controller plus $0-$30 supplies | 45-90 minutes | Controller, sensor, basic wiring, app setup |
| Pro smart-controller install | $125-$300 labor, plus hardware | 1-2 hours for a standard door | Mounting, wiring, sensor placement, testing, cleanup |
| Multi-door smart retrofit | $100-$250+ hardware, plus labor | 2-4 hours depending on routing | Multiple sensors, cleaner wire management, naming, testing |
| Full opener replacement | Commonly $300-$900 installed | 2-4 hours per opener | New opener, rail, controls, safety setup, force and travel adjustment |
| Door or opener tune-up | Commonly $100-$300 | 1-2 hours | Inspection, adjustment, lubrication, minor corrections |
Cost swings come from the number of doors, opener protocol, adapter needs, sensor type, garage Wi-Fi quality, finished ceiling or wall routing, battery backup requirements, camera integration, local labor rates, and whether an electrical receptacle must be added.
If a receptacle is missing at the opener location, do not run an extension cord across the ceiling as a permanent fix. Have an electrician add a proper outlet. New electrical work may trigger permit requirements depending on the jurisdiction, especially when adding a ceiling receptacle, modifying a circuit, or working in a finished attached garage.
When to DIY vs When to Hire a Pro
DIY is reasonable when the opener is compatible, the wall-button terminals are accessible, the door is balanced, the photo eyes work, the garage has strong Wi-Fi, and you are comfortable with low-voltage wiring. Most basic controllers use small-gauge low-voltage leads, adhesive or screw-mounted sensors, and app-based pairing. A careful homeowner can do that in under two hours.
Hire a pro when the opener wiring is unclear, the door is heavy or out of balance, the opener behaves inconsistently, the garage has finished surfaces that need clean concealed routing, you have multiple doors, you want Home Assistant integration, or you need an outlet added. Also hire a pro if anyone has bypassed safety sensors in the past. That is a stop-work condition, not a configuration issue.
On our projects, a clean smart-controller install includes labeled low-voltage routing, protected sensor wire, no loose leads near the rail or torsion shaft, verified open and closed status, a reversal test, Apple Home naming, and a basic handoff showing who has access. For clients, we like a simple commissioning note: device model, opener model, sensor location, Apple Home room/name, before-and-after photos, reversal-test result, and warranty or maintenance notes.
Independent reader supportYour contribution helps us test, update, and keep practical guides available for everyone.Safety, Code, and Liability Notes Homeowners Should Not Skip
Automatic residential garage door operators are covered by safety standards, and modern installations rely on working entrapment protection. The practical homeowner version is simple: the door must reverse when it hits an obstruction, and it must not close through a blocked photo-eye beam.
Never bypass photo eyes because HomeKit will not close the door reliably. If a controller command exposes a closing problem, the correct answer is to repair the safety device, wiring, alignment, brackets, tracks, or opener settings. Raising the sensors, taping them together, or aiming them away from the door opening creates a safety and liability problem.
Crashes, No Sound, or Screen Glitches?
Random freezes, missing sound and display glitches usually trace back to one bad driver. Find and replace yours safely.Free scan · under a minutePC Slower Than It Used to Be?
A free scan shows the junk files, broken settings and background clutter dragging Windows down - then fixes them in one click.Free scan · Windows 10 & 11Keep low-voltage control wiring away from the belt, chain, screw drive, torsion spring, drums, lift cables, hinges, rollers, and door sections. Use insulated staples or clips sized for low-voltage cable, not crushed fasteners. In finished garages, use surface raceway where needed. Around vehicles, ladders, bikes, and storage zones, assume anything loose will eventually be snagged.
Be careful with automations that open the door. A close automation can still be risky, but an open automation is a security event. We avoid rules that open a garage solely because a phone is near the house. Better triggers include a deliberate user command, CarPlay/Siri confirmation, or a vehicle-based system with stronger presence logic.
Installation Details That Separate a Good Setup From a Frustrating One
Sensor placement is the most common source of wrong status. Magnetic reed sensors need consistent alignment when the door is fully closed. Tilt or vibration sensors need a stable mounting location on the top section and must tolerate heat, cold, and door movement. If the Home app shows open when the door is closed, the sensor is usually misaligned, mounted on a flexing panel, too far from the magnet, or losing wireless signal.
Rank #4
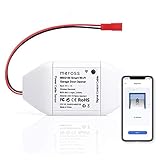
- Be Smart: Make your existing garage door smart. Remote and Voice Control, just tapping the meross app from anywhere or speaking to your Alexa, Google Assistant or SmartThings devices. To let in your family, guests or couriers through the garage door while you are cooking or not at home. No monthly fee or any other subscription fee!
- Works with Most Models: The smart garage door opener is work with 200 brands and over 1600 models (adapter maybe required). Support the openers using Security+ 1.0 and Security+ 2.0 protocols (Not Security+ 3.0 ). If your garage door openenr requires an extra adapter, please contact us. We'll ship the adapter to you at no additional cost.
- Multiple Notification Modes: Stay alert by different notification modes such as garage door open/ close status, overtime notification and overnight notification to remind you close the garage door. And you can check the garage door open/ close operation records through the APP.
- More Precise and Stable: It comes with a high sensitivity wired sensor which monitors the status of garage door more accurate and the signal stays stable. With adapter convert 110v to 5v, much safer.
- Easy to Install: Installation is much easier than you may think. Pls make sure your wifi strength is acceptable near your garage door. If you meet any issue about meross garage opener remote, simply contact meross support team
Wi-Fi is the second common problem. Many smart garage devices still prefer 2.4 GHz because it travels farther than 5 GHz. If the controller drops offline, do not keep resetting it. Measure the signal at opener height with the garage door closed. Metal doors and vehicles can change the radio environment. A mesh node in the house may not cover a detached garage; a wired access point or better-positioned node may be needed.
Quick wins for a faster PC:
Repair Windows errors before they cause bigger problemsFix Now →Fix the driver behind crashes, sound loss and screen glitchesFind Drivers →Power is third. The opener outlet should be permanent, accessible, and appropriate for the garage environment. If the opener is plugged into a GFCI-protected circuit, understand what else is on that circuit. A tripped GFCI can make both the opener and smart controller appear dead.
Finally, label the system. A small label on the opener noting the smart-controller model and installation date helps the next service technician. It also helps future homeowners understand what has been added to the low-voltage terminals.
Our Practical Recommendation
If your garage door and opener are in good condition, choose a native HomeKit retrofit controller first. Meross is the value pick for a straightforward single-door Apple Home setup. Tailwind is the better homeowner experience when auto-open behavior and mixed-platform support matter. iSmartGate is worth a look for multi-door, gate, or camera-heavy installations. ratgdo or Konnected-style boards are powerful for advanced local-control homes, especially where Home Assistant is already part of the system.
If the opener is near the end of its life, noisy, unreliable, or attached to a door with safety issues, spend the money on the door and opener first. A $50 controller on a failing opener is not a good upgrade. A properly installed $300 to $900 opener replacement with working safety devices, quiet operation, clean wiring, and then HomeKit support is the better long-term result.
Do these 3 things before closing this tab:
1Scan for outdated or missing drivers - takes under a minute2Clear out junk files and repair common Windows errors3Fix the driver behind crashes, sound loss and screen glitchesThe best HomeKit garage door setup is not the one with the longest feature list. It is the one that opens when it should, stays closed when it should, reports status correctly, protects people and property, and can still be serviced five years from now.
Frequently Asked Questions
What is the best way to add HomeKit to an existing garage door opener?
For most homes, the best method is a native HomeKit retrofit controller wired to the opener’s wall-button terminals with a separate door-position sensor. Meross is usually the budget path, Tailwind is stronger for auto-open behavior, and iSmartGate fits more complex multi-door or gate setups.
Does Chamberlain myQ still work with Apple HomeKit?
Chamberlain’s myQ Home Bridge is not a good new recommendation. Chamberlain says myQ and HomeKit functionality for that bridge are no longer supported as of June 15, 2024. New Apple Home projects should use another compatible controller or a supported local bridge setup.
How much does it cost to add HomeKit support to a garage door?
A DIY retrofit commonly costs $40 to $130 for the controller, plus $0 to $30 for small supplies or adapters. Professional installation is commonly $125 to $300 in labor when the opener is compatible and already working properly.
Do I need an Apple TV or HomePod?
Yes, if you want the best Apple Home experience away from home. Remote control, notifications, automations, and activity history work best when the home has a HomePod or Apple TV acting as the Apple Home hub.
Is it better to replace the opener instead of adding a controller?
Replace the opener if it is noisy, failing, missing working safety sensors, incompatible, or connected to a door that binds or is out of balance. A smart controller is best for a safe, reliable opener that already works well.
Why does my HomeKit garage door show the wrong status?
The most common causes are a misaligned sensor, a magnet mounted too far from the reed switch, a sensor placed on a vibrating door section, weak wireless signal, or poor Wi-Fi at the opener. Fix the sensor placement before replacing the controller.
Quick Recap
Product prices and availability are accurate as of the date/time indicated and are subject to change. Any price and availability information displayed on Amazon at the time of purchase will apply.
What’s actually slowing this PC down?
Pick the symptom - the matching free tool is one click away.