What’s actually slowing this PC down?
Pick the symptom - the matching free tool is one click away.
The practical answer is this: space most traditional workbench dog holes 4 to 6 inches on center, but do not start by copying a grid. Start with the vise. Put the first dog hole just under the vise dog’s usable maximum opening, then repeat that spacing, or a smaller spacing, down the bench. That prevents the dead zone where a board is too wide for one hole and too narrow for the next.
For a typical American woodworking bench, 3/4-inch round dog holes are still the broadest standard for bench dogs, holdfasts, and hold-down clamps. For a modern MFT-style assembly or track-saw top, use 20 mm holes on 96 mm centers. Those two systems are close, but not the same: 20 mm is about 0.787 inch, so a 20 mm accessory may not fit a 3/4-inch hole, and a 3/4-inch dog may be sloppy in a 20 mm hole.
On our job sites and in cabinet-shop setups, we treat dog holes like layout lines in a kitchen cabinet run: accuracy matters more than quantity. A straight front row of well-placed holes will do more work than a bench top covered in holes that fight the vise, hit the base, or fill drawers with sawdust.
Best Dog Hole Spacing for Most Workbenches
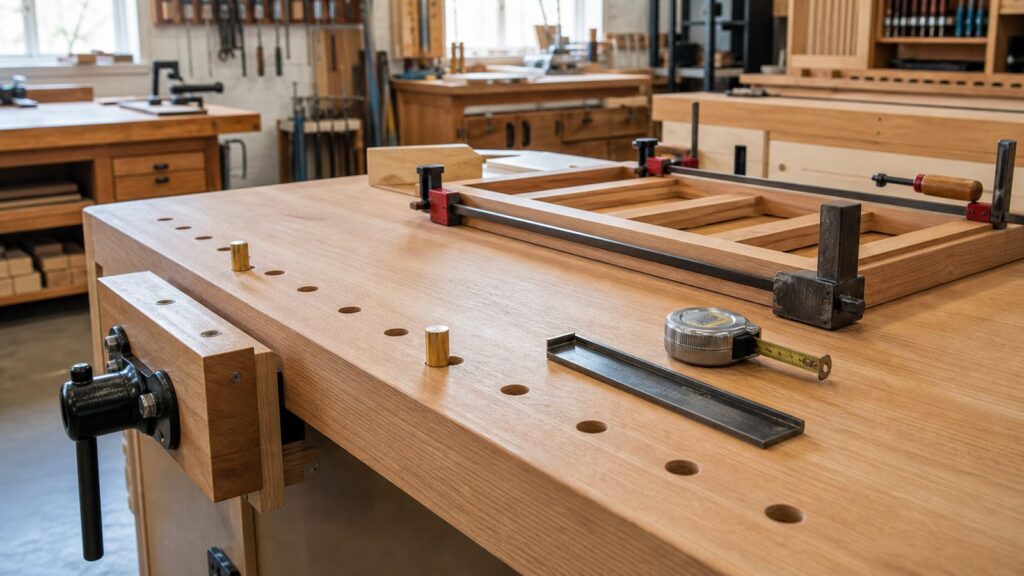
For a traditional woodworking bench, use 4 inches, 5 inches, or 6 inches on center. The best single recommendation for most builders is 4 to 5 inches on center along the front row. That gives fine enough adjustment for cabinet parts, face frames, drawer parts, panels, and narrow boards without drilling an excessive number of holes.
A 6-inch spacing can work well on a long hand-tool bench with a tail vise or wagon vise, especially if the vise has generous travel. The tradeoff is that small changes in board length or width may require more fiddling with spacers, battens, or a different clamping method. If you build cabinets, install trim, or handle a mix of solid wood and plywood parts, 4-inch or 5-inch spacing usually feels better in daily use.
#1 Best Overall

- 【Obtain Patents】Patented 3/4" Work bench dog hole clamps woodworking. 2 Pack/Set. Quick clamp and release design. Easier to handle than common hold down clamps woodworking. Bench dog clamps are your ideal woodworking tools and accessories
- 【Fit with 3/4" Bench Dog Hole】Work bench dog clamps for bench dogs 3/4 inch workbench (Thickness 18mm to 30mm). Upgraded bench dog hole locking design to hold the workpiece more securely. The clamping block is equipped with a rubber protection pad to increase the clamping force and prevent the workpiece from being damaged
- 【Up to 155 Lbs Clamping Force】Workbench dog clamps for woodworking offer up to 155 Lbs clamping force. Bench dogs woodworking 3/4 is designed for holding wood workpiece edge. This bench dog clamps 3/4 is convenient for you to work on wood pieces surface of any shape and size, and fix the wood pieces anywhere on the woodworking bench
- 【Premium Material】Bench dog clamps 19mm is made of high-strength nylon and 45# steel for greatly increased durability and reliability, can hold workpieces safely and accurately. Bench dog 3/4 clamp is manufactured and designed to exacting standards, and are guaranteed to not let you down
- 【Practical and Convenient】These workbench clamps feature simple operation and easy installation. Widely compatible with most standard workbenches, they are a thoughtful practical gift choice for woodworking hobbyists and DIY lovers
For MFT-style work, the standard is not 4 inches. It is 20 mm holes spaced 96 mm apart, which is about 3.78 inches. That layout is useful when you want repeatable squareness with rail squares, parf dogs, guide rails, and sheet-goods fixtures. It is less about planing pressure and more about precise registration.
Dog Hole Layout Comparison
The table below is the decision point. Pick the system based on the work you actually do, not on the most impressive-looking bench top online.
| Layout | Best use | Typical spacing | Hole size | Pros | Watch-outs |
|---|---|---|---|---|---|
| Traditional front row | General woodworking, cabinet parts, hand-tool work | 4-6 inches on center | 3/4 inch | Works with many US bench dogs and holdfasts | First hole must match vise travel |
| Fine cabinet layout | Doors, face frames, small parts, precise clamping | 3-4 inches on center near the vise | 3/4 inch | More clamping positions, fewer awkward gaps | More holes to drill and maintain |
| Long hand-tool bench | Planing long boards and slabs | 5-6 inches on center | 3/4 inch | Clean top, fewer holes, good with tail vise | Less flexible for short parts |
| MFT-style grid | Track-saw work, repeatable square cuts, assembly | 96 mm, about 3.78 inches | 20 mm | Excellent for guide-rail systems and fixtures | Not always compatible with 3/4-inch accessories |
| Hybrid cabinet-shop setup | Mixed solid wood and sheet goods | 3/4-inch front row plus 20 mm auxiliary top | Both systems, separated by purpose | Best all-around flexibility | Requires discipline so accessories do not get mixed |
Start With the Vise, Not a Tape Measure Pattern
The vise decides the first spacing. Close the vise, raise the vise dog, and measure from the working face of that dog to the farthest point where the vise still clamps securely. If the usable dog-to-dog capacity is 5-1/2 inches, the first bench hole should be slightly less than that, commonly 5 inches from the vise dog. Then repeat that same spacing, or a smaller spacing, down the row.
Windows Errors? Fix Them Before They Spread
Repair common Windows errors and clear accumulated junk for a smoother, more stable PC - no reinstall needed.Free scan · no reinstallOutdated Drivers Are Slowing You Down
One free scan finds every outdated or missing driver and matches the right update for your exact hardware.Free scan · exact hardware matchThat rule is more reliable than saying every bench should use 4 inches or 6 inches. A bench with a 7-inch tail vise travel can handle wider spacing. A small front vise with only 4 inches of reliable travel needs tighter spacing. The goal is simple: every board width should fall within a clamping position.
Here is a practical layout method. Install the vise first. Put the movable dog in the vise. Close the vise until it has about 1/2 inch of comfortable tightening travel remaining. Mark the first dog hole on the bench top at that point. If that distance is 4-3/4 inches, use 4-1/2 inches or 4 inches for the rest of the row. If it is 6-1/4 inches, use 6 inches or 5 inches. Do not place the first hole farther away than the vise can reach.
For a tail vise or wagon vise, run the row parallel to the front edge. For a front vise used with dogs, keep the holes aligned with the vise dog, not centered on the bench because it looks balanced. Workholding is judged by whether the board stays put, not by symmetry.
How Far From the Front Edge Should Dog Holes Be?
A front row of dog holes usually belongs about 2 to 3 inches from the front edge of the bench. That is close enough for edge work, planing stops, and cabinet parts, but far enough back to avoid weakening the edge or crashing into the apron, vise hardware, leg joinery, bolts, or screws.
Free tools Windows power users keep installed
One-click scans. No signup required.
If your bench has a thick front apron, a shoulder vise, a leg vise, or a large undercarriage, inspect from below before drilling. We have seen benches where a perfect-looking 3-inch offset would have drilled straight into a vise guide rod or a leg tenon. Mark the underside structure on the top with painter’s tape before you commit.
For a cabinet bench, one front row often does most of the daily work. Add a second row only if you need holdfast positions or clamping options away from the edge. A full field of holes may help on an assembly table, but on a planing bench it can become a place for dust, screws, finish drips, and small hardware to disappear.
3/4 Inch vs 20 mm Dog Holes
In the United States, 3/4-inch round holes remain the traditional default. They fit a large range of bench dogs, holdfasts, planing stops, and hold-down clamps sold for woodworking benches. A 3/4-inch brad-point bit, auger bit, Forstner bit, or router jig is also easy to source.
A 20 mm hole is the standard for MFT-style tops. The 96 mm grid is designed around repeatable setups, especially for track-saw cuts, guide rails, right-angle fixtures, and European-style accessories. If your shop breaks down a lot of plywood, melamine, MDF, cabinet sides, and door panels, a 20 mm grid can be extremely useful.
The Tool Desk
Outbyte Driver Updater FREEScan for outdated or missing drivers - takes under a minuteDriver Scan →Outbyte PC Repair FREEClear out junk files and repair common Windows errorsFree Scan →Rank #2

- Perfect Combination: Provides clamping force in three directions. (Horizontal and vertical clamping force) Prevents the plate from rising due to squeezing from both sides. Better fixation effect and wider application.
- No Trace: This woodworking clamp is made of high-quality metal and designed with silicone pads where it contacts the board, which protects the wood surface from damage when clamping and prevents any harm to the workpiece.
- Efficient and Convenient: Bench dog clamp with a ratchet wrench for continuous and fast tightening, producing high horizontal clamping force with minimal force. It is easy and convenient to use for both novice and experienced woodworkers.
- Universal size: These dog hole clamps fit holes in 3/4 inch (19 mm) benches and are ideal for a variety of woodworking tasks, including planing, cutting, and grinding.
- Wide range of applications: You can fix workpieces of almost any size or shape in any position on the workbench, and workpieces can be well fixed even on the top or edge of the table.
The mistake is assuming the two systems are interchangeable. They are not. A 20 mm hole is roughly 0.037 inch larger than a 3/4-inch hole. That difference sounds small, but it matters when a bench dog is supposed to register square or a hold-down clamp needs to bite. Some accessories tolerate the mismatch. Precision dogs and rail setups usually do not.
For a professional cabinet or remodel shop, the best compromise is often a hybrid setup: a traditional 3/4-inch front row in the main bench and a replaceable 20 mm, 96 mm auxiliary top for track-saw work. That keeps hand-tool clamping strong and gives you modern sheet-good accuracy without turning one bench into a compromised catch-all.
Holdfast Holes Need Thickness and Testing
If you plan to use holdfasts, dog hole spacing is only half the question. The bench top thickness and hole quality determine whether the holdfast grips. Many traditional holdfasts are designed around 3/4-inch holes in a top roughly 1-3/4 inches thick or thicker. Gramercy, for example, lists its holdfasts for 3/4-inch holes in tops at least 1-3/4 inches thick, with about 6-1/2 inches of reach and up to about 7-1/4 inches of clamping capacity in a 2-inch top.
Thin 3/4-inch plywood or MDF tops often do not give traditional holdfasts enough wall thickness to wedge properly. You can still use clamps, cam-action hold-downs, or threaded fixtures, but do not expect a forged holdfast to behave in a thin sheet the way it does in a 3-inch hardwood slab. If you are building from sheet goods, laminate layers to reach 1-1/2 to 2-1/4 inches, or install hardwood sleeves in high-use holes.
Very thick tops can create the opposite problem. A holdfast may not flex and wedge correctly through a 4-inch or 5-inch top. In that case, relieve the underside locally around selected holdfast holes, or buy holdfasts made for thicker benches. Do not guess. Drill test holes in scrap that matches the real top thickness and material, then test the actual holdfasts and dogs you intend to use.
Round Holes, Square Holes, and What We Use
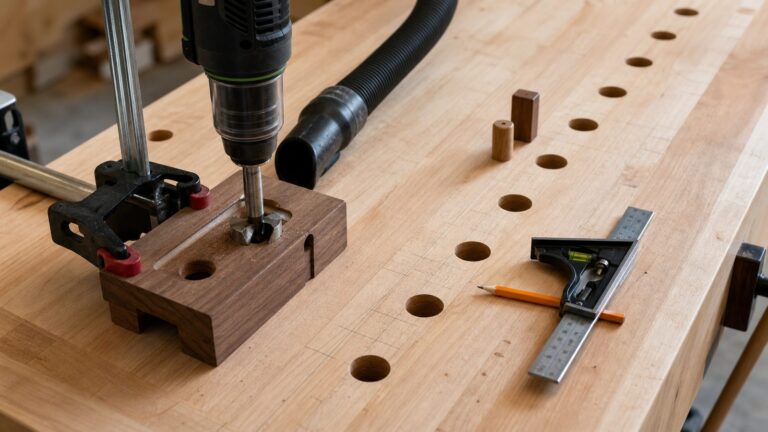
Round holes are the practical choice for most modern shops. They are easy to drill after the bench is assembled, easy to clean up with a chamfer bit, and compatible with the widest range of accessories. A good 3/4-inch bit and a drilling guide can produce a clean, plumb row without specialized joinery.
Square dog holes have a real advantage: they resist dog rotation. That helps with traditional wooden dogs, planing pressure, and certain tail-vise setups. The downside is layout and labor. Square holes are easiest to build into the bench during construction, not after the top is already glued up and mounted. They also commit you to a narrower accessory ecosystem.
For most cabinet-woodwork benches, we use round holes unless the bench is a dedicated hand-tool bench with a traditional square-dog tail vise. The reason is not fashion. It is serviceability. A round 3/4-inch system lets a carpenter add a holdfast hole later, replace a damaged dog, or set up a temporary stop without remaking the bench.
Cost to Add Dog Holes in 2026
Adding dog holes to an existing bench is usually a low-cost upgrade if the bench is structurally sound. In 2026 US pricing, a practical DIY upgrade often lands around $20 to $150 for a quality 3/4-inch or 20 mm bit, layout supplies, a chamfer bit, and a small set of dogs. If you buy a drilling guide, router template, or MFT layout system, the setup can climb over $100 and sometimes into the $250 range.
Bench dogs vary widely. Budget plastic dogs or pegs can be under $1 to $5 each. Aluminum or brass 3/4-inch dogs commonly run about $12 to $40 per pair or small set. Imported or cam-style 3/4-inch hold-down pairs are commonly around $30 to $50. Forged or US-made holdfasts often cost about $40 to $80 each.
Rank #3

- Includes: (12) workbench dogs
- Function: These workbench stops provide a safe, non-marring, and secure hold on your wood stock – anchoring them along the edge or on top of your workbench while giving you optimal control, leverage and accessibility for cutting, Painting, routing, and sanding applications
- Features: a practical, low-profile design that not only increases the precision of your woodworking projects, but improves the safety of your employees (and work pieces) as well – including removable padded bench brakes for an anti-slip work surface and a squared clamping pad that delivers a secure fit. Also included two 3/16” holes where dowels can be inserted for perfect painter's points.
- Premium build: the bench dogs were constructed out of high quality nylon, delivering strength and uniformity, and come with non-slip ethylene vinyl acetate (EVA) rubber bench brake inserts
- Specs: Total length of each bench dog is 2 inches with a slightly less than 3/4 inch diameter and 1-7/8 inches without the bench brake bump - installs easily by drilling a 3/4” (19mm) diameter bench dog hole and simply press into place
The bench top itself changes the economics. A 3/4-inch MDF 4×8 sheet has been commonly listed around $45 to $50 at major US retailers, while 3/4-inch plywood commonly ranges about $47 to $75 per 4×8 sheet depending on grade and veneer. Hardwood is a different category. Hard maple from woodworking suppliers can run about $6 to $8 or more per board foot, so a 60 to 100 board-foot hardwood top can put the lumber alone around $360 to $800 or more before waste, milling, shipping, or premium widths.
For full bench context, an economical laminated 2x construction-lumber or MDF plywood top may land around $150 to $400 in materials. A hardwood cabinet-shop bench with vises, dogs, holdfasts, and finish commonly reaches $600 to $1,500 or more depending on size, species, thickness, and hardware.
A Practical Layout for Cabinet Woodwork
For a cabinetmaker’s bench, use a layout that supports repeatable clamping without turning the top into pegboard. A strong starting point is one front row of 3/4-inch dog holes, 2-1/2 inches from the front edge, spaced 4 inches or 5 inches on center after the first hole is matched to the vise travel.
On a 72-inch bench, that might mean 12 to 16 holes in the main row. Add two to four holdfast holes in the field of the bench, placed where you actually assemble doors, secure face frames, or hold wide panels. If your bench is 30 inches deep, useful holdfast holes often land 8 to 12 inches back from the front edge and 18 to 24 inches apart, but avoid structure below.
For a 60-inch bench used mostly for small cabinetry, 4-inch spacing gives you more control. For an 8-foot bench used for doors, casing, and long boards, 5-inch or 6-inch spacing can be cleaner. If you cut sheet goods with a track saw, build or buy a separate 20 mm, 96 mm auxiliary panel instead of compromising the main bench row.
Where Not to Drill
Do not drill blindly through a bench top. Avoid leg tenons, aprons, stretchers, vise screws, guide rods, mounting plates, lag bolts, threaded inserts, hold-down tracks, electrical boxes, and drawers. If the bench has storage below, through-holes will drop shavings, screws, brad nails, washers, finish, and dust into that storage unless you add protection.
Quick wins for a faster PC:
Fix the driver behind crashes, sound loss and screen glitchesFind Drivers →Repair Windows errors before they cause bigger problemsFix Now →Scan for outdated or missing drivers - takes under a minuteDriver Scan →Before drilling, map the underside. Use a square to transfer leg and apron locations to the top with tape. Mark vise hardware. Mark drawer banks. Check the first 12 inches around the vise more carefully than the rest of the bench because that is where most hidden hardware lives.
Leave a light chamfer on the top edge of each hole. A sharp rim splinters, catches finish, and dents workpieces. The chamfer should be small enough that dogs still register firmly. Keep metal dogs lower than the workpiece surface when planing, sanding, or routing so you do not strike brass, aluminum, or steel with a cutting edge.
Rank #4
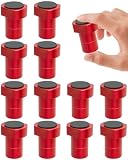
- 【Compatible Size】Includes 12 pack of bench dogs. Designed to seamlessly fit any standard 3/4" (19mm) dog holes, these bench dogs can be directly inserted into various MFT workbenches for effortless installation, ensuring simple and user‑friendly operation.
- 【Non-Slip Pad】The top of the dog hole clamp is fitted with round anti-slip pads to effectively improve grip, keeping lumber securely in place during routing, cutting, or sanding operations. This ensures machining precision and operational stability, contributing to safer work conditions.
- 【Premium Material】Constructed from anodized aluminum alloy, these bench dogs woodworking deliver superior durability over plastic or nylon alternatives while maintaining excellent resistance to wear in demanding work environments.
- 【User-Friendly Design】A low-profile design allows the bench dogs to sit beneath the workpiece surface, preventing collisions with tools for enhanced operational safety while also protecting tools from damage. The absence of sharp edges on top further reduces the risk of catching knuckles when working at a woodworking bench.
- 【Versatile Woodworking Tool】Ideal for both hobbyists and professional woodworkers, these bench dogs help ensure precision work across a range of applications—from table saw operations to milling, cutting, or sanding tasks. They provide reliable auxiliary clamping and support, making them a practical and essential addition to any workbench for woodworking enthusiasts and professional craftsmen alike.
DIY or Hire a Pro?
This is a good DIY project if you already own accurate layout tools and can drill square holes. Plan on 1 to 3 hours for a simple front row on an existing bench, plus time to make test holes. A careful DIY setup needs a tape, square, marking knife or sharp pencil, center punch or awl, 3/4-inch or 20 mm bit, drill guide or router jig, backer board, chamfer bit, and vacuum.
Hire a carpenter, cabinetmaker, or shopfitter if the bench is expensive, the top is thick hardwood, the vise hardware is complex, or the holes need to align with a precision 20 mm rail system. Professional help also makes sense when you are building a full bench with integrated vises, storage, electrical service, dust collection, and a replaceable work surface. The cost of one mistake in a hard maple top can exceed the cost of having the layout drilled correctly.
Recommended Free Tools
For homeowners setting up a garage shop, permits are usually not needed just to drill dog holes or modify a movable workbench. Permits and code issues can enter the picture when you add electrical circuits, hardwired lighting, dust collection equipment, or permanent shop infrastructure. In residential garages, electrical work should follow the applicable residential electrical code adopted by your jurisdiction, and dust-producing woodworking equipment should be handled with serious fire and respiratory safety in mind. OSHA machine-guarding rules apply to employers and job sites, and NFPA standards address combustible wood dust hazards in commercial settings. Even in a home shop, the practical lesson is the same: control dust, guard machines, avoid ignition sources, and do not bury electrical hardware under a bench top full of chips.
Step-by-Step Dog Hole Layout
First, choose the accessory system. Use 3/4 inch for traditional US bench dogs and holdfasts. Use 20 mm on 96 mm centers for an MFT-style top. Do not mix systems in the same row unless you have a specific reason and mark them clearly.
Second, test the hardware. Drill one or two holes in scrap with the same thickness and material as the bench top. Test the dogs, holdfasts, and clamps. Check whether the dog slides cleanly, whether the holdfast bites, and whether the hole is too loose after chamfering.
Third, mark the front-row offset. For most benches, use 2 to 3 inches from the front edge. Keep the row aligned with the vise dog. Snap a straight line or use a long straightedge. Accuracy matters because crooked rows make clamping feel awkward and can spoil repeatable cabinet setups.
Do these 3 things before closing this tab:
1Clear out junk files and repair common Windows errors2Fix the driver behind crashes, sound loss and screen glitches3Repair Windows errors before they cause bigger problemsFourth, set the first hole from the vise. Measure the vise dog’s usable travel and place the first hole slightly less than that distance from the vise dog. If the vise reliably opens 5-1/2 inches between dogs, mark the first hole at 5 inches, not 6 inches.
Fifth, repeat the spacing. Use 4 inches, 5 inches, or 6 inches on center based on the work. For cabinet parts and smaller assemblies, 4 or 5 inches is usually the better choice. For long boards and a cleaner top, 5 or 6 inches can work.
Best Value

- Easy to use: The bench dog clamp does not require assembly and can be locked or unlocked with one hand. It is easy and convenient to use for both novice and experienced woodworkers.
- Firmly and Non-marking: Our clamps's excellent clamping force ensures a firm hold. Equipped with silicone pads, it protects wooden surfaces from damage while clamping, preventing any harm to your workpiece.
- Unique color and Application range: With their ability to fit 3/4 Inch (19 mm) holes, these brightly colored dog hole clamps are perfect for a wide range of general woodworking tasks, including routing, cutting, and grinding.
- Durable and long-lasting: This woodworking clamp is made of high-quality metal and crafted with durable materials that are not easily damaged, ensuring its longevity.
- Efficient after-sales service: if you have any problems, you can ask us for help at any time, we will reply you within 24 hours to ensure your satisfaction and peace of mind.
Sixth, drill clean and plumb. Use a guide, jig, drill press setup, or router template if accuracy matters. Back up the exit side if drilling through. Vacuum chips often so heat and packed dust do not burn the hole. Lightly chamfer the top edge and test every few holes before drilling the entire row.
Bottom Line
If you want one reliable layout, use 3/4-inch round dog holes in a front row 2 to 3 inches from the front edge, spaced 4 to 5 inches on center, with the first hole set just inside your vise’s usable dog-to-dog capacity. Add only a few holdfast holes at first, then expand after several projects show you where they are needed.
Use 20 mm holes on 96 mm centers when the bench is primarily a precision sheet-goods, track-saw, or MFT-style assembly surface. For a serious cabinet shop, a hybrid setup is often the most useful: a strong traditional bench with 3/4-inch workholding and a separate replaceable 20 mm grid panel for layout and cutting. That gives you clamping strength, accessory compatibility, and repeatable accuracy without drilling more holes than the work requires.
Frequently Asked Questions
What is the best spacing for workbench dog holes?
For most traditional workbenches, 4 to 6 inches on center works well. For cabinet work and smaller parts, 4 to 5 inches is usually more useful. Set the first hole based on the vise’s usable dog-to-dog travel.
Should dog holes be 3/4 inch or 20 mm?
Use 3/4-inch holes for traditional US bench dogs, holdfasts, and hold-downs. Use 20 mm holes for an MFT-style 96 mm grid. The two sizes are close but not reliably interchangeable.
How far from the front edge should bench dog holes be?
A front row is typically 2 to 3 inches from the front edge. Keep it close enough for edge work and planing, but clear of aprons, leg joinery, vise screws, guide rods, and fasteners.
Can I use holdfasts in the same holes as bench dogs?
Often yes, if the holes and bench thickness match the holdfast. Many traditional holdfasts work in 3/4-inch holes and need a top around 1-3/4 inches thick or more, but test your actual hardware first.
Do I need a full 96 mm MFT grid on a woodworking bench?
Only if you use guide rails, parf dogs, and repeatable square-layout accessories. A hand-tool or cabinet bench often works better with one accurate 3/4-inch front row plus a few strategic holdfast holes.
Do I need a permit to add dog holes to a garage workbench?
Usually no. Drilling or modifying a movable workbench normally does not require a permit. Electrical circuits, hardwired lighting, dust collection, and permanent shop changes may trigger local code requirements.
Quick Recap
Product prices and availability are accurate as of the date/time indicated and are subject to change. Any price and availability information displayed on Amazon at the time of purchase will apply.