Quick wins for a faster PC:
Fix the driver behind crashes, sound loss and screen glitchesFind Drivers →Clear out junk files and repair common Windows errorsFree Scan →Custom concrete molds are easiest when you treat them like small precast jobs, not craft projects. The goal is simple: build a form that is square, sealed, stiff, level, and easy to strip without damaging the concrete. Get those five things right and you can cast countertops, pavers, stepping stones, wall caps, planter boxes, fire-table tops, bench seats, splash blocks, and decorative pieces at home with predictable results.
The biggest mistake we see homeowners make is starting with the mix bag instead of the mold plan. Concrete is heavy, wet cement is caustic, and cured pieces can crack if they are too thin, poorly reinforced, moved too early, or cast in a form that flexes. On our job sites, we stage the form, reinforcement, tools, lifting plan, and curing cover before water ever hits the mix. That same discipline is what makes a home project come out clean.
For 2026 budgeting, a small decorative mold project can be done for about $25-$100 if you already own basic tools. A countertop or tabletop project commonly lands around $8-$20 per square foot in consumable materials before tool purchases or rentals. Standard 80-lb concrete bags often cost about $6-$9 and yield about 0.60 cubic feet. Specialty countertop, white, fiber-reinforced, high-strength, or rapid-set mixes can run $20-$40 or more per bag. The numbers matter because concrete projects get expensive when you discover halfway through that the form is short, the slab is too heavy to move, or the finish requires tools you did not plan for.
Start With the Right Kind of Concrete Mold
A concrete mold is just a temporary container that holds wet concrete in the exact shape you want until the concrete is strong enough to support itself. The best mold material depends on the shape, finish, and number of castings.
Outdated Drivers Are Slowing You Down
One free scan finds every outdated or missing driver and matches the right update for your exact hardware.Free scan · exact hardware matchPC Slower Than It Used to Be?
A free scan shows the junk files, broken settings and background clutter dragging Windows down - then fixes them in one click.Free scan · Windows 10 & 11#1 Best Overall

- EASY FORM RELEASE: Releases concrete from molds, plywood, fiberglass, aluminum, steel, urethane, and more
- READY-TO-USE FORMULA – No mixing, shaking, or dilution required; simply spray or pour directly onto molds or forms
- CLEAN, NON‑STICK PERFORMANCE – Oil goes on white for easy visibility during application and dries non‑staining with no residue left behind
- EXTENDS MOLD & TOOL LIFE – Prevents concrete buildup and sticking, reducing wear on molds, forms, and tools while making cleanup quicker and easier
- IDEAL FOR MULTIPLE APPLICATIONS – Perfect for concrete forms, tubes, sculpture molds, decorative concrete, and general casting projects
For countertops, table tops, fireplace caps, and smooth rectangular pieces, melamine-coated particleboard is the usual homeowner-friendly choice. It is flat, smooth, fairly inexpensive, and already sealed on the face. A 3/4 in. x 4 ft. x 8 ft. melamine panel is a common mold sheet, and in 2026 a reasonable national budget is about $40-$80 per sheet, plus screws and bracing. Screw the side rails from the outside so the concrete-facing surface stays clean.
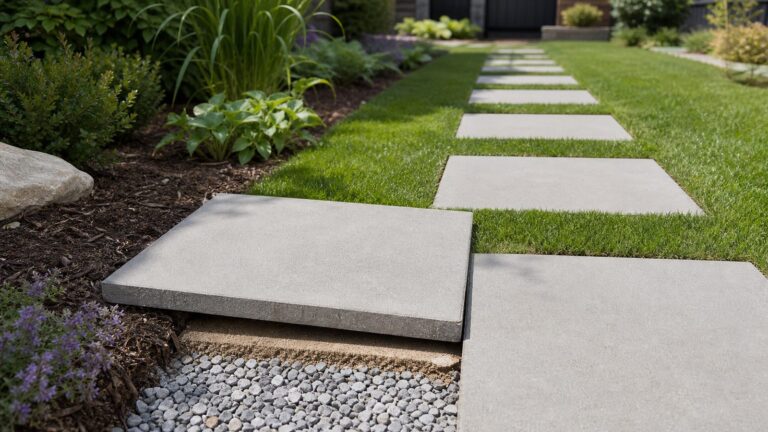
For rough utility forms, plywood and 2x lumber work well. They are good for simple pads, garden pieces, equipment bases, splash blocks, and thick stepping stones where a perfectly smooth face is not required. Plywood grain can telegraph into the concrete unless you seal it, line it, or accept a rougher finish.
For repeat small castings, plastic and silicone molds are convenient. A reusable plastic paver mold, planter mold, or stepping-stone mold can keep the project simple. Flexible rubber molds are better for detailed shapes, curves, textures, and undercuts because they release without prying hard against fragile edges.
Rigid foam is useful for knockouts, especially sink openings, drain holes, light channels, or recesses. Foam must be secured so it cannot float during vibration. It also needs enough draft, release, or removable sections so you can get it out without gouging the concrete.
Recommended Free Tools
Best Beginner Projects
If this is your first concrete mold, start with something small enough to lift with one or two people and simple enough to pour in one batch. A 16 in. x 16 in. stepping stone, a small bench leg, a garden cap, or a 12 in. test tile will teach you more than a full outdoor kitchen counter. A test tile is not wasted time. Use the same mix, pigment, caulk, release method, vibration method, polishing steps, and sealer you plan to use on the finished piece. It will show color shift, bugholes, edge quality, release problems, and sealer appearance before the main pour.
Plan Size, Weight, Yield, and Cost Before You Cut
Concrete rewards simple math. Before buying material, calculate volume, bag count, finished weight, and handling needs. The basic volume formula is:
Length in feet x width in feet x thickness in feet = cubic feet of concrete.
Then divide by the bag yield and add about 10 percent for waste, spillage, uneven fill, and small measurement errors. A standard 80-lb bag of concrete mix yields about 0.60 cubic feet. A 50-lb bag of Sakrete fast-set concrete mix yields about 0.38 cubic feet.
What’s actually slowing this PC down?
Pick the symptom - the matching free tool is one click away.
Example: a 4 ft. x 2 ft. x 2 in. concrete top is 4 x 2 x 0.167, or about 1.34 cubic feet. Divide 1.34 by 0.60 and you get 2.23 bags. Add waste and you should buy 3 standard 80-lb bags. If you make the same piece 1.5 in. thick, it uses about 1.0 cubic foot, but it still weighs roughly 145 lb because concrete is dense.
Weight is where many DIY concrete projects get into trouble. At 1.5 in. thick, a concrete countertop weighs about 18 lb per square foot. A 4 ft. x 2 ft. piece is roughly 144 lb before any sink opening. An 8 ft. countertop section can approach 300 lb. That affects cabinet support, sawhorses, carrying paths, helper count, and whether the piece can be flipped safely after curing.
| Project Type | Typical Size | Estimated Concrete | 2026 Material Budget | Key Planning Issue |
|---|---|---|---|---|
| Stepping stone or small paver | 16 in. x 16 in. x 2 in. | About 0.30 cu. ft. | $25-$60 with a basic mold and one bag | Keep thickness consistent so pieces do not rock or crack |
| Small planter box panels | Varies by wall thickness | Often 1-3 bags | $40-$120 depending on mold and reinforcement | Inner form must be secured against floating |
| 4 ft. x 2 ft. countertop | 2 in. thick | About 1.34 cu. ft., usually 3 standard 80-lb bags | $8-$20 per sq. ft. in consumables | Weight, edge finish, reinforcement, and sealer quality |
| Outdoor pad or small slab | 4 in. thick | Length x width x 0.333 ft. | DIY bagged cost varies; hired slabs often $6-$16 per sq. ft. | Base prep, drainage slope, joints, permits, and access |
| Ready-mix order | Usually larger pours | Sold by cubic yard | About $125-$195 per cubic yard delivered, often more for short loads | Timing, crew size, truck access, and finish window |
Material prices vary by region, store, and availability. Standard concrete mix is cheap compared with the rest of the system. Melamine, silicone, reinforcement, pigment, polishing pads, wet grinding tools, and a good sealer often cost more than the concrete. For countertops, the sealer is not an afterthought. It determines stain resistance, food-contact suitability, cleaning behavior, and heat tolerance more than the mold does.
Choose Mold Materials That Match the Finish
For a smooth concrete face, use a smooth mold face. Concrete mirrors the surface it cures against. A scratched form, wavy side rail, sloppy caulk bead, sawdust in the corner, or proud screw head will show up in the casting.
The Tool Desk
Outbyte Driver Updater FREEFix the driver behind crashes, sound loss and screen glitchesFind Drivers →Outbyte PC Repair FREEClear out junk files and repair common Windows errorsFree Scan →Melamine is the easiest material for many countertop and tabletop forms because the coated face releases well and leaves a clean surface. Use 3/4 in. material when possible so the form has enough stiffness. Cut the base panel to the finished size plus room for side rails. Cut side rails square and straight. If the piece is 2 in. thick, your side rails need to be 2 in. tall from the inside bottom surface, not roughly ripped from scrap and guessed.
Plywood works when you do not need a glass-smooth surface. Seal raw plywood with a compatible coating or line it with plastic laminate if surface quality matters. Raw wood absorbs water from the mix, which can cause rough faces, discoloration, and difficult release. Framing lumber can bow, so brace it heavily and sight down each board before use.
Plastic molds and silicone molds are useful for repeated decorative castings. They usually need less carpentry, but they still need support. A flexible mold full of concrete can belly out and distort the finished piece unless it sits in a rigid cradle or on a perfectly flat surface.
Form release is not one-size-fits-all. For small decorative castings, a compatible release agent can help. For melamine countertop molds, many systems recommend no release because melamine is already sealed and oils can stain the surface, interfere with sealers, or change the finish. Follow the mix and form-system instructions. Do not assume cooking oil, motor oil, or random spray lubricant is harmless because it releases one test piece.
Free tools Windows power users keep installed
One-click scans. No signup required.
Build the Mold Step by Step
1. Make a Full-Size Template
Measure the installation area and make a full-size template for countertops, caps, odd-shaped shelves, and built-in pieces. Include wall irregularities, overhangs, faucet holes, sink openings, cooktop cutouts, and any exposed edges. For simple rectangular garden pieces, a drawing with exact outside dimensions and thickness may be enough.
Rank #2

- EASY FORM RELEASE: Releases concrete from molds, plywood, fiberglass, aluminum, steel, urethane, and more
- READY-TO-USE FORMULA – No mixing, shaking, or dilution required; simply spray or pour directly onto molds or forms
- CLEAN, NON‑STICK PERFORMANCE – Oil goes on white for easy visibility during application and dries non‑staining with no residue left behind
- EXTENDS MOLD & TOOL LIFE – Prevents concrete buildup and sticking, reducing wear on molds, forms, and tools while making cleanup quicker and easier
- IDEAL FOR MULTIPLE APPLICATIONS – Perfect for concrete forms, tubes, sculpture molds, decorative concrete, and general casting projects
For countertops, keep overhangs conservative unless you understand the reinforcement and support requirements. Narrow strips around sinks and cooktops are crack-prone. A long thin web of concrete around an opening is not the same as a solid slab. If the piece has a large cutout, sharp inside corner, long unsupported overhang, or heavy appliance bearing on it, the mold design is no longer just a woodworking problem.
2. Cut the Base and Side Rails Square
Cut the base panel flat and oversize enough to attach the sides. Cut side rails to the exact finished thickness. A table saw gives the cleanest result, but a circular saw with a straightedge can work if you take your time. Label every part. Dry-fit the mold before sealing anything.
Fasten the side rails from the outside or underside. Keep screws out of the concrete face. Space screws close enough to prevent bowing, commonly about 6-8 in. apart on small countertop forms, with extra fastening near corners and cutouts. Predrill melamine near edges to reduce splitting.
3. Brace and Level the Form
Wet concrete pushes outward. A form that looks stiff when empty can spread when filled and vibrated. Add blocking, cleats, or outside bracing so the sides stay straight. Set the form on a flat bench or sturdy sawhorses that can carry the full wet weight. Shim until the mold is level in both directions unless the project intentionally needs slope.
For outdoor pads and slabs, slope is usually part of the design. Drainage should be planned before the pour, not improvised with a trowel after the concrete stiffens. A patio, pad, or exterior top commonly needs positive drainage away from the house. Isolate slabs from fixed structures where movement would otherwise cause binding or cracking.
4. Seal the Inside Seams
Use 100 percent silicone caulk for many melamine countertop forms and similar smooth molds. Mask both sides of the inside seam with painter’s tape, apply a steady bead, tool it to a consistent radius, and pull the tape while the silicone is still workable. The bead shape becomes the concrete edge, so keep your hand pressure consistent.
Let the caulk cure per the tube instructions. Rushing this step can smear the bead, contaminate the concrete surface, or make demolding messy. After cure, clean out dust, chips, and loose caulk. A tiny piece of debris in the corner can leave a visible defect on the finished edge.
5. Add Knockouts and Details
Sink openings, drain holes, decorative recesses, and embedded hardware need to be secured firmly. Foam knockouts can float when concrete is vibrated. Screw or glue them to the base in a way that does not damage the exposed concrete face. Seal around knockouts with the same care as the outside edges.
Avoid sharp inside corners where possible. A small radius reduces stress concentration and helps the concrete release. If you need a crisp modern look, understand that sharp edges chip more easily than eased edges, especially during stripping, lifting, and installation.
Mix, Pour, Reinforce, and Consolidate
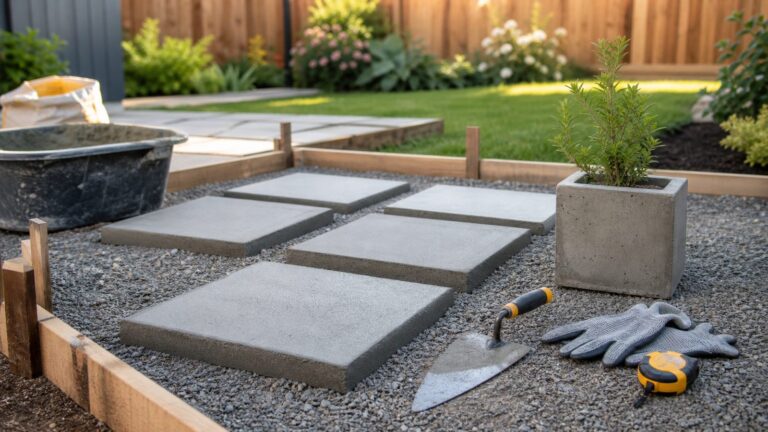
Stage everything before mixing. Cut reinforcement. Lay out gloves, buckets, drill mixer, trowels, margin trowel, scale or measuring container, plastic sheeting, towels, and cleanup supplies. Brief helpers on the sequence. Concrete has a working time, and rapid-set mixes shorten that window.
Measure water carefully and repeat the same water ratio between batches. This is critical for colored concrete. Batch-to-batch water variation is one of the fastest ways to get blotchy color, uneven strength, dusting, and different surface textures. Add water gradually. A soupy mix may flow easily, but excess water weakens concrete and increases shrinkage.
Place the first lift into the mold and work it into corners and edges. Use a gloved hand, margin trowel, or small tool to pack corners. Tap the outside of the form with a rubber mallet or use controlled vibration to bring trapped air to the surface. Do not over-vibrate until aggregate sinks and paste rises excessively.
Reinforcement belongs in the middle third of the concrete thickness for many small precast pieces, not lying on the bottom of the form. If reinforcement sits on the bottom, it does little for bending stress and may telegraph, rust, or create weak cover. Depending on the project, reinforcement may be wire mesh, ladder wire, fiberglass mesh, fibers, rebar, or a countertop-specific reinforcement system. Use a reinforcement approach compatible with the thickness and mix.
For a 1.5-2 in. countertop, heavy rebar is often too bulky and can cause more problems than it solves. Countertop mixes and systems commonly rely on fibers, mesh, or engineered reinforcement that fits the thin section. For thicker utility pieces, small rebar or welded wire may be appropriate if proper cover is maintained. Steel that is too close to the surface can rust and stain later.
Fill the mold to final height, strike off excess, and finish the back surface as needed. The face against the mold will usually become the visible top for precast countertops. That means the surface you are troweling may be the underside. Keep that in mind before spending time finishing the wrong face.
Do these 3 things before closing this tab:
1Clear out junk files and repair common Windows errors2Scan for outdated or missing drivers - takes under a minute3Repair Windows errors before they cause bigger problemsRank #3

- Professional concrete form release - Achieve smooth, stain-free concrete surfaces with no residue left behind, while reducing cleanup time. Our form release agent delivers architectural-quality results every time.
- Versatile mold release for any project - Works on wooden, plastic, and metal molds, making it perfect for precast plants, commercial jobs, and even DIY concrete projects at home.
- Safe concrete mold release - Our release agent is free from solvents, diesel oil, kerosene, waxes, and silicones, and is VOC-compliant across the U.S. and Canada for safer use in any work environment.
- Prevents costly defects - Helps stop blowholes, pinholes, and air voids, ensuring durable, uniform concrete surfaces the first time, with less rework required. Don't spend more time on concrete repair - use our concrete form release agent.
- Ready-to-use and easy to apply - Simply brush, roll, or spray for quick, effective form release on any mold type—ideal for both direct and delayed release applications.
Cure Concrete Like Strength Depends on It
Concrete is not dry just because it looks hard. Hydration takes time and moisture. Most concrete is designed around 28-day compressive strength, and early abuse can cause cracks, weak edges, dusting, curling, and sealer problems.
After finishing, cover the mold with plastic sheeting to slow moisture loss. Protect it from sun, wind, freezing temperatures, and sudden heat. Fast moisture loss is one of the main reasons small concrete projects crack. Cold weather slows strength gain; freezing early can permanently damage concrete. Hot, dry, windy weather can pull water out before the cement has properly hydrated.
Demold only after the mix manufacturer’s minimum time and only when the piece can be handled without edge damage. Some rapid-set products can be stripped sooner, but sooner is not always better for appearance or long-term durability. For countertop pieces, many builders wait at least 24-48 hours before careful stripping, then continue curing before heavy polishing, sealing, transport, or installation. Always follow the exact mix system you are using.
When stripping a melamine form, remove screws and side rails carefully. Do not pry against a finished edge with a steel bar. Use wood shims or plastic wedges if needed. Have enough people ready before flipping the piece. A 150-lb top is not a solo lift, and a 300-lb top needs a real lifting plan.
Finish, Polish, and Seal Without Creating New Problems
Small imperfections are normal in cast concrete. Bugholes, slight color variation, and edge texture are part of the material unless you use professional forming, vibration, slurry, and polishing methods. Decide early whether you want a cast-smooth finish, a lightly honed finish, or exposed aggregate. Each finish requires a different process.
If you grind or polish concrete, use wet methods or dust-controlled tools. Dry grinding and cutting concrete can create respirable crystalline silica exposure. NIOSH and OSHA both warn that silica dust is a serious health hazard. On a home project, that means eye protection, waterproof gloves for wet cement, hearing protection for saws and grinders, and a wet polishing or dust-collection setup for abrasion work. A paper dust mask is not a silica-control plan.
Wet cement can burn skin. Wear waterproof gloves, long sleeves when needed, eye protection, and boots you can wash. Keep clean water nearby for rinsing splashes. Do not let children or pets near mixing, pouring, grinding, or curing areas.
Sealer choice depends on use. A garden paver does not need the same sealer as a kitchen countertop. Countertop sealers may need to be food-safe after cure, stain-resistant, heat-resistant, and compatible with the polishing level. Small-project sealers commonly add $30-$150 or more. Follow the sealer instructions for moisture condition, cure age, surface prep, temperature, film thickness, recoat timing, and full cure. Sealing too early can trap moisture, haze, blush, or fail to bond.
Special Rules for Outdoor Slabs and Larger Flatwork
A mold for a stepping stone is different from forms for a slab. Once you are placing concrete on grade, base prep, drainage, thickness, reinforcement, and joints matter more than the form boards.
For a typical small residential slab, 4 in. thickness is common, but suitability depends on soil, loads, climate, and use. A walkway, trash-can pad, hot-tub base, driveway approach, and garage slab are not the same job. A slab supporting vehicles, masonry, posts, stairs, or a structure can trigger code requirements and should not be treated as a casual mold project.
Control joints help guide shrinkage cracking. NRMCA guidance commonly places joint spacing at about 24-36 times the slab thickness. For a 4 in. slab, that often means joints around 10 ft. apart, and generally no more than 15 ft. Joint panels should be as square as practical. Long narrow panels crack unpredictably. Joints need to be cut or tooled early enough to do their job, not after random cracks already form.
Permit rules are local. Many cities allow small decorative yard pieces without a permit, but permits may be required for structural concrete, driveway approaches, sidewalks in the right-of-way, stairs, retaining walls, foundation work, work affecting drainage, or larger patios and slabs. Cities such as Las Vegas, Portland, and Boise publish homeowner permit guides, but your jurisdiction controls your project. Before pouring anything permanent, check the local building department and any HOA requirements.
Common Mistakes That Ruin Concrete Molds
The first mistake is building a flexible form. If the sides bow 1/8 in. during the pour, the finished piece will show it forever. Brace long sides, use straight stock, and check diagonals for square.
The second mistake is inconsistent caulk. The silicone bead is part of the mold geometry. A lumpy bead creates a lumpy edge. Mask, tool, and pull the tape cleanly.
Rank #4

- CLEAN FORM RELEASE: Delivers clean, consistent concrete form release from wood, metal, plastic, styrene, urethane, and fiberglass forms. This concrete form release agent provides excellent wettability to capture fine surface detail while helping minimize dusting for clean, paintable concrete finishes.
- HIGH-YIELD CONCENTRATE: Concentrated formula mixes at a 1:20 ratio with water, creating an economical concrete release agent for construction projects. Covers an average of 2,500 sq. ft. per gallon, making it ideal for concrete forms and molds, concrete casting, and repeated form applications.
- NON-STAINING PERFORMANCE: Petroleum-free, non-staining concrete form release leaves a paintable surface after stripping forms. Designed for general construction with an emphasis on wood forms while also performing on metal, plastic, styrene, urethane, and fiberglass form surfaces.
- EASY SPRAY APPLICATION: Compatible with conventional application methods, with spray application recommended for best results. Season new forms before first use, remove puddles, allow to dry thoroughly, and clean spills or overspray easily with water for convenient jobsite cleanup.
- BIODEGRADABLE FORMULA: Biodegradable, petroleum-free concrete mold release formulated for reliable daily use in general construction. Works as an eco-friendly release agent and spray-on form release while delivering clean release performance without petroleum distillates and with easy water cleanup.
The third mistake is guessing at water. Measure it. Write it down. Repeat it. If a second batch is wetter than the first, the color, shrinkage, and strength can change in the same piece.
The fourth mistake is poor consolidation. Concrete must be worked into corners and around reinforcement. Unconsolidated edges create voids. Excessive vibration can segregate the mix. The right amount depends on the mix, thickness, and desired finish.
Do these 3 things before closing this tab:
1Scan for outdated or missing drivers - takes under a minute2Repair Windows errors before they cause bigger problems3Fix the driver behind crashes, sound loss and screen glitchesThe fifth mistake is moving too early. Green concrete chips easily. A piece can feel hard on the surface and still be weak at the edges. Give it time.
The sixth mistake is designing beyond the material. Thin webs around sinks, long unsupported overhangs, suspended pieces, stair treads, driveway slabs, and structural supports are not good beginner projects. Concrete has high compressive strength but weak tensile strength unless the section, reinforcement, and supports are designed correctly.
When to DIY and When to Hire a Pro
DIY concrete molds make sense for small precast pieces, decorative castings, garden elements, pavers, stepping stones, simple caps, small tables, and practice countertops where a cosmetic flaw is acceptable. They also make sense when you want a custom size that would be expensive to buy and the piece can be safely handled.
Hire a professional when failure could injure someone or damage the home. That includes structural concrete, foundation work, driveway approaches, garage slabs, stairs, suspended or elevated pieces, retaining walls, large outdoor slabs, hot-tub pads, load-bearing countertops with long spans, and complex sink or cooktop layouts. A pro should also take over when the project requires ready-mix timing, pump access, power finishing, engineered reinforcement, inspection, or tight finish tolerances.
Recommended Free Tools
Cost is not the only reason to hire. Hired residential slab work in 2026 is commonly reported around $6-$12 per square foot for basic installed slabs, with real contractor quotes often around $10-$16 per square foot depending on excavation, base, access, reinforcement, thickness, finish, and local labor. Decorative work costs more. That price includes crew timing, placement experience, finishing skill, and accountability. For a permanent slab tied to the value and safety of the property, that can be money well spent.
For countertops, DIY consumables at $8-$20 per square foot can look attractive, but tools, polishing, sealer, mistakes, and labor add up. If you need a flawless kitchen island, integrated sink, long overhang, or tight installation schedule, price a professional concrete countertop fabricator before committing.
A Practical Home Mold Checklist
Use this checklist before mixing. Confirm the finished dimensions, thickness, weight, and lifting plan. Calculate concrete volume by cubic feet and buy enough bags with 10 percent waste. Choose a mold material that matches the desired surface. Cut form parts square. Brace the form. Seal seams with a consistent silicone bead. Secure knockouts. Cut and stage reinforcement. Level the form or set the intended slope. Measure water. Protect yourself from wet cement and silica dust. Cover the curing concrete. Wait before stripping, polishing, sealing, loading, or installing.
The cleanest custom concrete molds are built slowly and poured efficiently. Most problems are decided before the concrete goes in: a crooked cut, a weak brace, a bad caulk line, a missing helper, or a poor curing setup. Take the time on the front end. Concrete is unforgiving once it starts to set, but it is very predictable when the mold, mix, reinforcement, and cure are handled with discipline.
The Tool Desk
Outbyte Driver Updater FREEFix the driver behind crashes, sound loss and screen glitchesFind Drivers →Outbyte PC Repair FREEClear out junk files and repair common Windows errorsFree Scan →Frequently Asked Questions
What is the easiest material for a DIY concrete countertop mold?
Melamine-coated particleboard is usually the easiest for smooth countertops and tabletops because it is flat, smooth, and already sealed. Use 3/4 in. material, screw the sides from the outside, and seal inside seams with 100 percent silicone.
How many bags of concrete do I need for a mold?
Use length in feet x width in feet x thickness in feet to get cubic feet. An 80-lb bag of standard concrete mix yields about 0.60 cubic feet, while a 50-lb fast-set bag yields about 0.38 cubic feet. Add about 10 percent waste.
Do I need release agent for concrete molds?
Sometimes. Plastic, rubber, and some wood forms may need a compatible release agent. Melamine countertop forms often do not, because release oils can stain concrete or interfere with sealers. Follow the instructions for your mold and mix system.
How soon can I remove concrete from the mold?
Follow the mix manufacturer’s minimum demold time. Many small precast projects are stripped after 24-48 hours, but concrete continues gaining strength for weeks and is commonly designed around 28-day compressive strength.
Can I make structural concrete molds myself?
Structural concrete is not a good DIY mold project. Hire a pro for foundations, stairs, suspended pieces, driveway approaches, large slabs, retaining walls, and any concrete element where failure could injure someone or damage the home.
Quick Recap
Product prices and availability are accurate as of the date/time indicated and are subject to change. Any price and availability information displayed on Amazon at the time of purchase will apply.