Outdated Drivers Are Slowing You Down
One free scan finds every outdated or missing driver and matches the right update for your exact hardware.Free scan · exact hardware matchWindows Errors? Fix Them Before They Spread
Repair common Windows errors and clear accumulated junk for a smoother, more stable PC - no reinstall needed.Free scan · no reinstallTo make a basket-weave veneer panel, cut squares and rectangles in a 1:2:4 proportion, shade the rectangle ends to suggest an over-under weave, assemble the pieces face down on a temporary sticky surface, then tape, trim, border, and glue the panel to a stable substrate with veneer on both sides. Peter Marcucci’s 2017 WOOD Magazine project demonstrates the method with black-dyed maple and cherry; its dimensions are a useful starting point for a small box top, not universal specifications.
Choose the pattern and scale
The pattern depends on the relationship between each square and rectangle: the rectangle is twice as wide and four times as long as the square. Marcucci describes this as the ratio that creates the design. The demonstrated project used 3/8-inch squares and 3/4 × 1 1/2-inch rectangles. The same proportion can be scaled up or down, though smaller pieces demand more precise cutting and handling.
For the example panel, the project called for 63 squares and 62 rectangles, and recommended cutting extras. It also used a 3/16-inch black-veneer border and a 1-inch walnut frame; the oversized panel was later trimmed to fit an 8 1/2 × 11-inch box top. These are the dimensions of that WOOD Magazine project, not a required layout for every panel. See Marcucci’s project and layout.
Choose an open or closed weave
The 1:2:4 panel is one way to make a basket-weave effect. The American Marquetry Society distinguishes two broader approaches:
Recommended Free Tools
| Approach | How it is assembled | Appearance |
|---|---|---|
| Open weave | Insert individual pieces into a background veneer. | The background remains visible between pieces. |
| Closed design | Join strips, crosscut the joined material, and stagger the resulting units. | The pattern forms a more continuous assembled design. |
Strip patterns can vary by aligning every other, every third, or every fourth strip. The society’s guide emphasizes careful alignment; it does not establish that one approach is faster than the other. Read the American Marquetry Society beginner guide.
#1 Best Overall
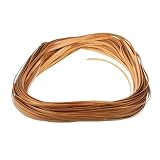
- Cabinet strip material:measures enough length and wide, this cane strips can be easily trimmed to fit your needs,rattan strips
- Strips material:durable and wear-resistant, providing long-lasting use and value, this cane strips is useful,DIY cane strips
- Caning material for chair: , this woven cane strips has , and to diy,DIY faux rattan strips
- Cane strips strip:simple weaving design, adding a touch of elegance and sophistication to your home crafts,faux rattan strips
- Handicrafts canes strips:suitable for rattan weaving furniture materials DIY crafts, providing convenience and practicality,faux rattan strips material
Gather materials and prepare accurate parts
For Marcucci’s individual-piece method, assemble veneer in contrasting colors, a razor knife, metal ruler, cutting board or mat, contact paper, painter’s tape, transparent tape, veneer tape, long tweezers, fine sand, a small cast-iron pan, a hot plate, substrate, backer veneer, and a press or clamps with platens. A raised fence and scrap material for a gauge strip help make repeatable cuts.
- Set a repeatable width. Use a gauge strip and straightedge to guide the knife as you cut veneer strips to the square width and rectangle width.
- Crosscut the pieces. Use a board with a raised fence to register the strips. Tape strips together before crosscutting to hold them tightly and help limit splintering.
- Make a few extras. The project calls for many small parts, and spare pieces let you replace ones that chip or do not match the layout.
- Remove tape carefully. Marcucci advises peeling tape at 45 degrees to the grain to reduce breakage.
Shade the rectangle ends
Darkened ends create the shadow that makes the flat pieces read as passing over and under one another. Marcucci’s project uses a hot plate on medium-high heat and a small cast-iron pan filled two-thirds with fine sand. Treat that as the setup described for the project, not a universal temperature or timing specification.
Rank #2
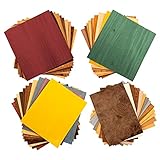
- Finally an assortment of colored veneers in various wood types that are ideal for marquetry, inlay, woodworking projects and more! 15 square feet of both domestic and exotic wood types ranging from mahogany, redwood burl, chestnut to Purple Heart, teak, zebra wood and everything in between! No variety pack is the same and each pack comes with different wood types, grains and dyed colors! This makes the veneer variety pack ideal for marquetry and inlay woodworking!
- Each veneer is approximately 1/42” thick which makes the veneer easy to work with and comfortable to cut to exact shapes and sizes. From building a fine guitar and adding wonderful and colorful artwork to making a family heirloom to be passed down from generation to generation, using these veneers will help you achieve the final look you want! Even for those of us just starting out, this pack of veneers is an excellent choice without breaking the bank.
- These veneers are all produced and processed in the USA! The veneers range in size from approximately 5” to 7.5” wide and each are approximately 8” tall. Each pack has 15 total square feet of assorted veneers that can be used for woodworking, arts, crafts, furniture accents, repair or restoration work, cabinets, boxes, doors, drawers, inlays, marquetry and a whole lot more!
- The veneers included in this pack are raw wood, which means there is no adhesive or paper backing on the veneer sheets. You must have or provide your own preferred adhesive in order to properly place and secure the veneer to your desired surface.
- Veneer sheet quantity, size, wood type, grain and overall appearance will vary from pack to pack. No two variety packs are the same. Please keep in mind that the variety pack you receive may or may not include the exact colors, wood types, size and grain patterns shown in the images on this listing.
- Practice first on scrap veneer so you can judge how quickly the sand darkens the wood.
- Use long tweezers to hold each rectangle and briefly dip each end about 1/8 inch into the hot sand.
- Aim for consistent, minimal charring rather than a deep burn; let the shaded pieces cool before assembly.
Heat can shrink veneer, a handling concern noted by Redbridge Marquetry Group. Its separate basket-weave method uses shaded strips, thin inserts, crosscutting, and staggering; do not substitute its materials or layout for the dimensions of Marcucci’s individual-piece pattern. See Redbridge Marquetry Group’s basket-weave and trellis method.
Free tools Windows power users keep installed
One-click scans. No signup required.
Assemble the pattern and keep it square
- Tape contact paper sticky side up to a cutting mat or cardboard. Mark perpendicular guide lines on the backing to establish a square reference.
- Lay the veneer pieces good side down. Build outward from the center, placing squares and rectangles according to the chosen pattern.
- Check the rows and edges against the guide lines as you work. If the pattern starts to drift, correct it before adding more pieces.
- When the face is complete, apply painter’s tape across it to hold the pieces together, then cut the panel free from the contact paper.
Add the border and frame
For the framed version, add the dark veneer border and then the wider frame strips. Marcucci overlaps the strips at the corners before trimming them to miters. Make several light knife passes rather than trying to cut through the veneer in one heavy pass. Diagonal transparent tape across both faces of a corner helps reduce breakage while trimming.
Rank #3

- High-Quality Wood Veneer: Receive 40 - 6' x 12' pieces of pure wood veneer, with a thickness of 1/42' - thinner than a dime. Each piece varies in grain and type, providing an amazing variety of exotic and domestic marquetry arts and crafts pack
- Trusted Manufacturer: Veneer Specialties, a well-known manufacturer in the industry, provides these high-quality wood veneer sheets for your crafting needs
- Labeled Pieces: Each piece is labeled with the wood veneer type and country of origin, making it easy for you to identify and use the right piece for your project
- Versatile Usage: Perfect for various crafting projects, including marquetry, intarsia, parquetry, and other woodworking arts. Use your creativity to create beautiful and unique items
- No Adhesive: The veneer comes with no adhesive, giving you the freedom to apply the adhesive of your choice, based on your project requirements
Apply wet veneer tape across the face and let it dry. Then peel away the painter’s tape by pulling at 45 degrees to the grain. The face tape helps hold the design together during mounting.
Mount the panel on a balanced substrate
Use a stable substrate such as MDF or plywood, and apply backer veneer to its reverse side. The backer helps balance the panel and reduce the risk of warping. Marcucci applies liquid hide glue to the substrate rather than directly to the basket-weave face; the project says other woodworker’s glue can also work.
Rank #4

- High-quality, real wood veneer
- 12" x 12" 3 pieces
- Thickness: 0.021"
- Unbacked veneer
- Spread glue on the substrate and position the basket-weave panel on one side, with backer veneer on the other.
- Press the assembly in a veneer press, or clamp it between platens. Waxed paper prevents sticking, and cardboard can help distribute pressure evenly.
- Marcucci’s project leaves the panel pressed for a few hours, then allows 24 hours for the glue to cure after it comes out of the press. Follow the directions for the adhesive you use, since those project timings are not universal glue specifications.
What the related strip method adds
Redbridge Marquetry Group’s method is a different route to a basket-weave or trellis pattern: it uses shaded strips and thin stringers, then crosscuts and staggers the assembled material. Its materials list includes a lipped cutting board, small wood spacer blocks, masking or veneer tape, sand for shading, and sycamore veneer. Those are supplies for that method, not requirements for the 1:2:4 black-maple-and-cherry project.
What’s actually slowing this PC down?
Pick the symptom - the matching free tool is one click away.
Quick Recap
Best Value

- Premium Material: Crafted from high-quality walnut wood veneer for a rich, natural look and feel.
- Versatile Size: Each panel measures 12 inches by 12 inches, perfect for various DIY projects and home decor.
- Easy Installation: Lightweight yet sturdy, these panels can be easily cut, drilled, and installed.
- Multipurpose: Suitable for wall paneling, furniture making, crafting, and more.
- Timeless Elegance: The warm, classic tone of walnut complements any interior design style.
Product prices and availability are accurate as of the date/time indicated and are subject to change. Any price and availability information displayed on Amazon at the time of purchase will apply.




