The Tool Desk
Outbyte Driver Updater FREEFix the driver behind crashes, sound loss and screen glitchesFind Drivers →Outbyte PC Repair FREERepair Windows errors before they cause bigger problemsFix Now →For a first veneer project, make a small, flat panel: choose veneer and a smooth, stable substrate, arrange the sheets dry, apply adhesive evenly, and press the assembly with uniform pressure. The best veneer, glue, and pressing method depend on the materials and shape of the job; follow the adhesive maker’s directions rather than treating one process as universal.
What you need to decide before you start
Veneering bonds a thin wood surface to a stable core. The core needs to be flat and smooth: bumps, voids, or unevenness can show through the veneer or interfere with a reliable bond. For a first attempt, a small, flat panel keeps sheet handling and pressure distribution manageable.
- Veneer: Decide whether you want raw veneer or a backed product. Backing can simplify some handling, but suitability depends on the product and substrate; no type is right for every project.
- Sheet layout: Decide how the grain should run and whether adjoining sheets should match. Dry-fit the layout before opening the adhesive.
- Substrate: Choose a smooth, stable panel rather than rough or voided construction-grade sheet goods.
- Adhesive and press: Match the adhesive to the materials and available pressing setup, and follow the product label for application, safety, and clamping or cure time.
- Panel balance: Plan how to treat the reverse face as well as the show face. The WWGOA guide warns that veneering only one face can contribute to warping (WWGOA).
Choose veneer and prepare the sheets
Veneer is available in different species, figures, and cuts. Woodcraft describes sheets ranging from 1/20 inch to 1/42 inch thick and distinguishes rotary-cut veneer from sequential flitch-cut sheets, which are kept in order to preserve a matched sequence (Woodcraft’s veneering guide). Those details can help you choose a look, but thin veneer also calls for gentle handling.
Store and arrange it carefully
- Keep sheets flat and protect their edges from splitting. If a matched flitch arrives rolled, let it relax and keep the sheets in sequence.
- Flatten wavy or highly figured veneer before gluing. The Woodcraft guide cautions that uneven stock can crack if applied without preparation (Woodcraft).
- Arrange the sheets on the panel without adhesive. Check grain direction and sequence, tape the seams, and confirm the arrangement before proceeding.
Select a substrate that supports the veneer
Woodcraft lists MDF, cabinet-grade particleboard, and quality plywood—including Baltic birch and Italian poplar—as substrate options. It cautions against rough, voided construction-grade sheet goods and notes the movement concerns involved in using solid wood (Woodcraft). MDF’s smooth surface is also described as suitable for wood veneer by the European Panel Federation, whose guidance discusses veneered MDF panels at an industry level (European Panel Federation).
#1 Best Overall

- Wood Veneer Sheets Variety Pack for Creative Projects: this wood veneer sheets variety pack includes 30 square veneer sheets in mixed brown colors, giving you multiple wood grain options in one set for marquetry, inlay, and woodworking designs
- Practical Dimensions: each of our wood veneer boasts a size of 7.9 x 7.9 inches/ 20 x 20 cm, the thickness is different due to wood reasons, about 1/50 inches/ 0.5 mm; These slim wood veneers are great for handcrafting enthusiasts, easy to cut into precise shapes, offering design flexibility; Suitable for intricate details, it supports smooth handling and accuracy for precise projects
- Natural Wood Veneer with Grain Texture: made from real wood, these wood veneer sheets feature natural grain patterns and color variations; Each sheet has its own look, adding authenticity and depth to finished pieces
- Wood Veneer for Marquetry, Inlay and DIY Crafts: the wood veneer for marquetry and inlay, as well as furniture accents, cabinet surfaces, box making, restoration work, and other DIY woodworking applications
- Unfinished Veneer Sheets for Custom Bonding: these veneer sheets do not include adhesive, allowing you to choose your preferred glue or bonding method based on your project needs and woodworking techniques
Whatever panel you choose, inspect it for flatness and surface defects before gluing. A smooth face helps the veneer sit evenly; a void or high spot cannot be corrected by pressing harder.
Choose adhesive and pressing method for the job
Woodcraft discusses PVA or yellow glue and urea-formaldehyde adhesive, while the European Panel Federation names UF or cross-linking PVAC adhesives for veneered MDF panels (Woodcraft; European Panel Federation). These references do not make the products interchangeable for every hobby project. Check the actual adhesive label for compatible materials, working time, ventilation and protective measures, application instructions, and required pressure and cure time.
Rank #2

- REAL WOOD VENEER SHEET – ready to stain, real wood veneer sheets which are ideal for using when repairing or refacing furniture, cabinets and fine woodworking. High quality veneer sheets that will stand the test of time
- PAPER BACKED FOR EASY HANDLING – our veneer sheets are 10 mil paper backed to help you grip the veneer easier when working on your project. Easy to apply with super bonding adhesive, these veneer sheets are strong yet flexible and won’t split the grain when bent to fit to your requirements
- EASY TO USE CABINET VENEER SHEETS – these wood veneer sheets for cabinets are ready for you to easily stain match your existing furniture for a seamless, premium finish. Simply cut to size with a box knife and apply contact adhesive with a roller to achieve best results
- “A” GRADE” PREMIUM QUALITY – made from the highest “A” grade veneer quality, this flexible veneer sheet is ready to stain for your restoration and repair work. The overall thickness of .024”
- VERSATILE AND COST-EFFECTIVE VENEER SHEETS – our wood veneer sheets can be used for a wide variety of projects including cabinets, resurfacing tables and general repair. Simple to use, these are a cost-effective way of restoring your projects back to their former glory without having to replace them
| Pressing setup | When it may fit | What to account for |
|---|---|---|
| Cauls and platens | Smaller, flat work where the setup can cover the panel evenly. | Use flat cauls or platens, such as MDF platens, and arrange the clamps so pressure is distributed across the assembly. |
| Screw press | Flat work when a suitable press is available. | Follow the press and adhesive requirements; pressure must be uniform across the panel. |
| Vacuum pressing | Curved work, or projects suited to a vacuum-bag setup. | It requires a vacuum pump and bag setup. Woodcraft describes vacuum pressing as useful for curved work (Woodcraft). |
Do not copy a clamp duration from another person’s process as if it were a universal cure time. The Woodcraft guide describes at least two hours clamped for its own process, but the correct time depends on the adhesive and its instructions (Woodcraft).
Glue and press the panel
- Confirm the dry fit. Make sure the veneer sheets remain in the intended order and the seams and grain orientation are correct.
- Prepare the press before applying glue. Have the cauls, platens, clamps, or vacuum setup ready so the veneer can be placed and pressure applied within the adhesive’s stated working time.
- Apply adhesive evenly to the substrate. Avoid both glue-starved patches and excessive pools. Canadian Woodworking emphasizes even coverage and adequate pressure in its veneering guidance (Canadian Woodworking).
- Position and secure the veneer. Lower it into place carefully and prevent it from shifting as you assemble the press.
- Apply distributed pressure. Make sure the pressing arrangement covers the panel rather than concentrating force in isolated spots. Use the adhesive maker’s directions for pressure and clamping or cure time.
Remove tape and glue without sanding through
After the adhesive has cured according to its instructions, remove the veneer tape and squeeze-out carefully. Woodcraft describes softening veneer tape with distilled water; avoid soaking the panel, and handle the thin veneer gently (Woodcraft). Scrape dried squeeze-out rather than trying to sand it away. Once the residue is removed, sand lightly: aggressive sanding can cut through thin veneer. Canadian Woodworking also emphasizes watching for squeeze-out and trimming after pressing (Canadian Woodworking).
Do these 3 things before closing this tab:
1Clear out junk files and repair common Windows errors2Fix the driver behind crashes, sound loss and screen glitches3Repair Windows errors before they cause bigger problemsQuick Recap
Best Value
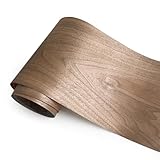
- Natural and beautiful: Wood veneer is a thin wooden sheet material produced by rotary cutting or sawing of logs, Has a natural woody feel,Different wood textures and tones can meet various design styles and aesthetic needs.
- Multifunctionality: Can be applied to various surfaces, suitable for refurbishment and production of furniture, cabinets, doors, speakers, and wall panels.
- Durable and Stable: The wood veneer uses backing materials to enhance durability and stability, making it less prone to deformation or cracking, and can maintain aesthetics and practicality for a long time.
- Flexible and Convenient: Its flexibility allows for easy installation on flat or curved surfaces, meeting design requirements of various shapes and sizes.
- Environmental protection and health: Wood veneer comes from wood, which is a renewable resource. The use of wood veneer conforms to the concept of green decoration and is conducive to sustainable development.
Rank #4

- Wood Veneer Sheets Variety Pack for Creative Projects: this wood veneer sheets variety pack includes 30 square veneer sheets in mixed brown colors, giving you multiple wood grain options in one set for marquetry, inlay, and woodworking designs
- Thin Square Wood Veneers, Easy to Cut and Shape: each wood veneer sheet measures 12 x 12 inches/ 30.5 x 30.5 cm with varied thickness (approx. 0.5 mm), making these veneers easy to cut, trim, and shape for detailed craft and woodworking projects
- Natural Wood Veneer with Grain Texture: made from real wood, these wood veneer sheets feature natural grain patterns and color variations; Each sheet has its own look, adding authenticity and depth to finished pieces
- Wood Veneer for Marquetry, Inlay and DIY Crafts: the wood veneer for marquetry and inlay, as well as furniture accents, cabinet surfaces, box making, restoration work, and other DIY woodworking applications
- Unfinished Veneer Sheets for Custom Bonding: these veneer sheets do not include adhesive, allowing you to choose your preferred glue or bonding method based on your project needs and woodworking techniques
Rank #3
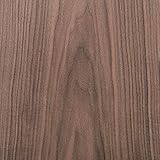
- REAL WOOD VENEER SHEETS – ready to stain, real wood veneer sheets which are ideal for using when repairing or refacing furniture, cabinets and fine woodworking. High quality Wood Veneer Sheet that will stand the test of time.
- PEEL & STICK FOR EASY APPLICATION – our Wood Veneer Sheets are ultra flexible and they are bonded to paper backing which, when peeled off, will provide a strong adhesive that will stick to any Rotary surface. Easy to apply with super bonding self adhesive, these veneer sheets are strong and flexible, it won’t split the grain when bent.
- EASY TO USE CABINET VENEER SHEETS – these wood veneer sheets for cabinets are ready for you to easily stain, match your existing furniture for a seamless, premium finish. Simply cut to size with a box knife and apply with a stiff bladed scraping tool or wooden block to achieve best results.
- “A” GRADE” PREMIUM QUALITY AND SIZING INFO – made from the highest “A” grade veneer quality, Real Wood Veneer Sheets, this flexible Wood Veneer Sheet is ready to stain for your restoration and repair work. The overall thickness is 0.4 MM
- VERSATILE AND COST-EFFECTIVE VENEER SHEETS – our Wood Veneer Sheet can be used for a wide variety of projects including cabinets, resurfacing tables and general repair. Simple to use, these are a cost-effective way of restoring your projects back to their former glory without having to replace them.
Common first-project problems to prevent
- Cracked veneer: Flatten wavy or highly figured stock before application and protect fragile edges during handling.
- Visible gaps or mismatched grain: Dry-fit the sheets, check their order, and tape seams before gluing.
- Weak or uneven bond: Prepare a smooth substrate, spread adhesive evenly, and use a pressing setup that distributes pressure.
- Warped panel: Consider the construction of both faces; the WWGOA guide identifies one-sided veneering as a warping risk (WWGOA).
- Sand-through: Scrape squeeze-out first and sand sparingly rather than using abrasives to remove glue.
Product prices and availability are accurate as of the date/time indicated and are subject to change. Any price and availability information displayed on Amazon at the time of purchase will apply.




