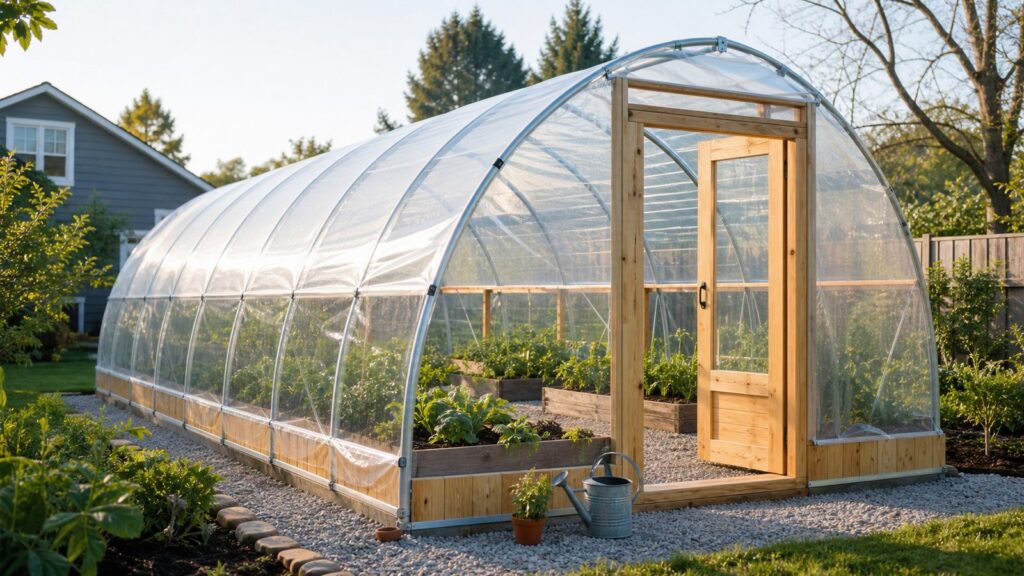
A DIY hoop house can be one of the best backyard upgrades for a serious gardener, but it should be treated like a small structure, not a weekend craft project. The frame has to resist wind uplift. The plastic has to survive sun exposure. The site has to drain. The interior needs enough ventilation that your winter greens do not cook on a sunny 45-degree day.
In practical terms, a hoop house, also called a high tunnel, is an unheated growing structure made from metal or PVC hoops, ground posts, baseboards, end-wall framing, and greenhouse film. It traps solar heat, blocks wind and cold rain, softens frost, and can stretch a normal garden season by 6 to 8 weeks in many climates. True year-round gardening is possible in parts of the U.S., but it depends on your region, crop selection, ventilation habits, and whether you add inner row cover or backup heat during hard freezes.
For a typical homeowner, the sweet spot is usually an 8×12, 10×20, 12×20, or 14×24 walk-in hoop house. A basic 10×20 or 12×20 DIY build commonly lands around $500 to $1,500 in 2026, depending on frame material, plastic quality, roll-up sides, door design, anchoring, and lumber. Larger 20×40 to 30×72 tunnels can run roughly $3,000 to $12,000 or more. Small retail kits start around the high hundreds, while farm-grade tunnels with heavier steel, closer bow spacing, roll-up systems, and end walls move quickly into the thousands.
On our job sites, the same rule applies to sheds, decks, fences, and hoop houses: layout and anchoring decide whether the finished project feels solid. Spend the time on site prep, square corners, proper bracing, and serviceable film attachment. That is what separates a useful year-round growing space from a plastic-covered frame that needs constant rescue.
Quick wins for a faster PC:
Repair Windows errors before they cause bigger problemsFix Now →Fix the driver behind crashes, sound loss and screen glitchesFind Drivers →Clear out junk files and repair common Windows errorsFree Scan →#1 Best Overall

- Upgraded Heavy-Duty Galvanized Frame: The load-bearing poles of this tunnel greenhouse are constructed with reinforced galvanized pipes (Diameter: 1", Wall Thickness: 0.02"), enhancing overall strength and stability. Reinforced door poles, added diagonal bars, U-shaped stakes, and tie-downs increase stability and protect your plants from harsh weather conditions.
- Thick High-Density PE Cover: Featuring a 140g/m² PE cover that is sun-resistant and insulating. Double-stitched seams and reinforced window seams prevent tearing. The extended cover edges can be weighted down or buried for improved insulation and sealing in this high tunnel greenhouse.
- Spacious Walk-In Design: With a roomy 9.58x6.43x6.23 ft space, this walk-in greenhouse tunnel accommodates a variety of plants. Easily access and maintain your plants, or set up multiple plant shelves to meet both home gardening and commercial planting needs.
- Efficient Ventilation Design: This hoop house greenhouse is equipped with 6 windows and a large zipper door to ensure airflow. The velcro and mesh net design helps keep small creatures out.
- Versatile Use for Multiple Settings: Ideal for home gardens, farms, and small commercial uses, this green house extends your growing season and lets you enjoy gardening year-round.
What a Hoop House Can and Cannot Do
A hoop house extends the growing season by collecting solar heat and shielding plants from wind, rain, frost, and light snow. Most backyard hoop houses are passive structures. They usually do not have permanent foundations, rigid glass, automated HVAC, or a code-built greenhouse system. Crops grow in the ground, in raised beds, or in containers.
That simple design is the advantage. A hoop house can cost a fraction of a permanent greenhouse and can be built with ordinary tools. It also has limits. At night, the inside temperature will eventually approach the outside temperature unless you add thermal mass, inner row covers, or heat. During the day, the interior can overheat fast, even in winter. The plastic skin holds warmth, but it does not remove humidity, carry snow, or resist wind without a proper frame and anchor system.
For year-round gardening, think of the hoop house as one layer in a system. In mild climates, it may be enough by itself for winter greens, herbs, and cool-season crops. In cold climates, the better setup is often double protection: the hoop house plus low row covers over beds inside the tunnel. That inner layer can be the difference between steady winter harvests and frost-burned leaves.
Choosing the Right Size
Start with how you will work inside the structure. A 3- to 4-foot-wide low tunnel is useful over a single raised bed, but it is not a walk-in workspace. For a backyard hoop house, most homeowners are better served by a walk-in structure at least 8 feet wide. A 10×20 footprint gives you 200 square feet, enough for two 30-inch beds, a center path, and shelves or seed trays at one end. A 12×20 gives you 240 square feet and more comfortable working clearance.
Common backyard sizes include 8×12, 10×20, 12×20, and 14×24. Homestead and small farm tunnels often jump to 20×48 or 30×72. Bigger is not always better in a residential yard. Larger tunnels need stronger bows, more bracing, wider plastic, better doors, and more attention to permits and setbacks.
A good interior layout is simple: keep beds no wider than you can comfortably reach, usually 30 to 36 inches from one side or 48 inches if accessible from both sides. Keep the main path at least 24 inches wide, and 30 to 36 inches is better if you use a wheelbarrow. Door openings should be wide enough for trays, tools, amendments, and a loaded cart.
2026 Hoop House Cost Guide
Costs vary because a hoop house can mean anything from a PVC frame over raised beds to a snow-rated, farm-grade high tunnel. For planning, price the project by footprint, frame strength, cover system, doors, ventilation, anchoring, and site work.
| Hoop house type | Typical size | 2026 budget range | Best use |
|---|---|---|---|
| Low tunnel over bed | 3-4 ft wide, 8-20 ft long | $75-$300 | Season extension for one bed, frost protection, quick crop cover |
| Small DIY walk-in hoop house | 8×12 to 12×20 | $500-$1,500 | Backyard vegetables, seedlings, winter greens, hobby growing |
| Retail DIY kit | Often 12 ft wide and up | About $475 starting point for small kits; more with length and options | Homeowners who want matched hardware and fewer sourcing decisions |
| Larger homestead tunnel | 20×40 to 30×72 | $3,000-$12,000+ | High-output gardening, small farm production, serious season extension |
| Commercial-grade high tunnel | Varies widely | Often $5-$12+ per sq ft | Farm use, grant-supported projects, stronger frames and systems |
As a broad benchmark, hoop houses and high tunnels are often cited around $2 to $8 per square foot for basic materials and labor, while more robust commercial-grade systems can run higher. Older extension pricing around $2.50 per square foot is useful as a low-end historical reference, but many 2026 homeowner builds exceed that once you add UV-rated film, lumber, wiggle wire, doors, roll-up sides, freight, and anchors.
Where the Money Goes
The main cost drivers are steel diameter and gauge, bow spacing, gothic versus round frame shape, snow and wind rating, plastic width, end-wall design, door hardware, roll-up side hardware, baseboards, anchoring, grading, irrigation, pest exclusion, and electrical work. A basic frame can look inexpensive until you add the parts that make it usable: a clean film attachment system, vents, doors that latch, and anchors that resist uplift.
Plan for lifecycle costs too. Standard 4-year, 6 mil greenhouse film is a normal choice, but the phrase “4-year” is not decoration. Budget to replace film before it becomes cloudy, brittle, patched beyond reason, or storm-damaged. Also expect to buy greenhouse repair tape, shade cloth in hot climates, frost cloth for winter crops, irrigation parts, and occasional spring wire or channel repairs.
Best Frame Material: PVC, EMT, or Steel Bows?
PVC is inexpensive and easy to bend, which is why many backyard tutorials use it. It can work for small low tunnels or temporary structures, but it is not our first choice for a walk-in hoop house that needs to stay up through wind, heat, and snow. PVC gets brittle with age and sun exposure, and PVC contact can shorten greenhouse film life by damaging UV stabilizers. If you use PVC, isolate it from the film with compatible tape or a protective barrier, and keep expectations realistic.
Rank #2
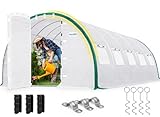
- [Exclusive Dual Hinged-Door] - Features patented dual hinged-door frames (Patent No. US 214173563) for superior convenience over traditional zipper models. Each door opens 180° for easy entry with garden tools and optimal airflow. Lockable and rigid, this system provides unmatched structural stability while protecting your plants. Product Specific size: 295.3"L x 118.2"W x 78.8"H
- [Reinforced Heavy-Duty & Anti-Sagging Top] - Engineered as a heavy duty greenhouse for winter, featuring a reinforced top structure with extra 4-5(depending on size) crossbars to prevent water or snow accumulation. Built with upgraded 0.7mm thickened galvanized steel for maximum rust resistance. Combined with spiral ground stakes, it remains rock-solid against outdoor winds.
- [Premium 150GSM Tear-Resistant Cover] - The reinforced PE mesh cover includes a UV inhibitor to prevent sun damage and Oxford seam-reinforcement at high-stress points. This high-transparency layer allows 85% sunlight transmission. The 8" overlong bottom cover can be buried in soil for maximum wind resistance and winter insulation.
- [All-Season Growing & Controlled Ventilation] - This greenhouse kit extends your growing season for vegetables, flowers, and seedlings. Equipped with 8 mesh screen windows (depending on size), it offers controlled ventilation while keeping intruders out. Full-perimeter velcro seals retain heat for early spring planting and winter protection.
- [Quictent Promise] - Quictent is committed to providing reliable service. For Quictent Tunnel Premium Greenhouses, you receive: A. Lifetime parts replacement (connectors, stakes, etc.); B. 365-day complimentary components for main parts (covers, frames, poles); C. Favorable parts support after the service period. (Quickly find us in the method at the end of product page below)
EMT conduit is stronger than PVC and still affordable for small backyard builds. Many homeowners use 1/2-inch or 3/4-inch EMT for smaller frames, bent with a hoop bender. For a more durable structure, galvanized steel bows from a greenhouse supplier are usually the cleaner choice. They cost more, but the geometry, fittings, purlins, and ground posts are designed as a system.
Free tools Windows power users keep installed
One-click scans. No signup required.
Frame shape matters. Round hoops shed wind reasonably well but can hold more snow. Gothic or peaked frames are better in snow-prone regions because they shed snow more effectively. If you live where wet snow is normal, choose a gothic frame, tighter bow spacing, and added purlins or trusses. A light round frame at wide spacing may be fine in a mild climate and a liability in a heavy March storm.
Use Real Greenhouse Plastic
The standard covering for a backyard hoop house is 6 mil, 4-year UV-rated greenhouse polyethylene. Do not use ordinary clear construction poly and expect it to last. Construction plastic is not built for long-term UV exposure; it yellows, gets brittle, tears, and often fails when you need it most.
Greenhouse film is sold in different widths and lengths. In 2026, small rolls can be found in the $27 to $56 range depending on size, while larger greenhouse-film rolls may start around $51 and rise with width and length. A 20-foot by 100-foot roll is commonly seen around the mid-hundreds. Your exact cost depends on the tunnel width, length, end-wall coverage, and whether you want one continuous sheet over the structure.
For a 10×20 hoop house, order enough film to cover the arch, both side drops, and end-wall wrap with extra material for gripping, fastening, and trimming. Shorting yourself by 6 inches makes installation harder and leaves weak edges. Film should be pulled snug, not drum-tight. Install on a calm, warm day if possible; plastic handles better and tightens more evenly.
Where plastic touches metal, fasteners, lumber edges, or any rough contact point, use anti-hotspot tape or smooth protective tape. Keep greenhouse repair tape on hand for small punctures. For long-term fastening, use wiggle wire and lock channel or bury film edges where appropriate. Staples alone are weak in wind and make future film replacement messier.
Site Planning: Sun, Drainage, Wind, and Access
A hoop house wants full sun, moderately level ground, good drainage, nearby water, and some protection from the worst wind. Do not build in the low spot of the yard because it looks unused. Standing water leads to mud, root disease, frost heave, slippery paths, and a miserable work area.
In many cold-season garden layouts, orienting the long axis east-west helps maximize winter sun. That is a starting point, not a rule to follow blindly. Local wind exposure, shade from buildings or trees, snow drifting, slope, and access may matter more. In hot climates, you may prioritize ventilation, shade cloth, and morning sun over maximum winter gain.
Leave working room around the structure. We like at least 3 feet of clearance on the sides for tightening plastic, mowing, clearing snow, inspecting anchors, and maintaining roll-up sides. If the hoop house sits near a fence, deck, patio, or the house, check drainage and snow shed carefully. Do not create a narrow slot where water dumps, snow packs, or wind accelerates.
The Tool Desk
Outbyte Driver Updater FREEFix the driver behind crashes, sound loss and screen glitchesFind Drivers →Outbyte PC Repair FREERepair Windows errors before they cause bigger problemsFix Now →Anchoring and Base Construction
Wind uplift is one of the most underestimated parts of a hoop house build. The structure is light, the skin is broad, and a gust can turn poor anchoring into twisted metal and torn plastic. Ground posts should be driven deep enough for your soil and frame system, commonly 18 to 30 inches or more depending on design. In loose, sandy, wet, or disturbed soils, you may need longer posts, earth anchors, concrete, or engineered anchoring.
A level, square base makes the rest of the job easier. Set batter boards or string lines, measure diagonals, and correct the rectangle before driving posts. A 1-inch layout error at the base can become a fight when hoops, purlins, doors, and plastic all need to line up. On our crews, we would rather spend another 30 minutes squaring layout than spend the afternoon forcing parts into place.
Baseboards are typically pressure-treated lumber or naturally rot-resistant material rated for ground contact where appropriate. Use corrosion-resistant fasteners compatible with treated lumber. Keep wood edges smooth where film passes over or near them. If you use raised beds inside, do not rely on the bed boxes to anchor the structure unless they were designed for that load path.
Ventilation Is Not Optional
A hoop house without ventilation is a crop stress machine. Even on a cool sunny day, temperatures inside can climb high enough to wilt greens, slow pollination, or damage seedlings. Ventilation also manages humidity, condensation, disease pressure, and summer heat.
Crashes, No Sound, or Screen Glitches?
Random freezes, missing sound and display glitches usually trace back to one bad driver. Find and replace yours safely.Free scan · under a minutePC Slower Than It Used to Be?
A free scan shows the junk files, broken settings and background clutter dragging Windows down - then fixes them in one click.Free scan · Windows 10 & 11Rank #3

- Spacious Walk-in Design: This walk-in tunnel greenhouse measures 15 x 7 x 7 ft. It provides ample space for vegetables, flowers, and potted plants. You can water, prune, and move plants comfortably inside, ideal for home gardening and small-scale growing
- Reinforced Galvanized Steel Frame: Our high tunnel greenhouse is made of 0.5 mm thick galvanized steel with center support bar for stability. Ground stakes and guy ropes help secure it firmly on lawns. It withstands wind and rain for long-term use
- Integrated Watering System: The tunnel greenhouse includes 6 brass nozzles and a 32.8 ft (10 m) hose. The nozzles feature adjustable angles and 3 spray modes. With the included connectors, you can easily set up the watering system to promote plant growth
- Optimal Growing Environment: The high tunnel greenhouse kit uses a 140 gsm PE cover that allows sufficient sunlight while providing insulation, Level 6 sun protection, and water resistance. The zipper roll-up door and 8 windows with straps promote airflow
- Easy Assembly: This hoop house greenhouse features bolt-fixed connections to reduce wobbling and deformation. Tube end caps help avoid scratches. Clear instructions and ties are included. The extended bottom edge allows added weight for extra stability
At minimum, build operable doors or vents at both ends. Better yet, include roll-up sides from the start. Roll-up sides are easier to install during the original build than after crops, irrigation, shelves, and paths are already in place. For a 10×20 or 12×20 backyard tunnel, full-length roll-up sides plus vented end walls give you much better control than doors alone.
Winter ventilation still matters. The goal is not to keep the tunnel sealed every day from November to March. On sunny days, open vents before temperatures spike, then close them before late afternoon cooling. In summer, many gardeners remove end panels, use shade cloth, roll sides fully open, or treat the structure as a rain shelter rather than a sealed greenhouse.
Step-by-Step Build Overview
1. Confirm Rules and Choose the Site
Before buying materials, check zoning, setbacks, easements, HOA rules, and building-permit triggers. Some jurisdictions treat small membrane structures as accessory structures. Others exempt certain agricultural or temporary structures, but those exemptions vary by state, city, size, occupancy, anchoring, and use. A backyard hoop house in one city may need no permit under a certain size, while a similar structure elsewhere may require review.
2. Lay Out the Footprint
Mark the corners, square the layout by measuring diagonals, and establish finished grade. For a 10×20 structure, both diagonals should match before posts are set. Correct drainage now. A slight crown or well-drained path is better than a flat muddy floor.
Do these 3 things before closing this tab:
1Scan for outdated or missing drivers - takes under a minute2Clear out junk files and repair common Windows errors3Fix the driver behind crashes, sound loss and screen glitches3. Set Ground Posts
Drive or set ground posts at the spacing required by your frame, often 4-foot spacing for stronger builds and 5- or 6-foot spacing for lighter systems. Keep posts aligned and plumb. In snow or wind country, closer spacing and added bracing are worth the cost.
4. Install Hoops, Purlins, and Bracing
Set each hoop into opposing ground posts, then connect ridge purlins and any side purlins. Add diagonal bracing at corners and end bays. Bracing is what keeps a frame from racking when wind pushes on the side.
5. Frame End Walls and Doors
End walls take more abuse than they appear to. They hold doors, vents, latch hardware, and film edges. Use straight lumber, exterior-rated fasteners, and diagonal bracing. A common door width is 30 to 36 inches for walk-in access, wider if you use a wheelbarrow or cart.
6. Install Film and Attachment Channels
Install greenhouse film on a calm day with help. Pull it evenly over the frame, center it, and attach it with lock channel and wiggle wire, batten boards, or another serviceable fastening system. Avoid sharp edges and protect film-contact points. Burying film edges can help seal sides, but roll-up sides need a different detail.
Recommended Free Tools
7. Add Ventilation, Irrigation, and Interior Protection
Set up roll-up sides, vents, shade cloth attachment, hose access, and drip irrigation before the house is full of crops. For winter growing, add low hoops and row cover inside the tunnel. That second layer is cheap, flexible, and effective.
Permits, Setbacks, and Safety Notes
Permit rules are local. Do not assume a hoop house is exempt because it has plastic instead of shingles. Jurisdictions may look at size, height, anchoring, electrical work, occupancy, proximity to property lines, fire separation, use as agriculture versus residential accessory storage, and whether it is temporary or permanent.
As a homeowner, start with these questions: What is the maximum accessory-structure size without a permit? Are there side-yard and rear-yard setbacks? Are membrane structures treated differently? Is electrical work allowed without a separate permit? Does the HOA restrict visible structures, height, or materials? Are there drainage rules that prevent runoff onto a neighbor’s property?
Rank #4

- High Strength and Stability: The tunnel greenhouse uses reinforced galvanized pipes (Diameter: 1", Wall Thickness: 0.02") to enhance overall structural strength. Reinforced door poles, added diagonal bars, U-shaped stakes, and tie-downs increase stability and protect plants.
- Thick High-Density PE Cover: This high tunnel greenhouse features a 140g/m² high-density PE material that is sun-resistant, and insulating. Double-stitched seams and reinforced window seams improve tear resistance. The extended cover edges can be weighted down or buried in soil to enhance insulation and sealing.
- Spacious Walk-In Design: With a spacious 19.36x9.68x6.50 ft area, this walk-in greenhouse tunnel is ideal for a variety of plant needs. It allows easy management and maintenance, and accommodates multiple plant shelves, making it ideal for both home and commercial gardening.
- Efficient Airflow: This hoop house greenhouse is equipped with 12 windows and a large zipper door to ensure excellent ventilation. The velcro on doors and windows allows for easy adjustment, while the mesh net prevents small creatures from entering, protecting plant health.
- Versatile Use for Multiple Settings: Ideal for home gardens, farms, and small commercial planting, this green house provides an optimal growing environment for various plants. It effectively extends the planting season, allowing you to enjoy gardening throughout the year.
Safety is mostly common sense, but it matters. Call 811 before driving long posts if there is any chance of buried utilities. Use eye protection when cutting metal, bending conduit, or driving posts. Keep extension cords out of wet soil, and hire a licensed electrician if you want permanent power for fans, heat mats, pumps, or lights. Use GFCI protection for any outdoor electrical equipment.
What to Grow for Year-Round Results
A hoop house does not make tomatoes a January crop in Minnesota without heat and lighting. It does, however, make cool-season crops much more reliable. For winter production, focus on spinach, kale, arugula, lettuce, mache, claytonia, scallions, parsley, cilantro, carrots, radishes, and Asian greens. These crops tolerate cool conditions and respond well to protected culture.
In spring, the hoop house gives you earlier starts for greens, brassicas, onions, herbs, and transplants. In summer, ventilation becomes the main job. Tomatoes, peppers, cucumbers, basil, and eggplant can thrive if the structure is not overheated and pollination is managed. In fall, the tunnel protects late crops from cold rain and the first frosts, extending harvest into winter.
For reliable year-round use, keep a thermometer inside, preferably one that records highs and lows. Many crop failures come from temperature swings the homeowner never sees: 88 degrees at noon, then 24 degrees before sunrise. Once you know the pattern, you can vent, shade, water, cover, or heat with better timing.
Low Tunnel vs Hoop House vs Kit High Tunnel vs Greenhouse
| Option | Cost | Durability | Best fit |
|---|---|---|---|
| Low tunnel | Lowest | Temporary to seasonal | Single beds, frost cover, inexpensive experimentation |
| DIY hoop house | Low to moderate | Good if anchored and covered properly | Backyard gardeners who can build and maintain it |
| Kit high tunnel | Moderate to high | Better component matching and often stronger options | Homeowners who want fewer design decisions and cleaner hardware |
| Permanent greenhouse | Highest | Longest-lasting when properly built | Heated growing, rigid glazing, utilities, finished appearance |
If you only want to protect lettuce in October, build low tunnels. If you want a walk-in growing room for serious backyard food production, a DIY hoop house is the better value. If your site has wind, snow, or you want roll-up sides and matched parts, a kit high tunnel can save time and reduce mistakes. If you want a heated, code-compliant, year-round growing building with utilities, benches, and rigid glazing, you are in greenhouse territory.
What’s actually slowing this PC down?
Pick the symptom - the matching free tool is one click away.
When to DIY and When to Hire a Pro
DIY makes sense when the structure is small, the site is level, utilities are not involved, and you are comfortable with layout, drilling, cutting, fastening, and lifting awkward materials. A 10×20 backyard hoop house is within reach for a capable homeowner with a helper, a post driver, drill, saw, level, tape, string lines, ladder, and basic hand tools. Expect a full weekend for a simple kit and two or three weekends for a self-sourced build with end walls, roll-up sides, beds, and irrigation.
Hire a pro, or at least get professional input, when the tunnel is large, the site needs grading, wind exposure is severe, snow loads are significant, the structure is close to a house or property line, or permanent electrical and water lines are part of the plan. A contractor can also help with concrete footings, drainage swales, retaining edges, accessible paths, and doors that hold up to daily use.
There is a middle ground: you can DIY the growing layout and hire out the structural or utility pieces. For many homeowners, that is the best value. Pay for grading, anchoring, electrical safety, and a clean shell, then build beds, irrigation, benches, and crop systems yourself.
Common Mistakes That Shorten Hoop House Life
The first mistake is building in a wet spot. If the site is muddy before the hoop house goes up, the plastic roof will not fix the underlying drainage problem. Improve grade, add paths, or choose a better location.
The second mistake is using the wrong plastic. Ordinary clear sheeting may look fine for a few weeks, but greenhouse-rated UV film is the correct material. A standard 6 mil, 4-year film is a practical starting point for most backyard builds.
Best Value
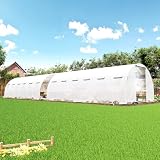
- Watering System: Built-in adjustable misting nozzles provide consistent, gentle watering to keep soil evenly moist and support steady plant growth, making this outdoor greenhouse convenient and reliable for busy gardeners
- Reinforced Galvanized Steel Frame: A 0.6mm galvanized steel frame with 4 vertical posts and 4 diagonal braces boosts stability. With spiral stakes and tension ropes, this heavy duty greenhouse resists wind, rain, and corrosion
- 360° Airflow Design: Front and rear double doors plus dual side roll-up doors with mesh windows ensure cross-ventilation. This walk in greenhouse keeps airflow steady, pests out, and humidity balanced for healthy growth
- Spacious Walk-In Design: The 10×44FT space with a 6.1FT entry height provides roomy interior for family gardening, school use, or small farms. This large greenhouse lets several people work easily without crowding
- Secure & Stable Design: Spiral stakes, ropes, and clamps provide firm anchoring. The 30cm widened edges boost wind resistance, while capped pipe ends prevent rust—keeping this greenhouse kit stable and safe over time
The third mistake is skipping ventilation. Homeowners design for winter warmth, then lose crops to heat and humidity. Build vents and roll-up sides first, not after the first crop failure.
The fourth mistake is weak anchoring. A hoop house can feel stable on a calm day and still fail under uplift. Use proper ground posts, anchors, bracing, and fasteners for your soil and exposure.
The fifth mistake is ignoring snow. Round PVC or light conduit frames can collapse under wet snow if the shape, spacing, and bracing are not appropriate. In snow country, use a gothic frame, closer bow spacing, and a maintenance plan for clearing accumulation.
Quick wins for a faster PC:
Scan for outdated or missing drivers - takes under a minuteDriver Scan →Clear out junk files and repair common Windows errorsFree Scan →Bottom Line
A good backyard hoop house is a practical construction project with a gardening payoff. For $500 to $1,500, many homeowners can build a useful 10×20 or 12×20 structure that protects crops, starts spring earlier, stretches fall later, and supports winter greens with the right crop plan. For larger or more exposed sites, expect the budget to climb into the thousands because the frame, anchoring, ventilation, and end walls have to do real work.
The best builds are not complicated. They are square, well-drained, properly anchored, covered with UV-rated greenhouse film, and designed to ventilate. Get those basics right, and a hoop house becomes a durable backyard growing space instead of a seasonal repair project.
Frequently Asked Questions
Do I need a permit to build a hoop house in my backyard?
Maybe. Permit rules depend on your city, county, size, height, anchoring, electrical work, setbacks, and whether the structure is considered temporary, agricultural, or accessory. Check local building and zoning rules before buying materials.
How much does a DIY hoop house cost in 2026?
A basic homeowner-size 10×20 or 12×20 hoop house commonly costs about $500 to $1,500 in 2026. Larger 20×40 to 30×72 tunnels often run $3,000 to $12,000 or more depending on frame strength, doors, roll-up sides, anchoring, and site work.
The Tool Desk
Outbyte Driver Updater FREEFix the driver behind crashes, sound loss and screen glitchesFind Drivers →Outbyte PC Repair FREERepair Windows errors before they cause bigger problemsFix Now →What is the best plastic for a hoop house?
Use 6 mil, 4-year UV-rated greenhouse polyethylene. Ordinary clear construction plastic is not made for long-term sun exposure and usually yellows, tears, and fails much faster.
Can you garden year-round in a hoop house without heat?
In mild climates, yes for many cool-season crops. In colder climates, year-round production usually requires hardy crops, interior row covers, careful ventilation, and sometimes backup heat during severe cold.
Should I build a PVC or metal hoop house?
PVC can work for small, temporary, low-cost structures, but metal is usually better for a walk-in hoop house. Galvanized steel or EMT frames are stronger, more durable, and better suited to wind and snow when properly braced and anchored.
How do I keep a hoop house from blowing away?
Use properly driven ground posts, solid baseboards, diagonal bracing, secure film attachment, and anchors sized for your soil and wind exposure. Do not rely on the weight of the frame alone.
Do these 3 things before closing this tab:
1Clear out junk files and repair common Windows errors2Fix the driver behind crashes, sound loss and screen glitches3Repair Windows errors before they cause bigger problemsQuick Recap
Product prices and availability are accurate as of the date/time indicated and are subject to change. Any price and availability information displayed on Amazon at the time of purchase will apply.