PC Slower Than It Used to Be?
A free scan shows the junk files, broken settings and background clutter dragging Windows down - then fixes them in one click.Free scan · Windows 10 & 11Crashes, No Sound, or Screen Glitches?
Random freezes, missing sound and display glitches usually trace back to one bad driver. Find and replace yours safely.Free scan · under a minuteTo lay out a rounded corner without calculating an offset, set a compass to the radius you want, mark that distance along both edges from the sharp corner, then use those marks to draw the curve. Keep the marks visible: they define where the curve begins and ends and guide the cut.
Lay out the radius with a compass
- Set the radius. Open a compass to the radius you want on the finished corner. You do not need to calculate a separate distance for this construction.
- Mark both edges. Place the compass point on the theoretical sharp corner and mark the radius distance along each adjoining edge. These two marks are the start and stop limits for the curve.
- Draw the short guide arcs. Keeping the compass point at the corner, sweep a short arc across each edge mark.
- Draw the connecting curve. Put the compass point on one edge mark and set the pencil at the other. Swing the compass between the short guide arcs. The WOOD demonstration describes using each edge mark as a center in turn to complete the curve. WOOD Magazine’s illustrated procedure is by Robert Wilson and was updated July 8, 2025.
- Cut to the line. Use a bandsaw or jigsaw to remove the waste, then refine the edge as needed. Treat the marked endpoints as cut limits rather than trimming past them.
Why the construction works
Each edge mark is one radius away from the theoretical sharp corner. Using those marks as centers for the connecting arc makes the curve meet the adjoining straight edges smoothly. This is the geometric explanation of the described layout, rather than a formal proof given in the WOOD article.
Choose a method for the work
| Method | Best fit | What it does |
|---|---|---|
| Compass layout | A one-off corner or a quick manual layout | Marks the radius directly on the workpiece; no radius formula is needed. |
| Shop-made hardboard template | Repeated marking with a consistent setup | Woodsmith describes a two-layer template: lower-layer right-angle fences register against the workpiece, while a hole in the upper layer serves as the circle template. A relief hole at the fence intersection helps the faces sit cleanly against the workpiece. See Woodsmith’s “Versatile Layout Tools” (September 13, 2012) and its “Handy Layout Templates” (June 8, 2017). |
| Commercial routing template | Repeated routed corners within the template’s range | Rockler states that its corner-radius templates cover 1/8-inch to 2-inch radii and can guide pencil layout or routing. For larger radii, the retailer recommends sawing away most of the waste before routing. This is product guidance, not an independent comparison. See Rockler’s product page, accessed October 8, 2026. |
| Router circle-routing system | Routing circles, curves, or round holes | Festool describes a router and multi-routing-template system for this equipment-based work. It is not needed for basic hand layout. See Festool UK’s application page, accessed October 8, 2026. |
| CAD | A digital drawing workflow | Autodesk Inventor documentation describes circles created from a center and radius as well as tangent-to-three-lines circle tools. CAD is useful for digital geometry, but does not replace the manual construction. See Autodesk Inventor Help. |
For multiple identical pieces, a template can make marking more repeatable; for a routed finish, verify the template’s radius range and router compatibility before choosing it. The cited sources do not establish a universal accuracy ranking among these methods.
Quick Recap
Best Value

- Precision Marking – The ARU bullnose corners 10-030 trim gauge tool ensures accurate marking on 3/4-inch radius bullnose drywall corners, helping you achieve seamlesscrown molding and tight-fitting corners.
- One-piece molded plastic construction – Plastic construction reduces tool weight for easy one-handed use. It is especially suitable for decoration scenarios that require frequent movement and positioning.
- Versatile and Time-Saving – Whether you're installing crown molding, baseboards, or drywall corners, this woodworking marking tool simplifies the process. The scriber feature allows for precise layout lines, reducing errors and saving time on rework. Suitable for both diy enthusiasts and professional carpenters.
- User-Friendly Design – Working alone? No problem! The ARU bullnose trim gauge can be nailed in place to anchor your tape measure, ensuring stability while marking.
- Complete Package for Immediate Use – Includes 1 x bullnose trim gauge tool, ready to simplify your trim work right out of the box.
Rank #4

- 【Manual Outer Radius Measurement】 This instrument measures outer radius. It quickly matches fillet sizes.
- 【Durable Plastic Construction】 Made of sturdy plastic, the radius gauge is lightweight and won’t easy scratch workpieces. It resists wear for consistent use in daily measuring tasks.
- 【Compact Size】 Measuring 3.35 inches long and 2.76 inches wide, radius measuring tool is easy to hold during operation.
- 【Clear 0-50 Scale】 Diameter measuring tool features a clear 0-50 scale that is easy to read. You can get measurement values quickly boosting work efficiency.
- 【Versatile Professional Applications】 This profiles gauge suits tool and die making, pipe fitting, and rounded corner checks.
Rank #3

- 【Package Includes】The radius fillet gauges set contains 5 different shapes and measuring range: R0.3-1.5mm/ R1-6.5mm/ R7-14.5mm/ R15-25mm/ R25-50mm to meet you various need.
- 【Premium Material】This radius gauge is made of high quality stainless steel, durable, high hardness and resistant to rust.
- 【Multi-purpose】The radius measuring instrument has two types of leaves so it can check both convex and concave surfaces. The convex pattern is used to detect the concave surface arc, and the concave template is used to detect the convex surface arc.
- 【Excellent Design】The 360-degree Locking Screw design allows you to unfold or fold it easily. Each leaf is clearly marked, convenient to identify which leaf you need.
- 【Wide Application】This radius gauge is widely used in home improvement, machine installation, electric equipment, suitable for tool and mold manufacturers, mechanics and many other workers to check the tool radius of the meter, measure the thickness or width of screw, valve, bearing ect.
Rank #2

- Made of durable ABS plastic material.
- Work on 3/4-inch rounded drywall corners and help you layout perfect lines for tight-fitting three-piece corners
- Save time and make it easy to install rounded bullnose corners with this bullnose trim tool.
- Package include 2pcs bullnose trim gauge.
#1 Best Overall
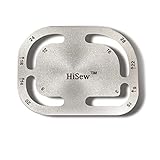
- 12 CORNER RADIUS OPTIONS:Includes 12 commonly used radius sizes (R3, R8, R9, R12, R14, R15, R16, R18, R20, R22, R24, and R28) for marking rounded corners on leather projects.
- LEATHER CORNER LAYOUT TOOL: Designed for marking curved corners on wallets, bags, belts, straps, notebook covers, and other leathercraft projects before cutting.
- STAINLESS STEEL CONSTRUCTION: Made from stainless steel with polished surfaces and smooth edges for comfortable handling during leather crafting.
- EASY RADIUS SELECTION: Choose the desired radius size, align the template with the leather edge, trace the curve, and create matching corner shapes for your projects.
- FOR LEATHER CRAFT APPLICATIONS: A practical template ruler for DIY leather workers who need repeatable corner measurements and layouts for handmade projects.
Product prices and availability are accurate as of the date/time indicated and are subject to change. Any price and availability information displayed on Amazon at the time of purchase will apply.
What’s actually slowing this PC down?
Pick the symptom - the matching free tool is one click away.




