Create a veneer starburst by cutting matching wedge-shaped pieces, arranging them around a shared center, and pressing the assembled veneer onto a stable panel. The angle of each wedge is 360 degrees divided by the number of sections: an eight-piece pattern uses 45-degree wedges. The steps below adapt Guy Dunlap’s walnut tabletop method for WOOD magazine, updated August 8, 2022, while noting where its dimensions apply only to that project.
Plan the pattern and panel
Choose the panel size, veneer, and number of sections before cutting. A larger section count creates narrower wedges; every wedge must have the same angle for the pattern to close evenly.
| Sections | Angle per wedge |
|---|---|
| 8 | 45° |
| Other counts | 360° ÷ section count |
WOOD magazine’s illustrated walnut tabletop uses eight sections in a 20-inch-diameter field. Those are dimensions for that example, not requirements for every starburst. Consider the grain direction and appearance you want: sequential sheets make it easier to preview a coordinated pattern, and quartersawn veneer can work well in a radial match, according to Australian Wood Review’s starburst matching guidance.
Choose veneer and prepare the cutting guide
Preview and number the veneer
Select consecutive veneer sheets and number them in stack order so their positions stay clear as you work. WOOD magazine’s method uses two mirrors to preview how the grain will repeat in the assembled starburst. Adjust the sequence before cutting if the reflected pattern is not the look you want.
Recommended Free Tools
#1 Best Overall

- Wood Veneer Sheets Variety Pack for Creative Projects: this wood veneer sheets variety pack includes 30 square veneer sheets in mixed brown colors, giving you multiple wood grain options in one set for marquetry, inlay, and woodworking designs
- Practical Dimensions: each of our wood veneer boasts a size of 7.9 x 7.9 inches/ 20 x 20 cm, the thickness is different due to wood reasons, about 1/50 inches/ 0.5 mm; These slim wood veneers are great for handcrafting enthusiasts, easy to cut into precise shapes, offering design flexibility; Suitable for intricate details, it supports smooth handling and accuracy for precise projects
- Natural Wood Veneer with Grain Texture: made from real wood, these wood veneer sheets feature natural grain patterns and color variations; Each sheet has its own look, adding authenticity and depth to finished pieces
- Wood Veneer for Marquetry, Inlay and DIY Crafts: the wood veneer for marquetry and inlay, as well as furniture accents, cabinet surfaces, box making, restoration work, and other DIY woodworking applications
- Unfinished Veneer Sheets for Custom Bonding: these veneer sheets do not include adhesive, allowing you to choose your preferred glue or bonding method based on your project needs and woodworking techniques
Make a wedge template
For an eight-section layout, make an MDF template with a 45-degree angle and sides longer than the radius of the veneer field. In the 20-inch field example, the template sides are 12 inches long. Sandpaper attached to one face helps keep the template from slipping against the veneer stack. Scale the template to suit your own field.
Cut and fit the wedges
- Align and tape the stack. Arrange the selected veneer sheets in order, align their edges, and tape them together so they cannot shift during cutting.
- Cut the first side. Hold the wedge template as a guide and cut through the stack with a veneer saw or a utility knife fitted with a fresh blade. Make a controlled cut rather than forcing the blade.
- Restack and cut the opposite side. Reposition the selected pieces as needed, then use the template to cut the second edge of each wedge.
- Arrange the grain. Lay the wedges out around a shared center. Turn alternating pieces face-up and face-down for the bookmatched arrangement used in WOOD magazine’s example. Check the grain and overall symmetry before joining the pieces.
- True the mating edges. Bring each seam into close contact before taping. Australian Wood Review describes shooting the edges with a hand plane as one way to improve the fit; tape alone does not correct an edge that is out of square or irregular.
- Tape the pattern together. Tape the wedges into halves, then join the halves to complete the full starburst. Handle the wedge tips carefully because they can be fragile.
Balance and press the panel
Veneer the reverse side of the substrate as well as the starburst face to help the panel remain stable. WOOD magazine’s example uses plywood, a backer veneer, melamine platens, and crowned cauls to distribute clamping pressure. Adapt the press setup to your panel and clamps so pressure is spread evenly across the assembly.
Rank #2

- REAL WOOD VENEER SHEET – ready to stain, real wood veneer sheets which are ideal for using when repairing or refacing furniture, cabinets and fine woodworking. High quality veneer sheets that will stand the test of time
- PAPER BACKED FOR EASY HANDLING – our veneer sheets are 10 mil paper backed to help you grip the veneer easier when working on your project. Easy to apply with super bonding adhesive, these veneer sheets are strong yet flexible and won’t split the grain when bent to fit to your requirements
- EASY TO USE CABINET VENEER SHEETS – these wood veneer sheets for cabinets are ready for you to easily stain match your existing furniture for a seamless, premium finish. Simply cut to size with a box knife and apply contact adhesive with a roller to achieve best results
- “A” GRADE” PREMIUM QUALITY – made from the highest “A” grade veneer quality, this flexible veneer sheet is ready to stain for your restoration and repair work. The overall thickness of .024”
- VERSATILE AND COST-EFFECTIVE VENEER SHEETS – our wood veneer sheets can be used for a wide variety of projects including cabinets, resurfacing tables and general repair. Simple to use, these are a cost-effective way of restoring your projects back to their former glory without having to replace them
- Position and tape the backer veneer to the underside of the plywood substrate.
- Spread yellow woodworking glue on the substrate face, not on the starburst veneer pattern. Guy Dunlap’s guide says, “Any type of yellow woodworking glue works”; that is guidance for the described method, not a universal adhesive specification.
- Assemble the starburst face and position it on the glued substrate.
- Place the panel between suitable platens and cauls, then clamp evenly while the adhesive sets according to its instructions.
Trim the panel and add a border if needed
A circular tabletop requires extra work beyond making the starburst field. In WOOD magazine’s project, a separate border is built from 12 segments with 15-degree miters; the segments are dry-fitted before the border is glued. The field and border are then trimmed to a circle with a router and trammel. The guide uses slow-setting epoxy to attach the border and routes a shallow groove along the seam for an inlay. These are project-specific choices, not necessary steps for a square panel, box lid, or starburst without a border.
For a circular field, use a suitable router setup and a downcut spiral bit as described in the guide. A straight bit is used for its inlay groove. Secure the work and follow the router and bit manufacturers’ instructions.
Outdated Drivers Are Slowing You Down
One free scan finds every outdated or missing driver and matches the right update for your exact hardware.Free scan · exact hardware matchWindows Errors? Fix Them Before They Spread
Repair common Windows errors and clear accumulated junk for a smoother, more stable PC - no reinstall needed.Free scan · no reinstallQuick Recap
Best Value
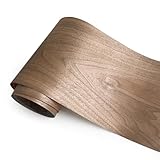
- Natural and beautiful: Wood veneer is a thin wooden sheet material produced by rotary cutting or sawing of logs, Has a natural woody feel,Different wood textures and tones can meet various design styles and aesthetic needs.
- Multifunctionality: Can be applied to various surfaces, suitable for refurbishment and production of furniture, cabinets, doors, speakers, and wall panels.
- Durable and Stable: The wood veneer uses backing materials to enhance durability and stability, making it less prone to deformation or cracking, and can maintain aesthetics and practicality for a long time.
- Flexible and Convenient: Its flexibility allows for easy installation on flat or curved surfaces, meeting design requirements of various shapes and sizes.
- Environmental protection and health: Wood veneer comes from wood, which is a renewable resource. The use of wood veneer conforms to the concept of green decoration and is conducive to sustainable development.
Rank #4

- Wood Veneer Sheets Variety Pack for Creative Projects: this wood veneer sheets variety pack includes 30 square veneer sheets in mixed brown colors, giving you multiple wood grain options in one set for marquetry, inlay, and woodworking designs
- Thin Square Wood Veneers, Easy to Cut and Shape: each wood veneer sheet measures 12 x 12 inches/ 30.5 x 30.5 cm with varied thickness (approx. 0.5 mm), making these veneers easy to cut, trim, and shape for detailed craft and woodworking projects
- Natural Wood Veneer with Grain Texture: made from real wood, these wood veneer sheets feature natural grain patterns and color variations; Each sheet has its own look, adding authenticity and depth to finished pieces
- Wood Veneer for Marquetry, Inlay and DIY Crafts: the wood veneer for marquetry and inlay, as well as furniture accents, cabinet surfaces, box making, restoration work, and other DIY woodworking applications
- Unfinished Veneer Sheets for Custom Bonding: these veneer sheets do not include adhesive, allowing you to choose your preferred glue or bonding method based on your project needs and woodworking techniques
Rank #3
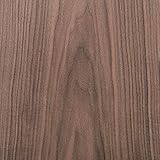
- REAL WOOD VENEER SHEETS – ready to stain, real wood veneer sheets which are ideal for using when repairing or refacing furniture, cabinets and fine woodworking. High quality Wood Veneer Sheet that will stand the test of time.
- PEEL & STICK FOR EASY APPLICATION – our Wood Veneer Sheets are ultra flexible and they are bonded to paper backing which, when peeled off, will provide a strong adhesive that will stick to any Rotary surface. Easy to apply with super bonding self adhesive, these veneer sheets are strong and flexible, it won’t split the grain when bent.
- EASY TO USE CABINET VENEER SHEETS – these wood veneer sheets for cabinets are ready for you to easily stain, match your existing furniture for a seamless, premium finish. Simply cut to size with a box knife and apply with a stiff bladed scraping tool or wooden block to achieve best results.
- “A” GRADE” PREMIUM QUALITY AND SIZING INFO – made from the highest “A” grade veneer quality, Real Wood Veneer Sheets, this flexible Wood Veneer Sheet is ready to stain for your restoration and repair work. The overall thickness is 0.4 MM
- VERSATILE AND COST-EFFECTIVE VENEER SHEETS – our Wood Veneer Sheet can be used for a wide variety of projects including cabinets, resurfacing tables and general repair. Simple to use, these are a cost-effective way of restoring your projects back to their former glory without having to replace them.
Materials and tools
- Decorative veneer; WOOD magazine’s example uses walnut.
- Plywood substrate and balancing veneer for the reverse face.
- MDF for the wedge template, plus suitable platens and cauls for pressing.
- Veneer saw or utility knife with a fresh blade.
- Painter’s tape, sandpaper, and yellow woodworking glue.
- Clamps and crowned cauls to spread pressure across the panel.
- For a circular tabletop: router, trammel, and downcut spiral bit; a straight bit for an inlay groove.
- Optional border stock, epoxy, and inlay material.
Product prices and availability are accurate as of the date/time indicated and are subject to change. Any price and availability information displayed on Amazon at the time of purchase will apply.




