Concrete is one of the most useful materials a homeowner can bring into a garden. It can be cast into a planter, shaped into edging, poured into a walkway, or used as a durable base for sheds, grills, rain barrels, and potting benches. It is also unforgiving. Once concrete is mixed and placed, the clock is running.
For most garden projects, the difference between a clean result and a cracked, dusty mess is not the mold or the decorative idea. It is the basics: correct quantity, compacted base, water control, slope, joints, finishing, and curing. On our job sites, we treat even small exterior concrete like permanent work because water, frost, soil movement, and daily use will test it quickly.
This guide gives you 39 concrete garden projects organized by difficulty and risk, with real 2026 U.S. cost ranges, bag math, safety notes, and clear guidance on when DIY makes sense and when a professional crew is the better call.
Before You Mix: Cost, Quantity, Safety, and Setup
Most DIY concrete mistakes start before the first bag is opened. A homeowner underestimates the volume, adds too much water to make placement easier, skips the gravel base, or forgets that a 20-foot path needs somewhere to drain.
#1 Best Overall

- 🌻 This versatile 6-pack includes 6 pcs concrete stepping stone molds in 3 sizes (10", 11", 12.6"), ideal for creating unique garden pathways. The contrasting sizes enable creative layouts to enhance your outdoor decor. Perfect for DIY enthusiasts seeking durable, reusable path makers.
- 🌻 The cement mold features a smooth base for a sleek finish. Mix and match designs to create visually appealing stepping stones. Suitable for concrete, resin, or plaster casting.
- 🌻 Made from high-quality, flexible yet sturdy plastic, these stepping stone molds resist cracking and warping for long-lasting use. The durable material ensures easy release of hardened stones without damage. Ideal for repeated projects in any season.
- 🌻 Simply fill the concrete stepping stone molds with your chosen material, allow it to set, and remove your custom stepping stone. The lightweight design makes handling easy, and cleaning is simple. No special tools needed—great for beginners and experts alike.
- 🌻 Beyond stepping stones, these cement molds can be used for coasters, wall art, or decorative tiles. The compact size allows easy storage when not in use. A must-have for crafters, gardeners, and home improvement lovers!
For 2026 budgeting, ready-mix concrete commonly runs about $110 to $195 per cubic yard in the United States. Some markets land closer to $160 to $195+ once delivery, fuel, short-load charges, taxes, weekend delivery, admixtures, and small-order fees are included. Professional basic flatwork often falls around $6 to $12 per square foot for a standard 4-inch residential slab, with many common jobs around $8 to $10 per square foot. Walkways are often $6 to $17 per square foot, and basic patios commonly range from about $6.92 to $9.77 per square foot, with decorative or complex patios climbing far higher.
DIY material cost can be much lower, but do not compare bag price against a finished professional slab. You still need gravel, forms, stakes, reinforcement where appropriate, finishing tools, joint material, curing supplies, sealers, disposal, and enough help to place the concrete before it stiffens.
| Project type | Typical DIY material range | Common pro installed range | DIY difficulty |
|---|---|---|---|
| Small cast planter, bowl, marker, or ornament | $10-$75 | Usually purchased retail, not installed | Beginner |
| Stepping stones or small paver path | $3-$8 per square foot in basic materials | $8-$17 per square foot for many walkways | Beginner to moderate |
| Simple poured garden edging | $5-$15 per linear foot in materials | $10-$25+ per linear foot installed | Moderate |
| Small 4-inch slab or pad | $2-$6 per square foot in materials | $6-$12 per square foot installed | Moderate to hard |
| Stamped or decorative flatwork | Materials vary widely | $8-$28+ per square foot installed | Pro-advised |
Bag Math for Garden Concrete
Use volume, not guesswork. For a slab, pad, or poured form, multiply length x width x thickness. Convert inches to feet first. A 4-inch slab is 0.333 feet thick. Divide cubic feet by 27 to get cubic yards, then add 5% to 10% for waste, uneven excavation, and spilled mix.
Example: a 4-foot by 6-foot grill pad at 4 inches thick is 4 x 6 x 0.333 = 7.99 cubic feet. Add 10%, and you need about 8.8 cubic feet. Many 80-pound bags yield about 0.6 cubic feet, so that pad takes about 15 bags. A cubic yard takes roughly 45 80-pound bags before waste. That is a lot of lifting and mixing.
Rule of thumb for flatwork: a 4-inch slab uses about 1.23 cubic yards per 100 square feet. A 6-inch slab uses about 1.85 cubic yards per 100 square feet. Once a project reaches several cubic yards, ready-mix usually makes more sense if the site has access and enough people are ready to place and finish it.
Safety and Permits
Cement products are caustic. Wear eye protection, waterproof gloves, long sleeves, dust protection when handling dry mix, and boots you can wash. An 80-pound bag is also a lifting injury waiting to happen if you are tired or working alone.
Call 811 before digging for footings, posts, edging trenches, patios, paths, or pads. Check local rules before building patios, shed slabs, stairs, retaining walls, public sidewalks, driveway aprons, equipment pads, or anything near property lines, easements, utilities, drainage swales, or structures. Many small garden ornaments need no permit. Permanent flatwork sometimes does.
Beginner Cast Concrete Projects
These projects are the best starting point because they are small, low-risk, and easy to redo. Use bagged concrete or mortar mix depending on the finish you want. Tap or lightly vibrate molds to release air bubbles, but do not overdo it; too much vibration can settle aggregate and bring excess paste to the top.
1. Round Planter Bowls
Use two nested plastic bowls as molds. Oil the forms lightly, pour 1 to 2 inches of mix in the bottom, insert the smaller bowl, and weight it. Keep walls at least 1 inch thick for small planters and closer to 1.5 to 2 inches for larger bowls. Add a drainage hole with a dowel or plastic tube. Expect $10 to $35 in concrete and supplies per planter.
2. Rectangular Concrete Planters
Build a simple melamine or plywood mold for clean sides. A practical herb planter might be 24 inches long, 8 inches wide, and 8 inches tall. Round the top edges slightly so they do not chip during handling. Cure several days before unmolding, then let the planter continue curing before planting. Use a liner or sealer for sensitive plants.
3. Hypertufa-Style Pots
Hypertufa-style mixes are lighter than standard concrete and often used for rustic garden pots. They are good for succulents and alpine plants. Keep the walls chunky, usually 1.5 inches or thicker, because lightweight mixes are not as impact-resistant as dense concrete.
4. Leaf-Cast Stepping Stones
Large leaves create detailed texture. Place the leaf vein-side up on a sand bed, mound concrete over it to about 1.5 to 2 inches thick, and embed wire mesh only if the piece is large enough to justify reinforcement. These are decorative stones, not a main walkway for heavy traffic.
Outdated Drivers Are Slowing You Down
One free scan finds every outdated or missing driver and matches the right update for your exact hardware.Free scan · exact hardware matchPC Slower Than It Used to Be?
A free scan shows the junk files, broken settings and background clutter dragging Windows down - then fixes them in one click.Free scan · Windows 10 & 115. Plant Markers
Pour small strips or tags in silicone molds, old trays, or handmade forms. Stamp plant names while the mix is firm but still workable. A $10 bag of mix can make dozens, depending on size.
6. Address Stone for the Garden Gate
Cast house numbers or a family name into a flat panel. Keep the panel at least 1.5 inches thick and add hanging hardware carefully, or set it into a small gravel bed instead of suspending it.
Rank #2

- Round Stepping Stone Mold:You can use our round concrete moulds in your garden and on your pavements, pavers in a variety of sizes to suit your needs. For you to create a beautiful stepping stone, passage, garden walkway
- Quality Material: All stepping stone molds are made of premium plastic material that is sturdy, flexible, and not easy to break or warp. The durable construction ensures repeated reuse in any season, resisting cracking even after multiple casting uses. The smooth surface of the molds also guarantees easy release of hardened concrete, resin, or plaster without damaging your finished stepping stones
- Easy to Use:No professional experience or special tools required! Simply fill the mold with your chosen material (concrete, resin, plaster, etc.), let it set completely, and then easily demold. The lightweight design makes handling and carrying convenient, and cleaning the molds after use is a breeze—saving you time and effort while enjoying the fun of DIY
- Personalized Ceative Molds: Our octagonal molds allow you to fully unleash your creativity and freely arrange them to create unique artistic patterns. They are perfect for DIY enthusiasts, gardeners, artisans, and anyone who wants to enhance the outdoor environment with personalized stone steps decoration
- DIY Garden Path:Perfect for outdoor use in gardens, pavements, walkways, and yards—create beautiful custom stepping stones to add charm to your outdoor space. Unleash your creativity by painting, coloring, or adding embellishments to make each piece one-of-a-kind
7. Concrete Garden Spheres
Use glass globe light covers or split plastic balls as molds. Spheres look good in planting beds because concrete has enough weight to stay put. Wear eye and hand protection if breaking away a glass mold.
8. Candle Holders and Tabletop Lantern Bases
Small cylinders, cubes, and shallow trays are easy beginner projects. Keep candle recesses oversized enough that heat is not concentrated tightly against the concrete. Expect 24 to 48 hours before careful unmolding for many small pieces, with continued curing afterward.
What’s actually slowing this PC down?
Pick the symptom - the matching free tool is one click away.
9. Solar-Light Bases
Cast small weighted bases for stake lights where soil is loose or mulched. Use a short piece of PVC as a sleeve so the light stake can be removed. A base about 6 inches wide and 3 inches thick is usually enough for small path lights.
10. Hose Guides
Cast squat cylinders with a rounded top or embed a smooth vertical pipe. Place them at bed corners so hoses do not crush plants. Keep edges smooth because hoses will drag across them all season.
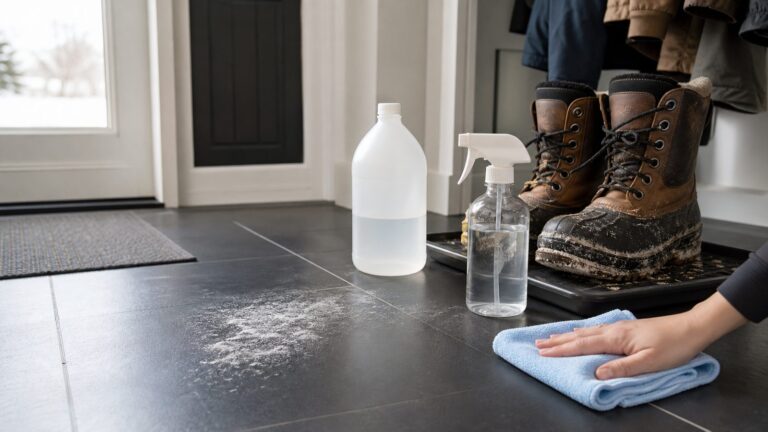
11. Boot Tray for the Garden Door
Pour a shallow tray with a slight recess and small decorative stones pressed into the surface. Keep the base around 1 to 1.5 inches thick. Add felt pads underneath if it will sit on finished flooring.
12. Mosaic Stepping Stones
Set tile pieces, stones, or glass into the top of a cast stone. Use outdoor-rated materials and avoid sharp edges. For walking surfaces, keep the top slip-resistant and mostly flat. Smooth glass can be slick when wet.
Weekend Garden Upgrades
These projects are still reasonable for capable homeowners, but they need better layout, excavation, and curing. Plan on a full weekend for prep and placement, then several days before normal use.
13. Textured Stepping Stones
Use a plastic form or homemade wood form for individual stones. A practical size is 16 to 24 inches across and 2 inches thick. Set stones on compacted gravel or sand, not loose soil. Leave a natural walking stride of roughly 24 inches center to center.
14. WalkMaker-Style Garden Path
Plastic path molds are useful for informal walkways. One 80-pound bag can cover one typical 2-by-2-foot mold section. For better durability, excavate and add 2 to 4 inches of compacted gravel, especially in wet or freeze-thaw areas.
15. Poured Concrete Garden Edging
Concrete edging holds mulch and gives beds a permanent line. Excavate a trench, set flexible forms, and pour a curb about 4 to 6 inches wide and 4 to 6 inches deep. Add control joints every few feet so cracking happens in planned locations.
Quick wins for a faster PC:
Clear out junk files and repair common Windows errorsFree Scan →Scan for outdated or missing drivers - takes under a minuteDriver Scan →16. Curb-Style Borders Around Beds
A taller border can create a clean separation between lawn and planting areas. Keep the exposed curb modest, often 3 to 5 inches above grade. Taller curbs can trap water or create trip points if placed near paths.
17. Downspout Splash Blocks
Cast a splash block about 12 inches wide, 24 to 36 inches long, and 2 inches thick. Slope or groove the top so water moves away from the foundation. Concrete near a house should never direct water back toward siding, vents, or framing.
18. Small Birdbath Basin
Cast a shallow basin with a roughened interior so birds have traction. Keep water depth shallow, usually 1 to 2 inches. Use a stable base and avoid top-heavy designs that can tip.
19. Low Garden Bench Seat
A cast concrete bench top can sit on concrete blocks, masonry piers, or steel supports. A small bench might be 48 inches long, 16 inches deep, and 2.5 to 3 inches thick. Reinforcement may be needed depending on span and support spacing. If you are unsure, shorten the span or use more supports.
Do these 3 things before closing this tab:
1Fix the driver behind crashes, sound loss and screen glitches2Repair Windows errors before they cause bigger problems3Scan for outdated or missing drivers - takes under a minuteRank #3

- 5 UNIQUE DESIGNS – Create eye-catching garden stepping stones with these premium concrete stepping stone molds. Featuring 5 detailed styles (Paw Print, Heart, Daisy, Maple Leaf, Pumpkin), they instantly turn ordinary cement into stunning landscaping stepping stones for your flower bed borders.
- FULLY CUSTOMIZABLE – Easily customize this reusable casting mold with any paint or personal text. Whether making personalized garden accents, pet memorials, or fun handmade garden gifts, you can create unique DIY patio pathway designs that suit your style perfectly.
- BUILT FOR THE OUTDOORS – Made for all weather. Use exterior-grade concrete to cast solid, weather-resistant stones. When sealed, they serve as durable outdoor garden decor and tough paving stone molds that withstand sun, rain, and frost without cracking or fading.
- REUSABLE & COST-EFFECTIVE – Save money with these reusable concrete molds. Craft multiple matching stones, build a complete garden path, or create seasonal decorative plaques without buying new molds. It's the smart, budget-friendly way to transform your backyard walkways.
- EASY, BEGINNER-FRIENDLY USE – No sculpting skills needed. Just pour concrete into the stepping stone mold, let it cure, and gently flex to release. Perfect for DIY patio pathway projects and weekend crafts, this tool makes creating professional-looking cement yard art quick and enjoyable.
20. Block-and-Board Bench with Concrete Block Bases
This is a simpler bench option. Use concrete blocks as bases and pressure-treated or naturally durable wood for the seat. Set the blocks on compacted gravel so they do not sink unevenly.
21. Outdoor Side Table
Cast a small concrete top, typically 18 to 24 inches wide and 1.5 to 2 inches thick. Concrete is heavy, so match the base to the weight. A 24-inch square top at 2 inches thick can weigh roughly 80 pounds depending on mix.
22. Potting-Table Concrete Top
A concrete work surface handles soil, water, and tools well. Keep it supported continuously or at close intervals. For a 24-by-48-inch top, plan carefully for weight, reinforcement, and edge protection.
23. Small Water-Feature Basin
Concrete can form a basin for a recirculating fountain, but waterproofing matters. Concrete is not automatically watertight. Use a compatible coating, liner, or waterproofing system, and test for leaks before finishing the surrounding planting bed.
The Tool Desk
Outbyte Driver Updater FREEScan for outdated or missing drivers - takes under a minuteDriver Scan →Outbyte PC Repair FREERepair Windows errors before they cause bigger problemsFix Now →24. Mailbox Planter Base
A small concrete planter at a mailbox post can look permanent and tidy. Do not encase wood posts in a way that traps moisture at grade. Leave drainage paths and keep soil from staying wet against the post.
Functional Flatwork for Gardens
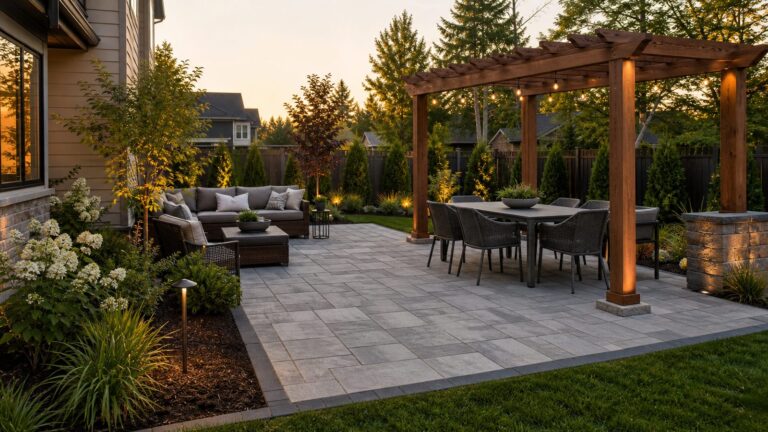
Flatwork is where DIY risk increases. A patio, pad, or walkway must carry loads, shed water, resist cracking, and survive weather. For many residential garden projects, a common baseline is 4 inches of concrete over 2 to 4 inches of compacted gravel. For a slab, some bagged-mix guidance uses about 7 inches total excavation: 4 inches of concrete over 3 inches of gravel.
Exterior concrete must drain. Use a broom finish or another slip-resistant texture, and slope surfaces away from structures. A common drainage target is about 1/8 to 1/4 inch per foot, depending on the project and local conditions. Keep concrete below siding, weep screeds, vents, and wood framing clearances.
25. Grill Pad
A grill pad keeps wheels level and grease off the lawn. A common size is 4 by 6 feet or 5 by 7 feet. At 4 inches thick, the 4-by-6 pad needs about 15 80-pound bags after waste. Add compacted gravel, form square corners, and broom finish the surface.
Free tools Windows power users keep installed
One-click scans. No signup required.
26. Rain-Barrel Pad
Water is heavy. A full 55-gallon barrel weighs more than 450 pounds before counting the barrel and stand. Use a stable 4-inch slab over compacted base, and make it larger than the barrel footprint. Keep it level, but make sure surrounding grade drains away.
27. Compost-Bin Pad
A concrete compost pad makes cleanup easier and keeps bins from sinking. A practical pad might be 4 by 8 feet. Add a slight slope so leachate and rainwater do not pond. Consider where runoff goes before you pour.
28. Trash-Can Storage Pad
For two or three cans, plan around 4 by 8 feet or larger. Place it where wheels can roll easily to the driveway or alley. Use a broom finish, and avoid a raised lip that turns into a trip hazard.
29. Small Shed Pad
A shed pad is possible for a skilled DIYer, but the stakes are higher. Small sheds often use a 4-inch slab, while larger sheds, poor soils, or heavy equipment may need thickened edges, reinforcement, or a designed foundation. Check the shed manufacturer’s requirements and local permit rules before pouring.
Recommended Free Tools
30. Fire-Pit Seating Pad
A concrete pad around a fire pit creates a clean seating zone, but heat and clearances matter. Keep fire features away from structures, fences, overhangs, and combustible materials. Do not assume a thin decorative slab is suitable under every fire pit. Follow the fire pit manufacturer’s base and clearance requirements.
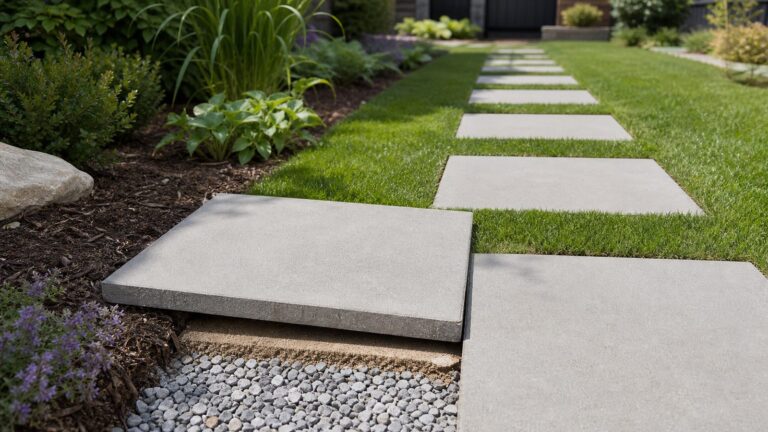
31. Garden Path Slab Sections
Instead of one long sidewalk, pour separate slabs or panels with control joints at logical intervals. For a 3-foot-wide path, 4-foot to 5-foot panel lengths often look proportional and help control cracking. Use isolation joint material where the path meets existing concrete or structures.
Rank #4

- Create Beautiful Sunflower Pathways: Transform your outdoor space with this 15-inch sunflower stepping stone mold. It forms a distinctive flower-shaped concrete stepping stone that brings a warm, natural accent to gardens, yards, patios, pathways, and other outdoor areas.
- Reusable Silicone Mold: Made from sturdy, flexible silicone, this concrete mold is designed for repeated use. Simply pour in your preferred cement, concrete, or casting material, let it set, and easily remove the finished stepping stone without damaging the mold.
- Easy to Use: No special skills are required to use this stepping stone mold. It's perfect for beginners, craft enthusiasts, and families. Personalize each garden stone by adding colors, pebbles, glass pieces, or other decorative elements to create a one-of-a-kind design.
- Versatile Concrete Casting Mold: Ideal for creating garden pathways, lawn decorations, patio accents, memorial stones, and a variety of outdoor landscaping projects. This reusable mold helps you create beautiful handmade concrete crafts for any season or occasion.
- Fun and Thoughtful Gift: A great gift for gardening enthusiasts, DIY lovers, and families who enjoy outdoor projects. Create memorable handmade stepping stones that add personality, creativity, and a decorative touch to any garden or walkway.
32. Small Garden Stairs
Concrete steps are not casual DIY work. A single low step in a garden path may be manageable, but stairs tied into a porch, entry, slope, or retaining condition should be professionally designed. Riser heights need consistency. Even a 3/8-inch variation can feel awkward underfoot.
33. Small Ramp for Garden Cart Access
A short ramp can help move carts into a shed or raised garden area. Keep slope comfortable and surface traction high. For accessibility, ramps have strict rules; for garden utility, still avoid steep, slick surfaces. Broom finish aggressively enough for wet shoes and wheels.
PC Slower Than It Used to Be?
A free scan shows the junk files, broken settings and background clutter dragging Windows down - then fixes them in one click.Free scan · Windows 10 & 11Outdated Drivers Are Slowing You Down
One free scan finds every outdated or missing driver and matches the right update for your exact hardware.Free scan · exact hardware match34. Equipment Pad Where Allowed
AC condensers, generators, and similar equipment often have manufacturer and code requirements. A small pad may look simple, but clearance, vibration, drainage, anchoring, and utility routing matter. Confirm requirements before pouring, and hire licensed trades where utilities are involved.
Independent reader supportYour contribution helps us test, update, and keep practical guides available for everyone.Concrete Supports, Footings, and Garden Structures
Concrete below grade is less glamorous than planters and pavers, but it is often what makes a garden structure last. The key is to match footing size and depth to soil, frost depth, post load, wind exposure, and local code.
35. Trellis Footings
A lightweight trellis may only need small post footings, while a large vine-covered structure can catch significant wind. Dig below organic topsoil to firm bearing soil. In freeze-thaw regions, local frost depth may control footing depth.
36. Fence or Arbor Post Footings
For posts, homeowners often use bagged concrete around pressure-treated posts or post bases. Do not guess on depth. Many fence posts are set with about one-third of the post length below grade, but frost, wind, gate loads, and soil conditions can require more.
Quick wins for a faster PC:
Scan for outdated or missing drivers - takes under a minuteDriver Scan →Clear out junk files and repair common Windows errorsFree Scan →37. Raised-Bed Concrete Block Walls
Concrete blocks can make durable raised beds. Keep them low unless designed as retaining walls. A one- or two-course garden bed is very different from a wall holding back saturated soil on a slope. Use level compacted base material, stagger joints, and provide drainage.
38. Decorative Retaining-Look Blocks
Stacked blocks can edge a bed or create a terraced look, but do not let appearance outrun engineering. Once a wall retains soil, especially over a couple of feet high or near a structure, driveway, sidewalk, or property line, drainage and reinforcement become serious issues.
39. Repair or Resurface Existing Garden Slabs
Small cracks, shallow spalls, and worn surfaces can sometimes be patched or resurfaced. The existing slab must be stable, clean, and sound. If it is heaving, sinking, holding water, or cracked because of base failure, a resurfacer will only hide the problem briefly.
Finishing and Curing Details That Make Concrete Last
Concrete hardens because of hydration, not because it simply dries. That is why curing matters. Poor curing is one of the biggest reasons DIY garden concrete dusts, scales, cracks early, or loses surface strength.
For exterior flatwork, avoid adding extra water at the surface to make finishing easier. Do not steel-trowel exterior slabs that will see rain, irrigation, or freeze-thaw exposure; a dense slick surface can become slippery and may be more vulnerable to scaling in cold climates. A broom finish is usually the practical choice for garden paths, pads, and patios.
Use control joints to create planned crack locations. A good working rule is that joint depth should be at least one-quarter of slab thickness. For a 4-inch slab, that means joints about 1 inch deep. Use isolation joints where new concrete meets walls, foundations, existing slabs, steps, posts, or other fixed objects.
In freeze-thaw markets, durability depends on more than concrete thickness. Use air-entrained concrete where appropriate, place it over compacted granular base, keep water from ponding, avoid overworking the surface, and cure it properly. Deicing salts are hard on young concrete, so avoid them during the first winter when possible.
For small castings, cover pieces with plastic after placement so moisture does not leave too fast. Many items can be carefully unmolded after 24 to 48 hours, but they are not fully mature. Give planters, stones, and garden pieces several days before handling heavily, and remember that concrete continues gaining strength for weeks.
What’s actually slowing this PC down?
Pick the symptom - the matching free tool is one click away.
Best Value
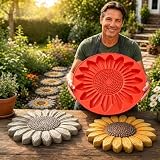
- Reusable DIY Casting: This reusable stepping stone mold is designed for concrete and cement craft projects. Pour the prepared mixture, allow it to cure completely, carefully demold and reuse the form to create coordinated decorative stones.
- Paintable Raised Relief: Detailed molded lines help define petals, feathers, leaves, and seasonal elements. Leave the cured piece with a natural stone appearance or personalize it with suitable outdoor paint and concrete sealer.
- Multiple Detailed Designs: Choose one selected pattern from sunflower, butterfly shape, honey bee, pumpkin, snowflake, mushroom, gnome, Highland cow, cardinal, bunny, turtle, owl, squirrel, floral butterfly, fox or frog to create personalized garden projects.
- Helpful Casting Tips: Place the mold on a flat, level surface, use a compatible release agent if needed, work the mixture into fine details, tap gently to reduce trapped air and wait for complete curing before demolding or painting.
- Garden Display Ideas: Create decorative stepping stones and accents for garden paths, patios, flower beds, lawns, yards and seasonal displays. The finished projects also make creative handmade gifts for gardeners and DIY enthusiasts.
When to DIY and When to Hire a Pro
DIY is a good fit for small castings, planters, stepping stones, informal paths, splash blocks, low edging, small pads, and simple garden features where failure is inconvenient but not dangerous. Bagged concrete is best for craft-size work and small paths because setup is simple and you can work at your own pace.
Ready-mix makes sense when the project reaches several cubic yards, access is good, and you have enough help ready. Concrete placement is time-sensitive. A homeowner mixing alone can pause between batches. A truck will not wait while forms are adjusted, tools are found, or grade problems are solved.
Call a professional for structural retaining walls, elevated patios, stairs tied into entries, large shed slabs, drainage redesign, pool-adjacent work, public sidewalks, driveway aprons, slabs supporting heavy equipment, generator pads with utility coordination, or any project where water could be directed toward a house. Also hire help when demolition, poor soils, tree roots, frost heave, or accessibility requirements are part of the job.
The most expensive garden concrete is not the concrete itself. It is the tear-out and replacement after a slab drains the wrong way, cracks through the middle of a finished patio, blocks a weep screed, or settles because the base was never compacted. Small projects are a great way to learn the material. Permanent flatwork deserves the same planning a contractor would give it.
Practical Shopping List for Most DIY Garden Concrete Work
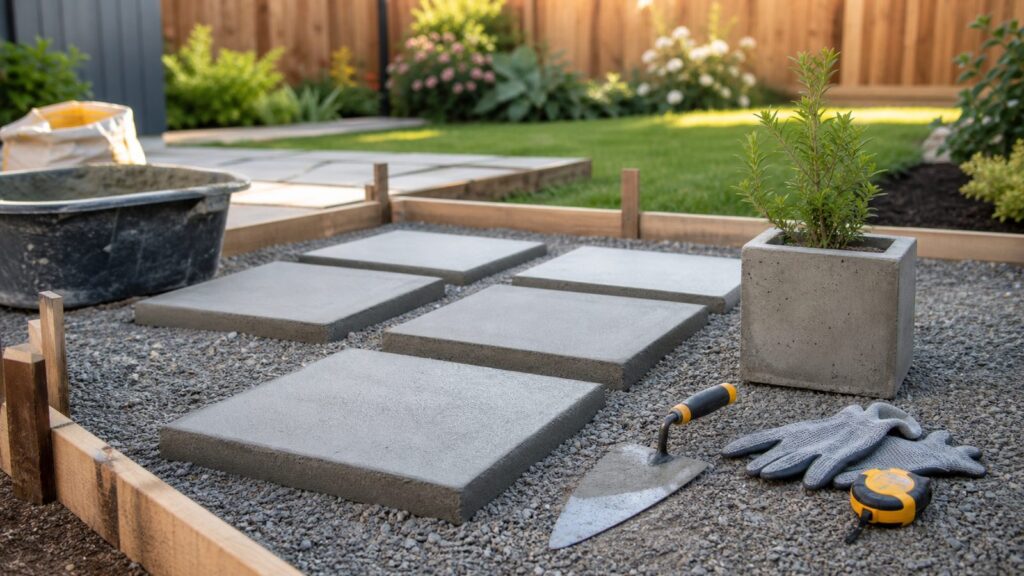
For cast projects, gather bagged concrete or mortar mix, clean water, mixing tub or bucket, margin trowel, mold release, molds, gloves, eye protection, dust mask, plastic sheeting, and a place to cure the pieces out of sun and wind.
For paths, pads, and edging, add gravel base, shovel, rake, hand tamper or plate compactor, forms, stakes, screws, level, tape measure, line, wheelbarrow, screed board, float, edging tool, broom, jointing tool or saw-cut plan, isolation joint material, and curing compound or plastic. For anything larger than a few bags, line up helpers before mixing starts.
Concrete rewards preparation. Measure the volume, buy extra, prep the base, control the water, finish for traction, and cure it like the final strength depends on it, because it does.
Frequently Asked Questions
How many 80-pound bags of concrete are in one cubic yard?
Many 80-pound concrete bags yield about 0.6 cubic feet, so one cubic yard takes roughly 45 bags before waste. For DIY garden projects, add 5% to 10% extra.
How thick should a concrete garden path or pad be?
For many residential garden paths and light-use pads, 4 inches of concrete over 2 to 4 inches of compacted gravel is a common baseline. Heavier loads, poor soil, or freeze-thaw exposure may require more.
Is bagged concrete or ready-mix better for garden projects?
Bagged concrete is best for planters, stepping stones, small paths, and small pads. Ready-mix usually makes sense when the project reaches several cubic yards and you have enough help to place and finish it quickly.
How long should concrete cure before using it in the garden?
Small castings can often be carefully unmolded after 24 to 48 hours, but concrete keeps gaining strength for weeks. Give garden slabs several days before light use and longer before heavy loads.
Do DIY concrete garden projects need permits?
Small planters, markers, and stepping stones usually do not. Patios, shed slabs, stairs, public sidewalks, driveway aprons, retaining walls, and equipment pads may require permits or inspections depending on local rules.
The Tool Desk
Outbyte PC Repair FREERepair Windows errors before they cause bigger problemsFix Now →Outbyte Driver Updater FREEScan for outdated or missing drivers - takes under a minuteDriver Scan →What concrete projects should not be DIY?
Hire a pro for structural retaining walls, elevated patios, entry stairs, large shed slabs, drainage redesign, pool-adjacent slabs, public sidewalks, driveway aprons, and slabs supporting heavy equipment.
Quick Recap
Product prices and availability are accurate as of the date/time indicated and are subject to change. Any price and availability information displayed on Amazon at the time of purchase will apply.