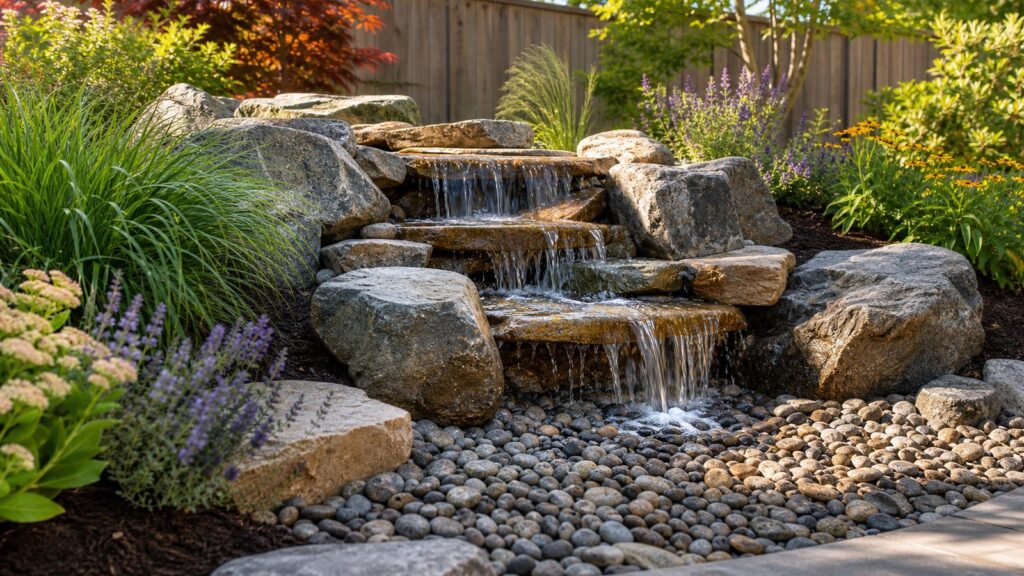
A small rock waterfall can change the feel of a garden fast, but only if it is built like a working water system instead of a pile of pretty stones. The best DIY scope for most homeowners is a pondless rock waterfall: a 12- to 24-inch spillway, a 2- to 6-foot stream, a hidden recirculating basin, 45 mil EPDM liner, underlayment, a submersible pump, flexible tubing, gravel, and a few well-placed character rocks.
For 2026, a realistic DIY material budget is roughly $600 to $2,500 for a compact pondless waterfall. A DIY pond-and-waterfall build commonly lands around $1,000 to $4,000+. Professionally installed pondless waterfalls often run $5,000 to $20,000+, depending on size, stone, access, drainage, and electrical work. That cost gap is why many capable homeowners try the project themselves.
The difference between a good DIY waterfall and a frustrating one is usually not artistic talent. It is planning: locating utilities, sizing the pump at real head height, protecting the liner, building an overflow route, and keeping the pump accessible after the stone goes in. On our job sites, those details are not optional. They are what keep a water feature from leaking, tripping a breaker, flooding mulch beds, or becoming impossible to service.
Start With the Right Waterfall Type
For most garden transformations, a pondless waterfall is the smarter DIY choice. Water flows from a spillway or upper pool, travels over rock, disappears into a gravel-covered basin, and is pumped back to the top. There is no exposed pond surface, which reduces open-water safety concerns, mosquito habitat, algae issues, and routine maintenance.
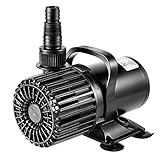
#1 Best Overall

- Specs & Dimensions: 4.33*3.5*4.1 inches; Max flow rate: 800 GPH (3000L/H); Max lift height: up to 10 ft.; Wattage: 50W; Voltage: 110-120V
- Adjustable Flow Rate: Water flow can be adjusted via the control knob and change different nozzles to meet the water pressure you want; As the lift height increases, the flow rate decreases
- Detachable & Cleanable: This powerful yet small-sized water pump is easy to hide and disguise; No tools are necessary for disassembly and it’s very easy to clean
- Many Possible Placement Positions: Place the pump flat on its base, stick it on an angled or vertical surface, and manually rotate it into any position you need
- Wide Range of Applications: This is a high-performance, energy-efficient pump and is well-designed for use in fish tanks, fountains, hydroponic systems, irrigation systems, etc
A pond waterfall can be beautiful, especially if you want aquatic plants or fish, but it raises the complexity. You need more excavation, more liner, deeper water, filtration, plant shelves, edge detailing, and often more serious winter planning. Fish or koi increase the requirements again because depth, oxygen, water quality, and filtration become life-support systems.
If this is your first water feature, keep the build compact. A 2- to 4-foot stream with a 16- to 20-inch spillway can look substantial in a small garden without creating a major excavation project. A 24-inch waterfall with a 6-foot stream starts to feel much larger because pump size, liner area, stone tonnage, basin capacity, and labor all rise together.
Plan the View, Sound, and Route Before You Dig
Do not start by asking where the rocks fit. Start by standing where you will actually enjoy the waterfall: the patio chair, kitchen window, grill area, garden gate, or deck stairs. The main spill stone should face that viewing point. Sound should travel toward the sitting area, not away from it behind shrubs.
A natural-looking waterfall uses elevation change, not just water volume. Even a 12- to 18-inch total drop can work if the water breaks over one or two flat spill stones. A taller 24- to 36-inch drop creates more sound, but it also requires more stable rock placement, more liner protection, and more attention to splash control.
Crashes, No Sound, or Screen Glitches?
Random freezes, missing sound and display glitches usually trace back to one bad driver. Find and replace yours safely.Free scan · under a minuteWindows Errors? Fix Them Before They Spread
Repair common Windows errors and clear accumulated junk for a smoother, more stable PC - no reinstall needed.Free scan · no reinstallKeep the stream route simple. Gentle curves look more natural than a straight trench, but tight curves are harder to line and rock. For a small DIY feature, plan a stream about 18 to 30 inches wide. That gives enough room for liner folds, edge stones, gravel, and water movement without turning the job into a mini creek restoration.
Mark These Items on the Ground
Use marking paint, rope, or a garden hose to lay out the upper spillway, stream edges, basin footprint, pump vault location, and electrical route. Then widen the marked area by at least 12 inches on both sides for liner overlap and working room. Homeowners often dig the visible stream only, then realize too late that the liner needs generous margins to fold up behind rocks and contain splash.
Before excavation, photograph and measure your layout. After utilities are marked and before stone covers anything, photograph the liner, plumbing, pump vault, and electrical route again. Those photos are cheap insurance when you need to troubleshoot five years later.
DIY Rock Waterfall Costs in 2026
The biggest cost drivers are waterfall width, height, stream length, rock tonnage, pump capacity, basin construction, liner square footage, electrical work, delivery fees, and whether you can excavate by hand. Decorative boulders and hand-selected stone can cost far more than basic river rock or crushed stone.
Free tools Windows power users keep installed
One-click scans. No signup required.
For stone, common 2026 pricing ranges include roughly $45 to $170 per ton for river rock, depending on region, supplier, and delivery. Basic gravel often runs about $15 to $75 per ton, pea gravel around $30 to $55 per ton, and crushed stone commonly $40 to $75+ per ton. EPDM rubber liner alone often costs about $0.70 to $2.00 per square foot, with broader pond liner materials ranging from about $0.28 to $3.00 per square foot.
| Project Type | Typical 2026 Cost | Best Fit |
|---|---|---|
| Small DIY pondless rock waterfall | $600-$2,500 materials | Compact garden feature with hidden basin |
| DIY pond with waterfall | $1,000-$4,000+ materials | Homeowners who want open water, plants, or small fish |
| Professional pondless waterfall | $5,000-$20,000+ | Larger features, boulders, slopes, drainage, or premium stonework |
| Professional backyard pond | About $3,675-$14,500 for many midsize builds | Ponds with waterfalls, plants, fish, filtration, and finished edges |
| Koi pond | Often $10,000-$30,000 | Fish-safe depth, filtration, plumbing, and water quality systems |
Hidden costs matter. Budget for expanding waterfall foam, extra underlayment, plumbing fittings, ball valve, hose clamps, soil disposal, water treatment, winterization supplies, a future replacement pump, and possibly an electrician. If you need a new outdoor receptacle or circuit, that can be a permit item and should usually be handled by a licensed electrician.
Permits, Utilities, and Electrical Safety
Call 811 before you dig. Do it even for landscaping work. Utility lines can run through lawns, planting beds, fence lines, and patio edges. National 811 guidance is to contact your local center a few business days before excavation so buried utilities can be marked. In many states, that is not just good practice; it is a legal requirement.
After marks are placed, hand dig carefully near marked utilities. Do not assume every irrigation line, low-voltage lighting cable, or private drainage pipe will be marked by utility locators. Walk the area and look for sprinkler heads, cleanouts, meter boxes, exterior outlets, and old landscape lighting.
What’s actually slowing this PC down?
Pick the symptom - the matching free tool is one click away.
Outdoor pump power should come from a GFCI-protected, weather-resistant outdoor receptacle with an in-use weatherproof cover. Do not bury extension cords, run cords through mulch as permanent wiring, or hide plug connections under stone. If the existing outlet is not properly located, protected, or rated, call an electrician. Water and improvised power do not belong together.
Materials and Tools You Need
For a compact pondless waterfall, plan on a spillway box or waterfall weir, pump vault, basin blocks or a structural basin kit, 45 mil EPDM liner, geotextile underlayment, flexible tubing, submersible pump, ball valve, check valve if required by the pump setup, waterfall foam, river rock, gravel, boulders, flat spill stones, and native plants for finishing.
Rank #2
- Solid Construction & Overload Protection: The shaft and drive ring piece are made from silicon carbide material, reduce the attrition and increase the service life; It is totally waterproof (IPX8) and provides overload protection
- Energy Saving with Low Noise: Ultra-quiet operation design(30-40db); Less power (220W) consumption with high output (4500GPH/17000LPH) which compared to other pumps; Fits for 720 gallon pond
- High Lift with Detachable Filter: Lift height can be up to 19FT/5.8M; This pump can more than accommodate your water features with portable handle and detachable filter
- Easy Installation: Adjustable outlet direction and 20.3FT power cord, to meet different requirements; Flexible Tube Size: 1 1/4” or 1 1/2” internal diameter; It can be worked with filters (filter system) together
- Multiple Usage: VIVOSUN Fixed Flow Rate pump can be used as submersible or inline; Multifunctional design for diving or land use; It is ideal for a variety of applications in ponds, fish tanks, fountains, waterfalls, etc.
Use 45 mil EPDM liner for most durable residential DIY builds. A 30 mil liner is common and cheaper, but it is less forgiving under rock-heavy waterfall work. Underlayment is not optional. Put it under the liner, and add extra padding above the liner at pinch points: beneath boulders, under spill stones, at drops, around folds, and anywhere someone may step during maintenance.
For tools, expect to need a shovel, trenching shovel, tamper, level, tape measure, utility knife, wheelbarrow, garden rake, hose, marking paint, work gloves, and eye protection. For larger stone, use a hand truck, rock bar, or compact equipment. Do not muscle large boulders into place if they can roll, crush liner, or injure someone. That is where DIY savings disappear quickly.
Size the Pump by Spillway Width and Head Height
Pump sizing is where many DIY waterfalls fail. The number printed on the pump box is often the flow at zero head, meaning no lift and minimal resistance. Your waterfall needs flow at the actual total dynamic head: vertical lift from basin water level to spillway, plus friction through tubing, fittings, and valves.
Use these rules of thumb for the look you want:
- 50 GPH per inch of spillway width for a light trickle.
- 100 GPH per inch for a sheet-style flow.
- 200 GPH per inch for a louder, white-water effect.
- 125 GPH per inch is a practical minimum often used for pondless waterfalls.
Example: for a 24-inch pondless waterfall, 125 GPH per inch means about 3,000 GPH before checking head loss. If your basin-to-spillway lift is 3 feet and the tubing run is 12 feet with a few fittings, choose a pump that still delivers about 3,000 GPH at that head, not a pump labeled 3,000 GPH at zero head.
Add a ball valve or use an adjustable pump so you can tune the flow after installation. Real-world flow changes once tubing, head height, gravel, rock placement, and spill stone geometry are involved.
Step-by-Step: Build a DIY Pondless Rock Waterfall
1. Lay Out the Feature
Mark the basin first, then the stream, then the upper spillway. The basin must be large enough to hold the water in circulation plus reserve volume for splash, evaporation, and pump protection. A small pondless feature often uses a basin footprint around 3 by 4 feet or 4 by 5 feet, depending on pump size and stream length. Kit instructions may specify exact basin volume; follow those numbers.
2. Call 811 and Confirm the Electrical Plan
Make the 811 request before excavation and wait for utility marking. Confirm the pump cord can reach a proper outdoor GFCI receptacle without extension cords. If you need new power, stop and schedule electrical work before the feature is built. It is much easier to coordinate conduit, receptacle location, and access before stone and liner are installed.
3. Excavate the Basin and Stream
Dig the basin to the depth required for the pump vault and water storage blocks. Keep sides stable and remove sharp roots, rocks, and construction debris. For the stream, excavate a shallow channel with shelves for stone. Typical stream depth may be 3 to 6 inches below finished grade, with deeper pockets at drops and edges high enough to contain splash.
Do not make the stream perfectly flat. Create small elevation breaks where spill stones will sit. Compact the soil lightly so the liner has firm support. If the subgrade is loose, rocky, or unstable, add extra underlayment and adjust the design before liner placement.
4. Install Underlayment, Liner, and Basin Components
Place underlayment over the basin and stream, then install EPDM liner with generous overlap beyond the edges. Avoid stretching the liner tight. Let it relax into corners and folds so the weight of water and stone does not pull it down later.
The Tool Desk
Outbyte PC Repair FREEClear out junk files and repair common Windows errorsFree Scan →Outbyte Driver Updater FREEScan for outdated or missing drivers - takes under a minuteDriver Scan →Install the pump vault and basin blocks or structural reservoir components according to the kit or manufacturer instructions. Keep the pump vault accessible behind a removable rock, grate, or lid disguised with gravel. If you cannot reach the pump without dismantling the waterfall, the design needs to change.
5. Run Tubing to the Spillway
Route flexible tubing from the pump to the spillway box. Keep bends broad instead of sharp. Use fittings that match the pump outlet and tubing diameter. Undersized tubing can rob flow, especially on pumps above 2,000 GPH.
Install a ball valve where it can be reached, not buried under a boulder. If the pump or spillway setup calls for a check valve, install it in the correct orientation. Dry-fit everything before covering the line.
6. Set Character Rocks and Spill Stones
Use fewer large rocks with smaller gravel around them instead of only uniform bagged stone. Natural waterfalls need scale variation. Place the largest rocks first, especially around drops and edges. Protect the liner under every heavy stone with extra underlayment or scrap EPDM.
Do these 3 things before closing this tab:
1Clear out junk files and repair common Windows errors2Scan for outdated or missing drivers - takes under a minute3Repair Windows errors before they cause bigger problemsRank #3
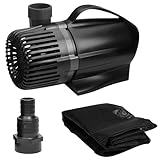
- Waterfall pump; Anti-Clog Technology
- Energy Efficient
- Quiet Operation
- Easy Assembly
- Flow rate of 2300 GPH at Zero foot lift
Set flat spill stones slightly pitched forward. The front edge should be level side to side unless you want water to favor one side. Use waterfall foam behind and beside spill stones to force water over the visible edge instead of disappearing beneath the rock. Foam is not structural; the stones must already be stable before foaming.
7. Cover the Basin and Edge the Liner
Cover basin blocks with the manufacturer-approved grate or stone support system, then add washed gravel. Keep gravel out of the pump vault. Along the stream edges, bring liner up behind rocks and soil so splash stays inside the system. Trim liner only after testing the waterfall at full flow.
Leave several inches of liner above the expected waterline. One common DIY mistake is cutting liner too early, then discovering that water climbs behind a rock, exits at a fold, or splashes over a low edge.
8. Fill, Test, Adjust, and Photograph
Fill the basin, start the pump, and let the system run. Adjust spill stones, foam gaps, and edge rocks while the water is moving. Watch for water sneaking under stones, pooling outside the liner, or splashing beyond the stream. Run the system for at least 30 to 60 minutes before final trimming.
Once the flow is right, photograph the plumbing route, liner edges, pump vault, spillway, and electrical location. Then finish with gravel, small stones, mulch outside the liner, and plants.
Drainage and Overflow Planning
A recirculating waterfall should not intentionally discharge water, but rain, overfilling, splash, and maintenance flushing still need somewhere to go. Do not direct overflow toward a foundation, basement window well, neighboring property, steep slope, or public storm drain unless your local rules specifically allow it.
Build a subtle overflow route toward lawn, gravel, or a rain-garden-style infiltration area where local conditions allow. Native marginal plants around the feature can soften rock edges, absorb splash, and reduce runoff. Keep aggressive roots away from liner seams, folds, and plumbing.
If your yard already has drainage problems, soggy soil, retaining walls, erosion, or water moving toward the house, solve that first. A waterfall is not a drainage correction system. It is a landscape feature that depends on drainage being under control.
Quick wins for a faster PC:
Scan for outdated or missing drivers - takes under a minuteDriver Scan →Repair Windows errors before they cause bigger problemsFix Now →Finishing Details That Make It Look Built-In
Hide the water source. The top spillway should disappear behind stone and planting instead of looking like a plastic box. Bury edges with intention: rock over liner, gravel in voids, soil outside the liner, and plants used to soften transitions. Avoid stacking stones in a visible wall unless the design calls for a formal cascade.
Vary rock size. Use boulders for structure, flat stones for spillways, river rock for transitions, and gravel for gaps. If every stone is the same size, the feature reads as dumped material instead of a natural outcrop.
Plant sparingly at first. Good choices often include native grasses, sedges, rushes, iris, ferns, and low perennials suited to your region and sun exposure. Keep mulch out of the water path and leave a service route to the pump vault.
Independent reader supportYour contribution helps us test, update, and keep practical guides available for everyone.Maintenance Schedule
A pondless waterfall is lower maintenance than a pond, but it is not maintenance-free. In spring, inspect liner edges, foam joints, pump intake, tubing, and the basin. Remove settled debris and confirm the pump is moving the expected flow.
Recommended Free Tools
During the growing season, check the pump intake every few weeks. Top off water lost to evaporation and splash. If algae appears on stones, reduce excess nutrients, improve circulation, and clean surfaces gently. Avoid harsh chemicals unless they are specifically safe for your system, plants, pets, and local runoff rules.
In fall, use a leaf net if trees overhang the feature. Leaves that break down in the basin can clog the pump and create odor. Before winter, follow the pump manufacturer’s guidance. In freeze climates, many homeowners remove and store the pump, drain exposed lines as needed, and keep the basin from freezing in a way that damages components.
Rank #4

- 【Cuter &Strong Water Flow】-AS CLEAN AS “ SPIRIT LIVES IN US"-Smarter &Powerful & QUIET pond pump, as "In quietness is your strength": 3000-gph pond water-fall pump submersible outdoor is very powerful with 3000gph high flow and 17 feet high lift.It can move a large volume of water to build water flow of waterfall or fountain in your yard. although pond water-fall pump submersible outdoor is powerful, doesn’t make much noise at all, when pumping except for the soothing sound of splashing water.
- 【Smarter & Quieter】-EASY INSTALLATION: It is AMPHIBIOUS, not only a larger outdoor 3000-gph pond waterfall pump (New upgaraded quieter&powerful pond submersible pumps for outdoor ponds) but also can be used on dry land for more applications. With 32.8 feet SUPER LONG CORD, it can meet a variety of distance requirements. Large 3000-gph pond waterfall pump for outdoor ponds comes already assembled. All you need to do is just to place it in the pond water-fall pumps and plug it in, which is so easy
- 【Amazing Motor Power】&【PUMP BAG】1. Is pump is amazing the power that it has. Larger 3000gph-155w submersible pond water-fall pump for outdoor ponds is so powerful 2.In order to help extend the service time of 3000gph submersible pond waterfall pumps for outdoor ponds we provide a mesh bag coming together with pond waterfall pumps. It can prevent large debris or fishes from sucking inside pond waterfall pumps submersible outdoor for ponds, and to better protect large3000 pond pump.
- 【Stronger】 &【Energy-saving】- as "NOT EXTRAVAGANT BUT SIMPLE LIFE" 1.EASY TO MAINTAIN: 2.so cute and you can adjust the flow for different looks. Stronger water flow is adjustable, and impressive 3.With detachable filter cover and removable rotor assembly,3000gph pond waterfall pump is very easy to disassemble and clean without too much hassle.To keep 3000gph pond waterfall pump in optimal condition for 24/7 running, we suggests to maintain pond water pump regularly for performing satisfactorily
- 【Pet Friendly】【Bday Present】-LONGEVITY& IPX-8:1Great fountain to entertain your cats 2OYOWATER 3000gph pond water-fall pumps for outdoor pond shell is made from silicon carbide to reduce erosion,using 100% copper wire motor & ceramic shaft, IPX-8 rated with heat-overload sensor for 24-hour continuous use.All premium materials ensures durablity of 3000gph fountain pumps submersible outdoor.Also,with 1year quality promise& worry-free after-sale &our California local technical support to back up
When to DIY and When to Hire a Pro
DIY makes sense when the feature is small, excavation is shallow, stone can be moved safely by hand, power already exists in the right location, drainage is simple, and you are comfortable taking time to test and adjust. A compact pondless waterfall can often be built over a long weekend by two capable adults, though stone selection, delivery, and electrical coordination can stretch the schedule.
Hire a pro when the project involves new electrical circuits, large boulders, machine excavation, steep slopes, retaining walls, drainage corrections, work near foundations, tight property setbacks, easements, or a fish/koi pond. Also hire help if the design depends on a high-volume pump, a tall waterfall, or stone that cannot be safely handled by people and basic equipment.
There is no shame in splitting the work. A homeowner might handle planting, gravel, and finishing while a contractor handles grading, basin excavation, boulder setting, drainage, and coordination with an electrician. That hybrid approach often controls cost while protecting the parts of the job that are hardest to fix later.
Common Mistakes to Avoid
The first mistake is undersizing the pump. A 24-inch spillway needs far more flow than many homeowners expect, especially after head loss. The second is skipping underlayment or using too little of it. Rock-heavy waterfalls punish liner at pressure points.
The third mistake is cutting the liner before testing. Water finds low edges and hidden paths. The fourth is burying the pump where it cannot be cleaned. The fifth is building without an overflow route. Even a recirculating system has to deal with rain and splash.
Finally, avoid making the feature too large for the space. A small, well-built waterfall with a clear viewing angle, good sound, stable stone, and clean access will outperform a sprawling feature that leaks, clogs, or overwhelms the garden.
The Tool Desk
Outbyte Driver Updater FREEScan for outdated or missing drivers - takes under a minuteDriver Scan →Outbyte PC Repair FREERepair Windows errors before they cause bigger problemsFix Now →The Bottom Line
A DIY rock waterfall is absolutely realistic for a homeowner who keeps the scope tight and builds with discipline. Plan for $600 to $2,500 in materials for a compact pondless feature, use 45 mil EPDM liner with underlayment, size the pump by spillway width and head height, protect the liner under every heavy rock, and keep the pump vault accessible.
The best result is not the biggest waterfall. It is the one that looks natural from the place you actually use, runs safely from a proper GFCI-protected outdoor receptacle, drains responsibly, and can be maintained without tearing apart the garden. Build those requirements into the plan from the start, and the finished waterfall will feel like it belongs there.
Frequently Asked Questions
How much does a DIY rock waterfall cost in 2026?
A small DIY pondless rock waterfall typically costs about $600 to $2,500 in materials. A DIY pond with a waterfall often costs $1,000 to $4,000 or more, depending on liner size, pump, filtration, stone, plants, and electrical work.
What size pump do I need for a backyard waterfall?
Plan roughly 50 GPH per inch of spillway for a trickle, 100 GPH per inch for a sheet effect, and 200 GPH per inch for louder flow. For pondless waterfalls, 125 GPH per inch is a practical minimum. Always check the pump’s flow at your actual head height.
Free tools Windows power users keep installed
One-click scans. No signup required.
Is a pondless waterfall better than a pond waterfall?
For most DIY garden projects, yes. A pondless waterfall has less open-water risk, fewer mosquito and algae concerns, and simpler maintenance. A pond waterfall is better if you specifically want open water, aquatic plants, or fish.
Do I need to call 811 before building a small waterfall?
Yes. Call 811 a few business days before digging, even for landscaping projects. Buried utility lines can cross lawns and planting beds, and many states legally require utility locating before excavation.
What liner should I use for a rock waterfall?
Use 45 mil EPDM liner for most durable residential DIY waterfall builds. Pair it with geotextile underlayment, and add extra protection under boulders, spill stones, drops, folds, and maintenance step points.
When should I hire a professional for a garden waterfall?
Hire a pro for new electrical circuits, large boulders, steep slopes, retaining walls, drainage corrections, koi ponds, work near foundations, or features inside setbacks or easements.
PC Slower Than It Used to Be?
A free scan shows the junk files, broken settings and background clutter dragging Windows down - then fixes them in one click.Free scan · Windows 10 & 11Crashes, No Sound, or Screen Glitches?
Random freezes, missing sound and display glitches usually trace back to one bad driver. Find and replace yours safely.Free scan · under a minuteQuick Recap
Product prices and availability are accurate as of the date/time indicated and are subject to change. Any price and availability information displayed on Amazon at the time of purchase will apply.