The Tool Desk
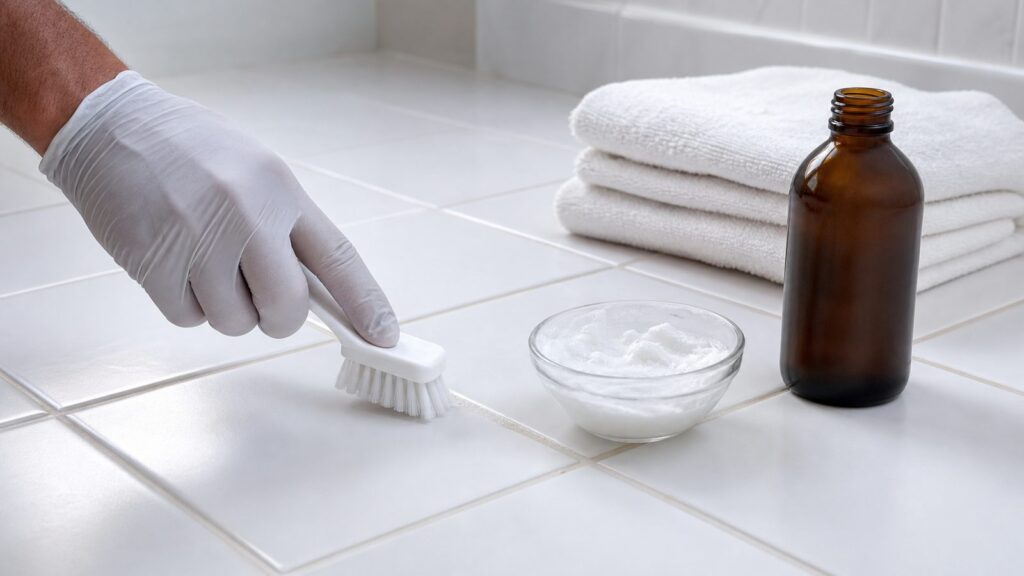
Outbyte PC Repair FREEClear out junk files and repair common Windows errorsFree Scan →Outbyte Driver Updater FREEFix the driver behind crashes, sound loss and screen glitchesFind Drivers →A paste made from baking soda and 3% hydrogen peroxide is one of the simplest ways to brighten lightly to moderately stained grout. For most ceramic or porcelain tile floors, shower walls, and kitchen backsplashes, the working mix is 2 parts baking soda to 1 part 3% hydrogen peroxide. Apply it to the grout lines, let it sit for 5 to 10 minutes, scrub with a nylon grout brush, rinse thoroughly, and dry the area well.
That is the short answer. The contractor answer is a little more careful: this method works best on surface soil, soap residue, mildew staining, and organic discoloration in cementitious grout. It is not a repair method. It will not fix cracked grout, missing grout, failed caulk, rust staining, deep oil contamination, efflorescence, mineral scale, or water coming from behind the tile assembly.
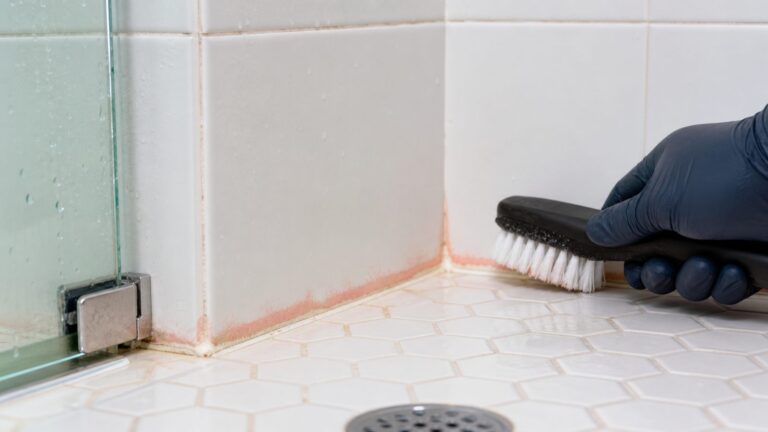
On our job sites, we treat grout cleaning as part appearance, part diagnosis. If the grout brightens and stays clean after ventilation and drying improve, it was probably maintenance. If it darkens again in the same spots within days or weeks, especially around corners, tub edges, shower curbs, plumbing penetrations, or exterior walls, the stain may be telling you there is a moisture problem.
What Baking Soda and Peroxide Actually Do to Grout
Baking soda and hydrogen peroxide work well together because they solve two different parts of the same problem. Baking soda is a mild alkaline abrasive. It helps loosen surface grime without the harshness of wire brushes or heavy-duty acidic cleaners. Hydrogen peroxide is an oxidizer. At the common household strength of 3%, it can help lighten many organic stains, including soap-scum tinting and mildew staining.
Windows Errors? Fix Them Before They Spread
Repair common Windows errors and clear accumulated junk for a smoother, more stable PC - no reinstall needed.Free scan · no reinstallCrashes, No Sound, or Screen Glitches?
Random freezes, missing sound and display glitches usually trace back to one bad driver. Find and replace yours safely.Free scan · under a minute#1 Best Overall

- Versatile Antiseptic Hydrogen Peroxide Solution for Everyday Needs: Look no further than our 3% hydrogen peroxide solution, your all-in-one choice for effectively cleaning and disinfecting minor cuts, scrapes, burns, bug bites, and skin irritations. It acts as a proactive shield against potential infections, making it an essential addition to your first aid kit.
- For Both Home and Professionals: Boasting a robust 3% USP rating, our hydrogen peroxide cleaner is a versatile solution that caters to a wide spectrum of users. It's not just for home use to ensure your family's safety but also meets the stringent quality requirements of medical professionals, hospitals, clinics, and dental practices. This means you can trust it in both personal and professional settings.
- Elevate Your Oral Health Regimen: Go beyond basic dental care with our 3% USP hydrogen peroxide. This multi-purpose solution is a game-changer for maintaining a healthy smile. Use it for teeth whitening to achieve a dazzling, confident grin. It's also effective in healing cold sores, canker sores, and addressing gingivitis, promoting comprehensive oral health.
- Leak-Proof and Travel-Ready: Convenience is key when it comes to first aid and hygiene products. Our 16 oz hydrogen peroxide 3 percent USP bottle features a secure screw-on lid, ensuring hassle-free storage and mess-free transportation. Whether it's stored in your home first aid kit or accompanying you on your travels, you can rely on its spill-proof design.
- Dependable Purity: We understand the importance of safety, efficacy, and purity. That's why our hydrogen peroxide solution comes in tamper-resistant packaging, providing an extra layer of confidence in its quality. It's meticulously formulated to be free from harsh additives and chemicals, ensuring that you have a dependable choice for various applications that require the highest standards of purity and effectiveness.
The combination is especially useful on cementitious grout, which is the traditional sanded or unsanded grout found in many older and newer homes. Cementitious grout is porous. It absorbs moisture and soil more readily than porcelain or glazed ceramic tile. That porosity is why grout lines darken faster than the tile around them.
This method is not the right default for every surface. Patch-test first if the grout is colored, if the tile is natural stone, or if the surface is unsealed and porous. Marble, limestone, travertine, encaustic tile, some cement tile, and metal trim can react badly to the wrong cleaner or abrasive scrubbing. Peroxide can lighten certain pigments, and baking soda residue can leave a white haze on textured tile if it is not rinsed well.
Tile industry guidance generally favors neutral or alkaline cleaners for routine grout maintenance. That is one reason we do not recommend vinegar as the everyday grout cleaner for cement-based grout. Vinegar is acidic, and acids can react with cementitious grout. Used repeatedly, they can weaken or roughen unprotected grout and make it soil faster.
The Best Baking Soda and Peroxide Grout Cleaner Ratio
For a small bathroom floor, shower wall, or backsplash, use this basic ratio:
Recommended Free Tools
- 2 tablespoons baking soda
- 1 tablespoon 3% hydrogen peroxide
- Optional: 1 small drop of dish soap for greasy kitchen grout
Scale the same ratio as needed. For a larger floor section, mix 1/2 cup baking soda with 1/4 cup 3% hydrogen peroxide. The paste should be spreadable but not runny. If it slides off vertical grout lines, add a little more baking soda. If it crumbles and will not stick, add peroxide a teaspoon at a time.
Use fresh peroxide when possible. Hydrogen peroxide breaks down over time, especially after the bottle has been opened. If an old bottle no longer fizzes lightly on contact with organic soil, it may still wet the paste but will not brighten as effectively.
Do not use higher-strength peroxide sold for specialty or industrial uses. Household 3% hydrogen peroxide is the right product for this maintenance method. Stronger concentrations can increase the chance of surface damage, skin irritation, pigment lightening, and unsafe handling.
Tools and Materials
A small grout cleaning job does not require expensive equipment. Most homeowners can do a bathroom or backsplash with basic supplies for less than the minimum trip charge of a professional cleaner.
Do these 3 things before closing this tab:
1Repair Windows errors before they cause bigger problems2Scan for outdated or missing drivers - takes under a minute3Clear out junk files and repair common Windows errors- Baking soda
- Fresh 3% hydrogen peroxide
- Small bowl or cup for mixing
- Measuring spoon or cup
- Nylon grout brush sized to the joint
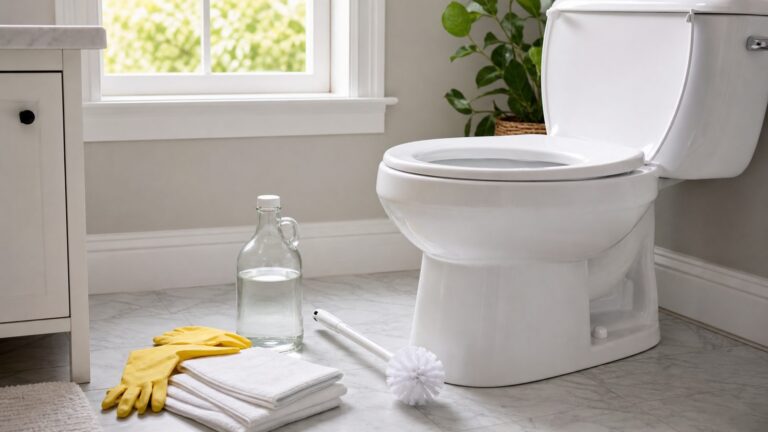
- Microfiber cloths or white cotton towels
- Bucket of clean water
- Wet/dry vacuum or regular vacuum for dry debris
- Nitrile gloves
- Eye protection for overhead shower work
- Fan or open window for drying
A nylon grout brush matters. Toothbrushes are usually too soft and too narrow for floor grout. Wire brushes are too aggressive. They can erode grout, scratch tile glaze, and damage metal edging. The brush should fit the grout joint so the bristles work down into the line instead of riding on the tile edges.
Step-by-Step: How to Clean Grout with Baking Soda and Peroxide
1. Dry-sweep or vacuum first
Start dry. Vacuum or sweep the tile before adding any cleaner. Sand, grit, pet hair, and construction dust turn into abrasive mud when wet. On job sites, we always remove dry debris before washing tile because it reduces scratching and makes the cleaner work on the stain instead of loose dirt.
Pay attention to corners, toe-kick areas, shower curbs, and the line where the floor meets the baseboard or tub. These are the spots where debris collects and where grout often looks worst.
2. Patch-test in a hidden area
Apply a small amount of paste to an inconspicuous grout line. Wait 10 minutes, scrub lightly, rinse, and let it dry. Check for lightened pigment, tile haze, surface dulling, or residue. This is especially important for colored grout, natural stone, textured tile, decorative tile, and any surface you are not sure is sealed.
If the tile is marble, limestone, travertine, cement tile, or another porous natural material, stop and verify the manufacturer’s cleaning guidance before continuing. The grout may tolerate the paste, but the tile may not.
3. Mix a small batch
Combine 2 parts baking soda with 1 part 3% hydrogen peroxide. For a standard vanity backsplash or a few square feet of floor, start with 2 tablespoons baking soda and 1 tablespoon peroxide. Mix until the paste looks like thick cake frosting.
Rank #2
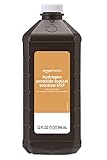
- First aid antiseptic (32 fluid ounces); helps prevent the risk of infection from minor cuts, scrapes, and burns
- 3% hydrogen peroxide formula
- Paraben and phthalate free
- No rubber latex
- If you like Swan Hydrogen Peroxide, we invite you to try Amazon Basics 3% Hydrogen Peroxide First Aid Antiseptic
For kitchen grout with cooking grease, add one small drop of dish soap. Do not add bleach, vinegar, ammonia, toilet cleaner, drain cleaner, or any other household chemical. Use one cleaning chemistry at a time, rinse fully, and keep the room ventilated.
4. Apply to grout lines, not the whole room
Spread the paste directly over the grout lines with a gloved finger, small spatula, or brush. Work in small sections of roughly 4 to 8 square feet on floors or one manageable wall area in a shower. Small sections let the paste dwell long enough to work without drying hard on the tile.
Free tools Windows power users keep installed
One-click scans. No signup required.
Avoid smearing paste across large areas of textured tile. Baking soda residue can lodge in texture and leave a chalky cast after drying. If that happens, it usually means the area needs more rinsing, not more scrubbing.
5. Let it dwell for 5 to 10 minutes
Give the paste 5 to 10 minutes of dwell time. That is usually enough for maintenance cleaning. If the paste begins to dry before 10 minutes, mist it lightly with water or peroxide. Do not let it bake onto warm tile in direct sunlight.
Longer is not always better. Leaving paste on for 30 minutes or an hour can make cleanup harder and may increase the risk of lightening colored grout. For stubborn stains, repeat a short treatment rather than letting one heavy application dry into the surface.
6. Scrub along the grout line
Scrub with a nylon grout brush in the direction of the joint. On floors, use short strokes along the line rather than sawing across tile edges. On walls, start high and work down so dirty rinse water does not run over cleaned areas.
Use firm pressure, not punishment. If the grout starts shedding sand, powdering, or opening up, stop. That grout is failing and should be repaired or replaced. Cleaning harder will only remove more material.
7. Rinse more than once
Rinse with clean water and a microfiber cloth. Then rinse again. Baking soda residue is the most common reason freshly cleaned grout looks chalky or uneven after it dries. Change the rinse water often, especially on floors larger than 25 square feet.
For floors, a wet/dry vacuum can speed up rinse-water removal. For shower walls, wipe from top to bottom and finish with a clean damp cloth. Avoid leaving cloudy water in corners, around tub edges, or at the base of shower doors.
8. Dry the area completely
Dry the tile and grout with towels, then run the bath fan or a portable fan. In bathrooms, let the fan run for at least 20 to 30 minutes after cleaning. Grout that stays damp will attract soil and mildew faster, even if it looked bright right after scrubbing.
Quick wins for a faster PC:
Scan for outdated or missing drivers - takes under a minuteDriver Scan →Clear out junk files and repair common Windows errorsFree Scan →If the area is a shower, do not seal it the same day unless the sealer manufacturer specifically allows it. Cementitious grout should be fully dry before sealing. Depending on humidity, ventilation, grout width, and how saturated the assembly became, that can mean waiting 24 to 72 hours.
What This Method Can and Cannot Fix
Baking soda and peroxide are useful, but they are not magic. The best results come from matching the method to the stain.
| Condition | DIY paste result | Better next step |
|---|---|---|
| Light gray surface soil on bathroom floor grout | Usually good | Clean, rinse twice, dry, consider sealing cementitious grout |
| Soap scum tinting in shower grout | Often good | Improve ventilation and squeegee routine after cleaning |
| Mildew staining on the surface | May lighten staining | Fix moisture source; use proper disinfectant only if needed and label allows |
| Greasy kitchen grout | Fair with a drop of dish soap | Use an alkaline degreasing tile cleaner if grease is heavy |
| Hard-water scale or mineral crust | Poor | Use a tile-safe mineral cleaner appropriate for the tile and grout |
| Rust stains | Poor | Use a rust remover compatible with the surface or call a pro |
| Efflorescence, white salts, recurring powder | Poor | Investigate moisture movement through the assembly |
| Cracked, missing, loose, or powdery grout | Not appropriate | Repair, regrout, or inspect for movement and water damage |
| Dark staining that returns quickly | Temporary at best | Inspect ventilation, sealant joints, waterproofing, and plumbing |
If the grout is structurally sound and the staining is on the surface, this DIY cleaner can make a visible difference. If the grout is damaged, the correct fix is not more cleaner. It is repair.
Safety Rules: What Not to Mix
Do not mix hydrogen peroxide with bleach, vinegar, ammonia, toilet bowl cleaner, drain cleaner, or other household cleaners. Public-health agencies warn that mixing common cleaners can create irritating or dangerous gases or corrosive compounds. The safe rule is simple: use one product, rinse thoroughly, and do not stack chemicals in the same joint.
What’s actually slowing this PC down?
Pick the symptom - the matching free tool is one click away.
Rank #3

- One 16-fluid ounce bottle of first aid antiseptic
- First aid to help prevent risk of infection from minor cuts, scrapes and burns
- Active ingredient: 3% hydrogen peroxide (stabilized)
- If you like Swan Hydrogen Peroxide, we invite you to try Amazon Basics 3% Hydrogen Peroxide First Aid Antiseptic
- Packaging may vary from images shown
Peroxide and vinegar are a common internet pairing, but they should not be mixed in the same container or applied together as a combined cleaner. Bleach and peroxide should also be kept separate. If you previously used another cleaner on the grout, rinse the area thoroughly with water and let it ventilate before using the baking soda and peroxide paste.
Wear gloves. Use eye protection when cleaning overhead shower tile because paste and rinse water can drip. Keep the room ventilated, especially in small bathrooms. Store peroxide in its original bottle and keep it away from children, pets, heat, and direct sunlight.
Cleaning does not automatically disinfect. If the goal is disinfection after sewage backup, illness, or confirmed microbial contamination, use an EPA-registered disinfectant according to the label after cleaning, with proper ventilation and without mixing chemicals. For large mold areas, recurring mold, or water-damaged materials, cleaning the visible grout is not enough.
Why We Do Not Recommend Vinegar as the Default Grout Cleaner
Vinegar is popular because it is cheap and easy to find, but it is acidic. Cementitious grout is cement-based. Repeated acid exposure can react with the cement paste, roughen the surface, and leave the grout more porous. That means it may look cleaner for a short time and soil faster later.
Vinegar is also a poor choice around natural stone. Acid can etch marble, limestone, travertine, and other calcium-based stone. The damage may show up as dull spots, rough texture, or permanent loss of polish.
There are specialty acidic cleaners used in tile work, but they are selected for specific problems, diluted properly, tested first, and rinsed thoroughly. They are not our first choice for routine grout maintenance in a finished home. For ordinary grout brightening, the baking soda and peroxide paste is a lower-fume, lower-risk starting point when the tile surface is compatible.
Should You Seal Grout After Cleaning?
If the grout is cementitious and in good condition, sealing after a deep clean can help slow future staining. Sealer does not make grout waterproof. It reduces absorption at the surface. Water management in showers still depends on the full tile assembly: backer, waterproofing membrane, slope, drain detailing, movement joints, penetrations, and ventilation.
Do not seal dirty grout. Do not seal damp grout. Sealing over soil can lock in discoloration, and sealing trapped moisture can make a damp assembly dry more slowly. After cleaning, let the grout dry fully. In a dry kitchen backsplash, that may be overnight. In a shower or thick floor grout joint, wait 24 to 72 hours or follow the sealer manufacturer’s instructions.
Epoxy grout generally does not need a penetrating sealer. Some high-performance single-component grouts also have specific care instructions. If you know the grout brand and type, follow that product’s maintenance guidance.
For a bathroom floor or kitchen backsplash, a penetrating grout sealer can often be applied by a careful homeowner. For a shower with recurring staining, cracked grout, missing caulk, or damp corners, inspect and correct those conditions before sealing. Sealer is not a moisture repair.
When Dirty Grout Is Really a Construction or Moisture Problem
Grout gets blamed for problems that start somewhere else. In showers especially, grout is not waterproofing. Water passes through grout and tile joints to some degree. A properly built wet-area assembly manages that water with waterproofing, slope, drainage, sealant at changes of plane, and ventilation.
Recurring dark grout can point to one of several problems:
- Bathroom fan is undersized, clogged, disconnected, or not used long enough
- Failed caulk at tub-to-tile joints, inside corners, shower curbs, or glass penetrations
- Cracked grout from movement in the wall or floor assembly
- Missing slope on a shower bench, niche, curb, or floor
- Plumbing leak behind the wall
- Wet backer board or substrate behind tile
- Efflorescence from moisture moving through cement-based materials
- Old topical sealer failing unevenly
For bathrooms, mechanical ventilation matters. A typical bath fan should exhaust outdoors, not into an attic or wall cavity. Many bathrooms use fans rated around 50 to 110 CFM, depending on room size and fixture count, but sizing and duct layout matter. A fan that is too small, blocked by lint, or connected to a crushed duct will not control humidity well.
After showers, run the fan for 20 to 30 minutes. If mirrors stay fogged, walls stay damp, or grout remains dark for hours, cleaning is not the main issue. The room needs better drying, better air movement, or a closer look at the assembly.
Rank #4

- Hydrogen Peroxide Cleaner - 3% Hydrogen Peroxide can cleans surfaces in your kitchen or bathroom. It's great for appliances like microwaves and refrigerators. Safer than using 35% hydrogen peroxide.
- Whitening -Add 3% hydrogen peroxide solution to a load of laundry to boost the oxygen whitening power, mix with baking soda as a great whitener, or scrub tile and ground to get out stubborn stains.
- Safe All-Purpose 3 percent hydrogen peroxide essential cleaner - An accelerated h2o2 concentration great for the pool, toilet, or salon. Food grade peroxide to the rescue.
- Washing Vegetables - Safely bulk wash your organic vegetables with liquid 3% food grade hydrogen peroxide. Just soak them in an h202 concentrate briefly, and rinse off the excess before ingestion.
- Gardening treatment - 3% food grade hydrogen peroxide solution diluted with water to low levels for gardening. Using a bottle, spray them on plants, use in hydroponics bath soak, soil and much more.
Also inspect sealant joints. Changes of plane should be sealed with appropriate flexible sealant, not rigid grout. That includes inside shower corners, tub-to-tile transitions, and many counter-to-backsplash joints. If those joints are cracked, missing, or moldy behind the bead, remove and replace the failed sealant before blaming the grout lines.
DIY Cost vs Professional Grout Cleaning in 2026
The DIY method is inexpensive. For a small bathroom or kitchen touch-up, materials usually run under $10 to $20: a box of baking soda, a bottle of 3% hydrogen peroxide, and a nylon grout brush. The real cost is time. A small bathroom floor can take 1 to 3 hours by hand, depending on grout width, soil level, and how careful the rinsing needs to be.
Professional tile and grout cleaning costs more, but the equipment is different. Pros may use alkaline cleaners, mechanical agitation, hot-water extraction, vapor equipment, and commercial rinsing methods. That matters on large floors, heavily soiled grout, textured tile, rental turnovers, and surfaces that need cleaning plus sealing.
| Option | Typical 2026 US cost | Best for |
|---|---|---|
| DIY baking soda and peroxide | Usually under $10-$20 in materials | Small bathrooms, backsplashes, light to moderate staining |
| Professional tile and grout cleaning | About $0.50-$3.00 per sq. ft.; minimums often $100-$200 | Large floors, heavy soil, textured tile, time-sensitive cleaning |
| Homewyse baseline cleaning range | About $0.79-$0.99 per sq. ft. as a January 2026 baseline | Budget planning for straightforward cleaning |
| Whole-home professional cleaning | Commonly $285-$676, averaging around $480 | Multiple rooms or larger tile areas |
| Professional clean and seal | Often around $0.75-$4.00 per sq. ft.; higher-cost markets may run $1.50-$5.00 per sq. ft. | Cementitious grout that is clean, dry, sound, and stain-prone |
| Grout repair or replacement | Often $1,200-$2,000 for many basic projects; major restorations can reach $2,500-$7,500 | Cracked, missing, powdery, loose, or failed grout |
Cost drivers include square footage, grout-line width, tile texture, soil level, grease load, hard-water deposits, mold or mildew staining, natural stone versus ceramic or porcelain, whether sealing is included, furniture or appliance moving, stairs, access, local labor rates, minimum trip charges, and whether repairs are needed before cleaning.
For example, a 40-square-foot bathroom floor may be a good DIY project if the grout is intact. A 700-square-foot main level with narrow grout lines, textured porcelain, kitchen grease, and furniture moving is usually a better candidate for a pro. The homeowner may save money doing it by hand, but the time and rinse quality often become the limiting factors.
Independent reader supportYour contribution helps us test, update, and keep practical guides available for everyone.When to DIY vs When to Hire a Pro
DIY is a good choice when the tile is ceramic or porcelain, the grout is intact, the staining is mostly on the surface, and the area is small enough to clean carefully. A bathroom floor, powder room, laundry room, backsplash, or a few shower walls can be reasonable weekend work.
What’s actually slowing this PC down?
Pick the symptom - the matching free tool is one click away.
Hire a professional cleaner when the square footage is large, the tile is heavily textured, the grout has years of embedded soil, or you want cleaning and sealing done together. Pros are also better equipped for large tile floors where rinse water management matters. Poor rinsing leaves residue, and residue attracts soil.
Bring in a tile contractor, remodeler, or qualified repair pro when the grout is cracked, missing, soft, powdery, or repeatedly wet. Those are not cleaning issues. They may involve movement, failed installation details, poor substrate support, or water intrusion.
Use this decision tree:
- Grout is dirty but solid: DIY clean, rinse, dry, and monitor.
- Grout cleans up but stains again slowly: Improve maintenance and consider sealing cementitious grout after it fully dries.
- Grout cleans up but darkens again quickly: Inspect ventilation, caulk, water exposure, and possible leakage.
- Grout is cracked, missing, loose, or powdery: Repair or regrout before cleaning.
- Tile area smells musty or stays damp: Investigate moisture sources before cosmetic cleaning.
Permit and Code Notes for Bathrooms
Cleaning grout does not require a permit. Recaulking, resealing grout, and routine surface maintenance generally do not require a permit either. The permit question changes when the work moves into plumbing, electrical, structural changes, shower rebuilding, exhaust fan installation, or tile assembly replacement.
If recurring grout discoloration leads to replacing a shower pan, moving plumbing, altering electrical, adding a new bath fan circuit, changing duct routing, or rebuilding wet-area walls, check local building requirements before work starts. Many jurisdictions require permits for bathroom remodels involving plumbing, electrical, or mechanical changes.
Bathroom exhaust should discharge outdoors. Exhausting moist bathroom air into an attic, crawlspace, soffit cavity, or wall space can create condensation and mold problems. If a bathroom fan is part of the fix, the duct route, termination, damper, and fan capacity should be handled correctly.
For homeowners, the practical line is this: clean and seal is maintenance; replacing failed wet-area construction is remodeling. When water is involved, the hidden assembly matters more than the visible grout line.
Common Mistakes That Make Grout Look Worse
The most common mistake is adding more chemistry when the first cleaner does not work. Mixing peroxide with vinegar, bleach, ammonia, or other cleaners is unsafe. Rinse between products and avoid chemical stacking.
The second mistake is using vinegar as the default. It may remove some deposits, but it is not a friendly long-term cleaner for cementitious grout or natural stone.
Recommended Free Tools
Best Value
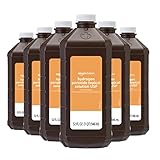
- First aid antiseptic (6-pack, 32 fluid ounces each); helps prevent the risk of infection from minor cuts, scrapes, and burns
- 3% hydrogen peroxide formula
- Paraben and phthalate free
- No rubber latex
- If you like Swan Hydrogen Peroxide, we invite you to try Amazon Basics 3% Hydrogen Peroxide First Aid Antiseptic
The third mistake is letting paste dry hard on textured tile. Once baking soda dries into texture, it can leave a chalky film that looks like failed cleaning. Work smaller, keep the paste damp during the dwell time, and rinse more than once.
Another problem is scrubbing too aggressively. Wire brushes, abrasive pads, and rotary tools can erode grout and scratch finishes. If moderate brushing with a nylon grout brush does not move the stain, identify the stain before escalating.
Finally, do not seal too soon. Sealing damp or dirty grout can lock in the very problem you were trying to fix. Clean first, rinse thoroughly, let the grout dry, then seal only if the grout type calls for it.
A Practical Maintenance Schedule
For bathroom floors and kitchen tile, a light neutral or alkaline cleaner every 1 to 2 weeks is usually enough if spills and standing water are handled quickly. For showers, squeegee or towel high-use areas after bathing when practical, and run the fan for 20 to 30 minutes.
PC Slower Than It Used to Be?
A free scan shows the junk files, broken settings and background clutter dragging Windows down - then fixes them in one click.Free scan · Windows 10 & 11Crashes, No Sound, or Screen Glitches?
Random freezes, missing sound and display glitches usually trace back to one bad driver. Find and replace yours safely.Free scan · under a minuteUse the baking soda and peroxide paste as an occasional brightening treatment, not a daily cleaner. For many homes, that means every 2 to 6 months in bathrooms and as needed on kitchen grout. Heavy-use showers, rentals, and homes with hard water may need more frequent attention, but recurring staining should still trigger inspection rather than endless scrubbing.
After a deep clean, inspect the grout lines while everything is dry and bright. Look for hairline cracks, pinholes, missing joints, soft spots, loose tiles, failed caulk, and areas that remain darker than the surrounding grout. Those details are easier to see immediately after cleaning.
Bottom Line
For sound grout on compatible tile, baking soda and 3% hydrogen peroxide are a practical, low-cost way to brighten grout without harsh fumes. Use a 2:1 baking soda-to-peroxide paste, give it 5 to 10 minutes, scrub with a nylon grout brush, rinse thoroughly, and dry the area well.
The bigger value is knowing when to stop. If grout is cracked, missing, powdery, repeatedly moldy, or darkening from behind the surface, cleaning is only cosmetic. At that point the right move is to inspect the tile assembly, sealant joints, ventilation, and possible water sources. Clean grout looks good; properly managed water is what keeps it that way.
The Tool Desk
Outbyte PC Repair FREERepair Windows errors before they cause bigger problemsFix Now →Outbyte Driver Updater FREEFix the driver behind crashes, sound loss and screen glitchesFind Drivers →Frequently Asked Questions
Can you clean grout with baking soda and hydrogen peroxide?
Yes. A paste made from baking soda and 3% hydrogen peroxide works well for light to moderate surface staining on many cementitious grout lines. It is best for soil, soap-scum tinting, mildew staining, and organic discoloration. Patch-test first, especially on colored grout, natural stone, textured tile, or unsealed porous surfaces.
What ratio of baking soda to peroxide works best for grout?
Use 2 parts baking soda to 1 part 3% hydrogen peroxide. For a small batch, mix 2 tablespoons baking soda with 1 tablespoon peroxide. The paste should be thick enough to stay on the grout line but soft enough to spread.
How long should baking soda and peroxide sit on grout?
Five to 10 minutes is usually enough for maintenance cleaning. Do not let the paste dry hard on textured tile or colored grout. For stubborn areas, rinse and repeat rather than leaving one heavy application on for a long time.
Is hydrogen peroxide safe on colored grout?
Sometimes, but it must be patch-tested first. Hydrogen peroxide can lighten some pigments, especially if it sits too long or is used repeatedly. Test in a hidden area, rinse well, let it dry, and compare the color before cleaning the full area.
Do these 3 things before closing this tab:
1Scan for outdated or missing drivers - takes under a minute2Clear out junk files and repair common Windows errors3Fix the driver behind crashes, sound loss and screen glitchesShould I use vinegar on grout?
Vinegar is not the best default cleaner for cementitious grout. It is acidic and can react with cement-based grout over time, especially if used repeatedly. It can also damage natural stone such as marble, limestone, and travertine.
How much does professional tile and grout cleaning cost in 2026?
Professional tile and grout cleaning commonly costs about $0.50 to $3.00 per square foot in the US, with minimum service charges often around $100 to $200. Whole-home cleaning commonly lands in the several-hundred-dollar range, and clean-and-seal service costs more than cleaning alone.
Quick Recap
Product prices and availability are accurate as of the date/time indicated and are subject to change. Any price and availability information displayed on Amazon at the time of purchase will apply.