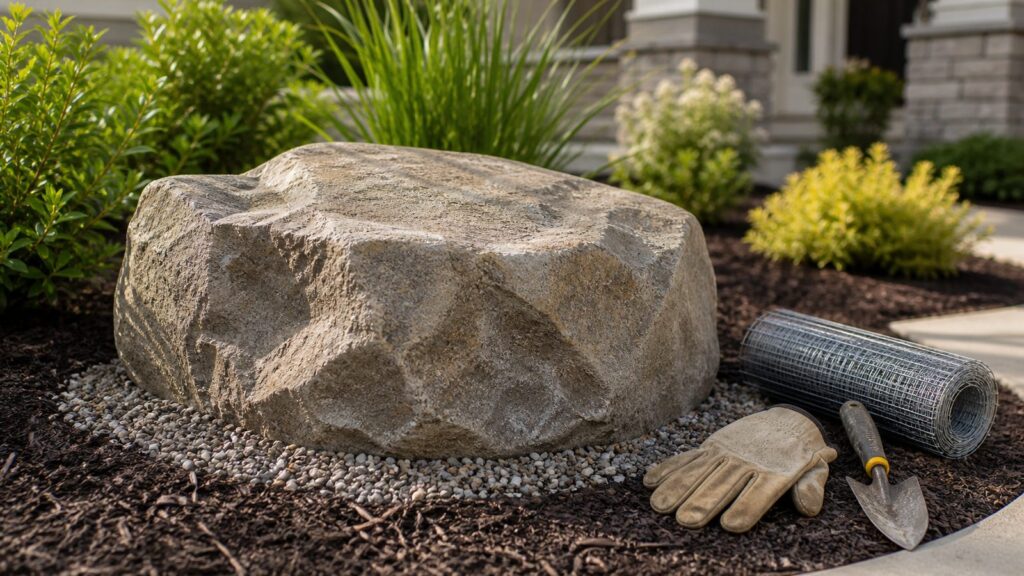
DIY fake boulders can be worth building when you want the look of landscape stone without paying for equipment, delivery, and placement of real rock. A well-built faux boulder can cover a wellhead, septic lid, irrigation valve box, cleanout, bare mulch area, or awkward planting bed gap for a fraction of the cost of installed natural boulders.
The best method for most homeowners is a hollow wire-mesh armature coated with surface-bonding cement or mortar, then colored with layered earth-tone washes and sealed with a matte UV-resistant exterior sealer. Done correctly, a medium faux boulder can cost about $100 to $250 in materials and weigh 20 to 70 pounds instead of several hundred pounds. Done poorly, it cracks, fades, traps water, or blocks utility access.
On our job sites, we treat faux rock as a finish carpentry project with masonry materials: shape first, structure second, texture third, color last. The realism comes from proportion, shadow, surface texture, and restraint. The durability comes from shell thickness, reinforcement, drainage, curing, and anchoring.
What DIY Faux Boulders Are Good For
Faux boulders are best used as decorative landscape accents and lightweight covers. They are not structural retaining wall stones, vehicle barriers, step stones, or seating unless engineered and built specifically for that load. Store-bought polyresin landscape rock covers commonly warn against standing or climbing on them, and the same common-sense rule applies to homemade hollow rocks.
Good uses include:
- Covering irrigation valves, septic risers, cleanouts, wellheads, pump equipment, and meter housings while keeping them accessible.
- Adding mass to a planting bed where a real boulder would be too heavy or expensive to place.
- Disguising drainage transitions, pipe stubs, or utility access points without permanently burying them.
- Creating lightweight garden stones for renters or homeowners who may redesign the yard later.
- Filling a visual gap where natural stone delivery would cost more than the project is worth.
A faux boulder is a poor choice where it would hold back soil, support a slope, carry foot traffic, sit in a driveway impact zone, or interfere with drainage. If the rock is part of a retaining wall, rockery, swale, stormwater feature, or utility access condition, treat it as construction rather than decoration.
#1 Best Overall

- BondsOn is a high strength, multi-purpose, self-bonding cement repair material for thin section repair and resurface, from 1/2” (13 mm) to feather-edge, on concrete, stucco, and masonry
- Just add Water & Mix
- Higher Strength than most Cements
- Great for Thin Repair or Resurface
- Coverage: 10 sq. ft. based upon 1/8" thickness
DIY Faux Boulder Cost in 2026
Real landscape boulders are priced by weight, stone type, availability, freight, and placement access. In 2026, real landscape boulders commonly run about $120 to $350 per ton before final placement, while national installed boulder work often lands around $252 to $486 per ton. Site prep can dominate the budget: clearing, excavation, slope flattening, or regrading can add roughly $1,000 to $6,000 or more before a boulder is even set.
Faux boulders shift the cost from machine work to materials and time. A small hollow cover can be built for about $40 to $100 if you already own basic tools. A medium decorative boulder usually falls around $100 to $250. A large reinforced faux boulder can reach $250 to $600 or more when you account for wire mesh, foam, cementitious coating, pigment, sealer, anchoring hardware, and extra shell thickness.
| Option | Typical 2026 Cost | Best Use | Main Tradeoff |
|---|---|---|---|
| Small store-bought faux rock cover | $50 to $60+ | Valve boxes, small pipe stubs, compact utility covers | Limited sizes, molded look, often lightweight |
| Large retail artificial rock or set | Several hundred dollars to $1,000+ | Fast cover for larger equipment or finished landscapes | Higher cost, fixed color and shape |
| DIY small hollow faux rock | $40 to $100 | One utility lid, cleanout, or small bed accent | Requires curing, painting, and sealing |
| DIY medium faux boulder | $100 to $250 | Garden focal point, septic lid cover, planting bed mass | Needs stronger armature and careful handling |
| DIY large reinforced faux boulder | $250 to $600+ | Large utility cover or statement accent | More labor, anchoring, drainage, and cracking risk |
| Installed real landscape boulder | $252 to $486 per ton installed, often more with site work | Permanent, natural, heavy landscape feature | Delivery, equipment, access, and site prep cost |
The cost drivers are size, shell thickness, form material, coating type, sealer quality, climate exposure, anchoring needs, and whether the piece must remain removable. If your project requires a perfectly sized utility cover and you do not want to spend a weekend building one, a retail faux rock may be the better buy. If you need a custom size, local stone color, or an irregular shape, DIY has the advantage.
Choose the Right Faux Boulder Method
There is no single best method for every yard. The right build depends on whether the rock needs to be hollow, light, impact-resistant, porous, removable, or simply decorative.
Wire Mesh and Cement Shell
This is the best all-around method for realistic DIY landscape boulders. Build the shape from chicken wire, hardware cloth, galvanized wire mesh, or expanded metal lath, then coat it with surface-bonding cement or mortar.
Use this method for medium and large boulders, utility covers, and exposed landscape pieces. Aim for a finished shell thickness of about 3/8 inch minimum on small pieces and 1/2 to 3/4 inch on larger pieces. Thin shells crack when moved, especially over flexible mesh. For a boulder wider than 30 inches, add ribs made from wire, scrap plywood, or rigid foam to reduce flex.
Rigid Foam With Cementitious Coating
Rigid foam is useful when you want a lightweight form with controlled dimensions. Stack or carve foam into an irregular rock shape, then coat it with mortar, surface-bonding cement, or a compatible exterior coating.
This method works well for hollow-looking decorative boulders, but foam must be protected from UV exposure and impact. Leave access openings or removable sections if it covers utilities. Do not rely on exposed foam as the finished weather surface.
Hypertufa Garden Rocks
Hypertufa typically combines Portland cement with perlite and peat or coconut fiber. It is lighter and more porous than standard mortar, which makes it useful for garden settings and mossy, aged-looking stones. It is less impact-resistant than a reinforced mortar shell.
Use hypertufa for smaller garden rocks, planters, and low-contact decorative stones. It is not our first choice for a removable utility cover that may be lifted repeatedly.
Fiberglass, Resin, or Polyresin
Fiberglass and resin products can make durable hollow covers, but they require different tools, ventilation, and finishing materials. Most homeowners are better served by buying a molded polyresin cover or building a cement-shell faux rock unless they already have fiberglass experience.
Windows Errors? Fix Them Before They Spread
Repair common Windows errors and clear accumulated junk for a smoother, more stable PC - no reinstall needed.Free scan · no reinstallCrashes, No Sound, or Screen Glitches?
Random freezes, missing sound and display glitches usually trace back to one bad driver. Find and replace yours safely.Free scan · under a minuteRank #2

- FOR EASY REPAIRS — It's the ideal concrete patch repair mix, neatly fixing cracks and spalls so your property looks like new. It's even textured for a more seamless blend with the existing structure
- TOUGH AND DURABLE — Formulated to avoid shrinking or cracking, the ready-to-use premixed cement patch offers good adhesion and high strength so your slabs, walls & walkways/sidewalks perform as good as ever
- EASY CLEANUP — Sika concrete patch is acrylic-based, so once application is done, it cleans up using only water. No need for special cleaners and chemicals
- GREEN — It follows regulations concerning the use of volatile organic compounds (VOC), helping to keep the air we breathe cleaner and fresher
- A BREEZE TO USE — Minimal prep is required, since it comes premixed. Just use a putty or trowel to spread where repairs are needed. It takes only a few hours to set and about a day for a full cure
Materials and Tools
For a medium hollow faux boulder around 30 inches long, 22 inches wide, and 16 inches tall, plan on the following materials:
- Galvanized hardware cloth, chicken wire, or expanded metal lath: 10 to 25 square feet.
- Wire ties, galvanized tie wire, or stainless fasteners: one small roll or pack.
- Surface-bonding cement or mortar mix: one to three 50-pound bags, depending on shell thickness and size.
- Acrylic bonding agent or polymer modifier if recommended by the cement product.
- Alkali-resistant mesh tape for stress points and seams.
- Plastic sheeting, bags, cardboard, or removable foam filler to support the hollow shape while coating.
- Concrete pigment, masonry stain, or exterior acrylic paint in three to five earth tones.
- matte UV-resistant exterior masonry sealer.
- Gravel for bedding: usually 1 to 3 cubic feet for a medium piece.
- Anchoring hardware if needed: landscape staples, ground stakes, hidden straps, or stainless eyelets.
Useful tools include tin snips, gloves, pliers, a margin trowel, small pointing trowel, stiff brush, chip brushes, mixing bucket, drill mixer, spray bottle, respirator, safety glasses, and nitrile or chemical-resistant gloves. For texture, keep crumpled plastic, aluminum foil, scrap burlap, old brushes, and a sponge nearby.
For cement work, use PPE. Dry concrete and masonry dust can contain respirable crystalline silica, and wet cement can cause chemical burns. At home, that means mixing outdoors, avoiding dry sweeping, wearing eye protection, wearing gloves, covering skin, and using a properly fitted respirator when handling dusty materials. Wet cement is not just mud; it is caustic.
Step-by-Step: How to Build a Realistic Hollow Faux Boulder
1. Start With the Rock Type in Your Region
The fastest way to make a fake boulder look wrong is to copy a generic gray movie-prop rock. Look at stone used in your neighborhood: granite, limestone, sandstone, basalt, fieldstone, river rock, or weathered ledge. Match the local color family and shape language.
The Tool Desk
Outbyte Driver Updater FREEScan for outdated or missing drivers - takes under a minuteDriver Scan →Outbyte PC Repair FREERepair Windows errors before they cause bigger problemsFix Now →Granite often has speckling and harder edges. Limestone tends toward buff, gray, cream, or tan with flatter bedding lines. Sandstone may show warm rust, beige, brown, and horizontal layers. River rock is smoother and rounded, but still irregular. A believable faux boulder should look like it belongs in the local soil.
2. Size the Boulder Around Its Job
If the boulder covers a utility item, measure the equipment first. Leave at least 2 to 4 inches of clearance around valve boxes, lids, pipes, and cleanouts so the cover does not rub or trap moisture. For septic, well, irrigation, and meter access, design lift points before you sculpt the final shape.
For a decorative bed accent, common DIY sizes are 18 to 24 inches long for a small rock, 30 to 42 inches long for a medium boulder, and 48 inches or more for a large feature. Once a cement-shell boulder gets above 4 feet wide, weight, flex, and handling become real constraints. At that size, build it in place or design it as a removable shell with reinforced edges.
3. Build an Irregular Armature
Shape the wire mesh into an asymmetrical form. Avoid perfect domes, football shapes, and smooth turtle-shell curves. Real boulders have uneven shoulders, flatter bearing points, chips, seams, and one or two dominant faces.
What’s actually slowing this PC down?
Pick the symptom - the matching free tool is one click away.
Overlap mesh seams by at least 2 inches and tie them every 3 to 4 inches. If the form flexes when you press on it, add ribs or temporary filler. For a hollow shell, use plastic bags, crumpled plastic sheeting, cardboard, or removable foam inside the form while applying the first coat. The filler supports the cement while keeping the finished boulder light.
4. Add the First Structural Coat
Mix surface-bonding cement or mortar to a peanut-butter consistency. It should hold on a trowel without slumping but still press into the mesh. Dampen the mesh lightly if needed, then push the first coat into and through the openings so the shell keys into the reinforcement.
Keep the first coat about 1/4 to 3/8 inch thick. Do not try to create all the final texture at this stage. Your goal is structure and coverage. Around openings, lift points, and lower edges, embed alkali-resistant mesh tape or add a second layer of wire to reduce cracking.
Rank #3

- POWERFUL CONSTRUCTION ADHESIVE: Our professional-grade construction adhesive heavy duty is suitable for all kinds of rough bonding surfaces, especially suitable for repairing peeling tiles, marble, wall surfaces, etc. Strong bonding and long-lasting effect, it is the perfect solution for home restoration and building construction
- SUPER STRONG ADHESION: Our cement glue designed for indoor and outdoor, which has excellent bonding strength and can easily cope with various harsh environments to ensure long-term and stable bonding. Whether it is repairing or fixing, tile adhesive can provide professional-level strong support for your project
- MULTI-PURPOSE CONSTRUCTION ADHESIVE HEAVY DUTY: Our concrete glue is ideal for repairing peeling tiles. Even on rough vertical walls, it can firmly adhere tiles without worrying about slipping. Ideal for tile, concrete, drywall, masonry, bathtubs and showers, bare wood, granite and more
- EASY TO USE: Say goodbye to complicated tools and no need for a caulking gun. Our construction glue is designed with a moderate consistency and comes with a precisely controlled tip cap to easily control the amount. Let you enjoy a fast and precise operation experience and complete the repair task easily
- AFTER-SALES SERVICE: We are always committed to providing every customer with a quality shopping experience. If our tile glue overflowed due to transportation or you are not satisfied with our cement glue for concrete, please contact us through Amazon and you will get satisfactory service
5. Build Thickness and Texture
After the first coat firms up, add a second coat to bring the shell to about 1/2 inch thick for most medium rocks. Large pieces and edges that will be handled should be closer to 3/4 inch. Texture the surface while the cement is firm but not fully hard.
Quick wins for a faster PC:
Clear out junk files and repair common Windows errorsFree Scan →Fix the driver behind crashes, sound loss and screen glitchesFind Drivers →Use trowel chatter for fractured stone, a stiff brush for grain, crumpled foil for small pits, plastic sheeting for fractured planes, and a damp sponge to soften harsh tool marks. Press in shallow crevices and bedding lines, but keep them random. Repeated parallel grooves look artificial unless you are intentionally copying layered sandstone or limestone.
6. Shape the Bottom So It Sits Naturally
The bottom edge should be irregular but stable. Leave three or four bearing points so the boulder does not rock back and forth. If the faux rock covers a utility lid, keep the bottom edge high enough to prevent rubbing and allow airflow. In freeze-thaw regions, leave weep gaps or small drainage openings so water cannot collect inside the hollow shell.
When installed, set the boulder into a shallow gravel bed rather than placing it directly on top of mulch. Even 1 to 2 inches of gravel helps seat the edge and makes the rock look partially buried.
7. Cure Before Painting
Cementitious shells need moisture and time. Keep the faux boulder shaded and lightly damp for the first 24 to 48 hours. Avoid direct hot sun and wind that can dry the surface too fast. Many cement products reach useful handling strength in a few days, but full cure takes much longer.
Free tools Windows power users keep installed
One-click scans. No signup required.
For practical DIY scheduling, wait at least 3 to 7 days before painting, depending on weather and product instructions. If the shell still feels cool, damp, or dark in patches, wait. Rushing paint and sealer can trap moisture and weaken the finish.
How to Paint Faux Boulders So They Look Real
Paint is where many DIY rocks fail. One flat gray or one solid tan will make the boulder look molded. Real stone has value variation, mineral streaking, dirty recesses, worn high points, and color shifts from soil and weather.
Use three value layers as a minimum:
- Dark crevice color: charcoal, umber, dark gray, deep brown, or muted olive worked into cracks and low areas.
- Mid-tone body color: the main local stone color, such as warm gray, limestone buff, sandstone tan, or granite gray.
- Light highlights: a dry-brushed lighter version of the body color on edges, ridges, and exposed faces.
For most yards, subtle is better. Sunlight exaggerates contrast. A boulder that looks dramatic in the garage can look painted outside. Thin masonry stain, concrete pigment washes, or diluted exterior acrylics often look more natural than thick opaque paint.
Work in layers. Mist the surface, brush dark color into recesses, wipe back the high spots, then add mid-tones in uneven washes. Dry-brush only the raised edges after the base colors dry. Add small mineral streaks vertically or along natural bedding lines, but do not stripe the entire rock. Photograph it from the street or curb before sealing. That is the distance where realism matters.
Finish with a matte UV-resistant exterior masonry sealer. Avoid glossy sealers unless you are imitating wet river stone. Gloss makes most faux boulders look plastic. In harsh sun, plan to refresh the sealer every 2 to 5 years depending on exposure and product quality.
Anchoring, Drainage, and Utility Access
A lightweight hollow boulder has one major weakness: it can move. Wind, children, pets, mowers, and freeze-thaw heave can shift it if it is simply set on mulch. The anchoring method should match the risk.
Rank #4
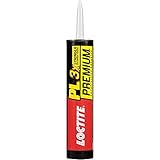
- All Purpose: One component polyurethane-based adhesive that covers a wide variety of projects and bonds to most materials for consistently successful results
- 3X Stronger: 3 times as strong as ordinary construction adhesives and stronger than many substrates it joins together
- Versatile: Ideal for sub floor installations and bonds to most common construction materials such as wood, OSB, drywall, brick, concrete, masonry, stone, foam insulation, metal, ceramic, PVC, and more
- Interior and Exterior: Paintable adhesive with no strong solvent odor that sets in 30 minutes and fully cures in 24 hours for projects inside and out
- Weather Resistant: Waterproof and can be applied directly to wet and frozen surfaces without shrinking and cures in cold temperatures
For small covers in protected beds, a gravel base and a few hidden landscape staples may be enough. For medium covers, install stainless eyelets or embedded wire loops near the bottom edge and connect them to ground stakes. For larger pieces, use hidden straps, rebar stakes outside the utility clearance zone, or a concealed base frame.
Never anchor through a septic lid, utility cover, meter box, irrigation valve box, or drainage structure unless the manufacturer or utility owner allows it. The faux boulder should preserve access, not create a new problem.
Recommended Free Tools
Drainage matters just as much. A hollow shell should not trap water against utilities or hold water inside during winter. Leave low weep openings, set the rock on gravel, and avoid sealing the bottom edge tight to the ground. In freezing climates, trapped water can expand and crack the shell.
Independent reader supportYour contribution helps us test, update, and keep practical guides available for everyone.Safety, Permits, and Code Notes
Most small decorative faux boulders do not need a permit. That changes when the work affects retaining walls, rockeries, drainage, slopes, utilities, septic systems, electrical equipment, gas meters, or public right-of-way areas. Residential building rules commonly exempt ordinary low-risk decorative work, but local code officials decide what is exempt in your jurisdiction.
Be especially careful with retaining walls and rockeries. Some cities regulate rockeries and retaining walls by height, surcharge, slope condition, and location. A faux boulder placed in front of a wall as decoration is different from a rock used to retain soil. If the project changes grade, redirects water, supports a slope, or sits near a property line, call the local building department before building.
Utility access is another practical code issue. Gas meters, electrical equipment, septic lids, cleanouts, and irrigation backflow devices may require clear working space. A removable cover is usually more acceptable than a fixed obstruction, but removable still means one person can lift it quickly and safely. For client-facing or professional work, document utility locations, access requirements, and maintenance instructions before placing faux boulders.
Do these 3 things before closing this tab:
1Fix the driver behind crashes, sound loss and screen glitches2Clear out junk files and repair common Windows errors3Scan for outdated or missing drivers - takes under a minuteCommon Mistakes That Make Faux Rocks Fail
The most common failure is building the shell too thin. A skim coat over chicken wire may look fine for a week, then crack when moved. Give medium rocks a 1/2-inch shell and reinforce openings, corners, and lift points.
The second mistake is making the boulder too symmetrical. Nature does not produce many perfect domes. Add one flatter side, one broken shoulder, one dominant face, and a few irregular bearing points.
The third mistake is using one paint color. Layer dark recesses, mid-tone body color, and light dry-brushed edges. Add muted mineral variation, then stop before it looks theatrical.
Other avoidable problems include skipping cure time, using rust-prone metal where water can reach it, making a solid concrete boulder that is too heavy to move, blocking utility access, ignoring drainage, and sanding or mixing cement products without dust control and PPE.
Recommended Free Tools
When to DIY and When to Hire a Pro
DIY makes sense when the boulder is decorative, removable, under about 4 feet wide, and not part of a retaining, drainage, or utility-code condition. It is also a good fit when you want a custom color or shape and can allow a weekend for building plus several days for curing and finishing.
Best Value

- STRONG AND SECURE BONDING — Add as a bonding grout or admixture to cement, concrete, or mortar for increased adhesion and impressive tensile strength
- DURABLE IN THE ELEMENTS — This acrylic concrete fortifier resists damage from repeated freezing and thawing for a more stable bond, reducing the need for upkeep and maintenance
- PERFECT FOR MANY PROJECTS OR JOBS — Simple to use and stores easily for home DIYers and professionals. No dilution is needed, so preparation work is quick
- FORMULATED FOR PERFORMANCE — Made with an acrylic-polymer latex that turns into a hardened concrete with 500 psi bond strength. You get superior reliability and a better overall performance
- VERSATILE AND HIGH QUALITY — Use as a cement bonding adhesive or as an acrylic coating primer for grout. It won't produce a vapor barrier and achieves a denser, tougher surface
Hire a professional when the work involves large real boulders, slope stabilization, retaining walls, drainage changes, machine access, public-facing commercial property, or regulated utility areas. Real boulders are heavy enough to injure people and damage property if placed poorly. Landscape construction crews commonly run about $50 to $120 per hour in 2026, and design consultation often runs $75 to $150 or more per hour, but that cost can be justified when site access, drainage, and liability matter.
For many homeowners, the best middle ground is simple: DIY the decorative faux boulder, but ask a contractor or utility provider before covering anything that must remain serviceable. A good-looking rock that blocks a septic riser or cleanout is not a finished project; it is a future service call made harder.
Practical Build Schedule
For one medium faux boulder, plan on this timeline:
- Design and measuring: 30 to 60 minutes.
- Armature building: 1 to 3 hours.
- First cement coat: 1 to 2 hours.
- Second coat and texture: 1 to 3 hours.
- Initial moist cure: 24 to 48 hours.
- Pre-paint curing: 3 to 7 days, depending on weather and product instructions.
- Color washes and dry-brushing: 2 to 4 hours including drying time between layers.
- Sealing: 1 hour plus cure time.
- Installation and anchoring: 30 minutes to 2 hours.
Make a small test rock before committing to a large boulder. A 12-inch sample lets you dial in mix consistency, texture, color, and sealer sheen without wasting full bags of material. On our crews, mockups prevent expensive rework. The same logic applies in a backyard.
Bottom Line
A realistic DIY faux boulder is not hard, but it does reward patience. Build an irregular reinforced form, keep the shell thick enough to survive handling, cure it properly, use layered color instead of flat paint, and set it on gravel with drainage and anchoring. For $100 to $250, a homeowner can often build a custom medium boulder that would cost much more to solve with real stone delivery and placement.
The line is clear: use faux boulders for appearance, concealment, and lightweight access covers. Use real construction methods and professional help when the rock affects structure, drainage, utilities, slopes, or public safety.
Frequently Asked Questions
How much does it cost to make a DIY fake boulder in 2026?
A small hollow faux rock usually costs about $40 to $100 if you already own basic tools. A medium decorative faux boulder typically costs $100 to $250. A large reinforced faux boulder can run $250 to $600 or more depending on cement quantity, mesh, foam, pigment, sealer, and anchoring needs.
Quick wins for a faster PC:
Repair Windows errors before they cause bigger problemsFix Now →Scan for outdated or missing drivers - takes under a minuteDriver Scan →Clear out junk files and repair common Windows errorsFree Scan →What is the easiest way to make fake landscaping rocks look real?
Match the stone color and shape common to your region, build an asymmetrical form, add real surface texture before painting, and use layered color. Start with dark crevices, add a mid-tone body color, then dry-brush light highlights on raised edges. Finish with a matte UV-resistant exterior sealer.
Can I make a hollow fake rock to cover a septic lid, well pump, or utility box?
Yes, but measure the equipment first and keep the cover removable. Leave at least 2 to 4 inches of clearance, include lift points, provide ventilation or drainage openings, and never block required service access. For regulated utilities or septic systems, confirm clearance requirements before placing the cover.
What concrete or cement mix should I use for faux boulders?
Surface-bonding cement or mortar mix works well over wire mesh for most DIY faux boulders. Hypertufa, made with Portland cement plus perlite and peat or coconut fiber, is lighter and more porous but less impact-resistant. For medium rocks, build the shell about 1/2 inch thick; large handled edges may need closer to 3/4 inch.
How long should a cement faux rock cure before painting and sealing?
Keep the shell shaded and lightly damp for the first 24 to 48 hours. Wait at least 3 to 7 days before painting, depending on weather and the cement product. If the surface still feels damp or shows dark moisture patches, wait longer before applying paint or sealer.
Do fake landscape boulders need a permit?
Small decorative faux boulders usually do not need a permit. Check locally if the work affects retaining walls, rockeries, slopes, drainage, septic access, utility clearances, public right-of-way areas, or any feature that supports soil or redirects water.
Quick Recap
Product prices and availability are accurate as of the date/time indicated and are subject to change. Any price and availability information displayed on Amazon at the time of purchase will apply.