Quick wins for a faster PC:
Fix the driver behind crashes, sound loss and screen glitchesFind Drivers →Clear out junk files and repair common Windows errorsFree Scan →The easiest way to clean stainless steel appliances is also the safest: wipe with the grain using a microfiber cloth dampened with warm water and a drop of mild dish soap, rinse with a second clean damp cloth, then dry immediately with a separate microfiber towel. For most refrigerators, dishwashers, range fronts, and microwaves, that 5- to 10-minute routine removes fingerprints, food film, light grease, and water spots without risking the finish.
On our job sites, we treat stainless steel like a finish material, not just a surface to scrub. The same appliance door that looks rugged in a showroom can be scratched by the wrong pad, stained by hard-water drips, or dulled by too much polish. The goal is simple: clean the appliance without damaging the brushed grain, coating, control panel, seams, or corrosion-resistant surface layer.
This guide gives you the practical method we recommend to homeowners after kitchen remodels, punch-list work, and appliance installations. It covers what to use, what to avoid, how much it costs in 2026, how to handle black stainless and fingerprint-resistant finishes, and when a cleaner or appliance pro is worth bringing in.
The Simple Method That Works on Most Stainless Steel
For routine cleaning, start with the least aggressive method. You do not need a cabinet full of specialty products for everyday fingerprints and smudges. You need clean cloths, light pressure, and a dry finish.
#1 Best Overall

- Cleans, polishes & protects stainless steel: Our stainless steel cleaner for appliances removes fingerprints, grease, residue, and water spots. Weiman appliance wipes leave a streak-free shine and a protective barrier that helps prevent future smudges.
- Safe for all stainless steel finishes: This stainless steel cleaning cloth & wipes kit is safe for all stainless steel finishes, including black stainless surfaces. Our stainless steel polish & cleaner a non-abrasive formula that doesn't scratch or dull. Does not repair existing scratches.
- For indoor & outdoor stainless steel: Our stainless steel wipes & cloth kit is ideal for stainless steel refrigerators, dishwashers, ovens, cooktop, sinks, range hoods, trash cans, and outdoor stainless steel grills. This stainless steel kitchen sink cleaner is a great choice for both inside appliances & outdoor grill exteriors.
- Easy, no-rinse application: Wipe in the direction of the metal grain, then buff with the included stainless steel cleaner cloth for a streak-free shine.
What you need
- Two or more clean microfiber cloths
- Warm water
- Mild dish soap
- Distilled or filtered water if your home has hard water
- Stainless-steel-safe polish or cleaner only when needed
In 2026, a basic DIY setup usually costs about $5 to $15 if you already have dish soap and a few microfiber cloths. If you are buying a multi-pack of microfiber cloths and a mild cleaner, expect about $10 to $30. Specialty stainless sprays, wipes, and kits commonly run about $3 to $30 per item, with premium kits costing more if they include coating products or dedicated polishing cloths.
Step-by-step routine
- Turn on side lighting or look from an angle to identify the grain direction. Most appliance doors have a vertical grain, but handles and trim can run horizontally.
- Start with handles. Hand oils are usually the dirtiest part of the appliance, and cleaning them first keeps you from transferring residue back onto the door.
- Mix warm water with one small drop of mild dish soap. The cloth should be damp, not dripping.
- Wipe with the grain from edge to edge. Avoid circular rubbing.
- Rinse using a second clean cloth dampened with plain water. In hard-water areas, use distilled or filtered water for this final wipe.
- Dry immediately with a clean microfiber towel, again moving with the grain.
- If the panel still looks dull, apply a pea-size amount of stainless polish or mineral oil to the cloth, not the appliance, and buff lightly with the grain.
The drying step is what most people skip. Stainless steel often looks streaky not because it is still dirty, but because soap, minerals, oil, or cleaner residue dried unevenly on the surface. A separate dry cloth fixes most of that.
Why Stainless Steel Gets Streaky, Cloudy, or Spotted
Stainless steel resists corrosion because chromium in the steel forms a thin protective surface layer. That passive layer is durable, but it is not invincible. Chloride-based cleaners, bleach, standing salty residue, harsh abrasives, and certain oversprays can damage the surface and contribute to pitting, discoloration, or rust-like staining.
Most appliance problems we see fall into one of four buckets: cleaning residue, mineral residue, oil buildup, or actual finish damage.
Cleaning residue
If a refrigerator door looks cloudy after cleaning, the usual cause is too much cleaner or polish. Stainless steel polish should be used sparingly. A light spray on the cloth or a pea-size amount can often handle an entire refrigerator panel. Heavy application leaves a film that catches dust and fingerprints.
Hard-water minerals
Water spots around refrigerator dispensers, dishwasher fronts, and lower appliance doors are often mineral deposits. If your tap water is high in minerals, a final wipe with distilled water can make a visible difference. Keep a small spray bottle under the sink and use it only for the final pass.
Grease film
Range fronts and over-the-range microwave doors collect vaporized cooking oil. For these areas, let the damp soapy cloth sit on the greasy spot for 15 to 30 seconds before wiping. Do not use oven cleaner, grill cleaner, or degreaser on appliance facia unless the appliance manual specifically allows it. Strong products can damage lettering, coatings, plastics, touch panels, and trim.
Finish damage
Scratches, pitting, and damaged coatings do not wipe away. Steel wool, stiff brushes, abrasive pads, aggressive melamine pads, and scouring powders can permanently change the sheen of a brushed stainless door. If the surface is black stainless or fingerprint-resistant stainless, damage can be even more noticeable because those finishes may use a coating over the metal.
Do these 3 things before closing this tab:
1Scan for outdated or missing drivers - takes under a minute2Repair Windows errors before they cause bigger problems3Fix the driver behind crashes, sound loss and screen glitchesWhat to Use and What to Avoid
Good stainless cleaning is mostly about restraint. Use soft materials, mild chemistry, and light pressure. Escalate only when the surface actually needs it.
Rank #2

- Cleans, polishes & protects stainless steel: Our stainless steel cleaner for appliances, which won a 2026 Good Housekeeping Cleaning Award, helps clean delicate, hard-to-clean surfaces. This appliance cleaner removes grease, fingerprints, water spots and residue while restoring a polished, like-new shine.
- No streak residue when used correctly: This stainless steel cleaning cloth & spray kit leaves a brilliant, streak-free finish when wiped in the direction of the metal grain and buffed with soft, dry cloth - no rinsing required.
- Safe for all stainless steel finishes: Our stainless steel polish & clean kit contains pH-neutral formula and is safe for stainless steel kitchen appliances, sinks, trash cans, grill exteriors, backsplashes, and countertops. This cleaning supplies for home kit does not contain Tetrachloroethylene (PCE) and will not dull or damage finishes.
- Prevents future smudges & water marks: This stainless steel appliance cleaner & polisher leaves behind a protective barrier that repels fingerprints, dust, and smudges, helping keep surfaces cleaner and shinier for longer.
- For appliances, sinks & Outdoor grills: Our spray & appliance cloth stainless steel kit is safe to use on stainless steel refrigerators, sinks, ovens, stovetops, microwaves, range hoods, trash cans, and grill exteriors.
| Cleaning option | Best use | Typical 2026 cost | Job-site caution |
|---|---|---|---|
| Warm water and microfiber | Light dust, fresh fingerprints, final rinse | Under $1 per cleaning after cloth purchase | Dry immediately to prevent water spots |
| Mild dish soap and water | Routine fingerprints, food residue, light grease | About $5-$15 if buying basic supplies | Use one small drop of soap; rinse after cleaning |
| Distilled or filtered water | Final wipe in hard-water homes | Usually under $2 per gallon | Useful around dispensers and dishwasher fronts |
| Stainless steel spray or wipe | Polishing clean panels and reducing fingerprints | About $3-$30 per item | Spray the cloth, not the appliance |
| Mineral oil | Very light finishing coat on uncoated stainless | Usually under $10 per bottle | Use a tiny amount; too much turns cloudy |
| Bleach or chloride cleaner | Not recommended for appliance stainless | Varies | Can contribute to pitting, discoloration, and corrosion |
| Steel wool or abrasive pads | Not recommended for appliance doors | Varies | Can permanently scratch the grain |
Spray the cloth, not the appliance
This matters more than most homeowners think. Spraying directly onto refrigerator doors, electronic displays, control panels, vents, seams, ice dispensers, or trim can push liquid where it does not belong. It can also create drip trails that dry before you can wipe them evenly. Put the cleaner on the cloth and keep the cloth damp, not wet.
Skip bleach, ammonia, and chloride cleaners
Bleach and chloride-containing cleaners are poor choices for stainless steel appliance faces. They can attack the protective surface layer and leave stains or pitting. Ammonia and harsh disinfectants can also be risky around coatings, plastics, screens, and printed control markings. If sanitation is needed on a handle, check the manufacturer’s directions for that appliance finish before using a disinfectant.
Be careful with vinegar and baking soda
Vinegar can help with some mineral deposits, but it should not be treated as a universal stainless cleaner. Acid left on stainless can create problems, and some coated finishes should not be cleaned with vinegar at all. Baking soda paste is mildly abrasive and can dull certain finishes if rubbed aggressively. If you use either, test in a small hidden area, keep contact time short, rinse thoroughly, and dry immediately.
Crashes, No Sound, or Screen Glitches?
Random freezes, missing sound and display glitches usually trace back to one bad driver. Find and replace yours safely.Free scan · under a minuteWindows Errors? Fix Them Before They Spread
Repair common Windows errors and clear accumulated junk for a smoother, more stable PC - no reinstall needed.Free scan · no reinstallHow to Clean Each Appliance Without Making a Mess
The same cleaning principles apply across the kitchen, but each appliance has trouble spots. Work methodically and avoid flooding seams, controls, and vents.
Refrigerators
Start with the handles, dispenser area, and lower door edges. These areas collect hand oils, water drips, pet nose marks, and food residue. Wipe the grain direction on each surface. Around an ice or water dispenser, use a lightly damp cloth and follow with distilled water if mineral spots are common.
Do not spray cleaner into the dispenser pocket, display, door gasket, hinge, or panel gap. If sticky residue sits near the handle, hold the damp soapy cloth against it for 30 seconds and wipe with the grain. Avoid abrasive spot scrubbing; that can leave a brighter patch you will see every time the kitchen lights hit the door.
Dishwashers
Dishwasher fronts often haze because of steam, detergent residue, and hard-water minerals. Clean the top control edge carefully, especially on hidden-control models where moisture can sit along the seam. Wipe down the front panel, rinse, and dry immediately.
If you are cleaning near the toe-kick or floor, watch for sharp panel edges. During remodel work, we also check that the dishwasher is secured properly, the drain line has the required high loop or air gap where applicable, and the door clears adjacent cabinet hardware. Those are installation details, not cleaning steps, but they matter when the appliance has been moved.
Ranges and ovens
Make sure the surface is cool before cleaning. Hot stainless can flash-dry soap or cleaner, leaving marks that take extra work to remove. For grease on the control panel or oven door, use a microfiber cloth with mild dish soap and warm water. Let the cloth dwell briefly on grease rather than scrubbing hard.
Do not use oven cleaner on the stainless front, knobs, control panel, handle, or trim unless the appliance manual specifically says it is safe. Oven cleaners are designed for interior oven soil and can damage exterior finishes.
Rank #3
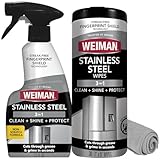
- Cleans, polishes & protects stainless steel: Our stainless steel cleaner for appliances removes fingerprints, grease, residue, and water spots. This kit includes spray, which won a 2026 Good Housekeeping Cleaning Award, cloth & appliance wipes that leave a streak-free shine and a protective barrier that helps prevent future smudges.
- Safe for all stainless steel finishes: This stainless steel cleaning cloth, spray & wipes kit is safe for all stainless steel finishes, including black stainless surfaces. Our stainless steel polish & cleaner has a non-abrasive formula that doesn't scratch or dull. Does not repair existing scratches.
- For indoor & outdoor stainless steel: Our stainless steel wipes, spray & cloth kit is ideal for stainless steel refrigerators, dishwashers, ovens, cooktop, sinks, range hoods, trash cans, and outdoor stainless steel grills. This stainless steel kitchen sink cleaner is a great choice for both inside appliances & outdoor grill exteriors.
- Easy, no-rinse application: Use our stainless steel spray onto the surface, wipe in the direction of the metal grain, then buff with the included stainless steel cleaner cloth for a streak-free shine.
- 3-piece value kit for complete care: This 3-piece kit includes stainless steel wipes for appliances for quick touch-ups, 12 oz stainless steel appliance cleaner spray & and a reusable microfiber cloth for buffing.
Microwaves and range hoods
Over-the-range microwaves and range hoods collect airborne grease. Clean filters separately according to the manufacturer’s directions. On the stainless exterior, use mild soap and water first, then rinse and dry. Pay close attention to the underside lip, where grease collects and where overspray can enter vents.
What’s actually slowing this PC down?
Pick the symptom - the matching free tool is one click away.
Special Finishes: Black Stainless and Fingerprint-Resistant Stainless
Not all stainless steel appliance finishes are the same. Standard brushed stainless is usually more forgiving than coated stainless. Black stainless and fingerprint-resistant stainless often have a factory-applied coating that changes what you should use.
Before using polish, oil, vinegar, baking soda paste, or any abrasive powder, check the appliance manual by model number. If the manual says to use only mild soap and water, follow that guidance. Manufacturer directions should override generic cleaning advice.
How to identify a coated finish
If the appliance is marketed as black stainless, smudge-proof, fingerprint-resistant, print shield, or easy-clean stainless, assume it may have a coating. These surfaces can reject oil-based polish, show cloudy buildup, or scratch differently than bare brushed stainless.
For coated finishes, use the mildest routine: damp microfiber, a small amount of dish soap if needed, clean damp rinse cloth, and immediate drying. Avoid polish unless the manufacturer specifically lists it as compatible.
The Tool Desk
Outbyte PC Repair FREERepair Windows errors before they cause bigger problemsFix Now →Outbyte Driver Updater FREEScan for outdated or missing drivers - takes under a minuteDriver Scan →Costs: DIY Cleaning vs Professional Help in 2026
Cleaning stainless steel appliance exteriors is usually a DIY job. The consumable cost per cleaning is typically under $1 when you use dish soap, water, and reusable microfiber cloths. Wipes cost more per use than spray bottles and cloths, but some homeowners like them for quick handle touch-ups.
Professional cleaners usually price stainless appliance cleaning as part of standard cleaning, deep cleaning, move-in/move-out cleaning, or an appliance add-on. It is rarely treated as a standalone trade service unless the job involves heavy grease, post-construction cleanup, interior appliance detailing, or moving appliances for access.
| Service level | Typical 2026 U.S. range | What affects the price |
|---|---|---|
| DIY routine exterior cleaning | Under $1 per cleaning after supplies | Appliance count, hard water, grease level |
| DIY starter supplies | About $10-$30 | Microfiber pack size, cleaner type, polish kit |
| Standard house cleaning visit | About $100-$300, with one national average around $180 | Home size, market rates, recurring vs one-time visit |
| Cleaner hourly rates | Roughly $27-$75 per hour per cleaner | Metro labor rates, service tier, whether supplies are included |
| Deep cleaning or move-in/move-out cleaning | About $250-$700+ | Interior fridge or oven work, grease removal, appliance pull-out, soil level |
For a normal kitchen with a refrigerator, dishwasher, range, and microwave, plan on 20 to 40 minutes for a careful first cleaning if the appliances have been neglected. Once the finish is clean and you have the right cloths, weekly touch-ups usually take 5 to 15 minutes.
When to DIY vs When to Hire a Pro
DIY is the right call when
- The appliance has ordinary fingerprints, light grease, food residue, or water spots.
- The finish is intact and not scratched, peeling, rusted, or cloudy from prior chemicals.
- You can clean without pulling out the appliance.
- You have the model manual or can confirm the finish type before using polish.
Most homeowners can handle routine stainless cleaning with no special tools. If you clean weekly or every other week, you will spend less time and use less product than if you wait until grease and minerals build up.
Free tools Windows power users keep installed
One-click scans. No signup required.
Rank #4

- Cleans, polishes & protects stainless steel: Our stainless steel cleaner for appliances, which won a 2026 Good Housekeeping Cleaning Award, helps clean delicate, hard-to-clean surfaces. This appliance cleaner removes grease, fingerprints, water spots and residue while restoring a polished, like-new shine.
- No streak residue when used correctly: This stainless steel cleaning cloth & spray kit leaves a brilliant, streak-free finish when wiped in the direction of the metal grain and buffed with soft, dry cloth - no rinsing required.
- Safe for all stainless steel finishes: Our stainless steel polish & clean kit contains pH-neutral formula and is safe for stainless steel kitchen appliances, sinks, trash cans, grill exteriors, backsplashes, and countertops. This cleaning supplies for home kit does not contain Tetrachloroethylene (PCE) and will not dull or damage finishes.
- Prevents future smudges & water marks: This stainless steel appliance cleaner & polisher leaves behind a protective barrier that repels fingerprints, dust, and smudges, helping keep surfaces cleaner and shinier for longer.
- For appliances, sinks & Outdoor grills: Our spray & appliance cloth stainless steel kit is safe to use on stainless steel refrigerators, sinks, ovens, microwaves, range hoods, trash cans, and grill exteriors.
Hire a cleaner when
- The kitchen needs a full deep clean, not just appliance fronts.
- There is heavy cooking grease around the range, hood, backsplash, and nearby cabinets.
- You want interior refrigerator, freezer, oven, or microwave detailing included.
- You are preparing a home for listing, move-in, move-out, or turnover.
A cleaner is often worth it when the work becomes labor-heavy rather than technically difficult. Ask what is included. Exterior wipe-down is different from interior oven cleaning, pulling out appliances, degreasing range hoods, or detailing refrigerator drawers.
Call an appliance or construction pro when
- An appliance must be moved and it has a gas line, water line, drain line, electrical connection, or anti-tip bracket.
- You see corrosion, leaking, loose mounting, damaged flooring, or missing safety hardware.
- A dishwasher, range, or refrigerator was recently installed and something looks misaligned or unsafe.
- You are in the middle of a kitchen remodel and appliance locations are changing.
Pulling a refrigerator forward may sound simple, but water lines and electrical cords can kink or catch. Ranges need anti-tip protection. Gas appliances require proper reconnection and leak testing. Dishwashers involve water supply, drain routing, electrical, mounting, and floor protection. If cleaning requires moving a built-in or connected appliance, slow down and treat it as an installation issue.
Independent reader supportYour contribution helps us test, update, and keep practical guides available for everyone.Safety, Warranty, and Permit Notes
Cleaning stainless steel is cosmetic maintenance and does not require a building permit. Wiping a refrigerator door, polishing a dishwasher front, or removing fingerprints from a range handle is ordinary homeowner maintenance.
Moving, replacing, or reinstalling appliances is different. Depending on your local jurisdiction, appliance work can trigger electrical, plumbing, gas, or mechanical permit rules. Requirements vary by city, county, and state. In some areas, replacing a hardwired dishwasher, modifying an icemaker line, reconnecting a gas range, or changing ventilation may require permits, inspections, or licensed trade work.
Recommended Free Tools
From a contractor’s standpoint, the dividing line is whether you are cleaning the appliance or altering the installation. If the appliance stays in place and you are only cleaning the exterior, it is maintenance. If the appliance is being disconnected, relocated, reconnected, hardwired, vented, or tied into plumbing or gas, verify local requirements before work starts.
Warranty is another practical issue. Appliance brands commonly recommend soft cloths, microfiber, wiping with the grain, and avoiding abrasive pads, steel wool, bleach, ammonia, and chloride-containing cleaners. For black stainless and fingerprint-resistant finishes, the manual matters even more. Keep the model number documented, especially during remodels or warranty periods.
Post-Construction and Remodel Cleaning Tips
Stainless appliances need extra care after a kitchen remodel because construction dust, adhesive residue, protective film, paint overspray, tile grout haze, and cabinet touch-up products can all land on the finish. On our job sites, we protect appliance faces during active work and remove protective film promptly once it is no longer needed.
Protective film should not be left to bake in sunlight or heat. Adhesive residue gets harder to remove after exposure to warmth, time, and UV light. If residue remains, use the manufacturer-approved method for that appliance finish. Do not attack adhesive with a razor blade, abrasive pad, or random solvent on a finished panel.
During punch-list work, keep stainless appliances covered when sanding, spraying, caulking, painting, or installing tile nearby. Chloride-containing products, acidic residues, and gritty dust can create permanent marks if they sit on stainless or get rubbed into the grain. If dust lands on the appliance, lift it off with a damp microfiber cloth and rinse the cloth often. Dry rubbing construction dust can act like fine sandpaper.
Best Value

- 2-in-1 benefits clean while preventing future fingerprints and smudges.
- Leaves stainless steel surfaces clean, polished and smudge free
- Regular use extends time between cleanings
- Water-based formula that won't leave an oily residue
A 10-Minute Weekly Stainless Steel Routine
For a typical kitchen, use this quick schedule once a week:
- Spend 2 minutes on handles, knobs, and touch points.
- Spend 3 minutes on refrigerator doors, including the dispenser area and lower edges.
- Spend 2 minutes on the dishwasher front and control edge.
- Spend 2 minutes on the range or microwave front, making sure surfaces are cool.
- Spend 1 minute buffing dry with a clean microfiber cloth.
For homes with kids, frequent cooking, or hard water, touch up handles and dispenser areas every 1 to 3 days. For lighter-use kitchens, a weekly wipe is usually enough. Deep grease removal around ranges may be needed monthly if you cook often with oil.
Common Mistakes That Damage Stainless Steel
The biggest mistake is treating stainless like a sink or grill grate. Appliance panels are visible finish surfaces. They need less force, not more.
- Using bleach, chlorine, chloride cleaners, or harsh disinfectants on stainless appliance doors
- Scrubbing with steel wool, stiff brushes, scouring pads, abrasive powders, or aggressive melamine pads
- Wiping across the grain or rubbing in circles
- Spraying cleaner directly into seams, vents, controls, displays, and dispenser areas
- Letting water, vinegar, soap, or cleaner air dry on the panel
- Using too much oil or polish and leaving a smeary film
- Assuming black stainless and fingerprint-resistant stainless can be polished like standard stainless
- Cleaning hot range or oven surfaces
- Letting salty food residue or hard-water drips sit near handles and lower door edges
- Pulling appliances out without checking water lines, gas connectors, cords, anti-tip brackets, and flooring
The Bottom Line
For most stainless steel appliances, the easy method is the right method: microfiber, warm water, a small amount of mild dish soap, a clean rinse cloth, and immediate drying with the grain. Use polish sparingly, avoid harsh cleaners, and check the manual before treating coated, black stainless, or fingerprint-resistant finishes.
If the appliance needs cleaning only, DIY is inexpensive and quick. If the work involves heavy grease, move-out detailing, or post-construction cleanup, a professional cleaner may save time. If the appliance must be moved, disconnected, reconnected, or adjusted during kitchen work, treat it as an installation and code issue, not just a cleaning task.
Frequently Asked Questions
What is the easiest way to clean stainless steel appliances without streaks?
Use a damp microfiber cloth with warm water and a drop of mild dish soap, wipe with the grain, rinse with a clean damp cloth, and dry immediately with a separate microfiber towel. Most streaks come from residue or air-dried water.
Can I use vinegar on stainless steel appliances?
Sometimes, but use caution. Vinegar can help with mineral spots, but it should not sit on stainless steel and may not be safe for coated, black stainless, or fingerprint-resistant finishes. Check the appliance manual first.
Can bleach damage stainless steel?
Yes. Bleach and chloride-containing cleaners can damage stainless steel’s protective surface layer and may contribute to pitting, discoloration, or rust-like staining. Use mild soap and water for routine appliance cleaning.
Should I use olive oil, mineral oil, or stainless steel polish?
Use very little product, and only when needed. Mineral oil or stainless polish can help standard uncoated stainless look even, but too much creates a cloudy film. Avoid oil or polish on coated finishes unless the manual allows it.
How do I clean black stainless steel or fingerprint-resistant stainless?
Assume the surface has a coating. Use microfiber, mild dish soap, water, and immediate drying. Avoid abrasive pads, powders, vinegar, baking soda paste, and polish unless the manufacturer specifically approves them.
Do I need a permit to move or replace appliances during a kitchen remodel?
Cleaning does not require a permit. Moving, replacing, or reinstalling appliances may trigger electrical, plumbing, gas, or mechanical permit requirements depending on your local jurisdiction and the appliance connection.
Quick Recap
Product prices and availability are accurate as of the date/time indicated and are subject to change. Any price and availability information displayed on Amazon at the time of purchase will apply.