Free tools Windows power users keep installed
One-click scans. No signup required.
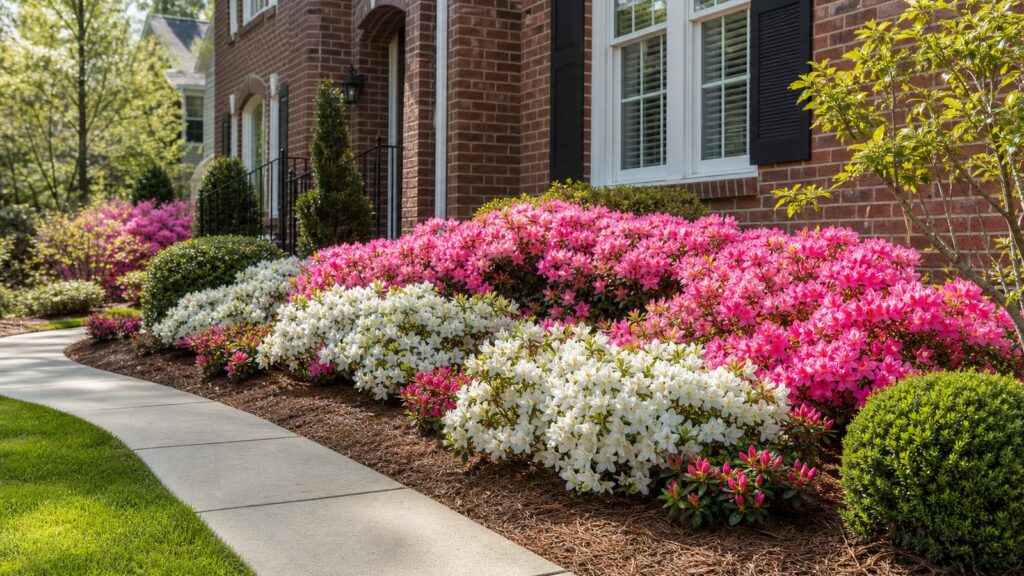
For maximum impact, azaleas need more than a good planting hole. They need the right site, acidic well-drained soil, mature spacing, and a layout that reads as one intentional planting from the street, porch, driveway, and main windows. The best azalea beds are designed first and dug second.
On our job sites, the difference between a thin-looking azalea planting and a strong one usually comes down to five decisions: choosing the right variety for the exposure, planting in groups instead of singles, correcting drainage before the shrubs go in, setting the root ball slightly high, and watering consistently through the first growing season. Skip any one of those and a beautiful nursery plant can become a stressed shrub within months.
Azaleas prefer acidic, organic, well-drained soil, commonly around pH 4.5 to 6.0. They are shallow-rooted, so wide bed preparation matters more than digging one deep hole. Most landscape azaleas perform best in partial sun, especially morning sun with afternoon shade. Hot west exposure, compacted clay, roof runoff, and buried root flares are the common reasons new azaleas decline.
Start With the Design, Not the Shovel
An azalea is a flowering shrub, but a group of azaleas is a landscape feature. Before buying plants, stand in the places where the bed will be seen most often: the sidewalk or street, the front entry, the driveway, the porch, and the largest front-facing windows. The goal is to create one clean mass of bloom, not a row of unrelated dots.
Quick wins for a faster PC:
Fix the driver behind crashes, sound loss and screen glitchesFind Drivers →Repair Windows errors before they cause bigger problemsFix Now →Scan for outdated or missing drivers - takes under a minuteDriver Scan →#1 Best Overall
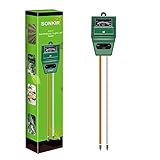
- Kindly NOTE: This soil tester can not be applied to test pH value of any other liquid. If the soil is too dry the indicator will not move, and water it before testing.
- 3 METERS IN ONE: Soil moisture level, Soil pH value and Sunlight level could be tested easily according to your need by switching the function button of this soil meter.
- NO BATTERY NEEDED: Simply insert the meter into soil, wait few minutes, accurate test results will be displayed on the readout panel. No battery is needed.
- STURDY AND SCIENTIFIC DESIGN: Reliable materials and upgraded technology used for this soil meter make it advanced and high-quality for long-term use.
- MULTIPURPOSE SOIL TEST KIT: Portable and compact design enables you to use this soil meter for house garden, farm, lawn and any other soil & plant analysis. Ideal for indoor and outdoor use.
For most homes, azaleas look strongest in odd-numbered groups of 3, 5, 7, or 9 shrubs. A pair can look stiff unless it is framing a walk or entry. A single azalea can work as an accent, but it rarely creates the impact homeowners are picturing when they think of a spring azalea display.
Use fewer cultivars in larger groups. Five shrubs of one color usually look better than five different colors competing with each other. If you mix colors, keep the palette intentional: white and soft pink for a cleaner foundation bed, coral and salmon for warmth, or lavender and white for shade gardens. Mixing every available bloom color usually makes the bed look busy for two weeks and unresolved the rest of the year.
Layer the Bed by Mature Height
Plan the bed in layers. Low, spreading azaleas belong toward the front edge. Taller upright varieties belong behind them or near corners where they will not block windows. If the bed is visible after spring bloom, add evergreen structure, ferns, hostas, sedges, hellebores, or other shade-tolerant perennials so the planting does not look empty after the flowers fade.
For a foundation bed, keep shrubs far enough from the house that the mature plant has breathing room. A 4-foot-wide azalea should not be planted 18 inches from siding. Leave room for air movement, painting, pest inspection, hose bibs, cleanouts, meters, vents, basement windows, crawlspace access, and AC service. A good-looking planting that blocks maintenance access becomes an expensive nuisance.
Do these 3 things before closing this tab:
1Repair Windows errors before they cause bigger problems2Scan for outdated or missing drivers - takes under a minute3Clear out junk files and repair common Windows errorsChoose Azaleas That Match Your Site
Azaleas are not one-size-fits-all shrubs. Some are evergreen, some are deciduous. Some stay under 3 feet tall, while others can reach 6 feet or more. Some tolerate more sun than others. The plant tag matters, but so does your actual site.
In many US landscapes, partial sun is the safest target. Morning sun with afternoon shade is ideal in hot regions and transition zones. Bright filtered light under high-canopy trees can also work if the soil is not too dry. Full shade often reduces bloom. Full afternoon sun, especially near brick, concrete, asphalt, or light-colored walls, can scorch leaves and stress shallow roots.
Evergreen azaleas are common for foundation color and year-round mass. Native deciduous azaleas are excellent where fragrance, pollinator value, and a looser woodland look are priorities. They can be especially effective along tree lines, naturalized slopes, and large beds where a less formal habit fits the property.
Check Hardiness and Mature Size
Pick cultivars for your USDA hardiness zone, sun exposure, and mature size. Do not space azaleas based on the nursery pot. A 3-gallon plant may look small on planting day, but if its mature width is 4 feet, the spacing should respect that. Crowding shrubs for instant fullness can work only if you are willing to prune, thin, or remove plants later.
For many landscape azaleas, 3 to 4 feet on center is common, but the mature width should drive the final layout. A compact 3-foot variety may be spaced about 30 to 36 inches apart for a full drift. A 5-foot variety may need 4 to 5 feet. Along walks and drives, leave enough clearance for the mature shrub so branches do not narrow the path.
Rank #2
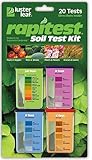
- Quick, at home results for Soil pH, Nitrogen, Phosphorous and Potash Innovative and inexpensive soil test kit features an easy-to-use capsule system and patented color comparators
- Contains all components needed for 20 tests. 5 for each of pH, N, P and K
- Contains all components needed to test all variables in several spots in the yard or garden
- Simple, detailed instructions included. Great for beginners and experienced gardeners alike.
- Soil pH preference list for over 450 plants included
Test Soil and Fix Drainage Before Planting
Azaleas want acidic, well-drained soil with plenty of organic matter. A common target pH is around 4.5 to 6.0, with some regional guidance closer to 4.7 to 5.5. A soil test is the cleanest way to know what you have. Depending on your local extension office or private lab, a basic soil test may cost $0 to $30.
Do not guess with lime, sulfur, or fertilizer. Lime is usually the wrong direction for azaleas unless a soil test specifically says otherwise. If the pH is too high, the plant may struggle to take up nutrients, and yellowing leaves can follow. If drainage is poor, fertilizer will not solve the real problem.
Poor drainage is one of the fastest ways to lose azaleas. Compacted clay, low spots, and downspout discharge areas raise the risk of root rot. Before planting, watch the area after a hard rain. If water sits, the site needs correction. That may mean raising the bed, improving the soil structure, redirecting downspouts, adding a drain solution, or choosing another location.
Prepare a Bed, Not Just a Hole
Azaleas are shallow-rooted. A wide, loose bed is better than a narrow deep hole. Where practical, prepare the bed about 18 inches deep and at least 30 inches wide. For a group planting, loosen and amend the whole bed area instead of digging isolated holes in hard soil.
In heavy clay, amending only a small hole can create a bathtub effect. Water moves into the loose amended hole and then cannot drain through the surrounding compacted soil. Bed-wide preparation reduces that risk. Use compost, pine bark fines, leaf mold, or a soil conditioner appropriate to your soil test and local conditions. The goal is loose, organic, well-drained soil, not a soft pocket surrounded by concrete-like clay.
Plan Around Utilities, Codes, and Maintenance Access
Call 811 before digging, even for shrub planting. Requirements vary by state, but shallow landscape work can still conflict with electric, cable, gas, irrigation, drainage, or communication lines. Marking the bed with flags or paint before the locate request helps everyone understand the work area.
Also check the public right-of-way, HOA rules, and local planting restrictions. Some municipalities limit what can be planted between the sidewalk and curb or near intersections, signs, hydrants, and utility equipment. Do not assume the strip in front of your house is unrestricted just because it is maintained like part of the lawn.
Keep azaleas clear of meters, cleanouts, AC units, dryer vents, crawlspace doors, basement window wells, hose bibs, sump discharge lines, and future access paths. Around AC condensers, leave enough clearance for airflow and service. Along walkways, leave room for the mature shrub plus snow shoveling, wheelbarrow access, or regular foot traffic.
Materials, Tools, and 2026 Cost Planning
A small azalea bed is not an expensive project compared with hardscaping, but the cost can vary widely. A one-gallon plant tucked into an existing bed is a different scope than a professionally prepared foundation bed with soil correction, mulch, edging, and drip irrigation.
For DIY planning, small 1-gallon azaleas often run about $10 to $25 each. Three-gallon shrubs commonly fall around $25 to $45. Five-gallon shrubs may cost $40 to $75 or more depending on cultivar, region, bloom type, and nursery quality. Larger plants create faster impact, but they cost more and still need careful establishment.
Professional shrub planting commonly runs about $25 to $85 per shrub for small shrubs when plant and labor are included, but azalea projects can exceed that when bed prep, grading, soil amendment, mulch, disposal, old shrub removal, or irrigation work is part of the job. Broader 2026 landscaping cost ranges put planting projects around $120 to $2,500, flower-bed installation around $800 to $3,000, and mulch installation around $30 to $120 per cubic yard.
| Azalea Planting Scope | Typical 2026 Cost Range | What Usually Drives the Price |
|---|---|---|
| DIY 1-gallon azalea planting | $10-$25 per plant, plus soil and mulch | Small plants, existing bed, homeowner labor |
| DIY 3-gallon azalea planting | $25-$45 per plant, plus materials | Better immediate size, more digging, more mulch |
| DIY 5-7 shrub front bed | $300-$1,200 | Plant size, amendments, edging, mulch, tools, drip parts |
| Professional 5-7 shrub front bed | $600-$2,500+ | Labor, bed prep, grading, disposal, soil correction, irrigation |
| Mulch installation | $30-$120 per cubic yard | Material type, delivery, access, labor rates |
| Small drip setup | $25-$150+ DIY materials | Bed size, timer, pressure reducer, tubing, emitters |
For tools, plan on a tape measure, marking flags, hose or rope for layout curves, round-point shovel, spade, garden fork, mattock for compacted soil, wheelbarrow, pruners, hose or watering wand, and mulch. For materials, budget for the azaleas, soil test, compost or pine bark soil conditioner, organic mulch, and any soil amendment recommended by the test.
Lay Out the Bed Before Digging
Set the plants in place while they are still in their pots. Use a hose or rope to shape the bed edge. Then step back and look from the street, entry, and windows. This ten-minute check prevents most layout mistakes.
Rank #3

- Accurate Soil pH Testing: Dewildetradingco Soil pH Test Strips offer measurements of soil pH levels (pH 3.5-9). As an essential tool for every gardener and grower, these test strips help determine the optimal pH for various plants, such as outdoor plants, indoor plants, gardens, grass lawns, fruit trees, flowers, vegetables, and forest shrubs.
- User-Friendly Testing Procedure: The testing process is simple and efficient. Mix the sample soil with water, let the solution sit for 30 minutes, dip one strip into the solution for 3 seconds, and then hold it horizontally for 60 seconds. Compare the results against the provided color chart on the bottle for quick and reliable readings.
- Cost-Effective and Versatile: With 100 Soil PH checker strips included in each package, Dewildetradingco provides a cost-effective solution for soil testing. It caters to various planting needs, offering valuable insights for a wide range of horticultural applications.
- Optimize Plant Health and Growth: Maintaining the correct pH is crucial for optimal plant growth and bountiful yields. Dewildetradingco Soil pH Test Strips enable gardeners and growers to adjust their soil conditions, ensuring nutrient availability and preventing wasteful spending on ineffective amendments.
- Convenient On-the-Go Monitoring: The Dewildetradingco Soil pH Test Strips are designed for portability, allowing gardeners to perform quick soil testing in various locations. As an essential tool in every gardener's soil tester kit, these pH strips help ensure thriving plant life and efficient resource management.
For a curved foundation bed, avoid tiny wiggles. Broad, simple curves look more professional and are easier to mow around. The bed should be deep enough for the mature plants, not just the root balls. A 30-inch-deep strip is usually too narrow for a serious azalea planting. Many front beds need 5 to 8 feet of depth to fit layered shrubs cleanly.
Measure spacing from plant center to plant center. If the tag says the mature width is 4 feet and you want a full mass, 3 to 4 feet on center is reasonable. If the bed is tight against a walk, give the walkway side extra room. A shrub that grows into a sidewalk will either look hacked back or become a daily annoyance.
Windows Errors? Fix Them Before They Spread
Repair common Windows errors and clear accumulated junk for a smoother, more stable PC - no reinstall needed.Free scan · no reinstallCrashes, No Sound, or Screen Glitches?
Random freezes, missing sound and display glitches usually trace back to one bad driver. Find and replace yours safely.Free scan · under a minuteHow to Plant Azalea Bushes Step by Step
Plant azaleas in fall or early spring in many US regions. Those seasons reduce heat stress and give roots time to establish before peak summer. In hot climates, avoid planting right before the hottest part of the year unless irrigation is reliable and someone will monitor the bed.
1. Water the Plants Before Planting
Water the azaleas in their pots before planting. A dry root ball is harder to rewet after it goes into the ground. If the plant is severely dry, soak the container until the root ball is evenly moist but not falling apart.
2. Dig Wide and Shallow
Dig each hole two to three times wider than the root ball but no deeper than the root ball height. In prepared beds, the hole is more about setting the plant at the right elevation than creating a separate pocket of perfect soil.
3. Remove the Container and Inspect the Roots
Slide the plant out of the pot and inspect the roots. Healthy roots should be firm and generally light-colored. Avoid planting root balls that are dark, mushy, sour-smelling, or badly deteriorated. If roots are circling around the outside, gently loosen them with your fingers or make a few shallow vertical cuts. Do not tear apart a fragile root ball so aggressively that the plant cannot recover.
The Tool Desk
Outbyte PC Repair FREEClear out junk files and repair common Windows errorsFree Scan →Outbyte Driver Updater FREEScan for outdated or missing drivers - takes under a minuteDriver Scan →4. Set the Root Ball Slightly High
Set the azalea so the top of the root ball sits slightly above the surrounding grade, often about 1 inch high in average soil and a little higher in heavier soils. Planting too deep is one of the most common failure points for woody shrubs. The crown and root flare should not be buried.
5. Backfill and Firm Lightly
Backfill with the loosened bed soil, amended according to your soil test and site conditions. Firm the soil gently with your hands to remove large air pockets, but do not stomp it into compaction. Build the grade so water moves across the root zone without ponding around the stem.
6. Water Deeply
Water each plant thoroughly after planting. The goal is to settle soil around the roots and wet the surrounding bed, not just sprinkle the mulch surface. For a newly planted 3-gallon azalea, a slow soak of several gallons is more useful than a quick splash.
Rank #4

- 【4 in 1 function】This is a 4-in-1 multifunctional soil tester.Our soil tester fastly to measure soil moisture, pH, temperature and sunlight to help you take better care of flowers and plants.You can know when you need to water your soil by measuring moisture and pH & Temperature value of the soil and sunlight level of plants with it.
- 【Large Screen & Backlight LCD Display】The Soil Tester uses a large LCD screen and white backlight to conveniently display and read digital parameter in day or dark.Use AAA1.5V * 4 batteries (not included),it will alert when the battery is low.
- 【Quick Accurate measurement】The latest probe detection technology in 2026 can quickly and accurately measure the pH, moisture and temperature in the soil,with the light intensity of the light sensor analysis on the instrument, it can allow you to know when to water, to control the pH and temperature acidity, and determine whether the plants have enough light to better cultivate the plants more scientifically.
- 【Easy to use】Just simply plug the probe into the soil about 4 inches(10cm) , wait 10 seconds to read intuitive data,and you will get an accurate and precise reading immediately.(This soil tester cannot be used directly to test any liquid. When measuring the soil, if the soil is too dry, do not insert it into dry and hard soil. Before testing, please water the soil test area and wait for 10 minutes, otherwise the testing machine will be damaged.)When testing soil pH and moisture, you need to read data from at least 5 locations in the soil. The average value of all the data will be the final soil pH and moisture.
- 【More convenient to read】The screen content adopts visual content design, which helps you read the data through specific values and easy to understand graphics, so that even novice growers can easily understand your soil conditions. The 45° rotating head design allows you to bend your head 0°-45°, allowing you to easily view the screen content without bending over.
7. Mulch Broadly and Shallowly
Apply 2 to 3 inches of organic mulch over the bed, keeping it pulled back from the stems. Pine bark, pine straw, shredded leaves, leaf mold, and composted organic mulch can all work. Mulch should cover the root zone broadly, not sit in a narrow mound against the trunk. A mulch pile against the stems holds moisture where the plant needs air and can invite decay.
Recommended Free Tools
Watering and First-Year Care
Azaleas have shallow roots, so establishment watering matters. Keep the soil evenly moist but not saturated. In the first few weeks after planting, check the root ball and surrounding soil two to three times per week. In hot, dry weather, that may mean watering every few days. In cool rainy weather, it may mean waiting.
A drip line or soaker hose is usually better than overhead watering. It puts water at the root zone and keeps foliage drier, which helps reduce disease pressure. For a small bed, a simple hose timer and drip tubing may cost $25 to $150 or more depending on the parts used.
Do not fertilize heavily at planting. If a soil test recommends fertilizer, follow the rate carefully. More is not better with azaleas. Excess fertilizer can burn shallow roots, especially in dry soil. If plants look stressed, check moisture, drainage, planting depth, and pH before reaching for more fertilizer.
Prune only as needed after bloom. Many azaleas set next year’s flower buds later in the season, so late pruning can remove the following spring’s show. Remove broken, dead, or crossing branches, but avoid shearing azaleas into tight boxes unless that is the formal look you are intentionally maintaining.
What’s actually slowing this PC down?
Pick the symptom - the matching free tool is one click away.
Common Problems After Planting
New azaleas usually fail for ordinary reasons: wrong exposure, wet roots, dry roots, high pH, planting too deep, or poor plant quality. The symptom may be yellow leaves, wilting, leaf scorch, sparse growth, or sudden decline, but the cause is often below the mulch.
Yellow Leaves
Yellowing can point to high soil pH, poor drainage, root damage, or nutrient issues. If leaves yellow while veins remain greener, pH-related nutrient availability may be involved. Do not automatically add fertilizer. Test the soil and inspect watering conditions first.
Wilting in Wet Soil
Wilting does not always mean the plant is dry. Roots damaged by saturated soil cannot move water properly, so the top wilts even though the bed is wet. If the soil smells sour or stays soggy, drainage is the problem to solve.
Leaf Scorch
Brown edges or scorched foliage often show up in hot afternoon sun, reflected heat, drought stress, or windy exposures. Morning sun and afternoon shade are safer in many regions. Mulch and consistent watering help, but they cannot fully compensate for the wrong exposure.
Poor Bloom
Too much shade, pruning at the wrong time, winter bud damage, or excess nitrogen can reduce flowers. If the plant is healthy but not blooming well, look first at light and pruning timing.
Best Value

- ✅ 1Dial & 1 LCD Screen - Replace/install all 3 batteries each time. Put button to %RH/°F to - Turn On, and put to LIGHT to - Turn Off. Read the LCD results in 3-5 mins. (Not Water Moisture Meter, so, please don't test liquid)
- 7Meter-in1 Comprehensive Maintenace: Specially designed for beginners, the built-in 1.6" chips board, can meet all your needs for measuring soil moisture, pH/fertility/temp/light/indoor temp&humidity. Simply switching modes on 1 button, can quickly result in a more accurate reading of various aspects of data of soil! Moreover, LCD screen can clearly display soil temp, air temp&humidity. helps you to plant lush and healthy plants, while it can also help you cultivate seedlings scientifically.
- Design Patented US & Utility Patented US: Origin Dual-Dial Design -combined with both soil meter and LCD-display soil/air temperature and humidity meter. This helps you to monitor soil moisture/pH/fertility/sunlight and soil temperature/air humidity and temperature in your garden/house all in one unit. Our 7 Soil Tester allows you to get a more comprehensive and direct understanding of your plants/ the key information for scientific seedlings.
- Effective Probe Based On 3 Metals: The soil pH tester has been with 3 kinds of quality metal material, which is accurate, strong, and durable for long-term use, length of about 6.8" and can be used for medium to large potted plants. it can analyze the soil more quickly, get to know the plant soil condition, and obtain more accurate data, furthermore, single probe design plant water meter is less harmful to the plant root system and won't bring out more soil of the plants after the test.
- Easy To Use & Wide Range: Simply insert the plant moisture meter more than 3" into the soil and switch the function button to obtain test results immediately or test the mini hygrometer thermometer in 3 mins. This moisture meter for house plants can be widely used in both outdoor &indoor gardens, farms, lawns, flowers, potted, and vegetable plants, etc., A great gardening gift for plant-lover friends, coworkers, and family.
When to DIY and When to Hire a Pro
Planting a few azaleas is a reasonable DIY project if the site drains well, utilities are marked, the bed is accessible, and you are comfortable doing the digging. A homeowner with basic tools can usually plant a 5-shrub bed over a weekend, including layout, soil preparation, planting, mulching, and cleanup.
Hire a pro when the job involves grading, drainage correction, compacted clay, old shrub removal, downspout conflicts, irrigation installation, large plants, or a highly visible front entry where the layout needs to look finished immediately. Professional installation also makes sense when the planting is part of a larger project involving walkways, retaining walls, foundation work, lighting, or exterior renovation.
From a construction standpoint, drainage and access are the big dividing lines. If water is moving toward the foundation, pooling near the bed, or discharging from a downspout into the proposed planting area, solve that before installing shrubs. Landscaping should improve the property, not hide a water problem until it becomes more expensive.
Crashes, No Sound, or Screen Glitches?
Random freezes, missing sound and display glitches usually trace back to one bad driver. Find and replace yours safely.Free scan · under a minuteWindows Errors? Fix Them Before They Spread
Repair common Windows errors and clear accumulated junk for a smoother, more stable PC - no reinstall needed.Free scan · no reinstallFinal Checklist for a Strong Azalea Planting
Before you plant, confirm the cultivar matches your hardiness zone, mature size, and sun exposure. Test the soil instead of guessing. Call 811 and check local restrictions if the bed is near the right-of-way or utility equipment. Prepare the whole bed where possible, roughly 18 inches deep and at least 30 inches wide, with good organic matter and reliable drainage.
Lay out azaleas in groups or sweeps, usually 3 to 7 plants for a small residential bed. Space by mature width, not pot size. Set each root ball slightly above grade, backfill without compacting, water deeply, and mulch 2 to 3 inches deep while keeping mulch off the stems. For the first growing season, check moisture consistently and correct stress early.
That is how azaleas deliver the impact homeowners actually want: a clean mass of spring color, healthy foliage after bloom, and a bed that still works with the house, utilities, drainage, and maintenance access years later.
Frequently Asked Questions
When is the best time to plant azalea bushes?
Fall or early spring is best in many US regions because cooler weather reduces heat stress while roots establish. In hot climates, avoid planting right before peak summer unless you have reliable irrigation and can monitor moisture closely.
How far apart should azaleas be planted?
Many landscape azaleas are spaced about 3 to 4 feet apart, but the mature width of the specific cultivar should control spacing. Compact 3-foot varieties can be planted closer than large varieties that mature at 5 feet or more.
Do azaleas need full sun or shade?
Azaleas usually perform best in partial sun, especially morning sun with afternoon shade. Full shade can reduce bloom, while hot afternoon sun or reflected heat can scorch leaves and stress shallow roots.
What soil pH do azaleas need?
Azaleas prefer acidic soil, commonly around pH 4.5 to 6.0. Some regional guidance targets a narrower range near 4.7 to 5.5. A soil test is the best way to know whether amendments are needed.
How much does it cost to plant azalea bushes in 2026?
Small retail azaleas may cost $10 to $25 for 1-gallon plants, $25 to $45 for 3-gallon plants, and $40 to $75 or more for 5-gallon plants. A DIY 5-7 shrub bed often runs $300 to $1,200, while professional installation can run $600 to $2,500 or more depending on bed prep, grading, mulch, irrigation, and labor.
Why do newly planted azaleas turn yellow or die?
Common causes include planting too deep, poor drainage, dry root balls, high soil pH, too much afternoon sun, compacted soil, or inconsistent watering. Check moisture, drainage, root flare depth, and soil pH before adding fertilizer.
Quick Recap
Product prices and availability are accurate as of the date/time indicated and are subject to change. Any price and availability information displayed on Amazon at the time of purchase will apply.