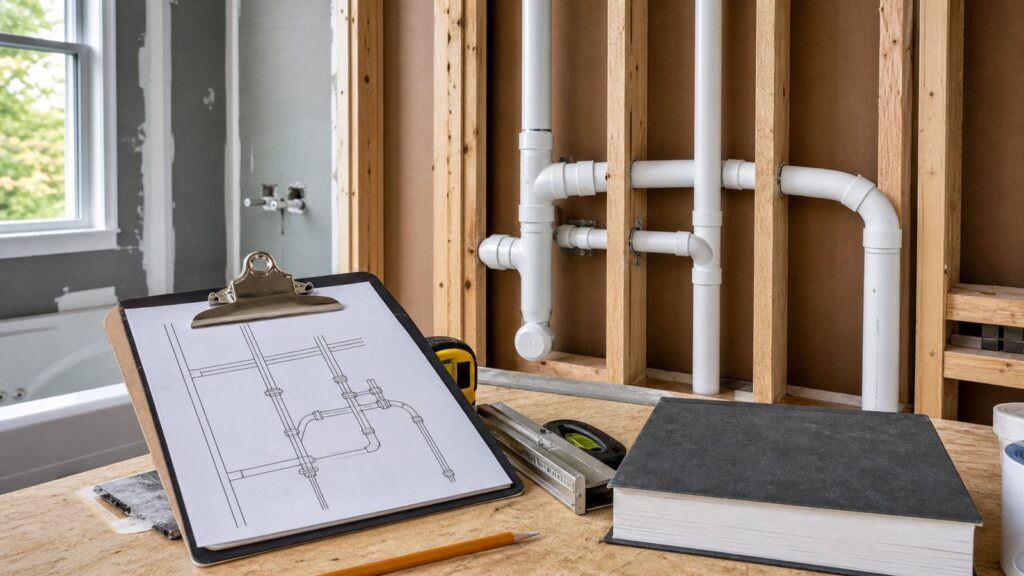
A good plumbing vent diagram answers three questions before anyone cuts drywall: where each fixture drains, how each trap is vented, and how the remodel ties back into the existing drain-waste-vent system. For a homeowner, that diagram is the difference between a clean remodel plan and a project that discovers code problems after the tile, cabinets, or roof are already involved.
On our job sites, we treat the vent diagram as a permit-ready planning document, not a rough sketch. It should show every fixture trap, trap arm, drain size, vent size, cleanout, vent connection, roof or sidewall termination, and any air admittance valve if the local code allows it. It should also show the existing stack, the new tie-in point, the flood-level-rim references, and the pipe slope. Without those details, the drawing may help someone visualize the room, but it will not reliably help a plumber price the work, an inspector review the work, or a builder protect the budget.
| # | Preview | Product | Price | |
|---|---|---|---|---|
| 1 |

|
2024 International Plumbing Code | $112.60 | Buy on Amazon |
If you are remodeling a bathroom, kitchen, laundry room, basement, or addition, start with two drawings: a floor-plan view and a vertical DWV riser view. The floor plan shows where the toilet, shower, sink, tub, washer, or island sink will sit. The riser view shows how the drains fall, how the vents rise, and where the system reaches the roof or connects into an existing vent stack. Together, those two views prevent slow drains, sewer-gas odors, bubbling toilets, failed inspections, roof flashing mistakes, and expensive wall or slab rework.
What a Plumbing Vent Diagram Actually Does
A plumbing vent protects the water seal in every trap. That water seal is the barrier between the living space and sewer gas. When a fixture drains, water moving through the pipe creates pressure changes. Without the right vent path, that pressure can pull water out of nearby traps or push air through them. Homeowners usually notice the problem as gurgling drains, sewer odor, slow draining, a toilet that bubbles when a shower runs, or traps that lose water unexpectedly.
#1 Best Overall
The vent diagram is the map for preventing those symptoms. It is also the map for permits. Under modern plumbing codes, fixture traps have to be vented by approved methods, and each building drain needs at least one vent system that extends outdoors. In many IPC jurisdictions, air admittance valves can supplement an approved design, but they typically do not replace the required outdoor vent path for the building. Local amendments matter, so a diagram that works in one city may need changes in another.
For a remodel, the diagram also protects the rest of the construction schedule. A bathroom wall that looks open on paper may carry structural framing, electrical runs, HVAC ducts, old cast iron, or a window header. A roof vent that looks simple may require flashing, roofing coordination, attic access, snow-height clearance, and location checks against windows, doors, decks, and air intakes. The earlier those conditions show up on the diagram, the less likely they are to show up as change orders.
The Simple Homeowner Version
Before the permit-level drawing, make a simple working diagram. It does not need to be beautiful. It needs to be measured and honest. Draw the room from above, mark the fixtures, mark the walls that are staying, and mark the existing plumbing stack if you know where it is. Then add the likely drain routes and vent routes.
For example, in a common bathroom remodel, the lavatory drain may be the practical wet-vent anchor for the bathroom group. The toilet, shower, and lavatory may be grouped near one wet wall so the vent can rise in that wall and continue to the roof or tie into an existing vent above the required height. That concept can save pipe runs and reduce demolition, but it is not a recipe to copy blindly. Wet venting is controlled by fixture order, pipe size, drainage fixture units, horizontal or vertical configuration, and the local code method. A licensed plumber should design the final layout.
The most useful homeowner sketch includes rough dimensions: the toilet centerline, shower drain center, lavatory center, wall thickness, joist direction, ceiling below, and distance to the existing stack. A toilet move of 6 inches can be minor in one house and a major framing problem in another. A lavatory move across the same wall is often manageable. Moving a toilet across joists, through a slab, or away from a usable stack is where costs rise quickly.
Permit-Ready Plumbing Vent Diagram Checklist
When a plumber, builder, or inspector reviews a remodel vent diagram, they need more than fixture icons. The drawing should show how the system works. We look for the following items before rough-in starts.
- Fixture list: toilet, lavatory, shower, tub, kitchen sink, dishwasher, washer standpipe, floor drain, bar sink, or other fixtures included in the remodel.
- Trap locations: each P-trap location, including showers, tubs, sinks, laundry standpipes, and floor drains.
- Trap-arm lengths: measured from the trap weir along the developed pipe length to the vent, not guessed as a straight line across the room.
- Drain pipe sizes: common residential DWV sizes include 1-1/2 inch, 2 inch, 3 inch, and 4 inch, depending on fixture and code.
- Vent pipe sizes: vent sizing should be tied to drain size, drainage fixture units, and developed length.
- Pipe slope: show the slope of horizontal drains and trap arms, commonly 1/4 inch per foot for smaller drainage piping and 1/8 inch per foot where allowed for larger pipe.
- Vent route: show where each dry vent rises, where vents combine, and how the vent reaches the roof or existing stack.
- Flood-level-rim references: dry vent connections need to remain high enough before horizontal offsetting or tying into another vent. Many code references use the 6 inch above flood-level-rim benchmark.
- Cleanouts: show accessible cleanouts at required locations, especially at stack bases, direction changes, long runs, and key tie-ins.
- AAV locations: if air admittance valves are allowed locally, show the exact location, access panel, elevation, and manufacturer clearance requirements.
- Existing tie-ins: identify cast iron, PVC, ABS, copper DWV, galvanized, or unknown existing piping, including size and condition where visible.
- Roof or sidewall termination: show the termination point, required height, distance from windows and openings, and flashing coordination.
If the diagram cannot answer those points, it is not ready for a final price or permit submittal. It may be ready for a budgeting conversation, but not for demolition.
Draw Two Views: Plan View and Riser View
The floor plan is the view most homeowners understand first. It shows walls, fixtures, and pipe runs as if you are looking down from above. This view is good for layout decisions: keeping the toilet close to the stack, grouping fixtures on a wet wall, avoiding joist conflicts, and planning where drywall or cabinets may need to open.
Windows Errors? Fix Them Before They Spread
Repair common Windows errors and clear accumulated junk for a smoother, more stable PC - no reinstall needed.Free scan · no reinstallOutdated Drivers Are Slowing You Down
One free scan finds every outdated or missing driver and matches the right update for your exact hardware.Free scan · exact hardware matchThe riser view is the view that explains the plumbing. It shows vertical relationships: trap, trap arm, drain, vent rise, horizontal branch, stack, roof penetration, and tie-in heights. A riser diagram does not need to be drawn to architectural scale, but it must be clear enough to show slope, connection order, and elevation. If a vent goes horizontal too low, or if a drain ties in before the fixture is properly vented, the floor plan alone may not reveal the problem.
What to Measure Before Drawing
Measure the room, but also measure the constraints. Note the joist direction, joist depth, bearing walls, basement or crawlspace access, attic access, roof pitch, and the location of the existing main stack. If there is old cast iron, galvanized pipe, or unknown piping behind plaster, build some investigation time into the schedule. A remodel that assumes clean PVC behind every wall can get expensive quickly in older houses.
Also measure trap-arm length the right way. The trap arm is measured from the trap weir along the developed length of the pipe to the vent, following the pipe path. It is not a straight-line distance from the sink to the wall. A trap arm that jogs around framing or cabinetry may be longer than it looks on the floor plan.
Trap-to-Vent Distance Rules Homeowners Should Know
Trap-arm distance is one of the most common reasons generic online diagrams fail in real houses. Under IPC-style rules, the maximum distance from a trap to its vent depends on pipe diameter and slope. Local amendments can change details, but these common IPC Table 909.1 values are useful for planning.
| Trap size | Typical slope used in table | Common IPC maximum trap-arm distance | Remodel planning note |
|---|---|---|---|
| 1-1/4 inch | 1/4 inch per foot | 5 feet | Often seen at small lavatories; short runs matter. |
| 1-1/2 inch | 1/4 inch per foot | 6 feet | Common for lavatory or sink planning, depending on code and fixture. |
| 2 inch | 1/4 inch per foot | 8 feet | Common for showers, tubs, laundry, and some sink layouts. |
| 3 inch | 1/8 inch per foot | 12 feet | Common toilet drain size in many residential layouts. |
| 4 inch | 1/8 inch per foot | 16 feet | More common for larger building drains or main lines. |
Those numbers are planning values, not a substitute for the adopted local code. The slope and pipe size work together. Oversloping can be a problem because liquid can outrun solids. Undersloping can leave waste sitting in the pipe. A good diagram shows the intended slope so the plumber and inspector are reviewing the same design.
Vent sizing also is not guesswork. IPC vent sizing is tied to drain size, drainage fixture units, and developed length. A commonly cited IPC rule is that vents over 40 feet of developed length must increase one nominal pipe size for the full developed length. That can matter in additions, long attic runs, and remodels where the only practical route to the roof is far away from the new fixtures.
Vent Types Compared for Remodel Planning
Different vent methods solve different problems. The right choice depends on the fixture group, the existing stack, the adopted code, and the access you have during construction. This is where a licensed plumber earns the money, because a layout that looks clever on paper can fail inspection if the fixture order or vent connection is wrong.
| Vent method | Best use | Code sensitivity | Maintenance risk | Cost impact in a remodel |
|---|---|---|---|---|
| True dry vent | Single fixture or fixture group with a clear wall path upward | Moderate; sizing, distance, and connection height still matter | Low when properly installed | Predictable if the wall and attic route are open |
| Common vent | Back-to-back or nearby fixtures sharing a vented connection | Moderate to high; geometry and connection details matter | Low if accessible cleanouts are planned | Can reduce pipe, but only when layout fits |
| Wet vent | Bathroom groups where one fixture drain also vents another fixture | High; fixture group, pipe size, and order are critical | Low to moderate if designed correctly | Often saves wall opening and pipe runs |
| Loop or island vent | Kitchen island sinks where a normal wall vent is not available | High; must be detailed correctly | Moderate because access and cleaning matter | Usually more expensive than a wall sink vent |
| Air admittance valve | Supplemental venting where allowed and access is available | High; not accepted everywhere and usually cannot replace the required outdoor vent | Moderate; mechanical part must remain accessible | Can avoid a roof penetration, but should not be used as a shortcut around code |
For homeowners, the takeaway is simple: do not choose a vent type because it looks easiest online. Choose it because it fits your house, your adopted code, and your inspection path. In many remodels, the cheapest long-term solution is to reuse an existing wet wall and stack instead of forcing a fixture layout that requires slab cutting, roof work, or complicated venting.
Quick wins for a faster PC:
Clear out junk files and repair common Windows errorsFree Scan →Scan for outdated or missing drivers - takes under a minuteDriver Scan →Air Admittance Valves: Useful, but Not Magic
An air admittance valve, or AAV, lets air into the drainage system when negative pressure develops. It can be useful in remodels where a full-height vent route is difficult. Many IPC jurisdictions allow AAVs when installed under approved conditions. Other jurisdictions restrict them or do not allow them in the same way. Even where they are allowed, they usually supplement the vent system rather than replacing the required outdoor vent for the building drain.
If an AAV is part of the design, the diagram should show its exact location and access. It should not be buried in a sealed wall. It should sit high enough for the fixture it serves, follow the manufacturer installation instructions, and remain reachable for future replacement. Because it is a mechanical device, we treat it differently from a passive pipe through the roof. It can be the right answer, but it should be chosen deliberately.
Roof Vent Terminations and Flashing Details
Roof terminations are another area where a vent diagram saves trouble. The vent has to terminate outdoors, but the exact height and location depend on the adopted code and local amendments. Many local codes use minimums such as 6 inches or 12 inches above the roof. Snow regions, roof decks, occupied roofs, nearby windows, doors, and air intakes can require more clearance.
Do not plan a roof penetration in isolation. It affects roofing, flashing, attic routing, insulation, and sometimes exterior appearance. On a simple asphalt-shingle roof, adding or relocating a vent penetration may be straightforward. On tile, metal, low-slope membrane, or an older roof near replacement age, it requires more coordination. A low plumbing quote may not include roofing repair, drywall repair, paint, cabinetry removal, or tile patching. Price those separately before approving the layout.
What’s actually slowing this PC down?
Pick the symptom - the matching free tool is one click away.
For 2026 budgets, national cost guides show roof vent installation commonly ranging from about $382 to $1,388, with some calculator estimates starting around $640 to $784 per piping run. Those numbers can be low if the work involves difficult roof access, finished attic spaces, steep pitch, specialty roofing, or repairs after the penetration is made.
2026 Cost Ranges for Vent and Drain Changes
Plumbing prices vary by region, access, house age, and inspection requirements, but realistic planning numbers help homeowners compare layouts. In 2026, rerouting or replacing a plumbing vent often averages around $1,500 nationally, with a broad range of about $500 to $5,000. The low end usually means easy access, short runs, and limited finish repair. The high end usually means opened walls or ceilings, roof work, multiple fixtures, old pipe tie-ins, or a difficult route.
Bathroom plumbing rough-in costs commonly land around $2,500 to $8,000 for remodel work, with a national average near $4,500. A simpler three-piece bathroom rough-in may be quoted around $1,500 to $4,000 when fixture locations are favorable. Moved lines, slab work, multi-story stack changes, or rescue work after a bad layout can reach $5,000 to $20,000.
| Work item | 2026 planning range | What changes the price |
|---|---|---|
| Reroute or replace plumbing vent | About $500 to $5,000; average around $1,500 | Access, wall repair, roof route, fixture count, stack location |
| Install roof vent penetration/run | About $382 to $1,388; some runs start around $640 to $784 | Roof type, pitch, flashing, attic access, local clearance rules |
| Bathroom plumbing rough-in | About $2,500 to $8,000; average near $4,500 | Fixture moves, slab cutting, vent route, inspections, old piping |
| Simple 3-piece rough-in | About $1,500 to $4,000 | Best case when fixtures stay near existing drain and vent paths |
| Install drain line | About $663 to $810 starting range | Length, pipe size, access, cleanouts, tie-in condition |
| Move drain pipe | About $909 to $1,106 starting range | Framing conflicts, demolition, slope, finish restoration |
| Install sink drain pipe | About $324 to $406 starting range | Cabinet access, wall opening, vent connection |
| Install toilet drain pipe | About $880 to $1,070 starting range | Floor framing, flange location, pipe size, stack distance |
Hourly plumbing rates in 2026 consumer guides commonly run about $45 to $200 per hour nationally. Many standard licensed plumbers fall around $75 to $150 per hour, while master plumbers may run $100 to $200 per hour. Emergency work, after-hours calls, dense urban markets, and specialty troubleshooting can cost more. Federal labor data shows plumbers, pipefitters, and steamfitters are a skilled trade with median pay around the low-$60,000 range in recent data, but consumer billing rates include overhead, licensing, insurance, vehicles, supervision, warranty risk, and business costs.
Material is not the main budget driver, but it still belongs in the estimate. A 3 inch by 10 foot Schedule 40 PVC DWV pipe was listed around $56.67, or $5.67 per foot, in a 2026 retail result. Smaller DWV pipe can be less, and bulk supplier pricing can vary widely by diameter, market, and quantity. Fittings, primer, cement, hangers, fireblocking, cleanouts, transition couplings, roof flashing, and access panels add to the material list.
Why Moving a Toilet Costs More Than Moving a Sink
Fixture moves are not equal. A lavatory usually has smaller drain piping and can often move within the same wall or vanity area with less disruption. A toilet needs a larger drain, proper flange location, adequate slope, and a route back to the stack or branch drain. If the joists run the wrong direction, or the toilet has to move across a structural bay, costs rise.
In slab homes, moving a toilet or shower drain often means saw cutting concrete, trenching, protecting existing utilities, re-pouring concrete, and dealing with floor finishes. In a second-floor bath, it may mean opening the ceiling below and coordinating framing limits. In an older home, it may expose cast iron that is cracked, scaled, or poorly supported. That is why we often advise homeowners to spend design energy on keeping the toilet and main stack close to where they already are. You can still get a much better bathroom without turning the DWV system into the most expensive part of the remodel.
A good vent diagram makes those tradeoffs visible. If Scheme A keeps the toilet within a short run of the existing stack and Scheme B moves it 7 feet across joists, the drawing should show the cost consequence before anyone falls in love with the floor plan.
Recommended Free Tools
Permits, Inspections, and Local Code Differences
Plumbing venting is code work. The 2024 IPC requires fixture traps to be vented by approved methods in Chapter 9, and at least one vent system for each building drain must extend outdoors. UPC jurisdictions may use different numbering, sizing, venting methods, or local amendments. Cities can also amend roof termination heights, AAV rules, permit fees, and inspection sequencing.
Permit costs vary widely. Small plumbing permits may be under $300 in some jurisdictions. Larger remodel permit packages often run $500 to $2,000 or more depending on project scope and city fees. Some cities price plumbing permits per fixture; one example fee schedule lists charges such as $26 for the first plumbing fixture and $20 for each additional fixture plus surcharge. Other remodel permits are calculated by valuation or trade category. Your builder or plumber should confirm the local requirement before work starts.
Inspection timing matters. Rough plumbing should be inspected before walls, floors, and ceilings are closed. Water tests, air tests, or other inspection requirements vary by jurisdiction. If tile or drywall goes in before the venting is approved, fixing a missed vent or improper tie-in becomes slower and more expensive.
When to DIY and When to Hire a Pro
A homeowner can absolutely help with the planning diagram. In fact, a measured homeowner sketch often improves the first meeting with a builder or plumber. You can document fixture locations, take photos of open basements or crawlspaces, identify the existing stack, note roof access, and list the fixtures you want to move. You can also compare layout options and ask better budget questions.
Free tools Windows power users keep installed
One-click scans. No signup required.
DIY should usually stop before final vent design, pipe sizing, structural boring, slab cutting, roof penetration, and work that requires a permit. Plumbing vents are simple in concept but unforgiving in execution. A sink that drains today can still be wrong if it siphons a trap tomorrow. A vent that looks connected can still fail if it goes horizontal below the required height. A toilet can flush in a test and still create gurgling or odor problems after normal household use.
Reasonable Homeowner Tasks
- Measure the room and fixture locations.
- Photograph existing plumbing from the basement, crawlspace, attic, and mechanical room.
- Mark joist direction and visible obstructions.
- Gather local permit information or ask the building department what code is enforced.
- Request that plumbing bids identify what finish repairs are included or excluded.
Hire a Licensed Plumber Immediately When
- You smell sewer gas or cannot identify where the odor is coming from.
- A toilet bubbles when another fixture drains.
- Multiple fixtures gurgle, drain slowly, or lose trap water.
- You suspect a blocked roof vent.
- The remodel involves slab cutting or moving a toilet.
- The existing system includes old cast iron, galvanized pipe, or unknown buried piping.
- The work changes a multi-story stack.
- The design depends on wet venting, island venting, or AAV approval.
What We Check on Bettesworth Remodels
Before rough plumbing begins, we compare the vent diagram to the actual building. First, we verify the existing stack location and pipe material. Then we check access from below and above. We confirm whether the proposed vent can rise in a real wall cavity without hitting a beam, window, duct, or electrical panel. We check whether the roof penetration lands in a workable location for flashing and exterior clearance. We confirm which finishes must be removed and which trades are needed to put them back.
We also ask a budget question that gets missed too often: does the plumbing number include repair work? Many plumbing bids include pipe, fittings, labor, and inspection support, but exclude drywall, paint, tile, roofing, cabinet removal, flooring, or countertop work. That is not necessarily wrong, but it has to be clear. A $1,800 plumbing proposal can turn into a $4,500 project if the finish restoration is carried elsewhere and nobody planned for it.
Finally, we keep inspection access open. Cleanouts need to remain accessible. AAVs, where allowed, need access. Test points and tie-ins need to be visible for the inspector. The best vent diagram is not just code-correct; it is buildable in the house you actually own.
Do these 3 things before closing this tab:
1Clear out junk files and repair common Windows errors2Fix the driver behind crashes, sound loss and screen glitches3Repair Windows errors before they cause bigger problemsCommon Diagram Mistakes That Cause Rework
The first mistake is drawing fixture locations without pipe slope. Drainage piping is not a line on paper; it needs vertical room. A shower drain that looks easy in plan view may not have enough depth once slope, trap, joists, and ceiling finish are considered.
The second mistake is measuring trap-arm distance wrong. Measure along the developed pipe path from the trap weir to the vent. If the pipe turns around a corner or jogs through framing, include that length.
The third mistake is assuming an AAV solves every difficult vent. It may be allowed, or it may not. It may be allowed for one fixture and not appropriate for the whole design. It must remain accessible.
The fourth mistake is connecting vents too low. Dry vent connections generally need to rise above the flood-level rim before horizontal offsetting or tying into another vent. The common 6 inch benchmark above the flood-level rim is a planning reference many code discussions use, but the local adopted code and fixture layout control the final detail.
The Tool Desk
Outbyte PC Repair FREERepair Windows errors before they cause bigger problemsFix Now →Outbyte Driver Updater FREEScan for outdated or missing drivers - takes under a minuteDriver Scan →The fifth mistake is ignoring structural limits. Drilling or notching joists, studs, plates, and beams is governed by building rules as well as plumbing rules. A vent route that requires cutting a structural member may be more expensive than choosing a different wall.
A Practical Step-by-Step Planning Process
Start with the existing system. Find the stack, main drain direction, roof vent, basement or crawlspace access, and any visible cleanouts. If the house is older, identify whether the piping is PVC, ABS, cast iron, copper DWV, galvanized, or mixed. Take photos before covering anything.
Next, place the fixtures. Keep the toilet and shower close to practical drain routes when possible. Use the lavatory wall strategically because it often provides a good vent path and may support a code-compliant bathroom-group venting strategy when designed correctly.
Then draw the floor-plan DWV routes. Mark pipe sizes, slope direction, and tie-ins. Add cleanouts and note any framing conflicts. After that, draw the riser view. Show traps, trap arms, vent rises, stack connections, vent combining points, and roof termination.
Price the plan before demolition. Ask for separate numbers where appropriate: rough plumbing, vent reroute, roof penetration, drywall repair, tile repair, paint, cabinetry, flooring, and permit fees. If you are comparing two layouts, price both. A fixture location that saves 12 inches of vanity space may add $3,000 in plumbing and finish repair. Sometimes that is worth it. Sometimes it is not.
Submit or review the permit documents before rough-in. Keep the inspection sequence on the schedule. Do not close walls until the rough plumbing inspection passes and any required test is complete.
The Bottom Line
The perfect plumbing vent diagram for a remodel is not perfect because it is pretty. It is perfect because it is specific enough to build, price, permit, and inspect. It shows the floor plan and the riser view. It identifies trap arms, pipe sizes, vent sizes, slopes, cleanouts, AAVs if allowed, roof termination, flood-level-rim requirements, and existing tie-ins. It respects local code instead of copying a generic image.
For homeowners, the smartest money is often spent before demolition: measure carefully, keep fixtures near existing wet walls where practical, confirm the local code, and have a licensed plumber review the final venting method. That planning can prevent sewer odor, slow drains, failed inspections, opened walls, roof mistakes, and the kind of rework that makes a remodel feel out of control.
Quick wins for a faster PC:
Repair Windows errors before they cause bigger problemsFix Now →Scan for outdated or missing drivers - takes under a minuteDriver Scan →Clear out junk files and repair common Windows errorsFree Scan →Frequently Asked Questions
What should a plumbing vent diagram include for a remodel permit?
It should show every fixture, trap, trap arm, drain size, vent size, slope, cleanout, AAV location if allowed, flood-level-rim reference, existing stack tie-in, and roof or sidewall termination. A floor plan plus a vertical riser diagram is usually the most useful format.
How far can a sink, shower, or toilet be from a plumbing vent?
It depends on trap size, pipe slope, and local code. Common IPC planning values include 5 feet for a 1-1/4 inch trap, 6 feet for 1-1/2 inch, 8 feet for 2 inch, 12 feet for 3 inch at 1/8 inch per foot, and 16 feet for 4 inch at 1/8 inch per foot.
Can one vent serve a toilet, shower, and sink?
Sometimes. Bathroom groups are often designed with wet venting, and the lavatory can be a practical anchor, but the pipe size, fixture order, trap-arm lengths, and local code method matter. Have a licensed plumber design this rather than copying a generic diagram.
Are air admittance valves allowed instead of a roof vent?
In many IPC jurisdictions, AAVs are allowed as part of an approved layout, but they usually cannot replace the required outdoor vent system for the building drain. They must also remain accessible for inspection and replacement.
Outdated Drivers Are Slowing You Down
One free scan finds every outdated or missing driver and matches the right update for your exact hardware.Free scan · exact hardware matchPC Slower Than It Used to Be?
A free scan shows the junk files, broken settings and background clutter dragging Windows down - then fixes them in one click.Free scan · Windows 10 & 11How much does it cost to reroute a plumbing vent in 2026?
A reasonable national planning range is about $500 to $5,000, with an average around $1,500. Access, wall and roof repairs, fixture count, pipe length, local labor rates, and old piping conditions can move the price significantly.
Should I DIY a plumbing vent diagram?
You can DIY the first planning sketch by measuring the room, locating fixtures, and documenting existing pipes. Final vent sizing, wet vent design, slab cutting, structural drilling, roof penetrations, and permit work should be handled by a licensed plumber.
Quick Recap
Product prices and availability are accurate as of the date/time indicated and are subject to change. Any price and availability information displayed on Amazon at the time of purchase will apply.