Free tools Windows power users keep installed
One-click scans. No signup required.
Wood cabinets do not need harsh cleaners to look fresh again. In most kitchens, the best first pass is simple: dry dust, wipe with a damp microfiber cloth, clean grime with a mild dish soap solution, wipe again with clear water, and dry the surface right away. That sequence removes the mix of cooking oil, dust, fingerprints, steam residue, and food splatter that makes cabinet doors feel sticky.
The key is protecting the finish. Most wood cabinets are not bare wood. They are protected by paint, stain plus clear coat, lacquer, polyurethane, conversion varnish, veneer finish, or a factory coating. Your job is to clean that film, not scrub through it. On our job sites, we treat cabinet cleaning like finish maintenance: start with the least aggressive method, test stronger products out of sight, and stop if color, sheen, or texture changes.
That matters because cleaning is inexpensive compared with the next steps. In 2026, a basic DIY cabinet-cleaning kit usually runs about $10 to $35 if you already own microfiber cloths. A more complete kit with extra cloths, non-scratch pads, a detail brush, gloves, shelf liner, and a step stool may land around $25 to $75. Professional kitchen cleaning commonly starts around $117 to $144 per kitchen, while cabinet refinishing, painting, or refacing can run from several hundred dollars to well over $7,000 depending on the scope. Cleaning is the low-risk first move before you price bigger work.
What Makes Wood Cabinets Greasy and Dull?
Kitchen cabinet grime builds in layers. Cooking oil becomes airborne when you fry, saute, roast, or run high heat on a cooktop. That oil lands on upper doors, crown molding, cabinet rails, and the faces closest to the range. Dust sticks to that film. Add fingerprints around pulls, steam from dishwashers and coffee makers, food splatter near prep zones, and trash pullout residue, and the finish starts looking darker than it really is.
The Tool Desk
Outbyte Driver Updater FREEScan for outdated or missing drivers - takes under a minuteDriver Scan →Outbyte PC Repair FREERepair Windows errors before they cause bigger problemsFix Now →The dirtiest zones are usually within 24 to 36 inches of the range, microwave, sink, dishwasher vent, trash cabinet, and coffee station. Handles and knobs often develop a halo because hand oils collect around the hardware. Shaker doors, raised panels, bead details, and crown molding hold grime in corners longer than flat slab doors.
Heat and moisture speed the problem up. A toaster oven tucked under an upper cabinet, a coffee maker venting steam at the same door every morning, or a dishwasher vent hitting a cabinet stile can soften grime and stress the finish. If the same cabinet gets sticky again within a few weeks, look for the source. Better ventilation and appliance placement often matter as much as the cleaner.
Know the Finish Before You Clean
Before you mix anything, identify what you are cleaning. A stained maple door with a factory clear coat can tolerate a different approach than old painted cabinets, thin veneer, thermofoil, or raw wood. If you do not know the finish, assume it is sensitive and test first inside a door or along a hinge-side edge.
#1 Best Overall
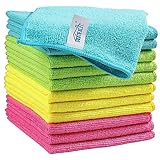
- Effective Streak-Free Cleaning: Clean kitchen countertops, windows, mirrors, bathroom surfaces, stainless steel, car interiors, glass, and other delicate surfaces with just water or your favorite cleaner—these microfiber cloths deliver streak-free, neat results with minimal effort, making daily cleanup fast and simple
- Lint-Free & Scratch-Safe: Soft to the touch and completely lint-free, these cloths won't scratch or damage delicate finishes like glass, ceramic, coated metals, car paint, or polished surfaces—clean with confidence on everything from household appliances to auto trim and electronics screens
- Ultra-Absorbent for Spills, Polishing & Drying: Designed to quickly soak up liquids, grease, and grime, making them ideal for drying dishes, wiping spills, polishing stainless steel, buffing car surfaces, and tackling everyday messes around the house, garage, or workshop—efficient cleaning without extra effort
- Reusable, Washable & Long-lasting: Machine washable and reusable hundreds of times with reinforced edges that hold up wash after wash—a durable replacement for disposable paper towels that cuts down on waste and repeat purchases for families, pet owners, detailers, and busy households
- Versatile Across Home, Auto & Beyond: Equally suited for general household cleaning, interior car detailing, exterior buffing, polishing wheels, wiping down tools, workshop surfaces, electronics, eyeglasses, screens, and more—simply rinse after use or toss in the washing machine; a practical all-around choice for homes, garages, shops, and small businesses
| Cabinet surface | Safest first cleaner | Be careful with | Stop if you see |
|---|---|---|---|
| Stained wood with clear coat | Damp microfiber, then 5% dish soap and 95% warm water | Abrasive pads, strong degreasers, steam, long dwell time | Cloudy finish, color on cloth, gummy texture |
| Painted wood | Damp microfiber and mild dish soap solution | Magic erasers, baking soda paste, vinegar, heavy scrubbing | Paint transfer, dull spots, exposed primer |
| Wood veneer | Nearly dry microfiber and mild soap solution | Excess water at edges, steam, soaking seams | Lifting veneer, bubbling, edge swelling |
| Laminate | Mild dish soap solution | Abrasives that scratch the face | Open seams, swollen particleboard core |
| Thermofoil | Damp microfiber and gentle soap | Heat, steam, solvents near edges | Peeling, loose corners, bubbling film |
| Raw or unsealed wood | Dry dusting only, then professional advice | Water, oil soap, vinegar, household sprays | Raised grain, dark water marks, staining |
Factory-finished cabinets are common in newer kitchens and are often more durable than site-applied finishes, but they are not indestructible. Older lacquer or worn clear coat can soften or blush when exposed to the wrong cleaner. Painted cabinets, especially around knobs, can polish smooth or lose sheen if rubbed too hard. Veneer and thermofoil need extra care at seams because water and heat can get behind the surface.
Outdated Drivers Are Slowing You Down
One free scan finds every outdated or missing driver and matches the right update for your exact hardware.Free scan · exact hardware matchPC Slower Than It Used to Be?
A free scan shows the junk files, broken settings and background clutter dragging Windows down - then fixes them in one click.Free scan · Windows 10 & 11Supplies for a Safe Cabinet Cleaning
You do not need a commercial cleaning cart. For most kitchens, gather 6 to 10 clean microfiber cloths, a small bucket, warm water, mild dish soap, a soft toothbrush or detail brush, nitrile gloves, a non-scratch sponge, a screwdriver for hardware, painter’s tape or small bags for labeling parts, and a stable step stool. Use white or light-colored cloths if possible so you can see whether finish color is transferring.
A good starting mix is about 5% dish soap to 95% warm water. In practical terms, that is roughly 2 to 3 teaspoons of dish soap in 2 cups of warm water, or about 1 tablespoon in 1 quart. The cloth should be damp, not dripping. If water runs down the door, the cloth is too wet.
Use three-cloth control: one cloth for washing, one cloth dampened with clear water for residue removal, and one dry cloth for immediate drying. This prevents soap film from staying behind. Soap residue attracts dust and can make cabinets look streaky within a day or two.
If you want a lower-toxicity cleaner, look for products carrying the EPA Safer Choice label. That program identifies products that meet EPA’s safer-ingredient standard. Even then, test first. A safer ingredient profile does not automatically mean safe for every cabinet finish.
Step-by-Step: How to Clean Wood Cabinets
1. Empty the work zone and inspect the cabinets
Clear counters under the cabinets and remove small appliances that push steam or heat against the doors. Open several doors and inspect the finish at hinges, bottom rails, and edges. Look for flaking clear coat, swollen panels, peeling thermofoil, black staining, musty odor, or veneer lifting. Those are repair signals, not cleaning problems.
2. Dry dust from top to bottom
Start with a dry microfiber cloth or vacuum brush attachment. Work from crown molding and upper rails down to door faces and lower drawers. Dry dusting removes grit before you add moisture. That reduces the chance of making fine scratches while wiping.
3. Clean handles and grime halos first
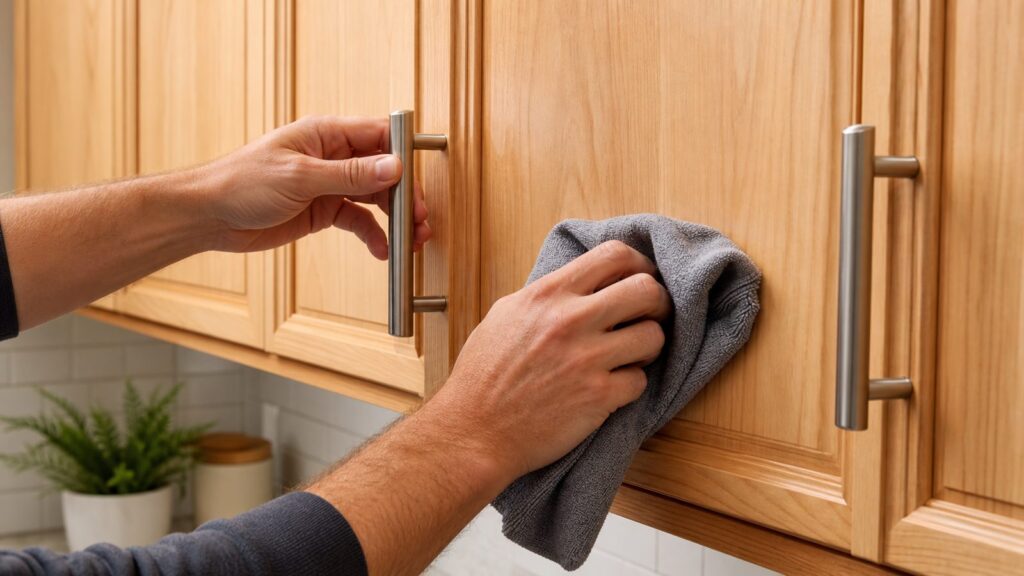
Cabinet pulls, knobs, and the area around them usually need the most attention. Wrap a damp soapy cloth around a finger and wipe around each pull. Use a soft toothbrush for the base of handles, but do not grind the bristles into paint. If dark halos remain around hardware, remove the hardware for a deeper reset. Label each set of screws and pulls by door or drawer, especially on older cabinets where screw lengths may vary.
Rank #2

- 10x GRIP-ROOT WEAVE - TRAP MORE, WORK LESS: Ultra-absorbent microfiber towels for car Grip Root weave works like PLANT ROOT FOLLICLES, sucking up & LOCKING AWAY 8x to 10x its weight in liquid, particulates, moisture, grime and dirt in far LESS TIME than traditional ‘Heavy Duty’ Cleaning Rags. Each towel features a 2.5mm thick design, providing enhanced durability and better grip during use.
- WON’T LINT, SCRATCH, PILL, SWIRL, SHED, or BLEED like thin, cheaply made microfiber towels for cars. RAPID DRY release layers make these the ideal microfiber towels for cars, creating that spectacular, SWIRL-FREE MIRROR SHINE with our cleaning rags. With a solid 2.5mm thickness, these towels are built to prevent damage while ensuring optimal performance.
- LASTS 1200+ WASHES - That’s 3.27 YEARS worth of use in this 12-pack of COMMERCIAL GRADE 300 GSM Reuseable Cleaning Cloth. The 2.5mm thickness and OVERLOCK BRAIDED STITCHING makes the ideal SUSTAINABLE SOLUTION for cleaning every SURFACE, crack, and CREVICE in your home, garage, or office.
- SOAK IT UP FASTER - 4X’s MORE ABSORBENT than COTTON cloths, these are the microfiber cleaning cloth for cars to get if you want an ALL PURPOSE cleaning towel, crafted with 2.5mm thickness to scoop up your messes, oils, and liquids FASTER than a SPONGE
- UNRIVALED POWER - TEST THIS GRIP-ROOT technology risk-free for 30 full days. With a 2.5mm thick design, it LOCKS AWAY dirt, dust, grime, spills, and messes better than any other high-performance cleaning rags you’ve tried.
4. Wash one small section at a time
Dip a microfiber cloth into the mild soap solution, wring it thoroughly, and wipe one door or two drawer fronts at a time. Follow the grain on stained wood when possible. On framed doors, clean the center panel, then rails and stiles, then inside corners. Do not spray cleaner directly into joints, panel grooves, hinges, or veneer edges. Apply cleaner to the cloth instead.
5. Let sticky grease dwell briefly, then wipe gently
For sticky grease, hold the damp soapy cloth on the spot for 30 to 60 seconds, then wipe with light pressure. Repeat rather than scrub harder. Most fresh-to-moderate grease releases with patience. If the cloth becomes gray or yellow, switch to a clean side. A dirty cloth just redistributes oil.
6. Wipe with clear water
Use a second microfiber cloth dampened with plain warm water to remove soap residue. This pass should be quick and controlled. The goal is not rinsing like a floor; it is removing surfactant film without soaking the finish.
7. Dry immediately
Use a dry microfiber cloth right away, especially along rails, panel profiles, door bottoms, and around hardware holes. Moisture that sits at seams can raise wood fibers, swell veneer edges, or work behind thermofoil. On a normal-sized kitchen, plan on 1 to 3 hours for exterior doors and drawers. Add another 1 to 3 hours if you are cleaning interiors, removing hardware, or dealing with heavy grease.
How to Clean Cabinet Interiors
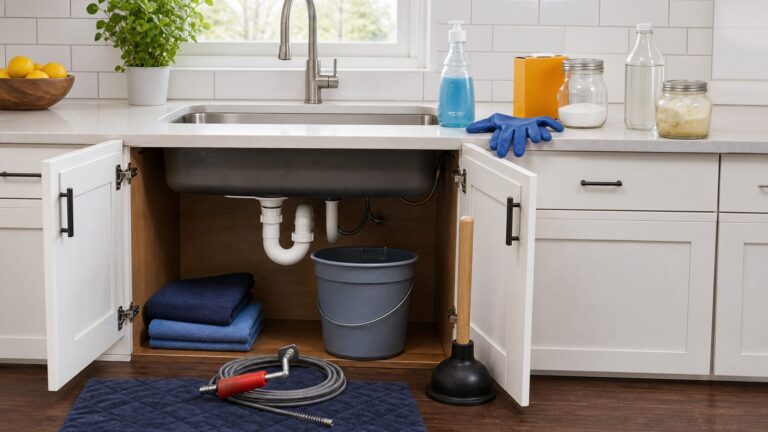
Cabinet interiors collect crumbs, dust, spice residue, cooking oils, and sometimes mildew around sink bases. Empty one cabinet at a time so the kitchen stays usable. Vacuum crumbs first with a brush attachment or handheld vacuum. Then wipe shelves with a damp microfiber cloth and mild soap solution if needed. Follow with clear-water wiping and dry the shelf before putting items back.
Recommended Free Tools
Old shelf liner deserves a hard look. Replace it if the adhesive is failing, if crumbs are trapped underneath, if it smells musty, or if moisture has reached the cabinet deck. Under-sink cabinets should be checked for slow leaks, swollen particleboard, black staining, rusted fasteners, or a soft cabinet floor. Cleaning will not correct water damage. If the cabinet bottom flexes under light hand pressure or stays damp after drying, repair the leak and assess the cabinet structure.
For drawers, remove inserts and vacuum corners. Wipe drawer boxes lightly and dry them before replacing organizers. Avoid soaking dovetail joints, plywood edges, or stapled drawer bottoms. If drawer slides are sticky, clean debris from the track with a dry brush first. Do not coat slides with furniture polish; use the slide manufacturer’s lubricant only if lubrication is actually needed.
What Not to Use on Wood Cabinets
Many cabinet-cleaning problems start with products that are technically household cleaners but too aggressive for finished wood. The risk is not always immediate. A cleaner can make a cabinet look good while wet, then leave a dull patch, softened finish, or residue after it dries.
Vinegar is often recommended as a universal cleaner, but it is acidic. On some finishes, repeated vinegar use can dull the sheen or stress a worn clear coat. If you use it at all, dilute it, test it in a hidden location, and keep it away from raw wood, damaged finish, stone countertops, and metal hardware that may react poorly.
What’s actually slowing this PC down?
Pick the symptom - the matching free tool is one click away.
Baking soda is mildly abrasive. It can help on some hard surfaces, but paste-style scrubbing can burnish painted cabinets and dull clear finishes. Magic erasers are also abrasive. They can remove grime because they lightly abrade the surface, which is exactly why they can create shiny or dull patches on painted and stained doors.
Rank #3

- Strong Absorbent & Streak-Free: Crafted with premium microfiber, these cleaning rags quickly absorb water and wipe away spills, dust, grease, and dirt without leaving streaks. Ideal for drying dishes, cleaning countertops, or polishing surfaces in the kitchen, car, or around the home.
- Soft & Lint-Free on Delicate Surfaces: Made from a non-abrasive blend of 85% polyester and 15% nylon, our microfiber cloths are gentle yet effective. They won’t scratch paint, glass, or delicate surfaces, and leave no lint behind—perfect for cleaning mirrors, electronics, stainless steel, and other smooth surfaces.
- Durable Construction for Long-Term Use: Designed with reinforced stitching, these cleaning cloths are not only reusable but also resist wear and tear even after frequent washing. A reliable alternative to disposable paper towels for everyday cleaning.
- Multi-Color Convenience for Any Task: Available in 4 assorted colors—Pink, Green, Blue, and Purple—for easy color-coding. Use different cleaning towels for the kitchen, bathroom, car, or electronics. Stay organized and keep your cleaning tasks clearly separated.
- Machine Washable & Quick-Drying: Each microfiber cloth measures 11.8" x 11.8", making them compact and easy to store. They can be washed by hand or machine. Quick-drying and always ready for your next cleaning job.
Citrus degreasers can work on tough grease, but some are strong enough to soften finishes or leave residue if not rinsed. Test first and use them only as a targeted spot cleaner. Steam cleaners are a poor choice for most cabinets because heat and moisture are the two things cabinet edges, veneer, and thermofoil dislike most.
Oil soap and furniture polish are also not automatic wins. Oil soap can leave residue if overused or poorly rinsed. Furniture polish can create a slick film that attracts dust, interferes with future painting or refinishing, and hides rather than removes dirt. If cabinets may be painted later, avoid silicone-heavy polishes entirely.
Never mix cleaning chemicals. Bleach mixed with ammonia, acids, or certain other cleaners can release dangerous gases. If you need disinfection for a specific contamination issue, ventilate the area, follow the product label exactly, and keep the process separate from routine wood-finish cleaning.
Do these 3 things before closing this tab:
1Fix the driver behind crashes, sound loss and screen glitches2Clear out junk files and repair common Windows errors3Scan for outdated or missing drivers - takes under a minuteCost: Cleaning vs Refinishing, Painting, Refacing, or Replacing
Cabinet cleaning is maintenance. Refinishing, painting, refacing, and replacement are construction scopes. The price difference is large enough that it is worth trying a careful cleaning before assuming the cabinets are worn out.
| Option | Typical 2026 cost | Best for | What it will not fix |
|---|---|---|---|
| DIY basic cleaning | $10-$35 | Light grease, fingerprints, dust, routine maintenance | Failed finish, swelling, peeling veneer, mold, worn paint |
| DIY expanded cleaning kit | $25-$75 | Detailed exterior cleaning, interiors, hardware removal | Structural cabinet damage or finish loss |
| Professional kitchen cleaning | About $117-$144 starting range per kitchen | Busy households, move-in refresh, moderate grime | Cabinet repair or coating failure |
| Detailed cabinet add-on labor | Roughly $40-$300 labor if billed at $40-$75/hour for 1-4 hours | Greasy door profiles, tall uppers, glass inserts, interiors | Deep finish restoration |
| Cabinet refinishing | About $307-$1,359 in many projects; some estimates run $3.71-$5.53/sq. ft. | Sound cabinets with worn or dated finish | Poor layout, failing boxes, water-damaged substrate |
| Professional cabinet painting | About $425-$1,465, with averages near $941 | Cosmetic color change on solid cabinets | Grease contamination unless properly cleaned and prepped |
| Cabinet refacing | About $4,234-$10,226, average near $7,230 | Good cabinet boxes with outdated doors and fronts | Bad layout, damaged boxes, moisture problems |
Costs move with location, door count, soil level, finish type, cabinet height, glass panels, open shelving, smoke residue, pet residue, and whether the cleaner has to empty the cabinets. General house cleaning benchmarks in 2026 commonly fall around $100 to $300 for a standard visit, with many cleaners charging about $40 to $55 per hour and some deep cleaning work landing around $200 to $400 or more. Heavy move-out or neglected kitchens can reach $500 to $700-plus.
Cleaning supplies have also become a little more expensive. Current 2026 CPI data shows household cleaning products up 2.9% year over year. That increase is noticeable at the store, but it is still minor compared with cabinet painting, refacing, or replacement.
Clean, Restore, Refinish, or Replace: A Practical Decision Tree
Choose cleaning when the cabinets are structurally sound, the finish is intact, and the problem is surface grime. If a door looks darker around pulls, feels tacky near the range, or has dust stuck to an oily film, cleaning is the right first step.
Rank #4

- 【Microfiber Towels Bulk】One pack of 50 microfiber towels for cars and home, measuring 12x12 inches, Made of 87% polyester and 13% polyamide, 210gsm microfiber cloth, is vacuum-packed to reduce greenhouse gas emissions. Please allow a few minutes for the towels to expand fully after unpacking to achieve optimal fluffiness and absorbency.
- 【Super Absorbent】 TEAWOO microfiber cleaning cloths quickly soak up moisture and dry rapidly, making them ideal for both automotive and household cleaning tasks. They efficiently remove dirt, grime, and liquids with ease.
- 【Soft and Lint-Free】TEAWOO microfiber towels bulk supply of ultra-soft, non-abrasive microfiber towels ensure a scratch-free cleaning experience on surfaces, paint, glass, and coatings. Perfect for cleaning tough grease and dirt from your car, kitchen, and windows, leaving no traces behind.
- 【Reusable and Washable】These reusable and washable microfiber towels cleaning for cars can be used hundreds of times without shrinking, shedding, or losing their cleaning effectiveness. They are a cost-effective alternative to disposable towels, ideal for car and household cleaning.
- 【Easy Maintenance and Use 】Our bulk microfiber towels come in 5 colors and are crafted with high-quality fabric and sewn edges, providing a soft and scratch-free feel. They are easy to maintain and perfect for keeping both your car and home spotless.
Choose light restoration when the finish is intact but dry-looking, uneven in sheen, or slightly tired after cleaning. This might involve a cabinet-safe conditioner or a professional touch-up product, but only after the cabinet is truly clean. Do not trap grease under polish.
Choose refinishing or painting when the finish is worn through, the color is dated, or cleaning exposes uneven sheen, scratches, or bare wood. A good refinishing job depends on proper degreasing, sanding or scuffing, adhesion testing, and coating selection. If the home was built before 1978 and painted cabinets may be sanded or stripped, ask about lead-safe practices before work starts.
Choose refacing when the cabinet boxes are solid and the layout works, but doors and drawer fronts are beyond saving or stylistically wrong for the house. Choose replacement when boxes are swollen, out of square, mold-damaged, poorly laid out, or made from failing substrate. Cleaning cannot fix delamination, water swelling, smoke staining, mold growth, UV-yellowed paint, or a failed clear coat.
A simple field test helps: clean one hidden or low-visibility door using the full mild process, then let it dry for 24 hours. If the door looks evenly clean and the finish feels hard, continue. If it remains sticky, turns cloudy, transfers color, or shows bare spots, stop and evaluate repair or refinishing.
When to DIY and When to Hire a Pro
DIY cabinet cleaning makes sense when the cabinets are newer or well maintained, the grime is light to moderate, you can reach the work safely, and there are no signs of finish failure. Most homeowners can clean the exterior of a standard 10-by-10 kitchen in an afternoon with mild soap, microfiber cloths, and patience.
Hire a professional cleaner when the kitchen has years of grease buildup, tall cabinets over 8 feet, extensive glass doors, heavy crown detail, smoke residue, or when you want interiors emptied and reset. Expect detailed cabinet work to be priced as deep-clean labor or an add-on, not always included in a standard cleaning visit.
Call a cabinet refinisher, painter, or carpenter when the finish becomes gummy, paint comes off on the cloth, veneer lifts, thermofoil peels, cabinet bottoms are swollen, hardware screws no longer bite, or dark staining suggests moisture damage. If there is a musty smell under the sink or black staining inside a cabinet, solve the moisture source before cosmetic work.
From a construction standpoint, cabinet care is also about the room around the cabinets. Use the range hood while cooking and clean the hood filters regularly. Move coffee makers and toaster ovens so steam and heat do not discharge directly into upper doors. Check dishwasher vent paths. Tighten loose pulls gently, but do not over-tighten screws into old doors or drawer fronts. If a screw hole is stripped, repair it correctly rather than driving a larger screw through the face.
Quick wins for a faster PC:
Repair Windows errors before they cause bigger problemsFix Now →Fix the driver behind crashes, sound loss and screen glitchesFind Drivers →Best Value

- Microfiber 16 x 12-inch cleaning cloth (24-pack); ideal for cleaning cars, trucks, boats, and more
- Ultra-soft and non-abrasive car drying towels; will not scratch paints, vinyl, glass, finishes, or other surfaces
- Effectively cleans either dry or with liquid cleaners for streak-free results and a lint-free shine
- Durable and absorbent; soak up 8 times their own weight
- Can be reused hundreds of times
Safety, Ventilation, and Permit Notes
Routine cabinet cleaning does not require a permit. Painting, refinishing, and replacing cabinet doors usually do not require a building permit either, but larger kitchen projects can trigger permits when electrical, plumbing, mechanical ventilation, gas lines, structural walls, or layout changes are involved. Local rules vary, so check your city or county building department before turning a cabinet refresh into a remodel.
Ventilation matters even for mild cleaning. Open a window or run the kitchen exhaust fan if you are using a commercial cleaner. Wear nitrile gloves if you have sensitive skin or are working through heavy grease. Keep cleaners away from children, pets, food prep surfaces, and open flames. Store products in their original containers so labels and safety instructions stay with the chemical.
If cabinets are old painted wood in a pre-1978 home, do not sand, scrape, or strip them casually. Lead-safe work practices may apply once you disturb old paint. Cleaning intact paint with a damp cloth is different from abrading it. If the coating is failing and you plan to refinish, bring in a pro who understands containment, dust control, and proper cleanup.
Maintenance Schedule for Grime-Free Cabinets
A realistic cabinet maintenance schedule is simple. Wipe fresh splatter the same day. Clean handles and the areas around them every 1 to 2 weeks in busy kitchens. Wipe the range-side upper cabinets monthly if you cook often. Do a full exterior cabinet cleaning every 3 to 6 months, and clean interiors once or twice a year.
Homes that fry often, have poor range ventilation, or use cabinets around coffee stations and toaster ovens may need more frequent touch-ups. A household that cooks lightly may only need a full cabinet wipe-down twice a year. The point is to remove oil before it cures into a sticky film. Fresh grease is a cleaning task; old oxidized grease becomes a finish problem.
For a fresh, grime-free finish, stay conservative: dry dust first, use damp microfiber, clean with a mild dish soap mix, remove residue, and dry immediately. If that does not produce a clean, even surface, the cabinet may be telling you the finish has reached the end of its service life. That is when refinishing or replacement becomes a better conversation than stronger cleaner.
Frequently Asked Questions
What is the safest way to clean wood kitchen cabinets?
Start with dry dusting, then wipe with a damp microfiber cloth. For grime, use a mild solution of about 5% dish soap and 95% warm water, wipe with clear water, and dry immediately.
Can I use vinegar to clean wood cabinets?
Use caution. Vinegar is acidic and can dull or stress some cabinet finishes, especially worn clear coat or paint. If you use it, dilute it and test in a hidden spot after drying.
Recommended Free Tools
How do I remove sticky grease without damaging the finish?
Apply a mild dish soap solution to a microfiber cloth, hold it on the sticky area for 30 to 60 seconds, then wipe gently. Repeat instead of scrubbing harder.
Can Magic Eraser be used on painted or wood cabinets?
It is risky. Magic erasers are abrasive and can create dull or shiny patches on painted cabinets or clear-coated wood. Test first, and avoid using them as a general cabinet cleaner.
How often should kitchen cabinets be cleaned?
Wipe splatter immediately, clean handles every 1 to 2 weeks, clean range-side uppers monthly if you cook often, and do a full exterior cleaning every 3 to 6 months.
When should cabinets be refinished instead of cleaned?
Refinishing may be needed when the finish is worn through, gummy, cloudy, peeling, transferring color, or showing bare wood. Cleaning will not fix swelling, delamination, mold, or failed clear coat.
Quick wins for a faster PC:
Repair Windows errors before they cause bigger problemsFix Now →Fix the driver behind crashes, sound loss and screen glitchesFind Drivers →Clear out junk files and repair common Windows errorsFree Scan →Quick Recap
Product prices and availability are accurate as of the date/time indicated and are subject to change. Any price and availability information displayed on Amazon at the time of purchase will apply.